To export WooCommerce products with images, open a Products export in Store Exporter Deluxe, tick the Featured Image and Product Gallery fields, set gallery formatting to Image URLs, and run it. Your CSV then lists every image URL per product.
Product images do a lot of the selling in an online store. When you move to a new host, build a product feed, or back up your catalog, missing image links turn your listings into empty placeholders.
This guide covers what WooCommerce’s built-in exporter includes, where it falls short, and how to export featured and gallery images step by step with Store Exporter Deluxe.
Still choosing a tool? Compare your options in our roundup of the best WooCommerce export plugins before you set up your first export.
Why Export WooCommerce Products With Images?

Product images drive engagement and conversions. When you export your catalog, each image has to stay tied to its product, or the destination store shows broken thumbnails.
Here’s when an export with images pays off:
- Backups: A CSV with image URLs is a safety net if a failed update or plugin conflict damages your catalog.
- Migrations: Moving to a new host or a fresh WooCommerce install is simpler when every product row already points to its images.
- Product feeds: Sales channels such as Google Merchant Center expect an image for every item, so your feed file needs working image links.
- Bulk edits: Updating prices or descriptions across hundreds of items is faster when the spreadsheet keeps image references beside each row.
- Sharing with partners: Suppliers, marketplaces, and designers can work from a file instead of logging in to your live store.
Keep alt text in mind as well. Screen readers use it to describe product photos, and it’s part of meeting web accessibility standards. The core WooCommerce importer can’t add or update alt text for product images, so check it on the new store after any migration.
Featured image vs. gallery images
Every WooCommerce product can carry two kinds of images, and a good export keeps them apart. You’ll find more on how galleries display in this guide to the WooCommerce product image gallery.
- Featured image: The main image that represents the product on its page and in catalog listings.
- Gallery images: Extra photos such as other angles, close-ups, or color options, shown as thumbnails beside or below the main image.
If an export mixes the two together, the destination store may pick the wrong photo as the main one. That’s why the export method matters.
What WooCommerce’s Built-In Exporter Includes And Misses
WooCommerce has a built-in product CSV exporter under Products > All Products > Export. It does include images. According to the WooCommerce product CSV importer and exporter documentation, the Images column holds a comma-separated list of image URLs, and the first image is the featured image.
That works for a simple backup. However, the core tool leaves gaps once your catalog grows:
- One combined column: Every image URL sits in a single cell, and the featured image is only marked by its position in the list.
- URLs only: There’s no option to export attachment IDs or server file paths instead.
- Basic filters: You can filter by product type and category, but not by whether a product has gallery images.
- Manual runs: Each export is a one-off, so there’s no built-in way to schedule a recurring backup or feed file.
Variable products add one more wrinkle. The same documentation notes that WooCommerce may leave attribute values out of variation names in exported files. If you sell T-shirts in several sizes and colors, read how to import variable products before you move them.
What To Look For In A Product Image Export Plugin
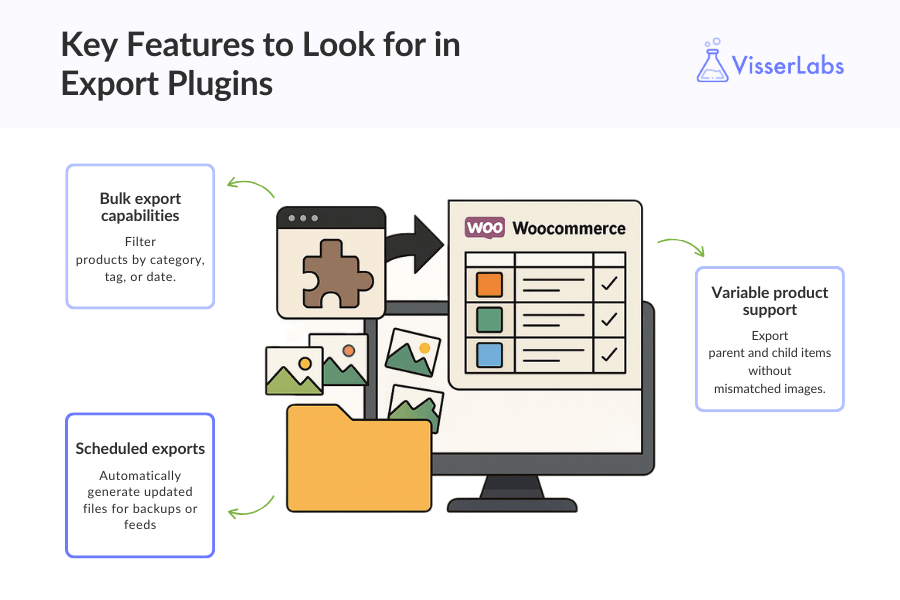
A dedicated export plugin closes those gaps without manual spreadsheet work. Look for these features:
- Image formatting control: Export images as URLs, attachment IDs, or file paths, in one cell or one column per image.
- Bulk filters: Narrow the export by category, tag, or whether a product has gallery images.
- Variable product support: Export parent and child items without mismatched images.
- Scheduled exports: Generate updated files for backups or feeds automatically.
How To Export WooCommerce Products With Images Using Store Exporter Deluxe
Visser Labs’ Store Exporter comes in free and premium versions. Store Exporter Deluxe adds Scheduled Exports, Export Templates, and the Product Gallery filter used below.
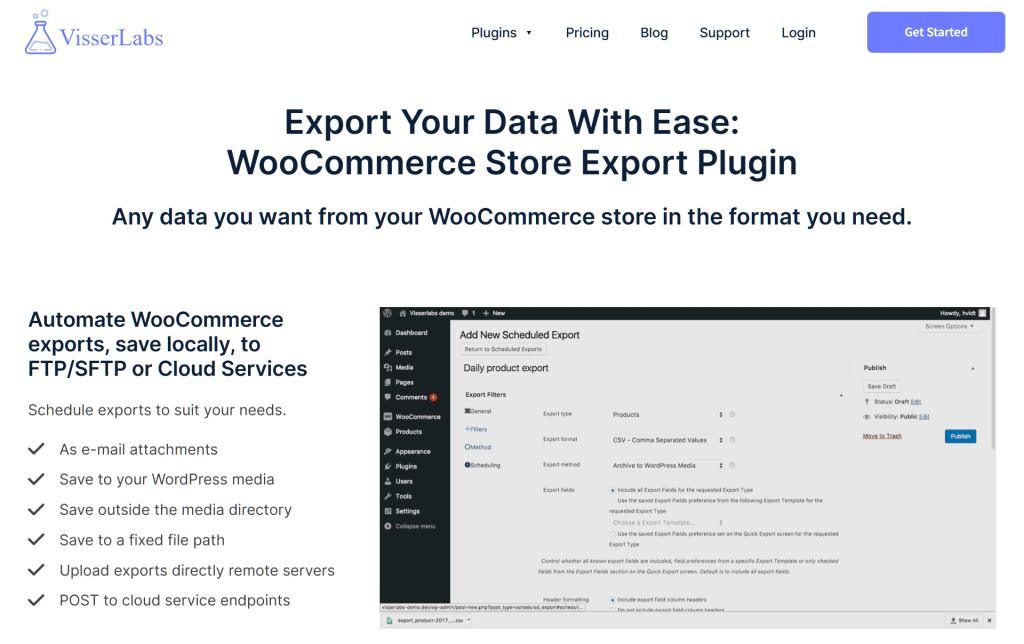
Before you start, install and activate Store Exporter Deluxe on your WooCommerce store.
Open Quick Export
In your WordPress dashboard, click WooCommerce > Store Export to open the Store Exporter page:
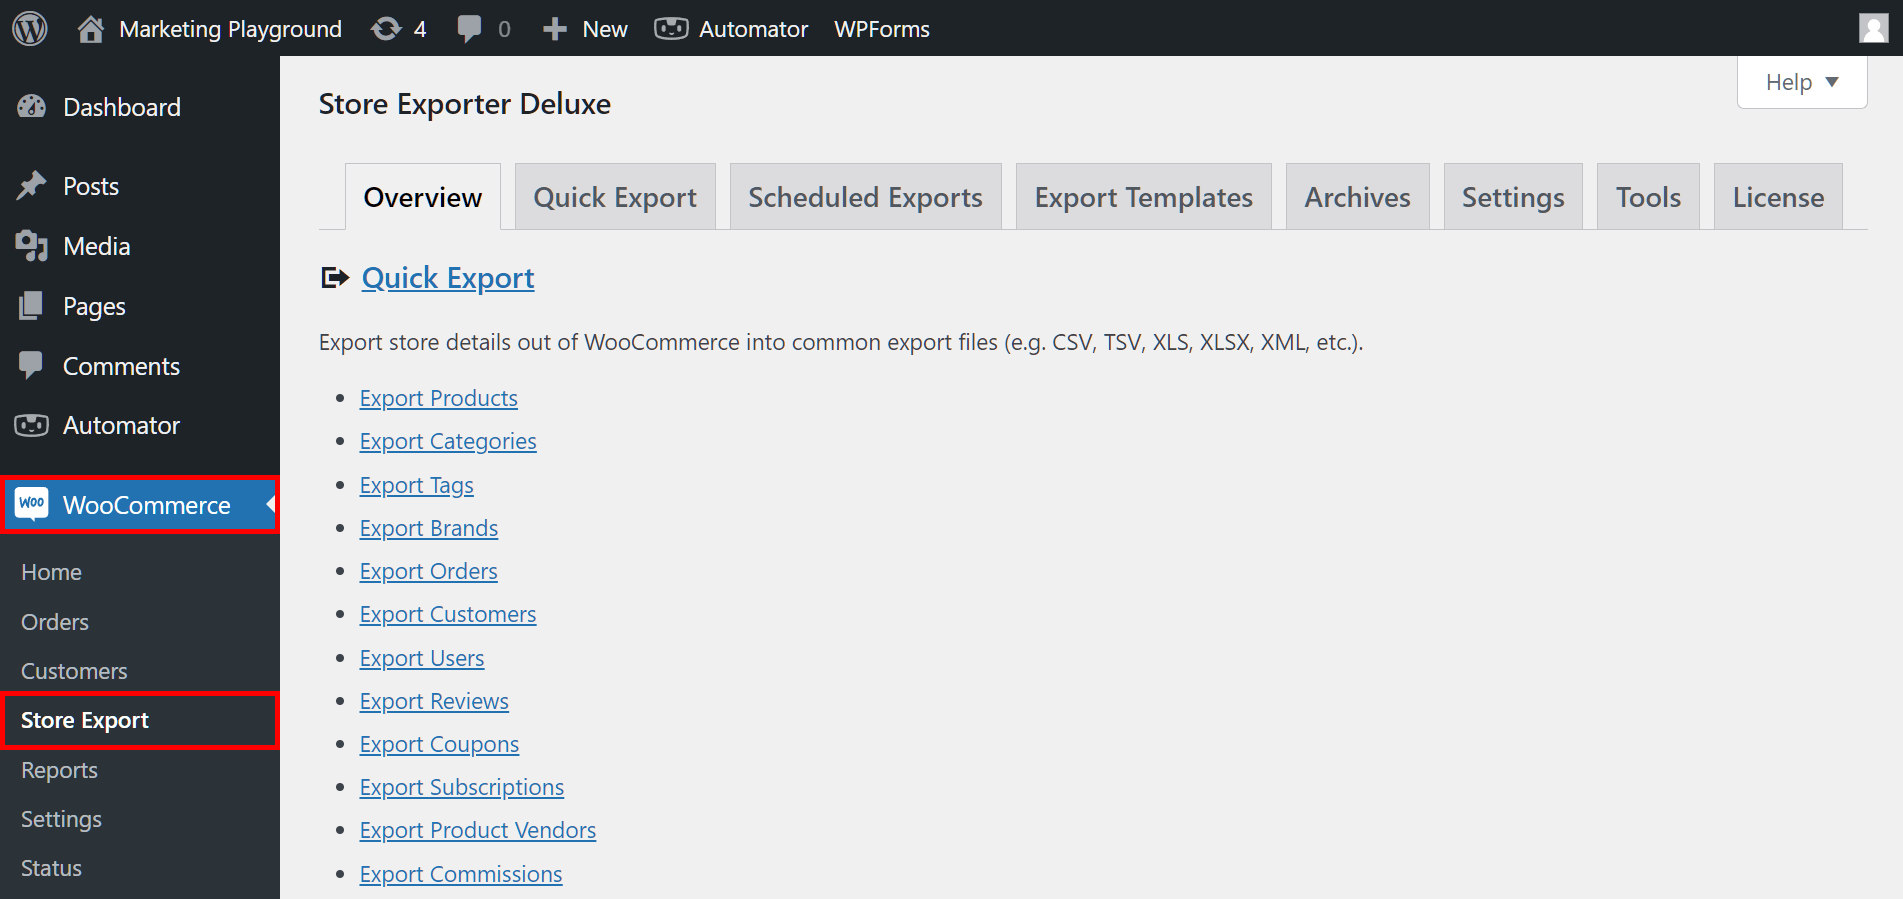
The page has several sections. For this guide, click the Quick Export tab.
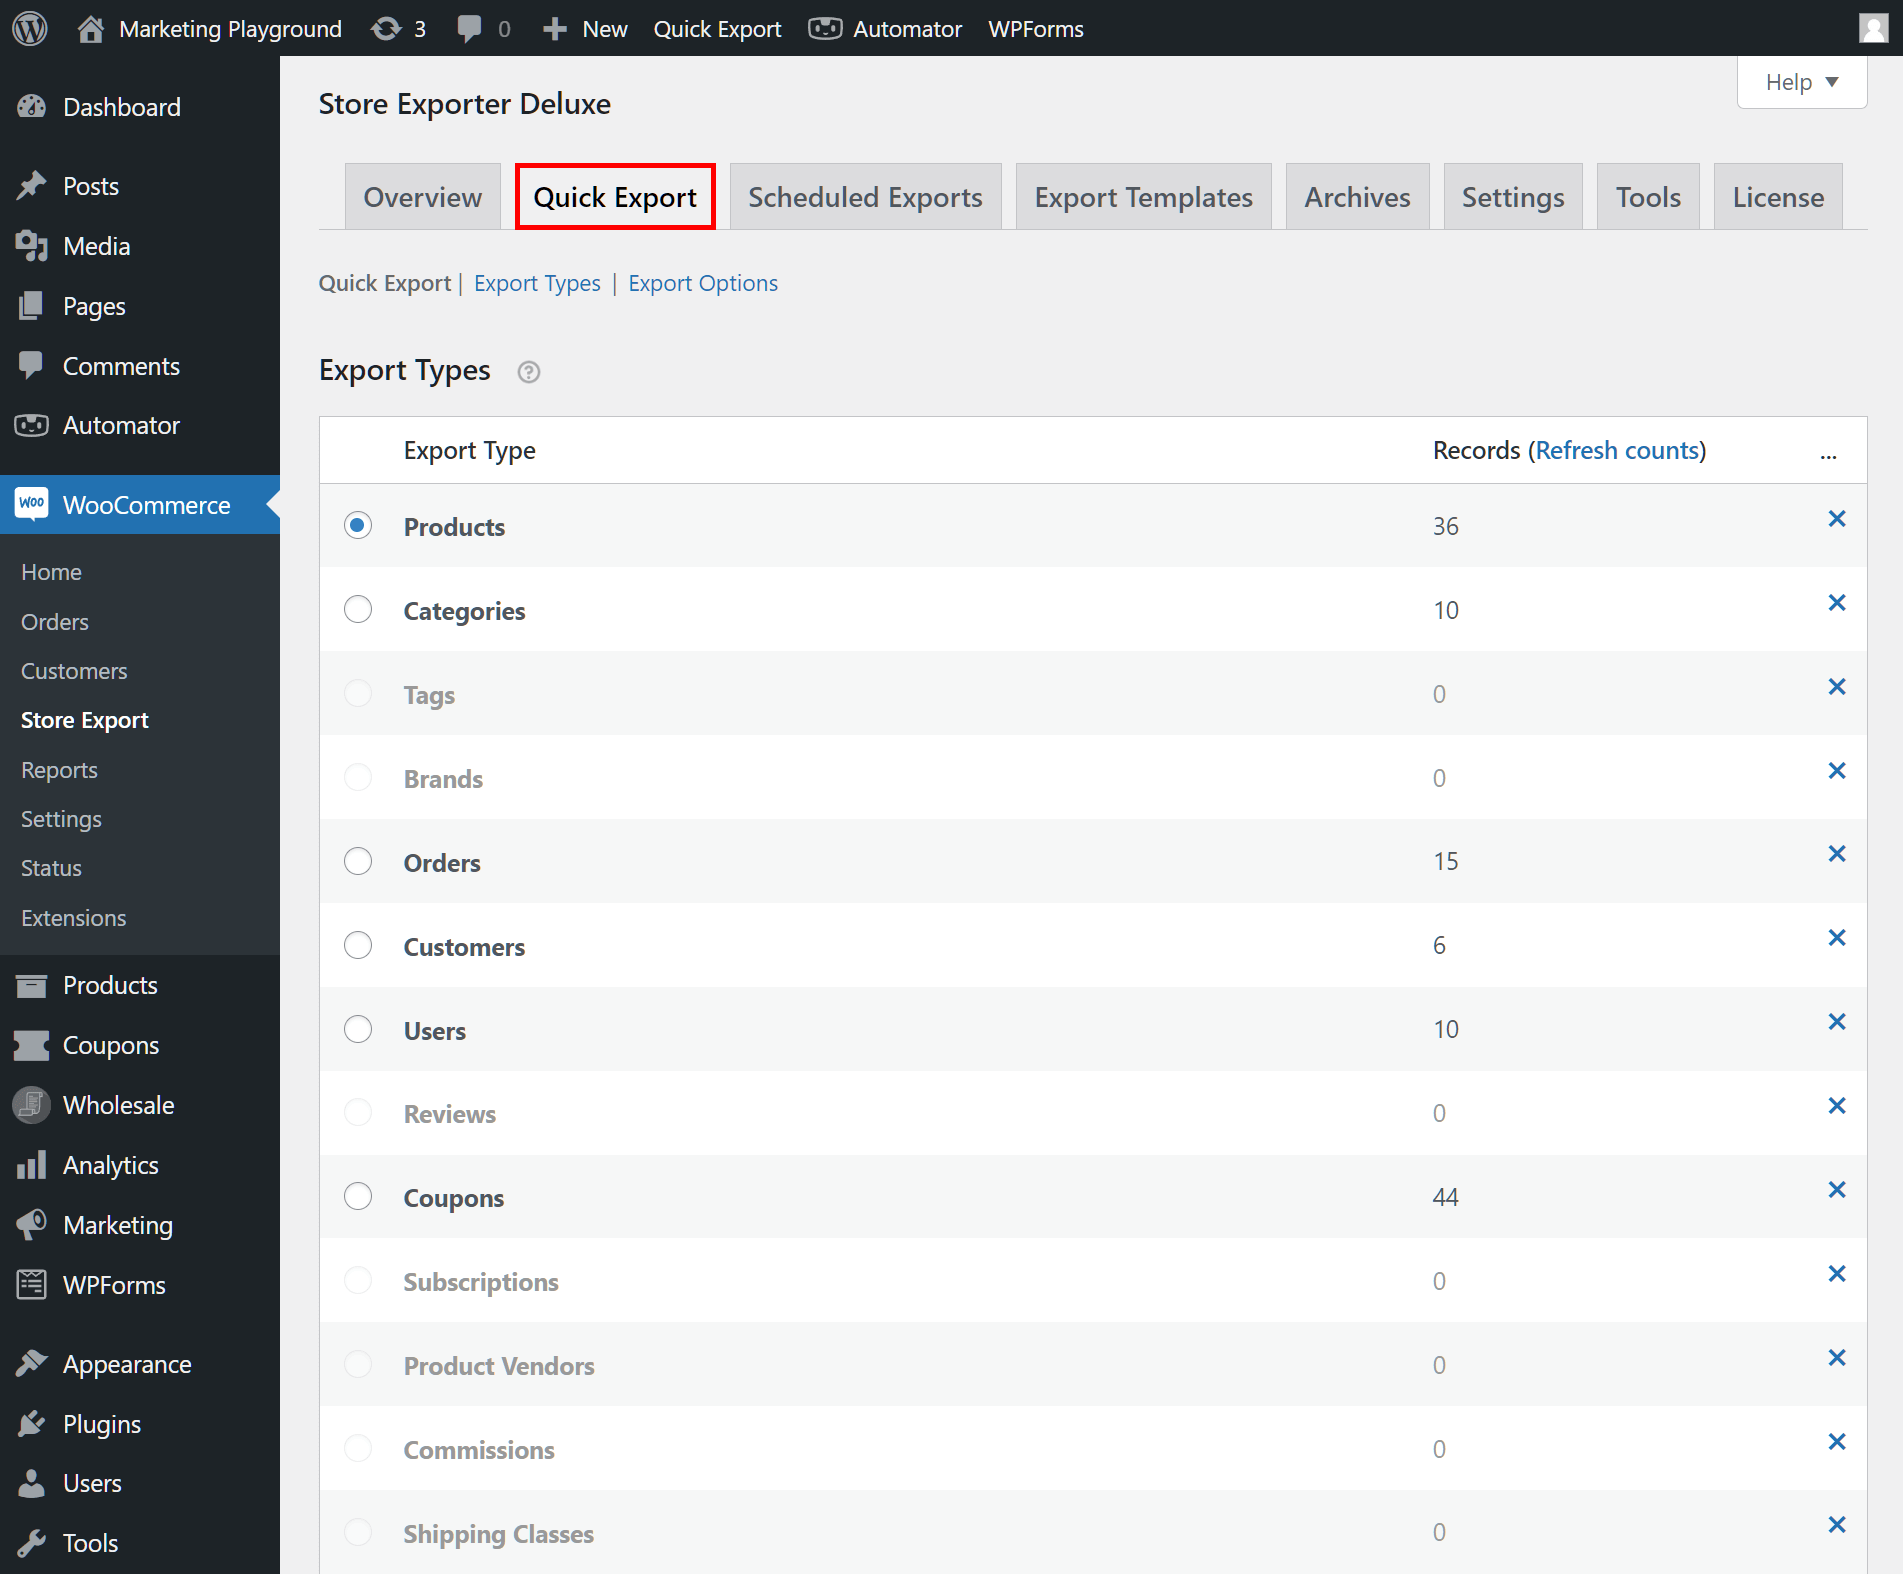
Step 1: Select the Products export type
In the Export Type area, click the circle next to “Products.”
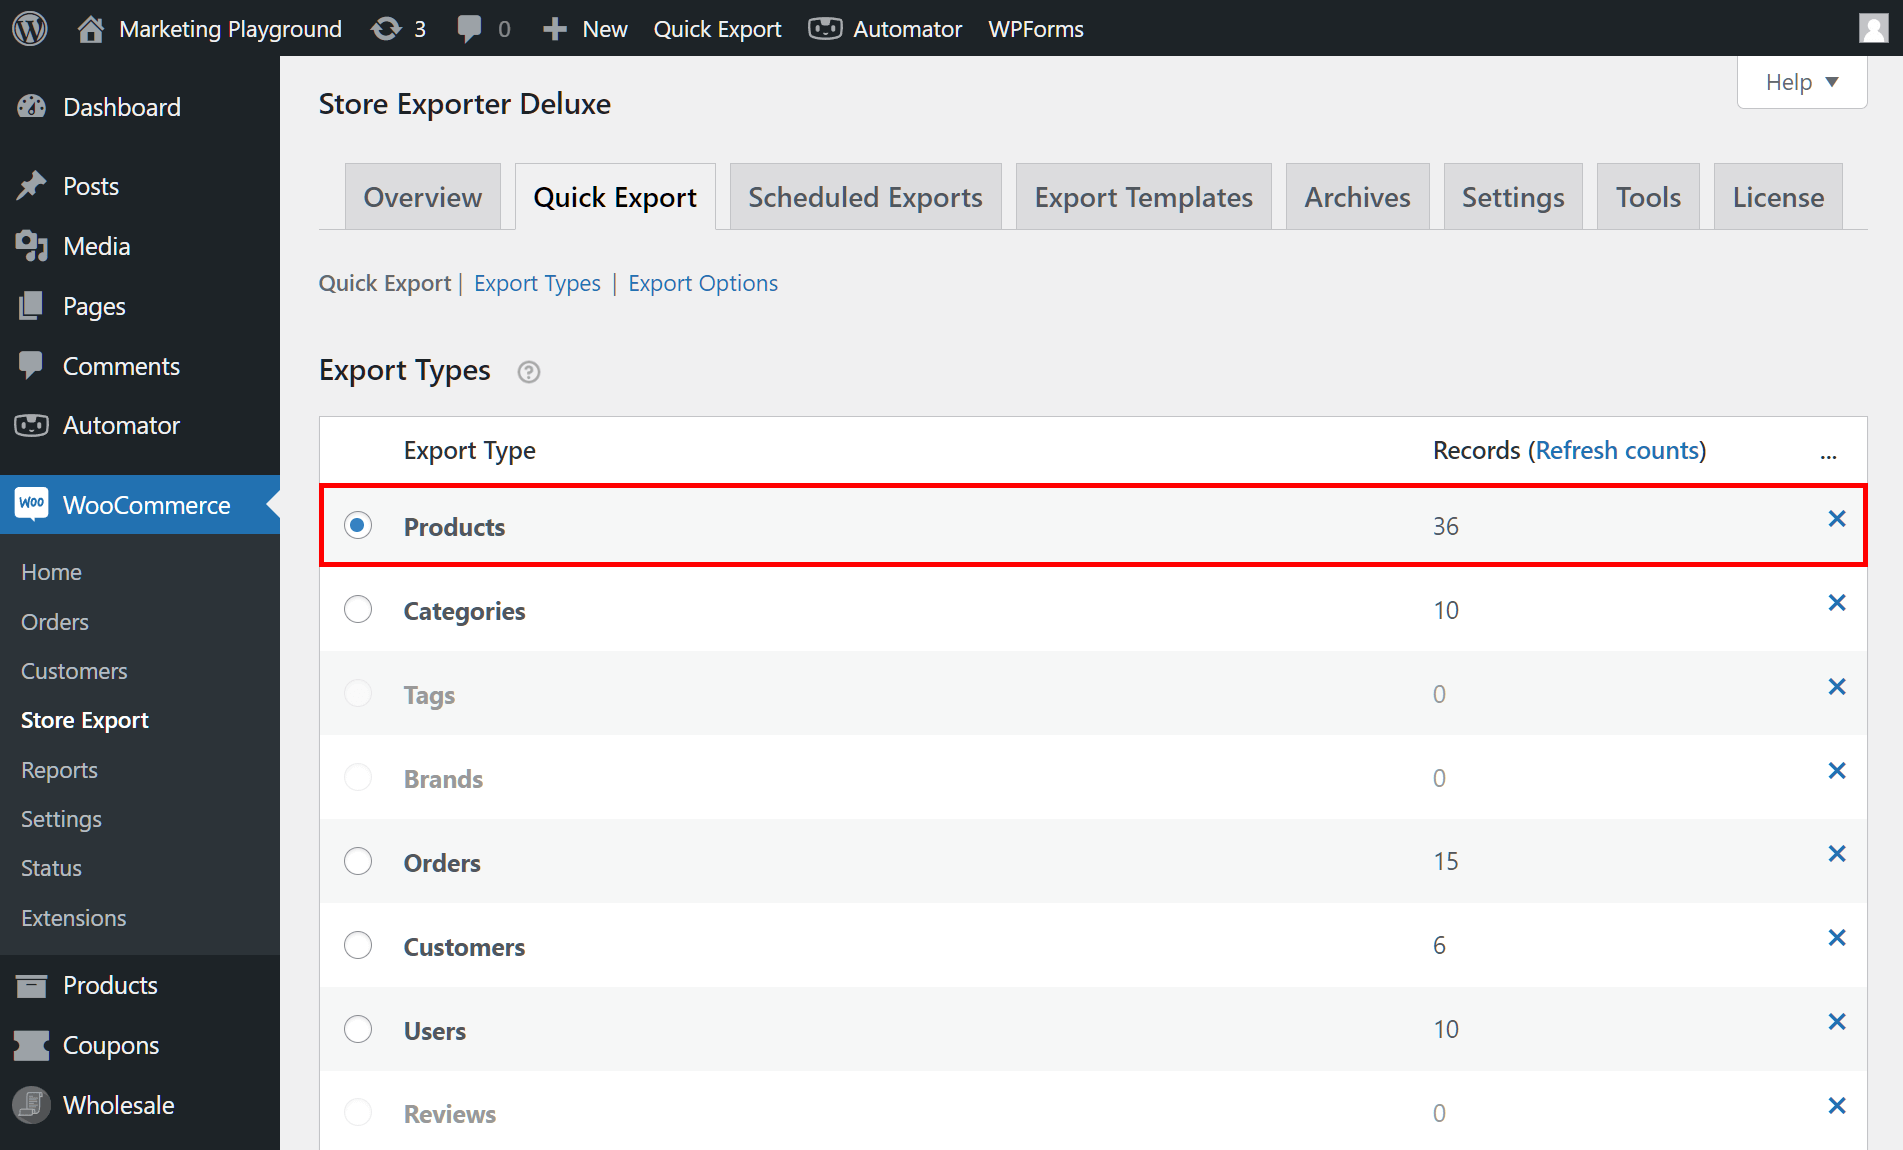
Don’t click the Quick Export button below the Export Types area yet. You’ll set your fields and options first.
Step 2: Choose the featured image and gallery fields
Scroll down to the Product Fields area.
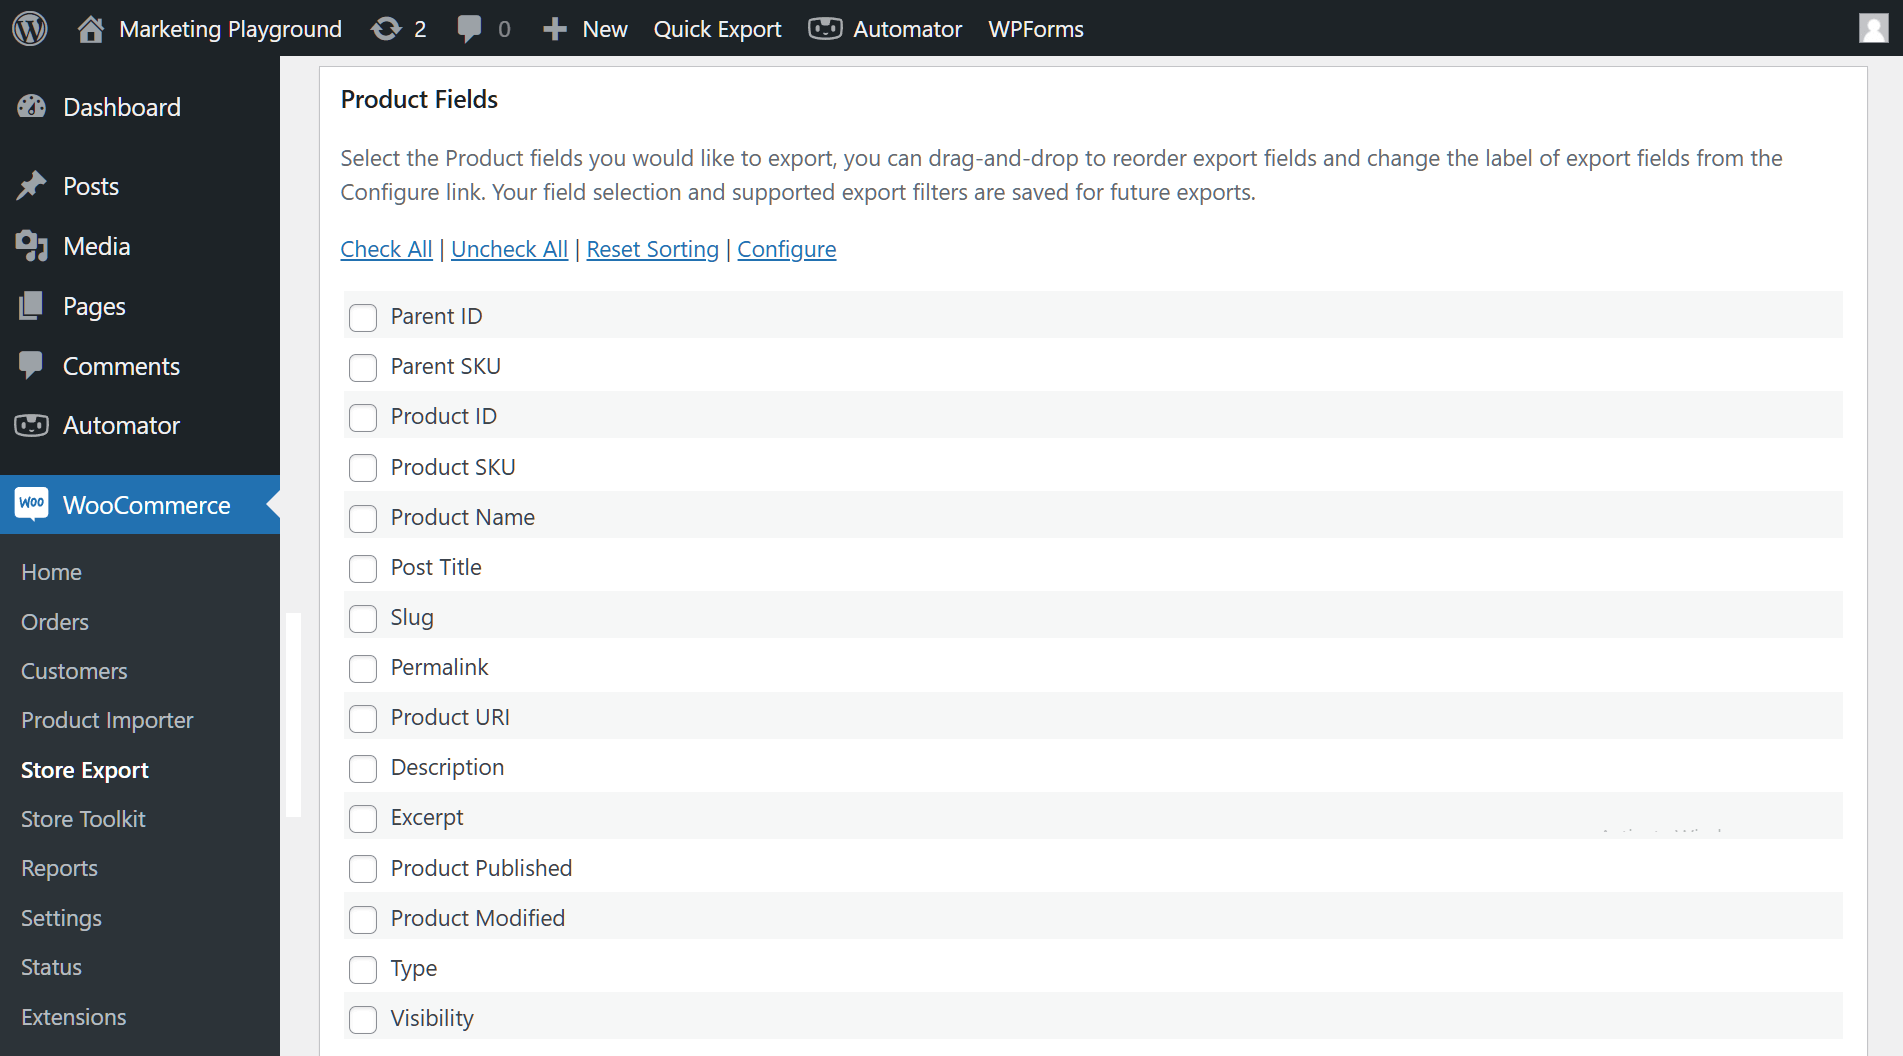
Tick the checkbox next to each field you want in the file. For an image export, tick Featured Image to include each product’s main photo.
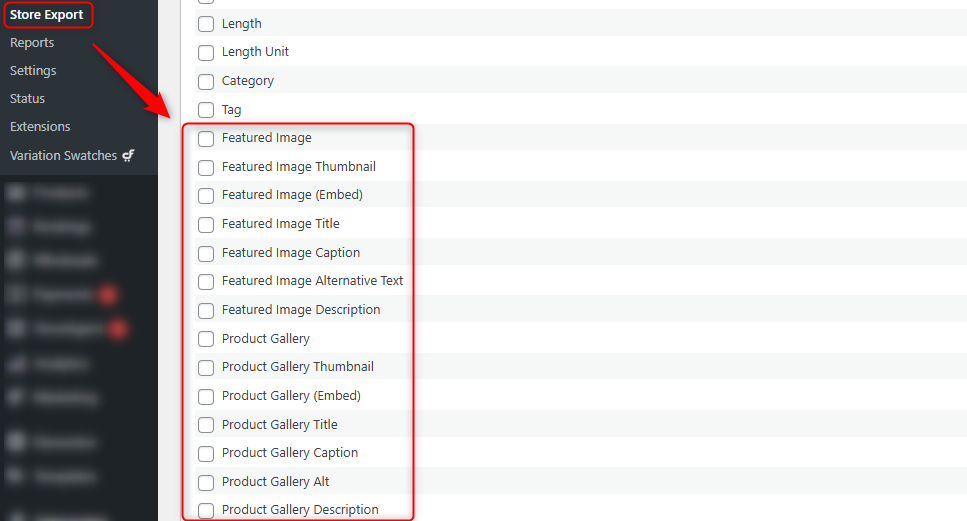
Then tick the Product Gallery fields to include every gallery image. Add any other fields you need, such as Product Name, SKU, or price, so each image row stays matched to its product.
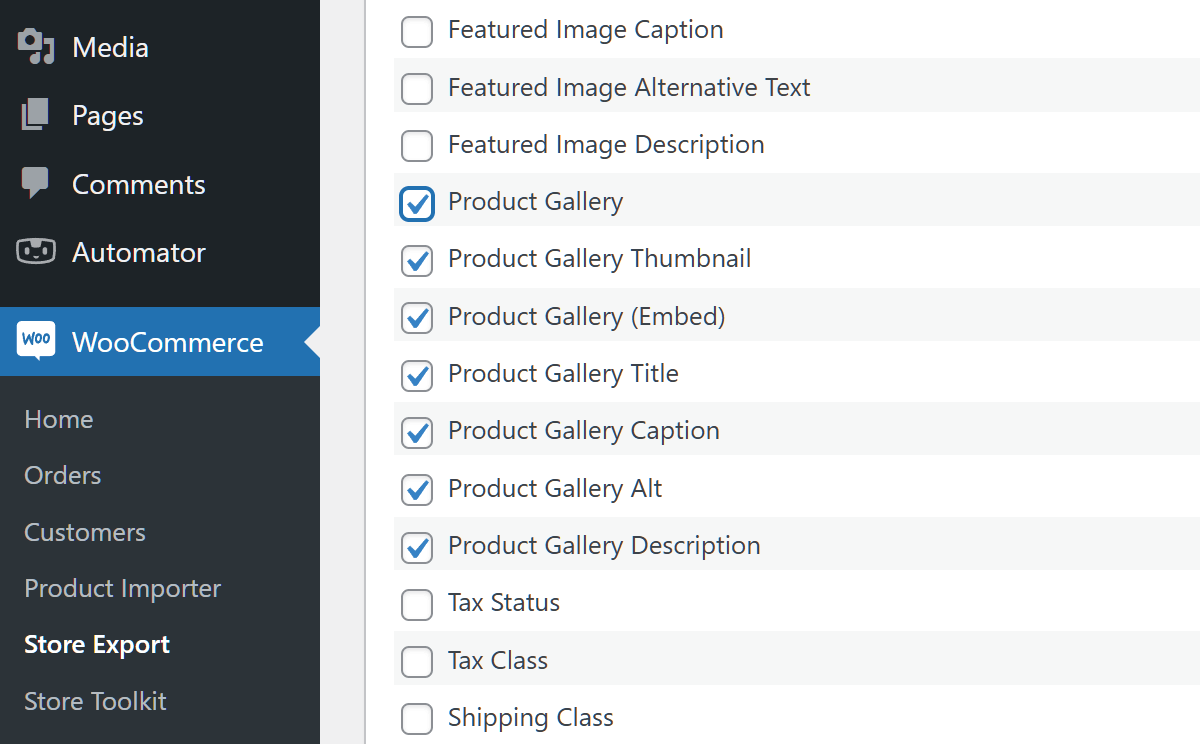
You can also drag and drop the fields to change the order of the columns in your export file.
Step 3: Pick your product filters
Head down to the Product Filters area.
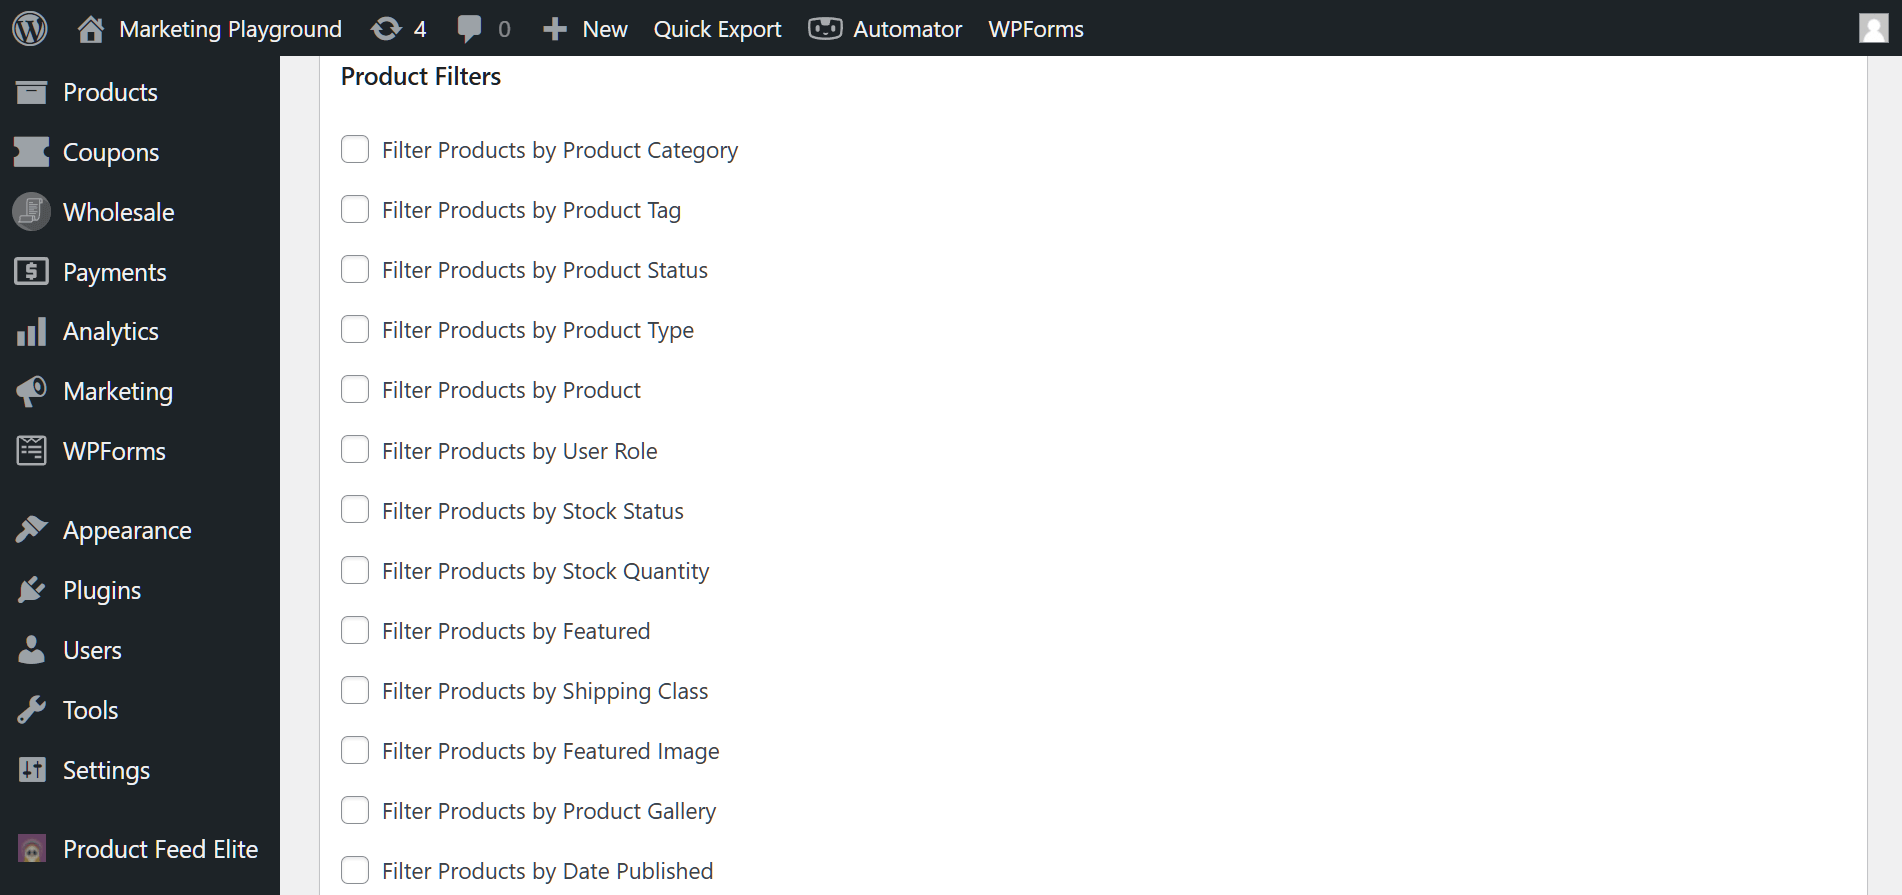
Filters let you export a subset of your catalog. For example, to export only products in the “Accessories” category, tick “Filter Products by Product Category” and choose “Accessories” from the dropdown.
For an image export, tick “Filter Products by Product Gallery” (available in Store Exporter Deluxe). It opens three new options:
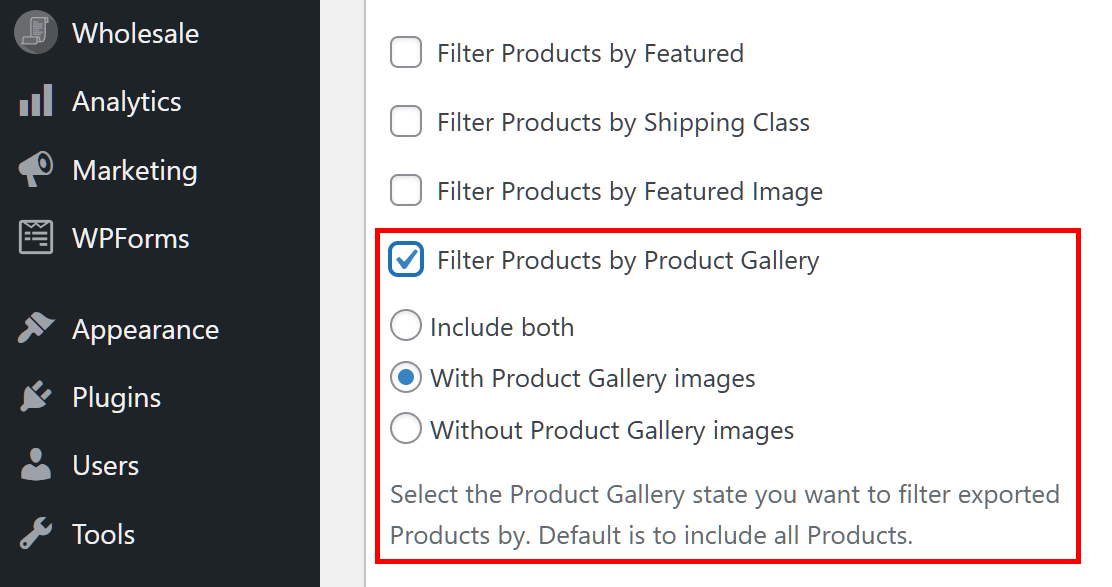
Pick “With Product Gallery images” to leave out products that have no gallery. You can also use Product Sorting to order products ascending or descending, or Custom Multi-Level Field Sorting for more control.
Step 4: Set your product gallery formatting
The Export Options area controls how your data appears in the file, including grouped products, upsells, and cross-sells.
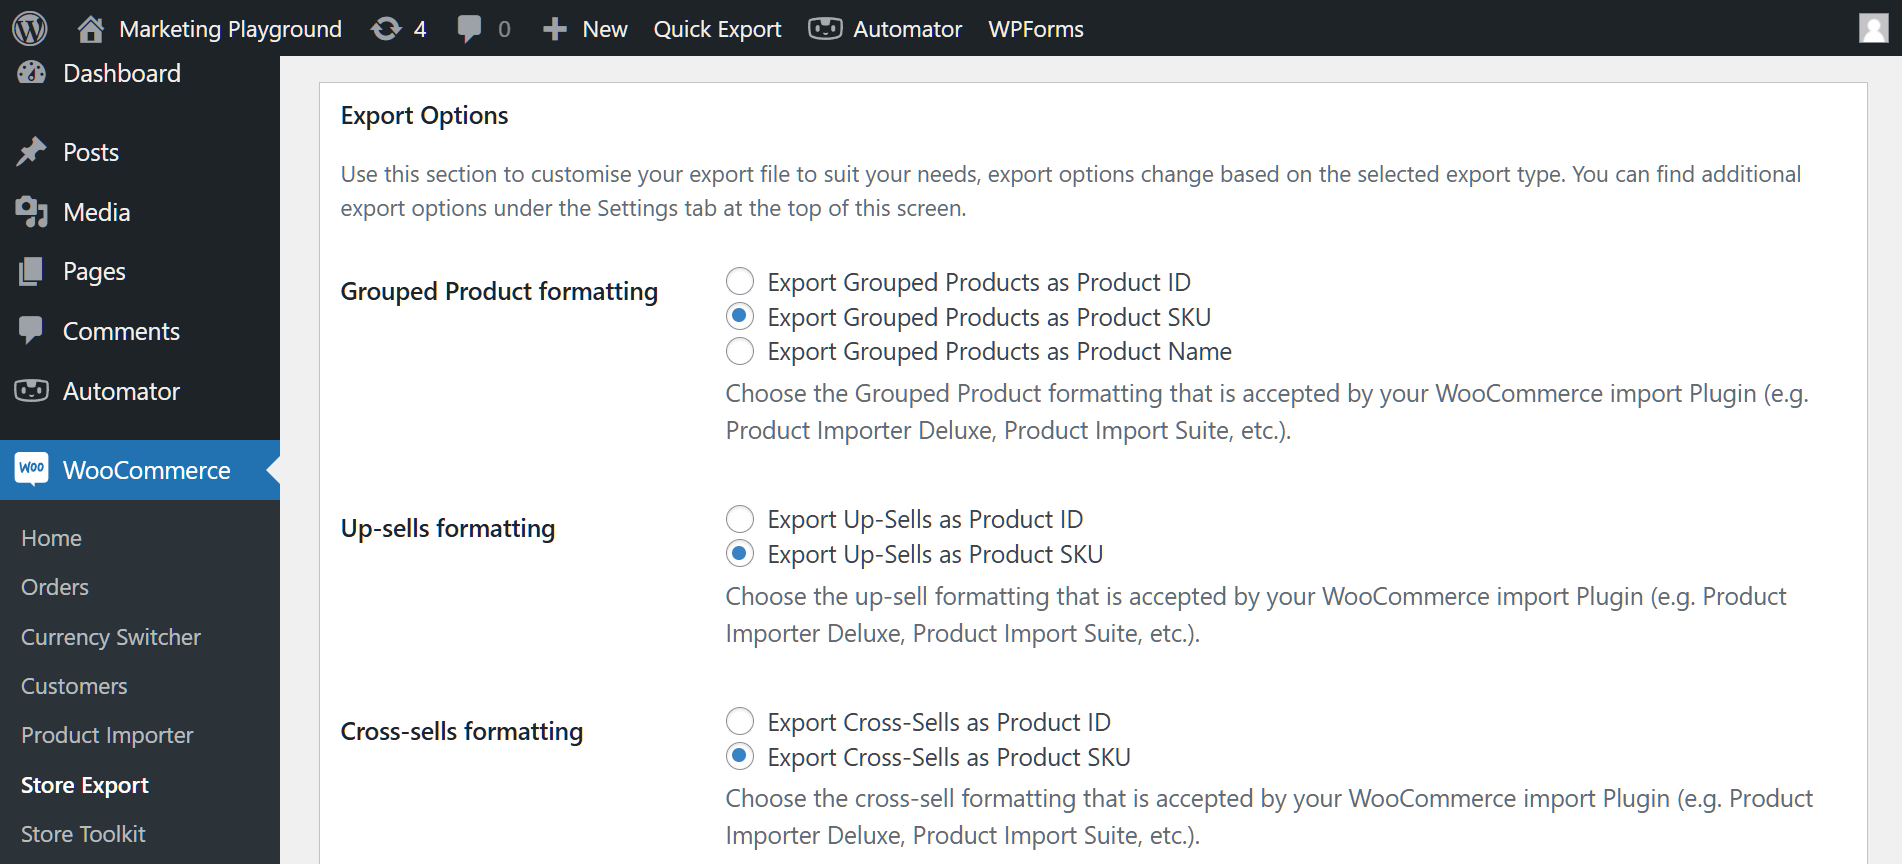
Focus on the product gallery settings:
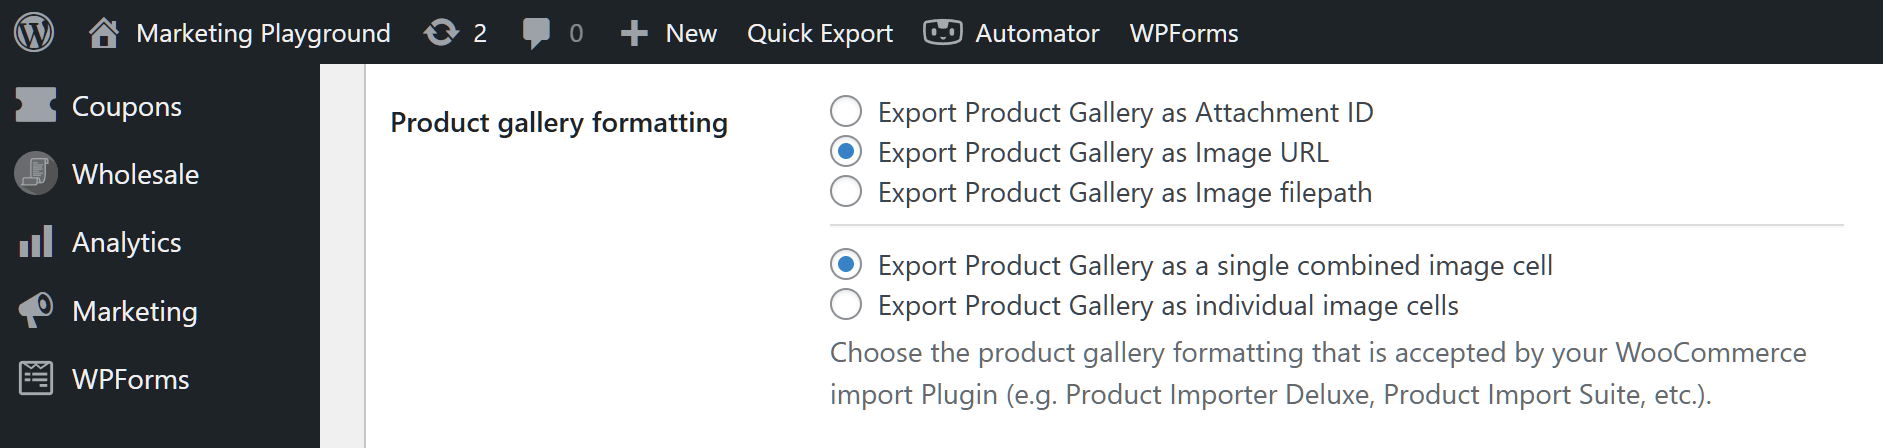
Attachment IDs, image URLs, or image filepaths
First, choose how each gallery image is written to the file:
- Attachment IDs: The image’s ID in your WordPress Media Library.
- Image URLs: The full web address of each image. Choose this one if you plan to import the file into another store.
- Image filepaths: The image’s location on your server.

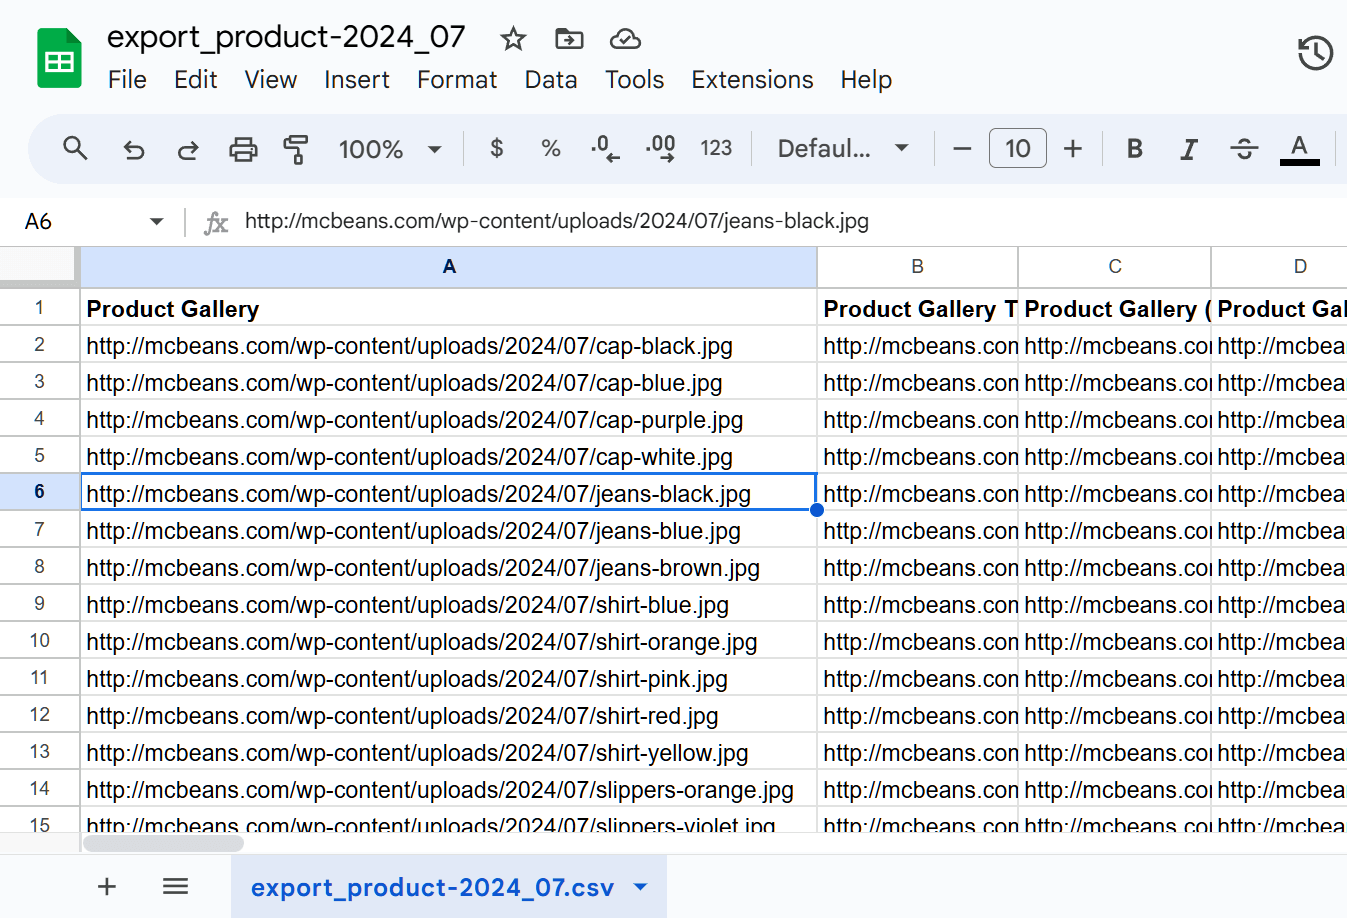
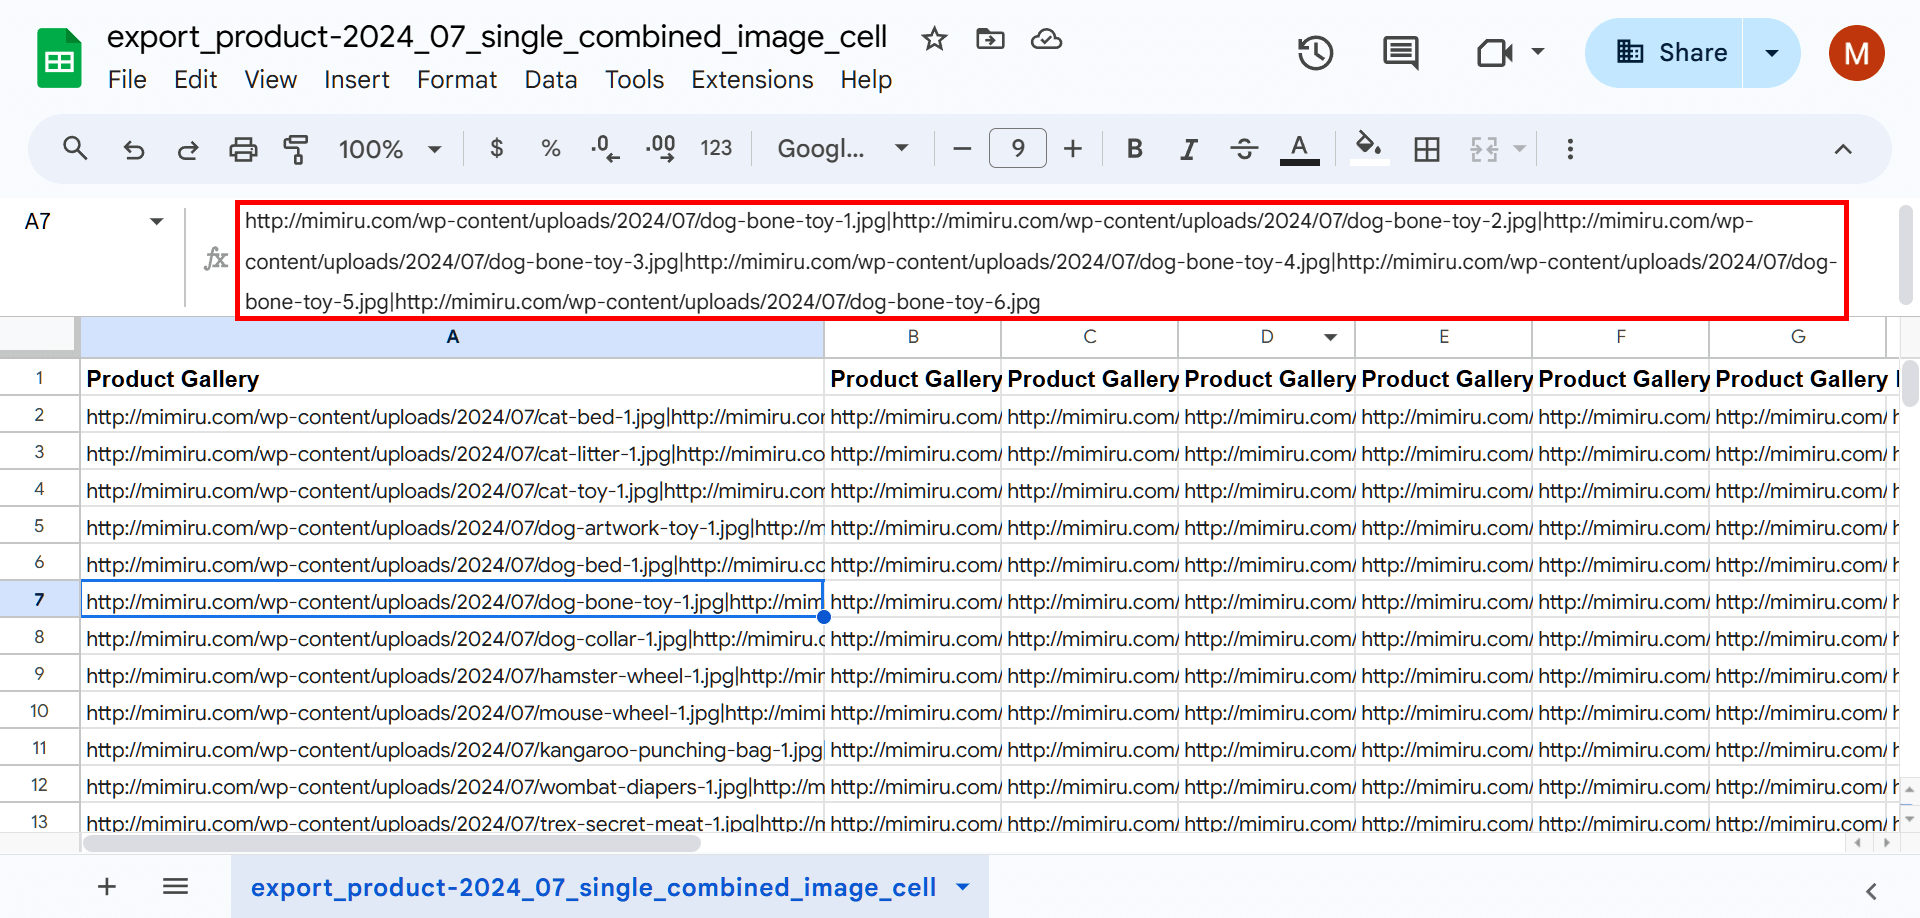
Here’s a spreadsheet showing product galleries as image URLs:
Combined vs. separate columns
Next, decide whether each product’s images share one cell or get a cell each.
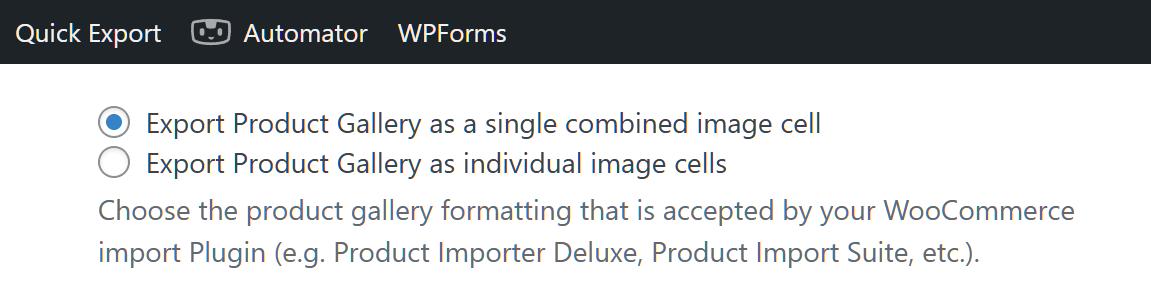
Export Product Gallery as a single combined image cell: Each product’s gallery lands in one cell with all of its image URLs. The spreadsheet has fewer columns, but each cell can get long and hard to read.
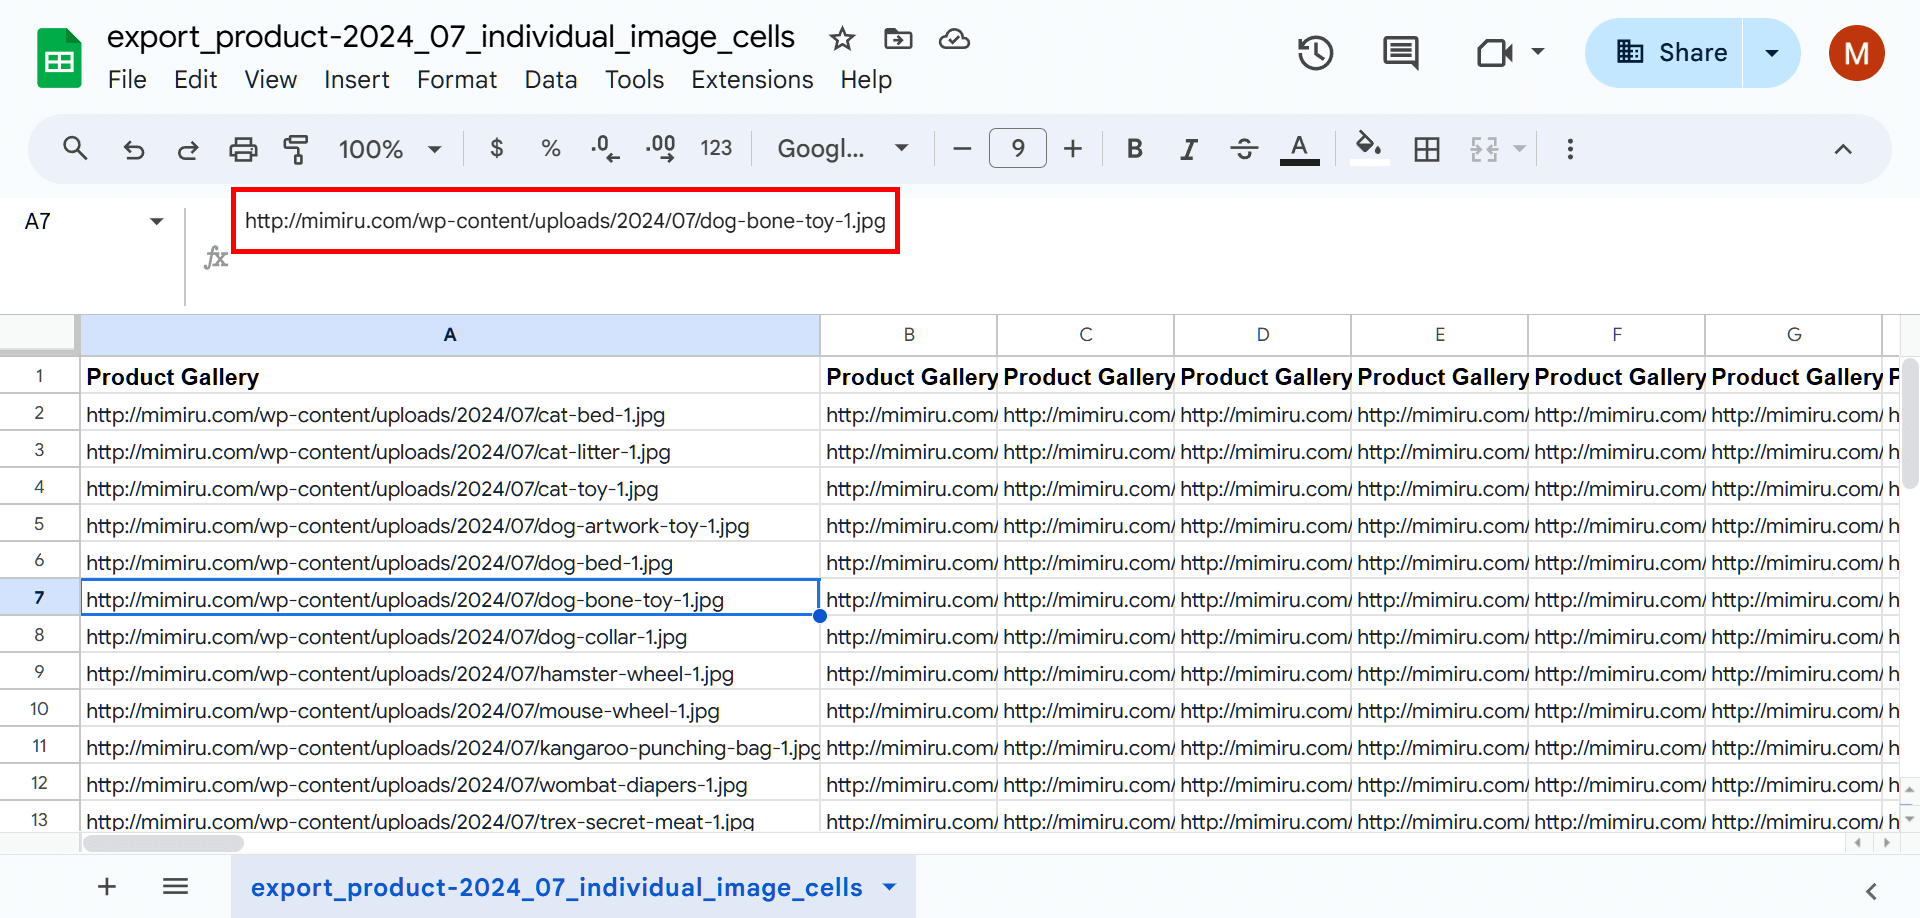
Export Product Gallery as individual image cells: Each gallery image gets its own cell. Every cell holds one URL, but the spreadsheet needs more columns.
Max unique Product Gallery images
Picking individual image cells unlocks one more setting:
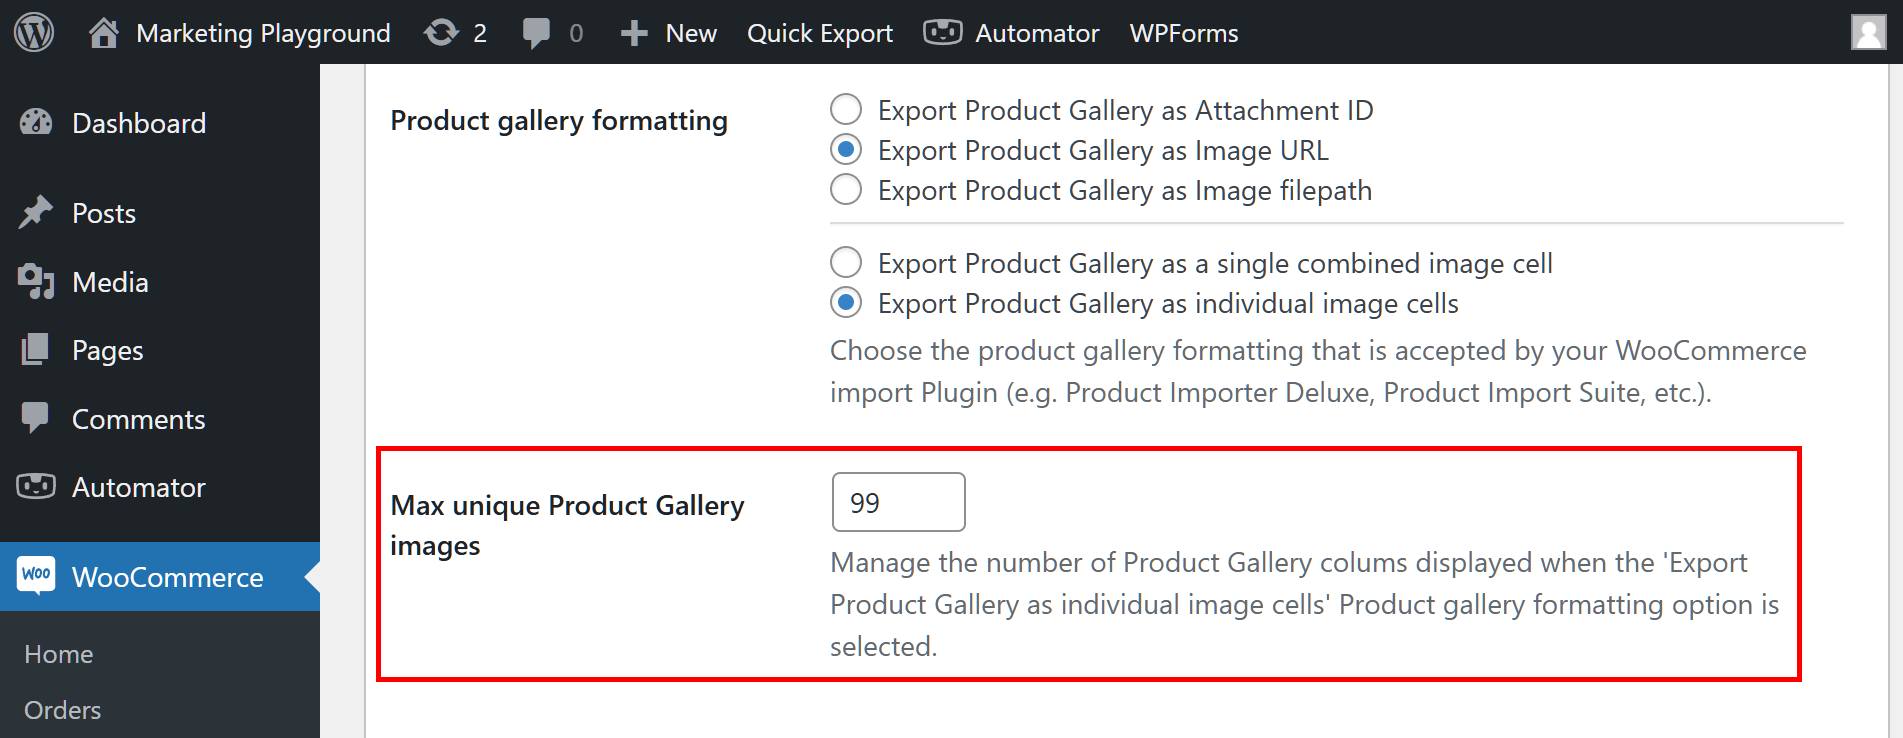
This sets how many Product Gallery columns your file includes. If some products have 20 gallery images, set Max unique Product Gallery images to at least 20. A lower number cuts the extra images from the file.
Step 5: Choose your file format and run the export
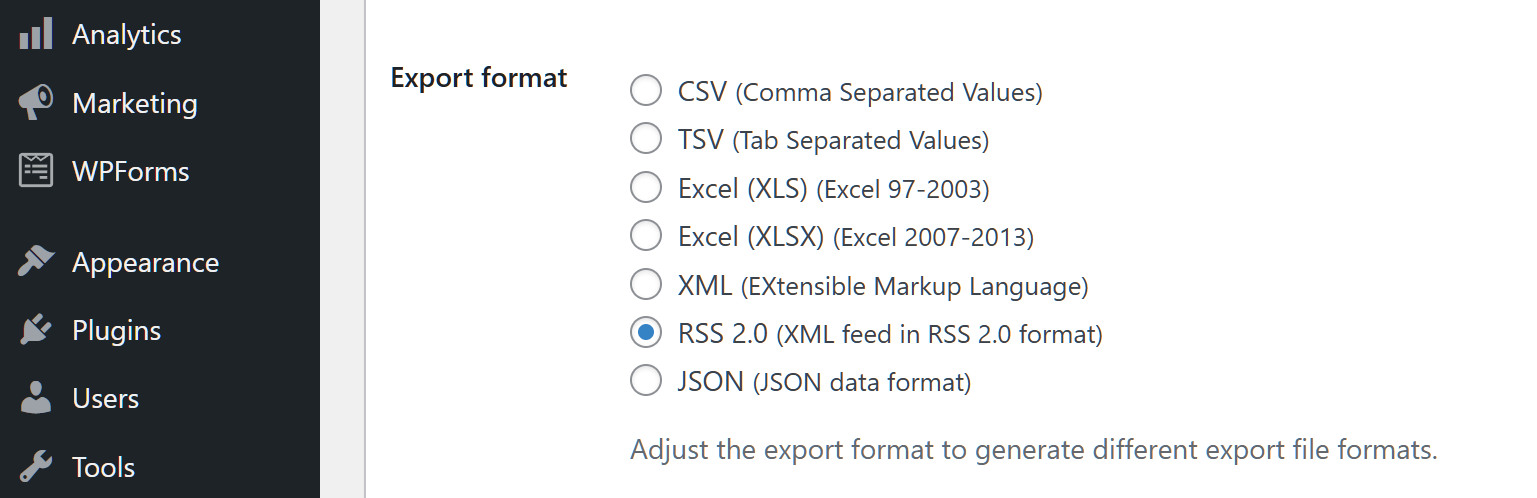
Still in Export Options, find Export format and click the circle for the format you want. Pick CSV if you plan to re-import the file into WooCommerce.
Skip the Export Template option for this run, since loading a template can overwrite the settings you just chose.
For large catalogs, use the Limit volume and Volume offset values to export in batches.
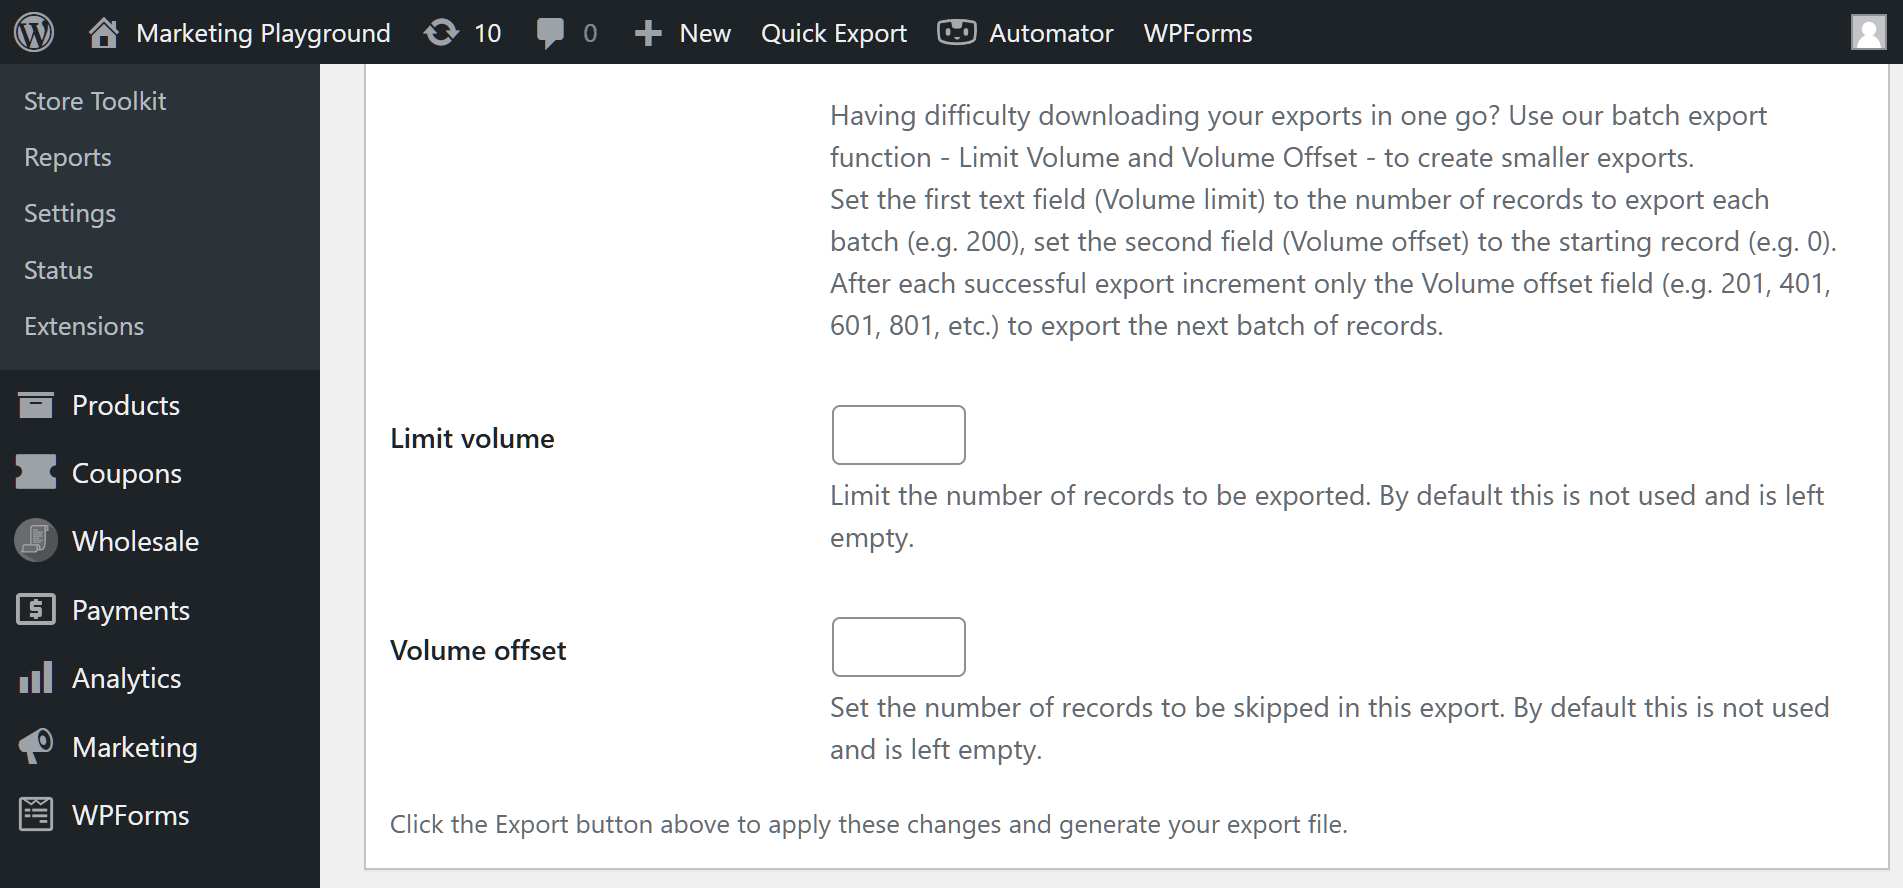
When your settings look right, click the Export Products or Quick Export button. Store Exporter Deluxe builds the file and downloads it to your computer.
Why Store Exporter Deluxe fits image exports
Compared with the core exporter, Store Exporter Deluxe gives you control over exactly how images land in the file:
- Separate image columns: Split gallery images into their own cells instead of one long list.
- Three image formats: Export attachment IDs, URLs, or file paths depending on where the file is going.
- Gallery filter: Export only the products that actually have gallery images.
- Scheduled exports: Set up recurring files for backups or product feeds.
Best Practices For Exporting Product Images
- Verify Media Library links: Make sure every product image is uploaded to WordPress before you export.
- Test on a staging site: Import the file somewhere safe first and confirm the images load.
- Keep the source images online: Image URLs only work while the original files stay reachable, so leave the old store live until the migration is done.
- Map columns for Google Merchant Center: Match your image columns to the platform’s feed requirements.
Pro Tip: Matching your image URLs and metadata to these requirements is one of the best ways to export WooCommerce products to Google Merchant Center without feed disapprovals.
One thing we see often: store owners export their products with images, move to a new site, and find the images won’t pull in. The URLs in the CSV only work while the original files stay reachable, so keep the source media library live until the migration finishes.
Want the bigger picture on product exports? Read “How To Export WooCommerce Products (An Easy, Step-By-Step Guide).”

For the export process across every data type, see “How To Export WooCommerce Data: Ultimate Guide.”

Export WooCommerce Products With Images The Right Way
A WooCommerce export of products with images is only as good as the file it produces. The built-in exporter gets URLs out, but separate gallery columns, a gallery filter, and scheduling make the file far easier to reuse for migrations and feeds.
To get it right:
- Decide why you’re exporting so you pick the right image format.
- Check what the built-in exporter covers before you rely on it.
- Follow the Store Exporter Deluxe steps to export featured and gallery images.
- Test the file on staging and keep source images online.
Ready to export your catalog with every image intact? Get Store Exporter Deluxe and run your first export in a few minutes.
FAQs: WooCommerce Export Products With Images
Can I export WooCommerce product images to CSV?
Yes. WooCommerce’s built-in exporter lists image URLs in a single Images column, with the featured image first. Store Exporter Deluxe exports the featured image and full gallery as URLs, attachment IDs, or file paths, in one cell or separate columns.
Does the export include gallery images or just the featured image?
Both. Add the Featured Image field and the Product Gallery fields to a Products export, and the gallery exports every image attached to the product.
Why aren’t my product images appearing after importing to a new site?
Usually the image URLs in your CSV can’t be reached. Some hosts block requests from other stores or return a page instead of an image. Check that each URL opens in a browser, or upload the images to the new store’s Media Library first.
Will the image URLs work when I import them into a new store?
Yes, as long as the source images stay reachable at their URLs. Re-import the same CSV with WooCommerce’s built-in product importer (Products > All Products > Import) and it pulls the images from those URLs into the new store.
Can I export only specific products with images?
Yes. The built-in exporter filters by product type and category. Store Exporter Deluxe adds more filters, including product category and “Filter Products by Product Gallery,” so you can export only products that have gallery images.
How do I handle multiple images per product?
In Store Exporter Deluxe, choose “Export Product Gallery as individual image cells” and set Max unique Product Gallery images to your largest gallery size. Each image then gets its own column, which is easier to map during import.