
If you need a list of active subscribers, a billing history export, or a feed of subscription data for another system, Store Exporter Deluxe lets you pull WooCommerce Subscriptions data straight out of your store. Below covers exporting subscriptions with the Quick Export tool and setting up a recurring export with Scheduled Exports.
For a broader look at subscription export use cases, format comparisons, and Google Sheets delivery, see How to export WooCommerce subscriptions (complete guide).
Prerequisites
| Requirement | Details |
|---|---|
| Plugin | Store Exporter Deluxe is active and licensed |
| WooCommerce Subscriptions | Installed and active. Without it, the Subscriptions tile shows 0 records and is greyed out (not selectable). |
| WooCommerce | Active, with at least one subscription to export |
| Administrator access | You’ll need an account with access to the WordPress admin dashboard |
Quick Export: Subscriptions
To export subscriptions right away:
- Go to WooCommerce → Store Export, then click the Quick Export button in the sidebar.
- Under export type, select Subscriptions.
- Choose the fields you want to include.
- Apply any filters you need.
- Set your batch options if you’re exporting a large number of subscriptions.
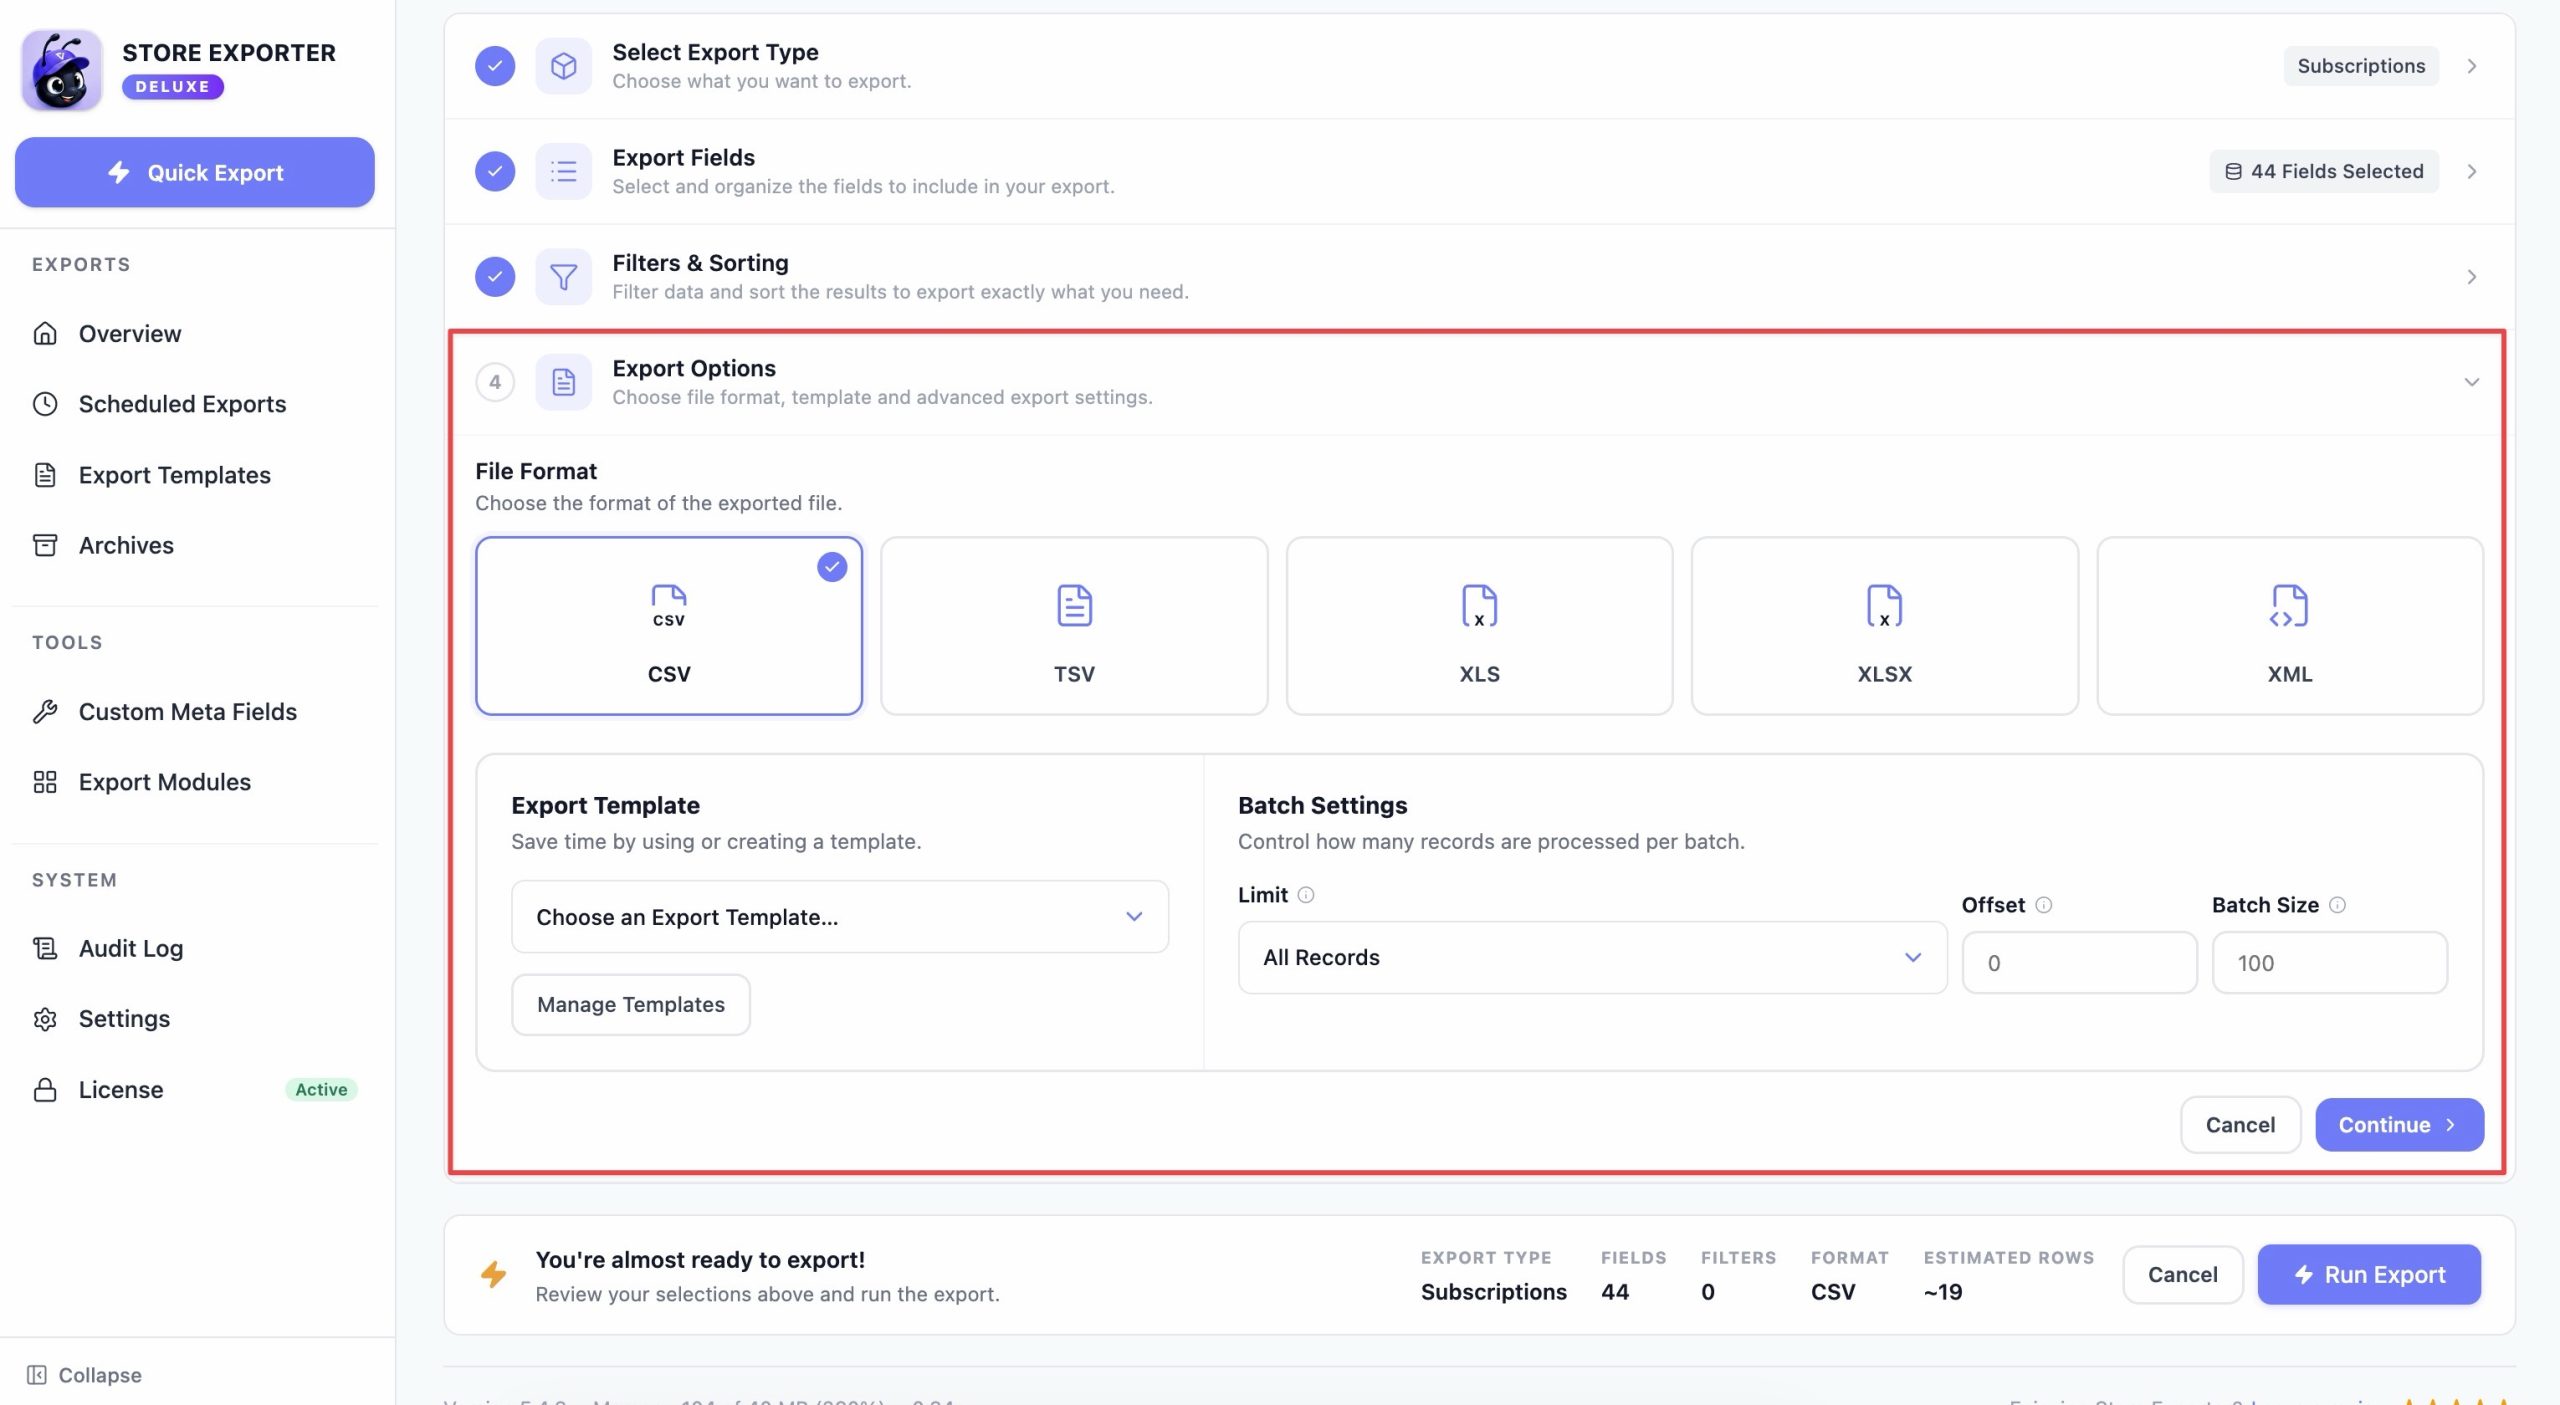
- Choose your export format.
- Click Export.
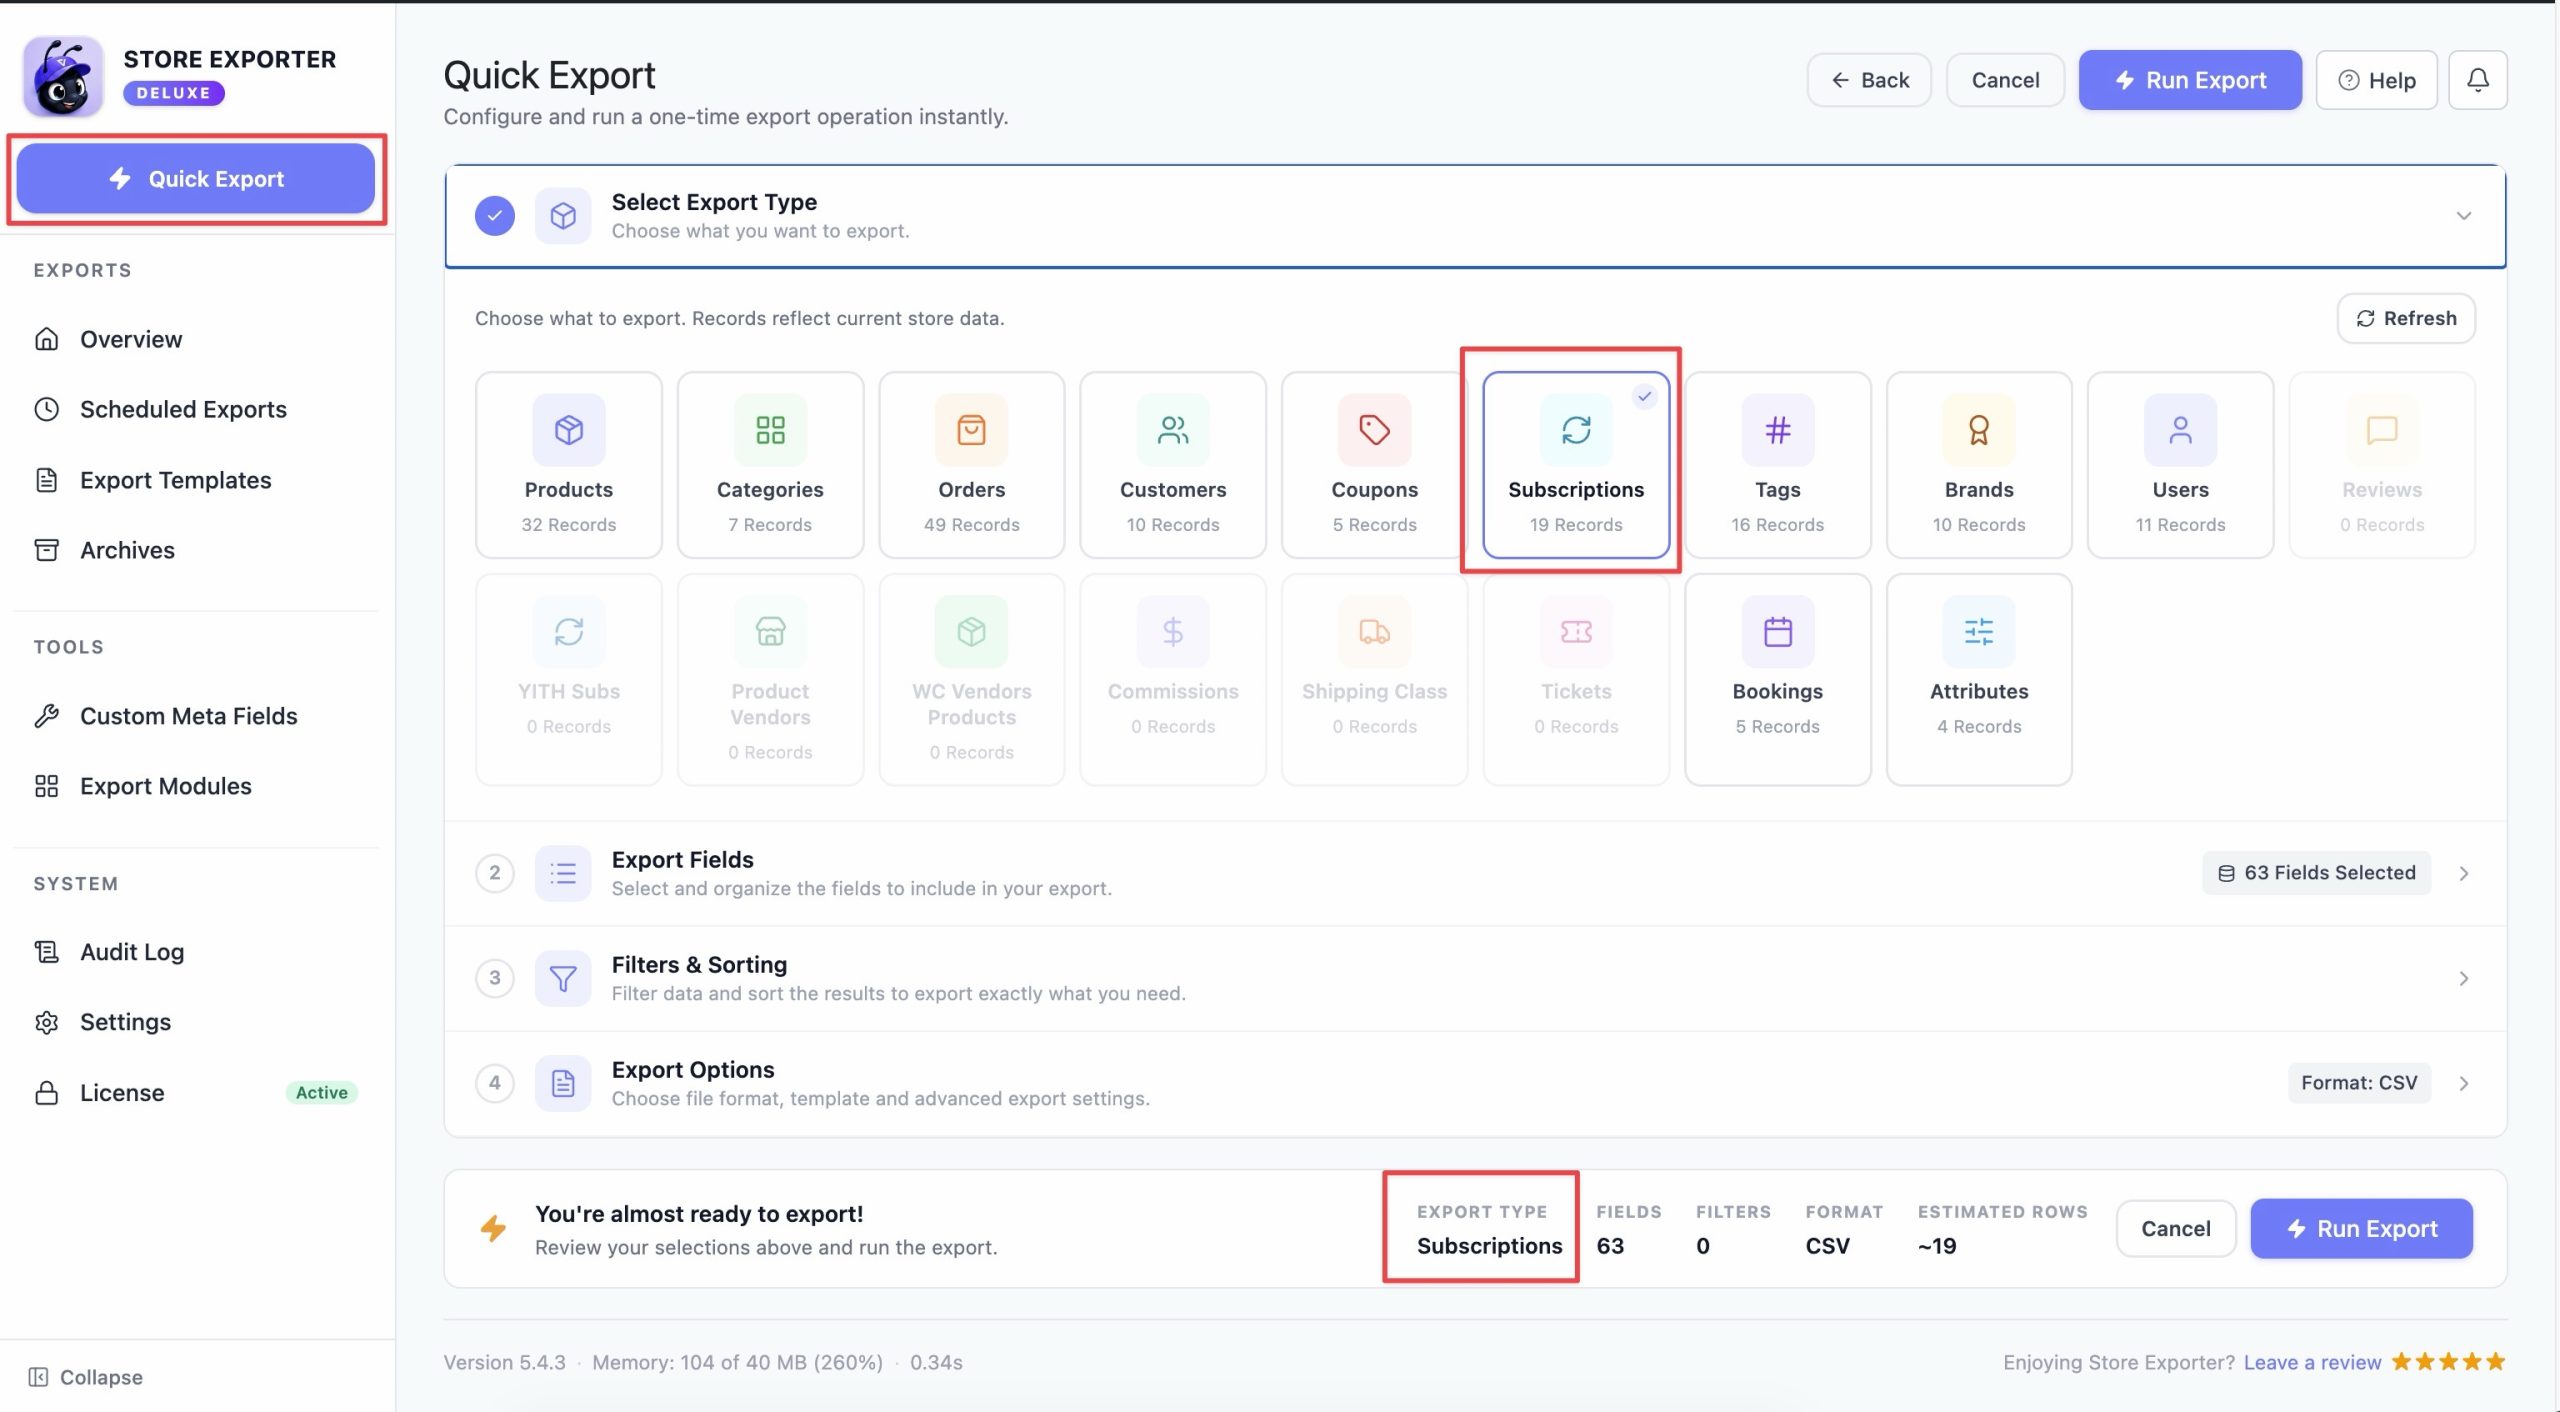
Available subscription fields
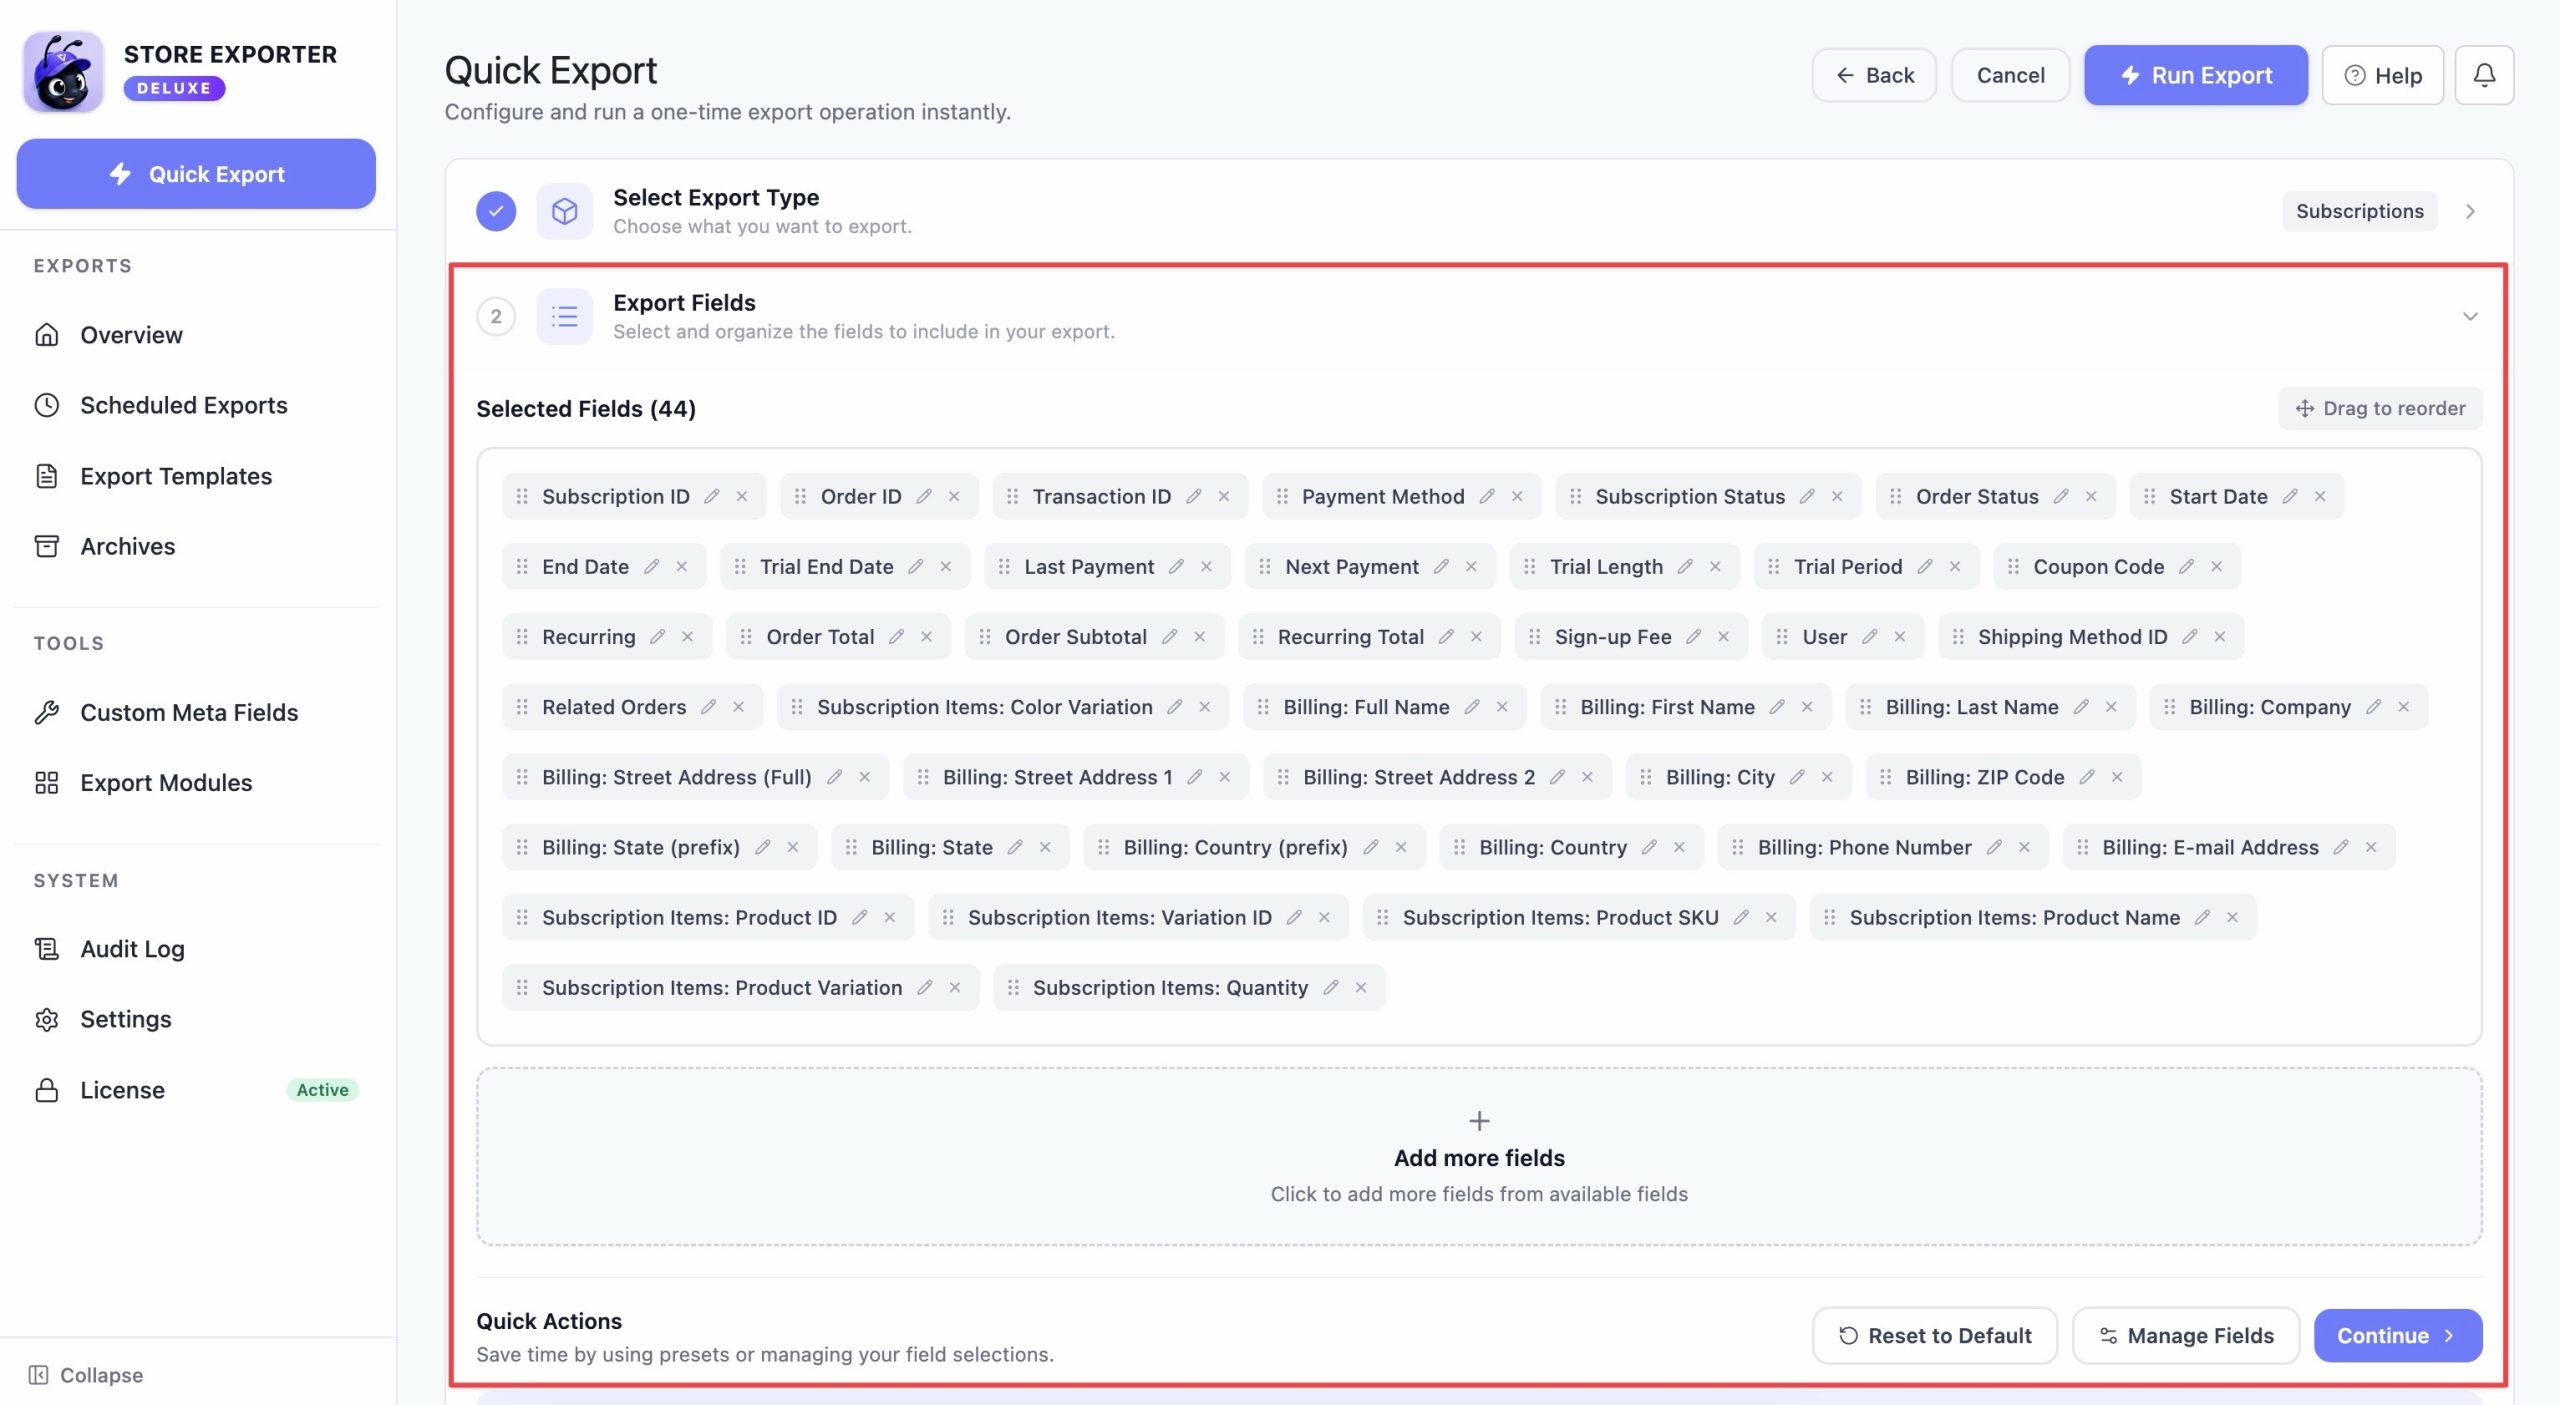
When you select Subscriptions as the export type, the Export Fields step groups the available columns into these categories:
- Subscription Info: Subscription ID, Order ID, Transaction ID, Payment Method.
- Status & Schedule: Subscription Status, Order Status, Start Date, Trial End Date, Trial Length, Trial Period, Next Payment, End Date, Last Payment, Coupon Code.
- Financial: Recurring, Recurring Total, Order Total, Order Subtotal, Sign-up Fee.
- Billing Address: Name, company, address, city, state, postcode, country, email, and phone. Each field is labeled “Billing: [field]”.
- Shipping Address: Name, company, address, city, state, postcode, country, plus shipping method and shipping cost. Each field is labeled “Shipping: [field]”.
- Customer: User and User ID.
- Order Items: Product name, ID, SKU, quantity, and variation for each item on the subscription. Each field is labeled “Subscription Items: [field]”.
- Basic Info: Fields that don’t fit the categories above, such as Related Orders.
A new export starts with a sensible default selection, including Subscription ID, Order Status, Start Date, Next Payment, and the customer’s billing name and email. Add or remove any field from the list.
To rename a column header, click the pencil icon next to that field in the Export Fields step and type the new header name. This is useful if a downstream system expects specific column names.
Filtering subscriptions
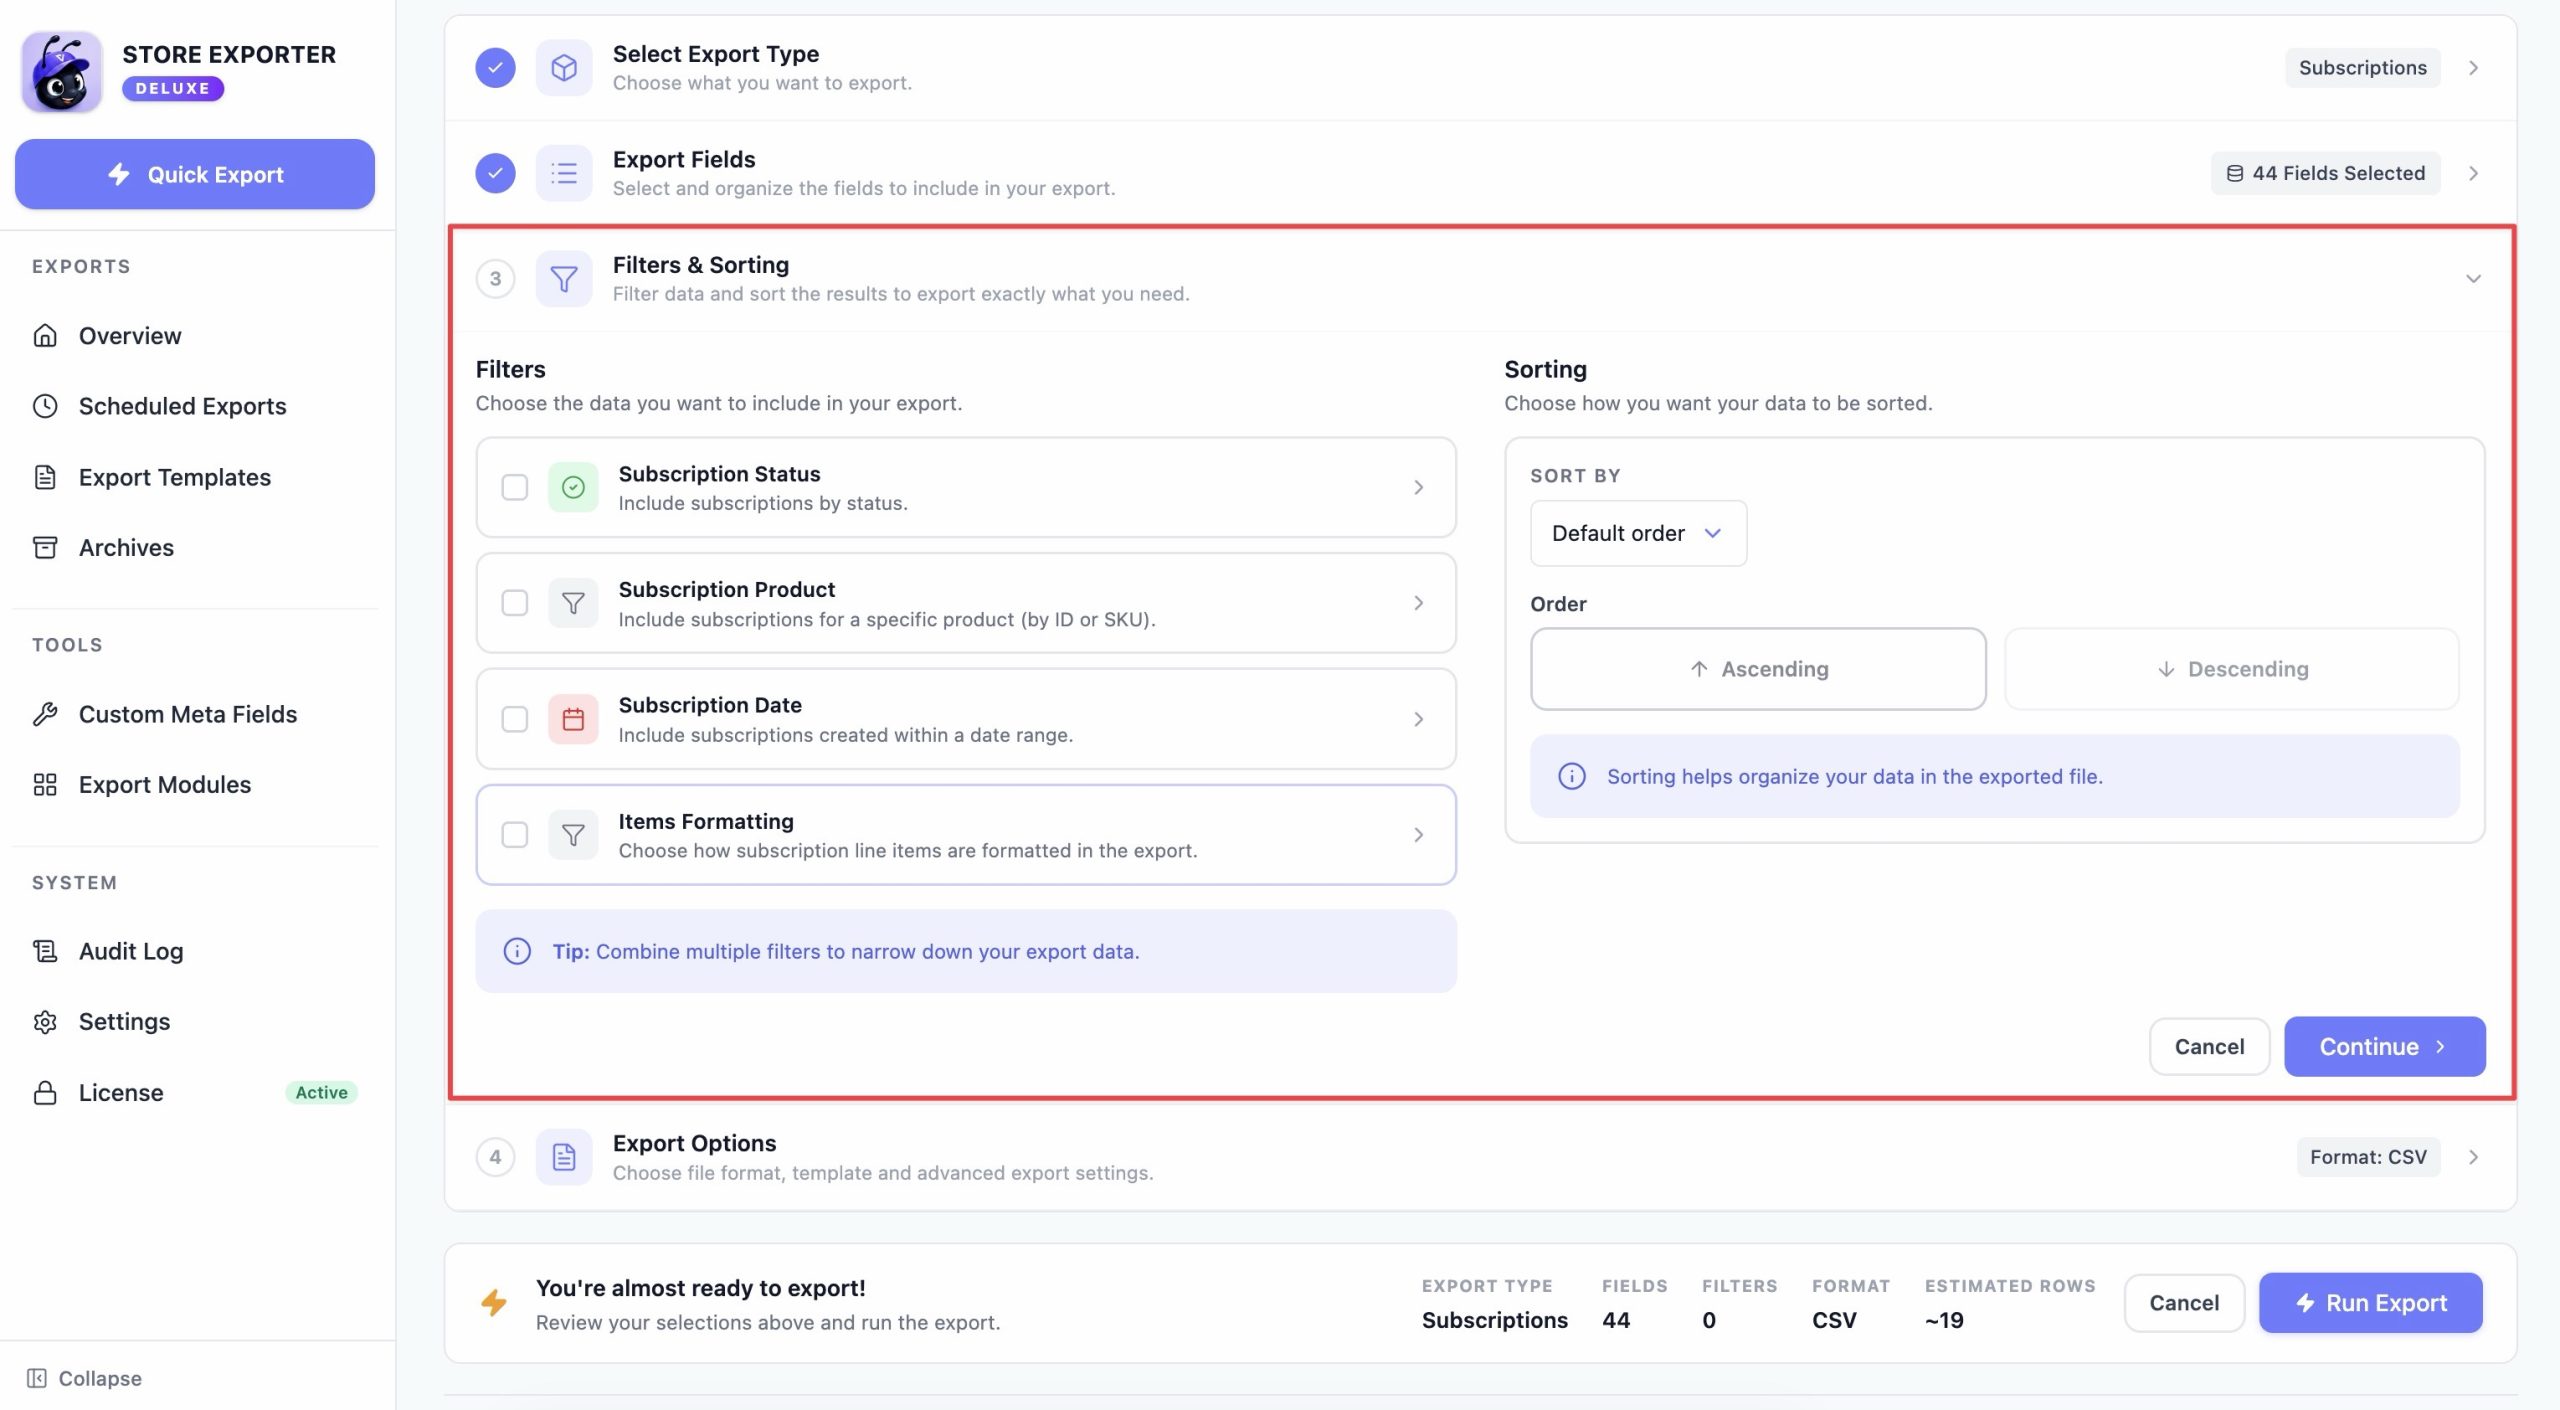
The Filters & Sorting step gives you four ways to narrow a subscription export:
- Subscription statuses: Choose one or more statuses to include. This list comes directly from WooCommerce Subscriptions, so it always matches the statuses active on your site, including Active, On Hold, Cancelled, Expired, Pending Cancel, Pending, and Switched.
- Product IDs: Enter a comma-separated list of product IDs to limit the export to subscriptions for those products.
- Subscription date: Set a date range to export only subscriptions created within that period.
- Items formatting: Choose whether each subscription’s line items export as Combined, Unique, or Individual rows. Combined is the default.
There’s no dedicated customer filter for subscription exports. If you need subscriptions for a specific customer, export the Customer or User ID field and filter the resulting file, or use the product filter if the subscription is tied to a specific product.
Batch exporting large datasets
For stores with a large number of subscriptions, use the batch settings on the Export Options step:
- Set Limit to the total number of records you want in this export, or leave it on All Records.
- Set Offset to the number of records to skip from the start (0 for your first export).
- Set Batch Size to control how many records are processed at once.
To export in batches, run the export multiple times, increasing Offset by your Limit value each time until you’ve covered your full subscriber list.
Scheduled subscription exports
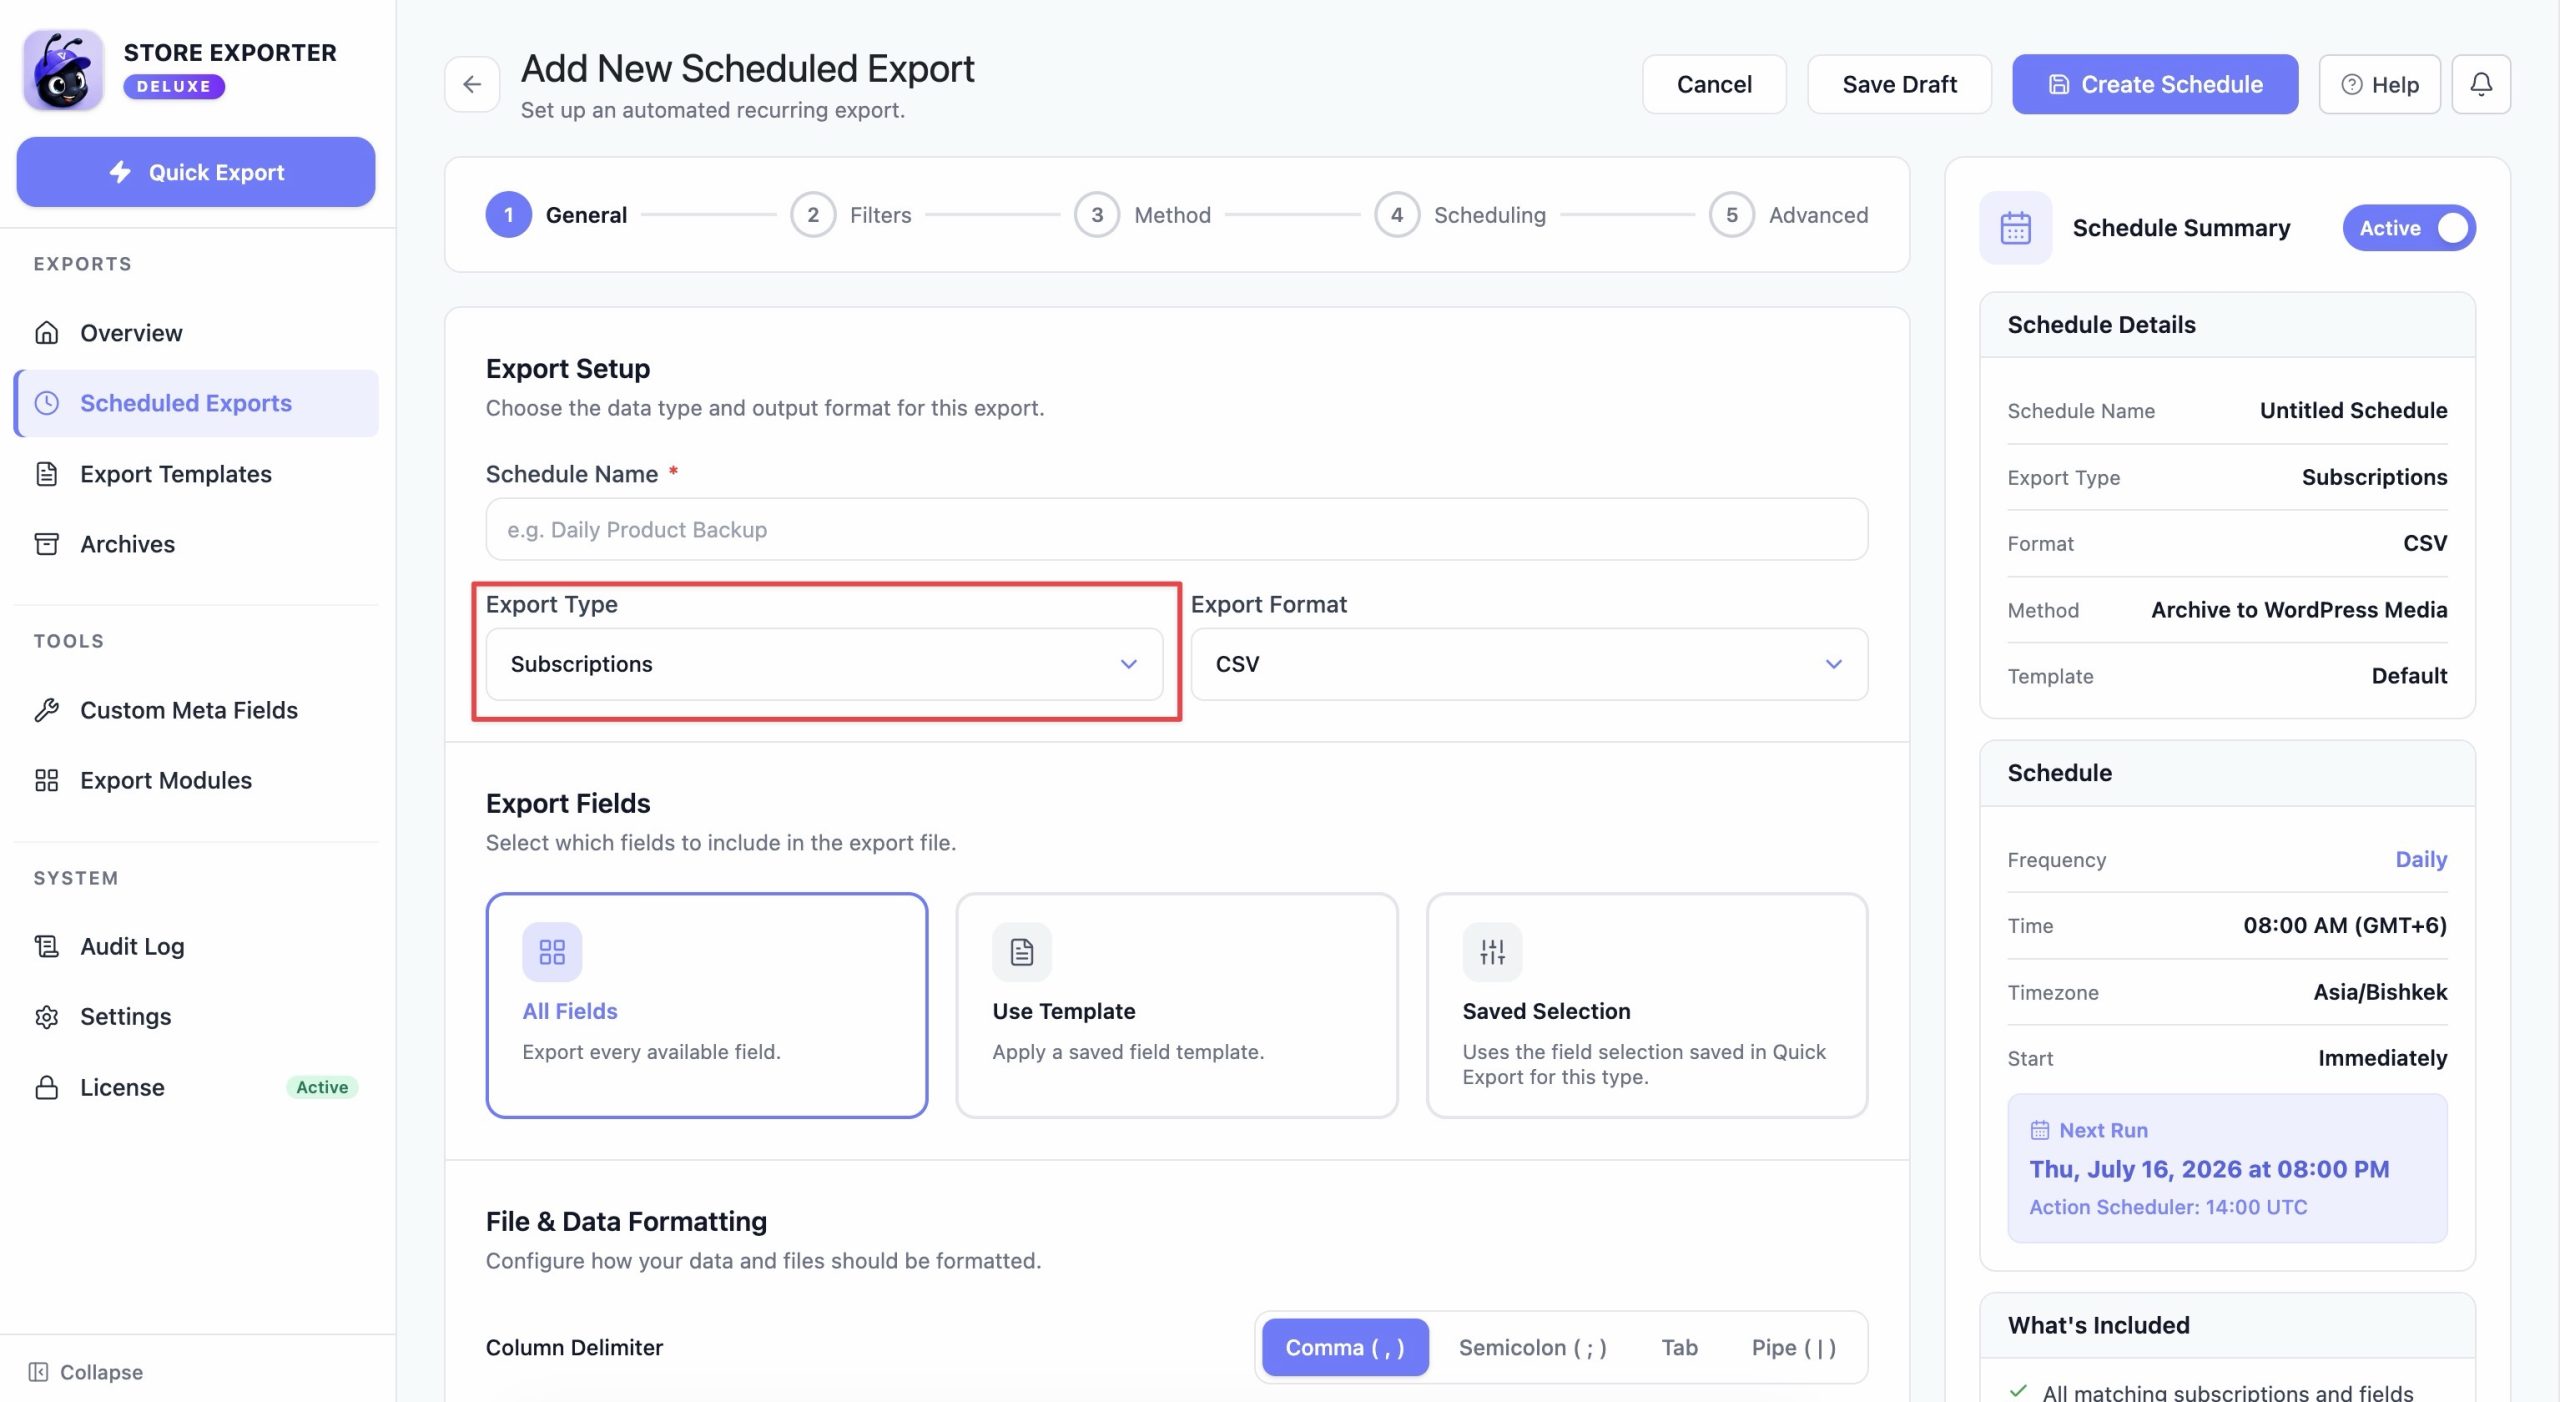
To set up a recurring subscription export, go to WooCommerce > Store Export, click Scheduled Exports in the sidebar, then create a new schedule and select Subscriptions as the export type. Configure the same fields and filters as above, then set:
- Frequency: Hourly, Daily, Weekly, Monthly, Custom, or Manual.
- Delivery method: Archive to Media, Save to Server, Send as Email, POST to URL, FTP / SFTP, or Google Sheets.
- Format: CSV, TSV, XLS, XLSX, XML, RSS 2.0, or JSON.
For detailed instructions on building a schedule, see How to schedule exports.
Supported export formats
Quick Export offers CSV, TSV, XLS, XLSX, and XML for subscription exports. Scheduled Exports offers all of those plus RSS 2.0 and JSON. If you need JSON or RSS output, set up a scheduled export instead of using Quick Export.
Related resources
- How to export WooCommerce subscriptions (complete guide)
- How to schedule exports
- Supported export fields
- Store Exporter Deluxe product page
- Pricing and plans
Need more help?
If you’re using Store Exporter Deluxe and run into an issue this article doesn’t cover, open a support ticket and our team will help you get your subscription export working.
If you’re using the free Store Exporter plugin, ask on the WordPress.org support forum and our team will get back to you there.
