This guide walks you through exporting WooCommerce products step by step using Store Exporter Deluxe. You’ll learn how to select export fields, apply filters, choose your file format, and run the export.
Looking for a general guide to exporting WooCommerce products? See our comprehensive guide.
Before you start, make sure you have:
- Store Exporter Deluxe installed and activated on your WordPress site
- WooCommerce installed and active with at least one product created
- Administrator access to your WordPress dashboard
Step 1 — Access The Product Export
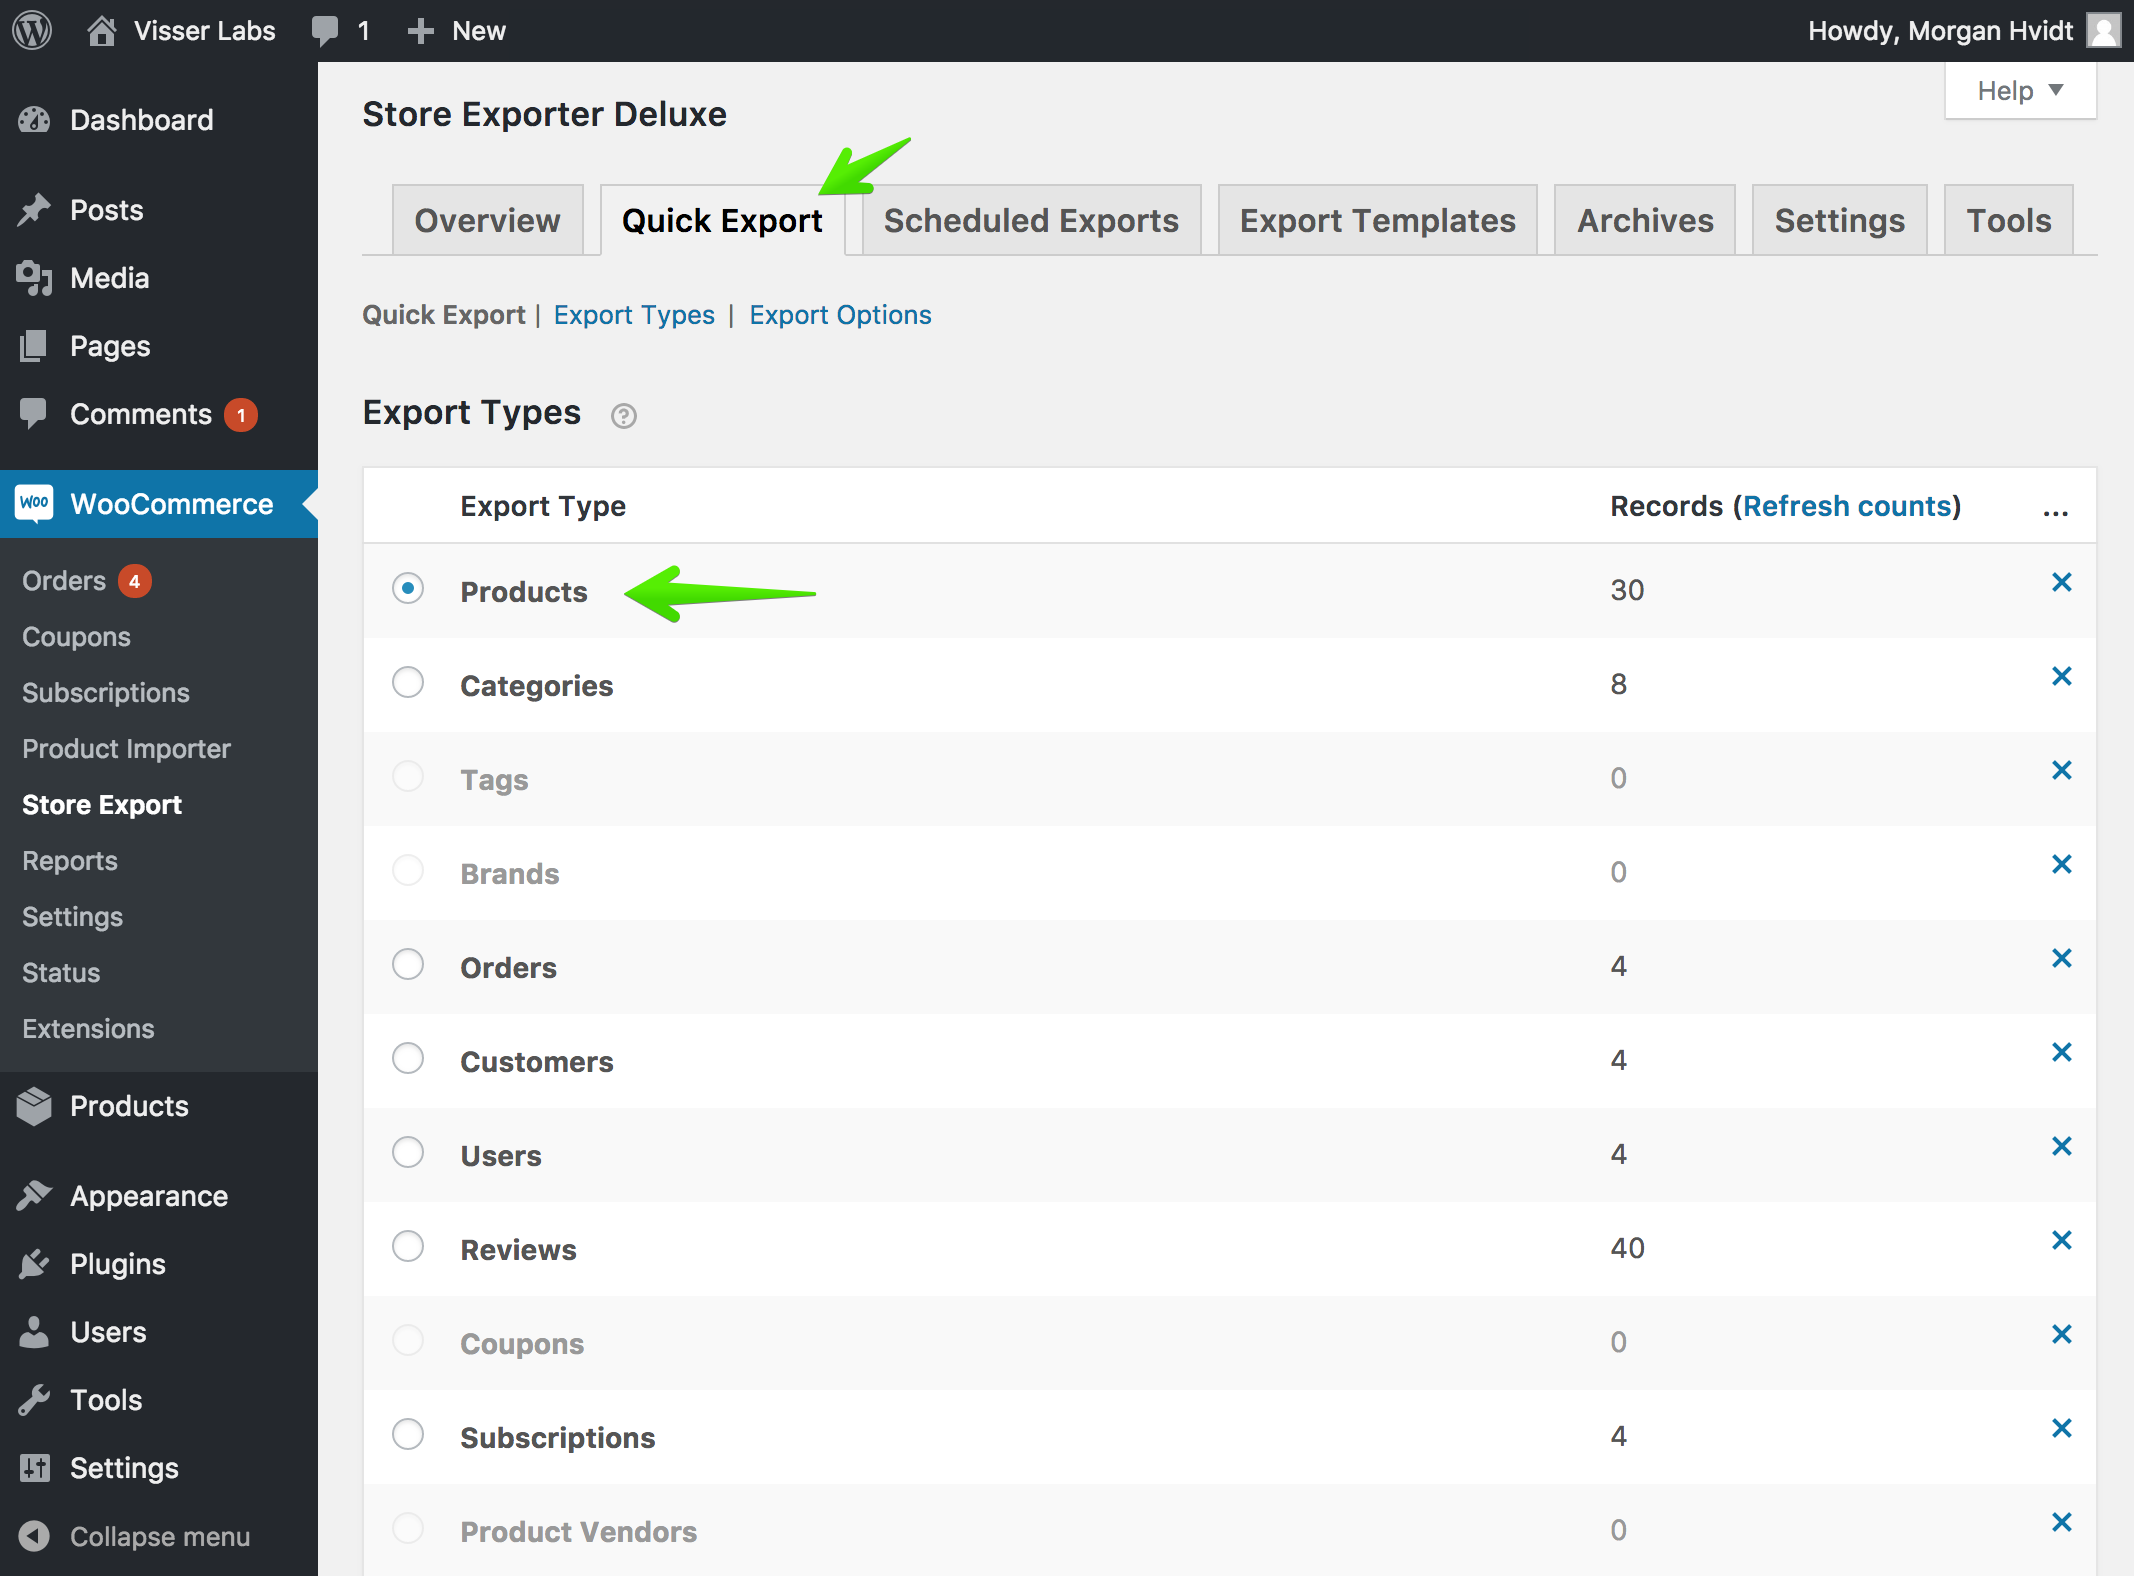
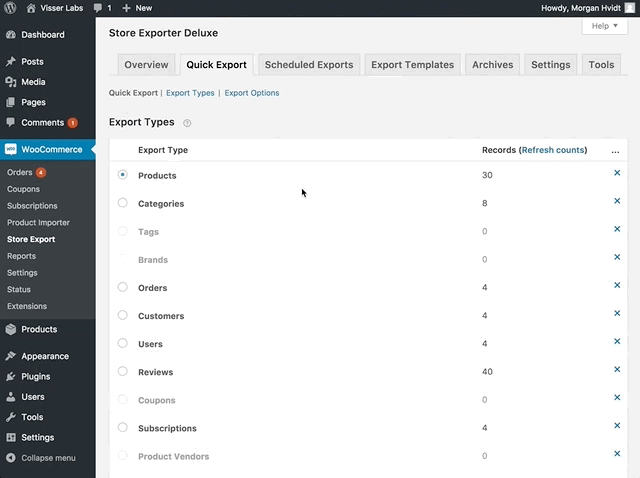
From your WordPress dashboard, navigate to WooCommerce > Store Export. This opens the Store Exporter Deluxe interface where all export types are managed.
Select the Quick Export tab at the top of the page. This is the fastest way to run a one-time product export. Under Export type, choose Products from the dropdown menu.
The page will update to show product-specific options including field selection, filters, and format settings. These are covered in the steps below.
Step 2 — Select Your Export Fields
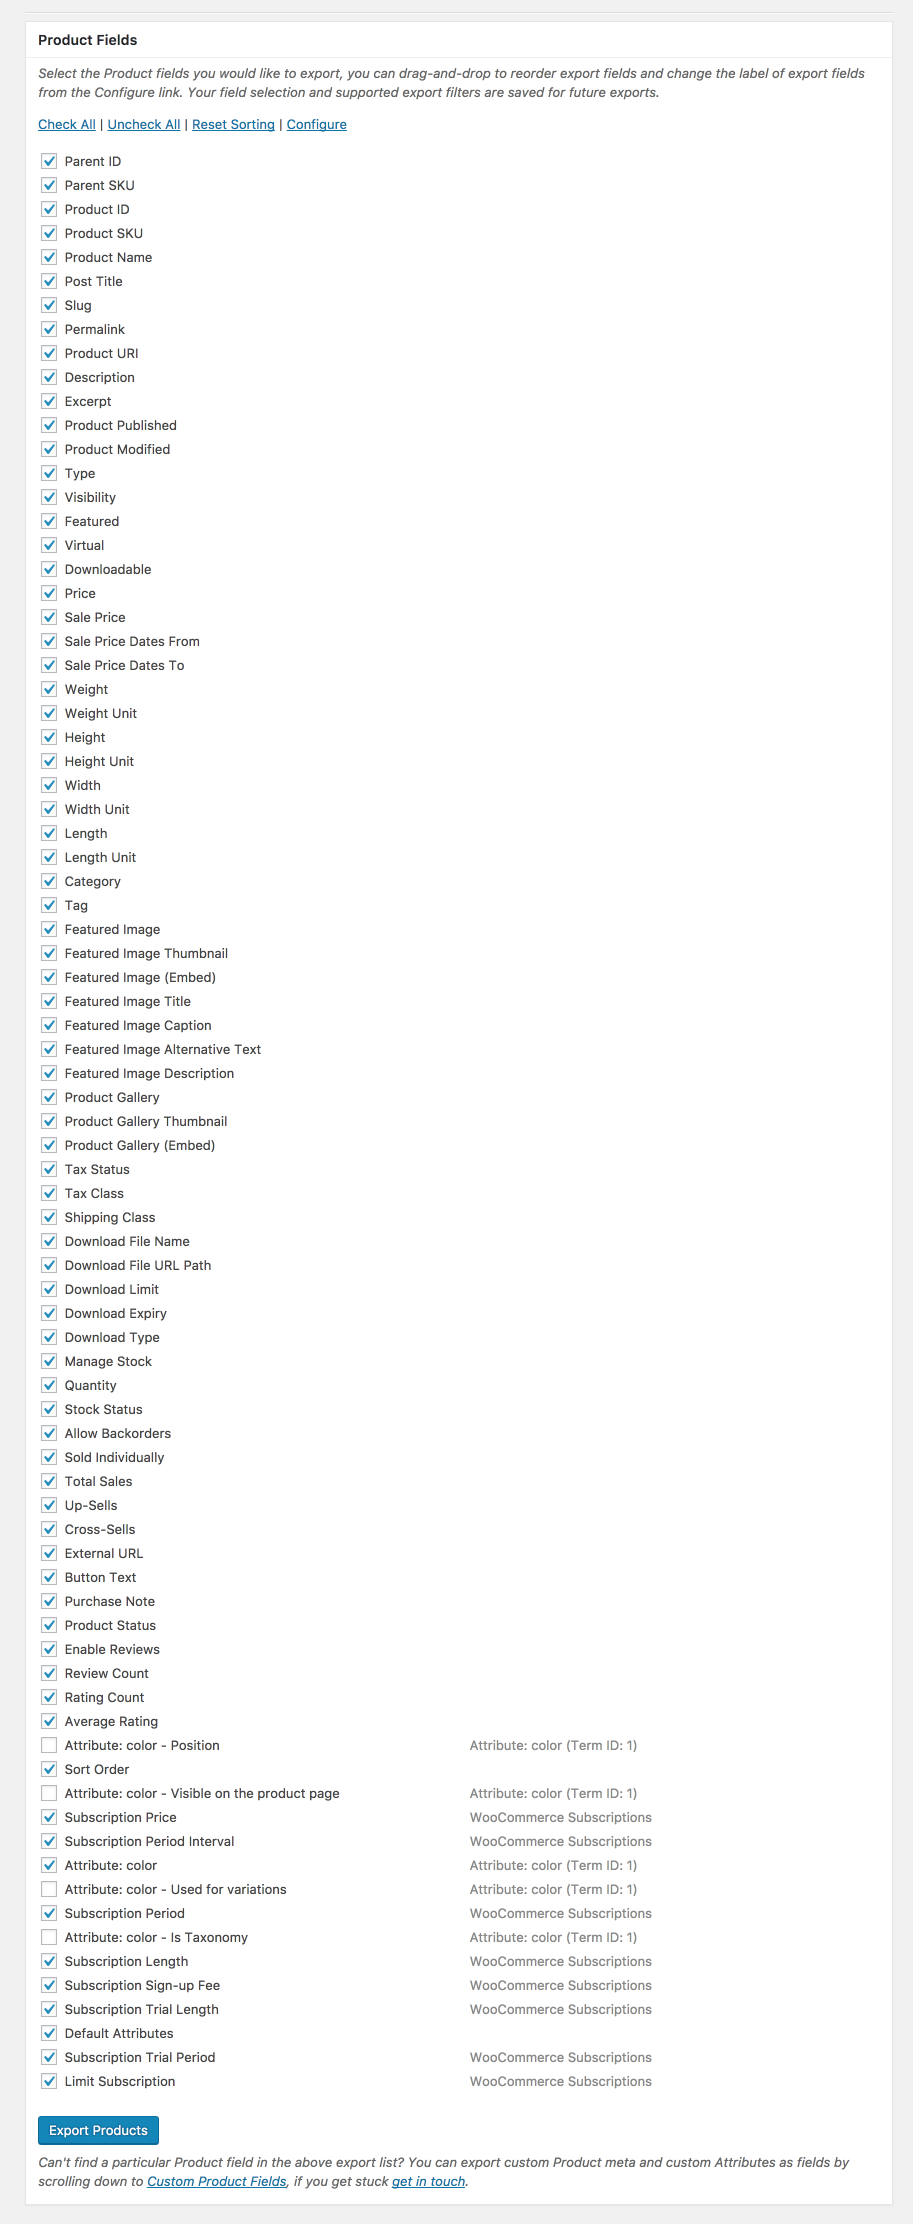
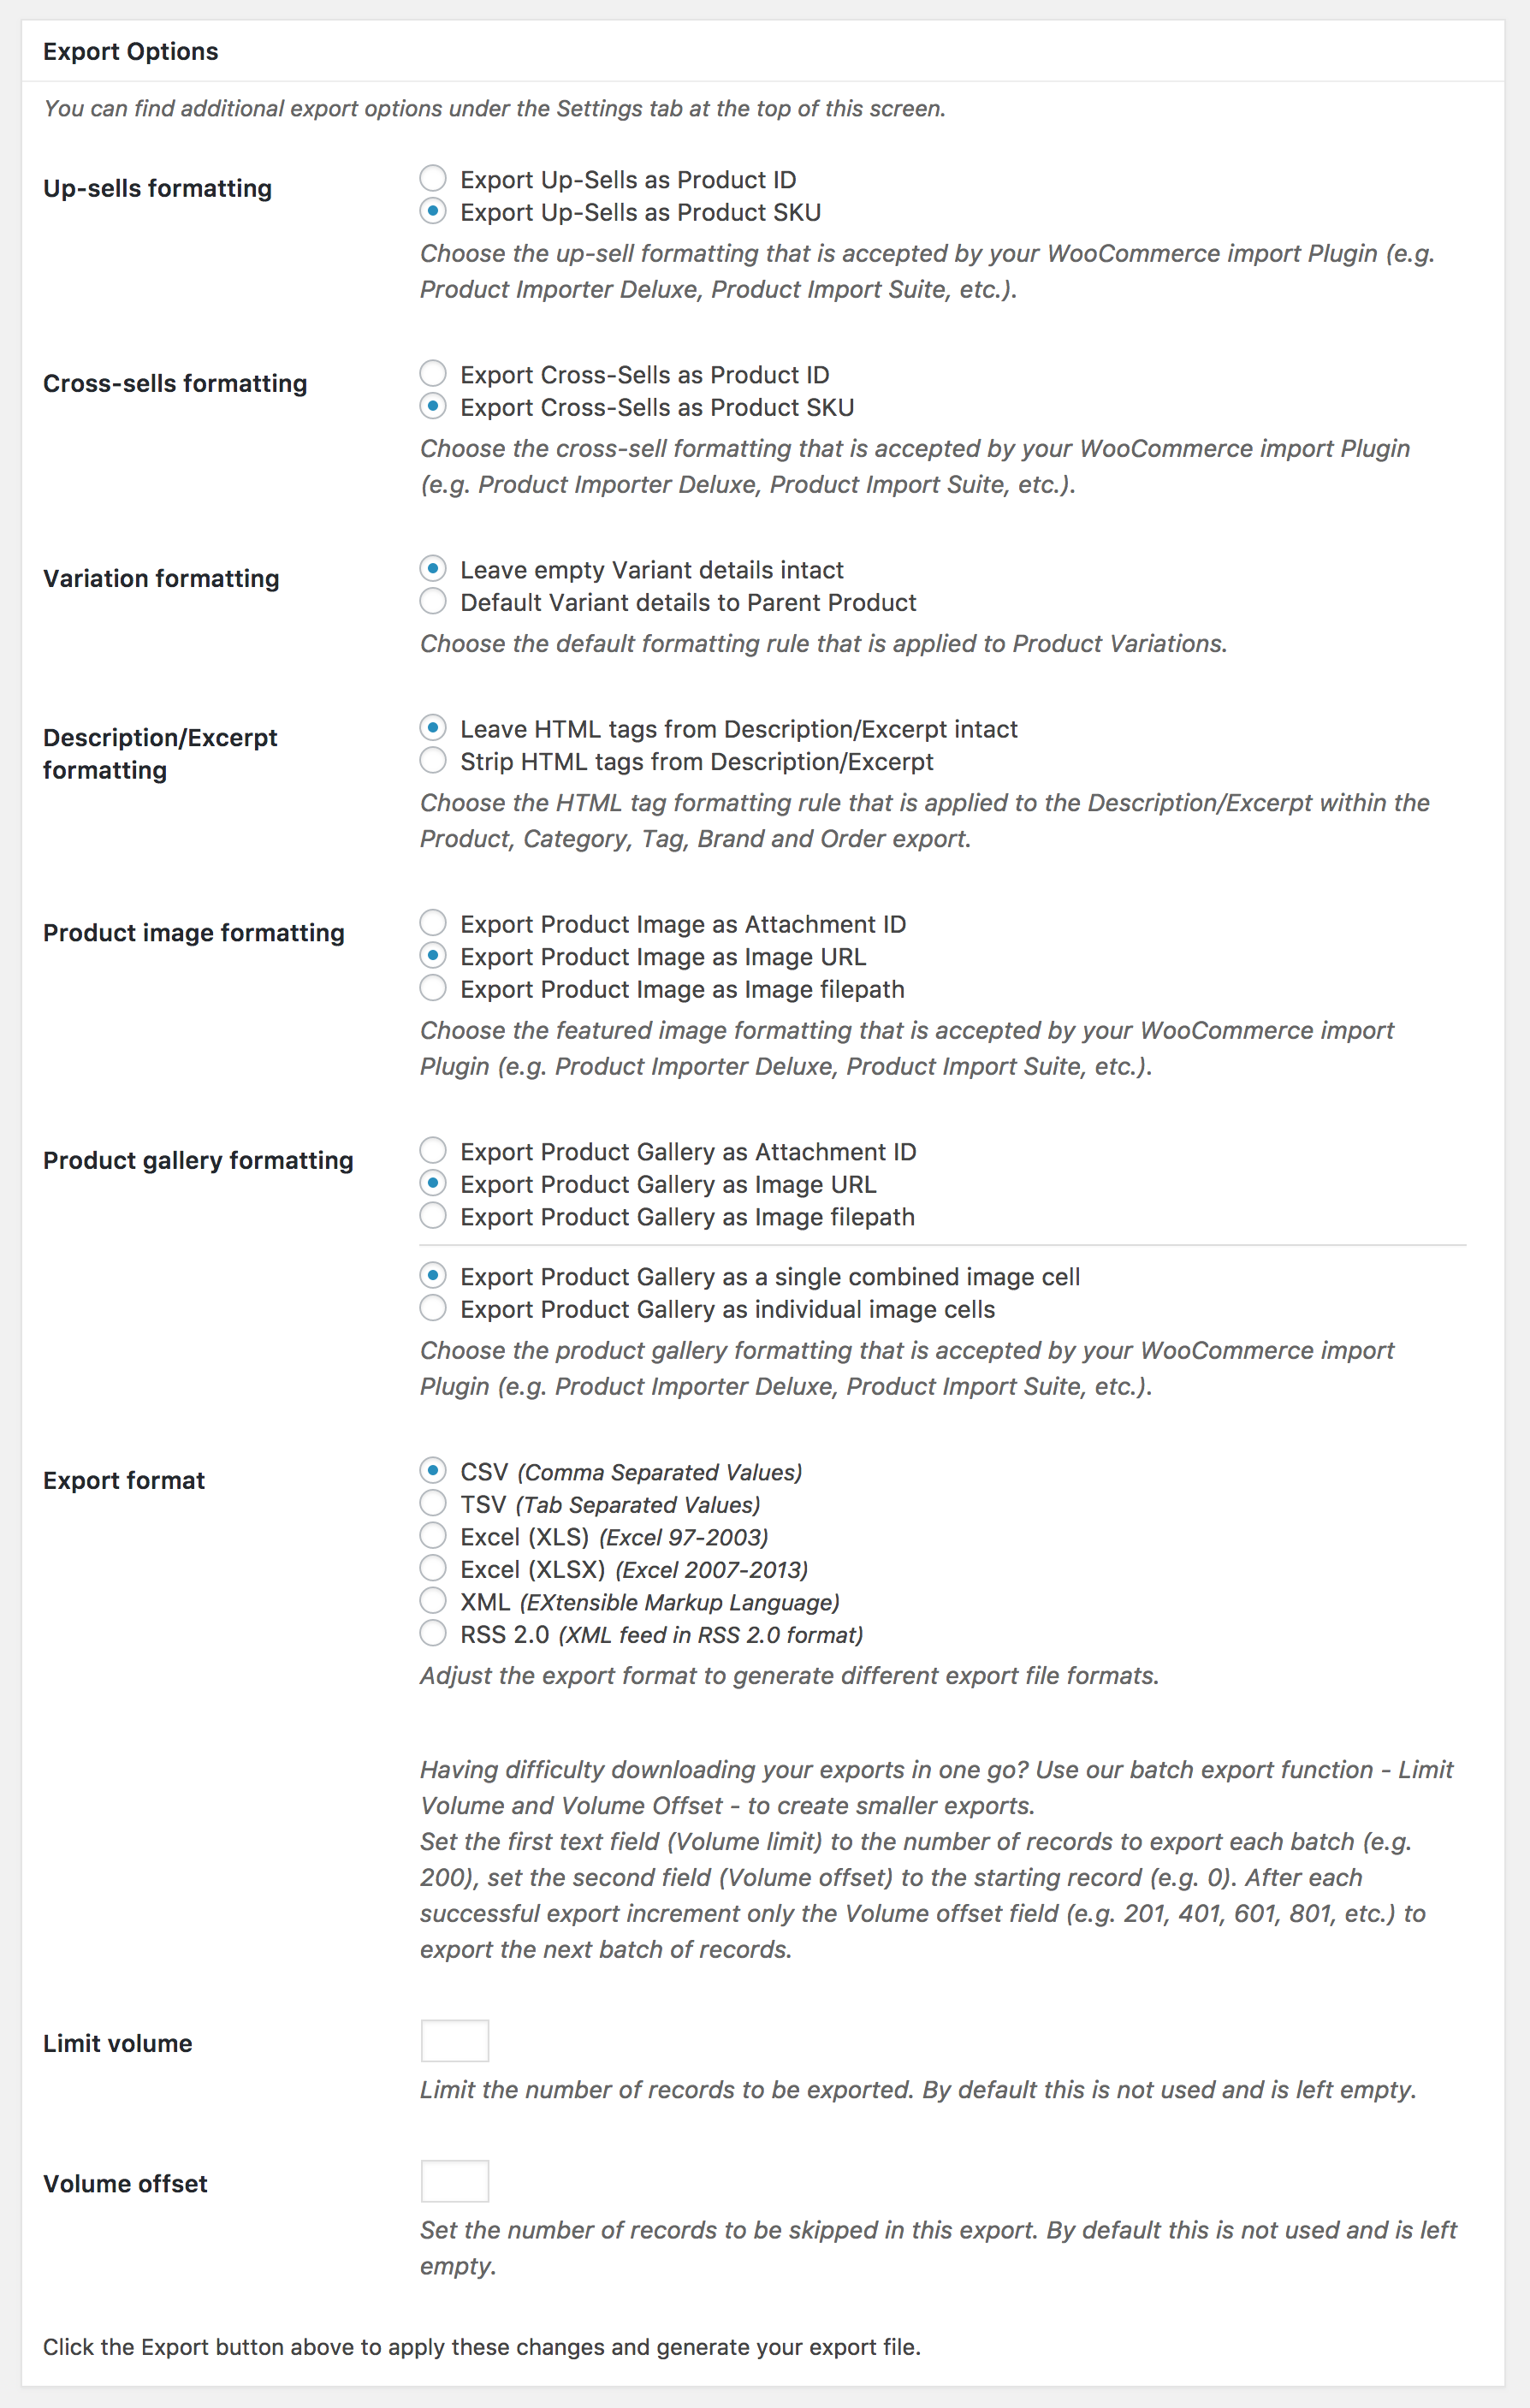
The Product Fields section lists every field available for export. Check the boxes next to the fields you want to include in your export file. Uncheck anything you don’t need.
Common fields for a standard product export include:
- Product Name — the title of the product
- SKU — the unique stock keeping unit identifier
- Regular Price and Sale Price
- Stock Quantity and Stock Status
- Categories and Tags
- Featured Image and Product Gallery
- Description and Short Description
Renaming column headers with the field editor
If you need your export columns to match a specific format (for example, when importing into another system), use the Field Editor. This lets you rename column headers without changing the underlying data. Click the pencil icon next to any field to edit its export label.
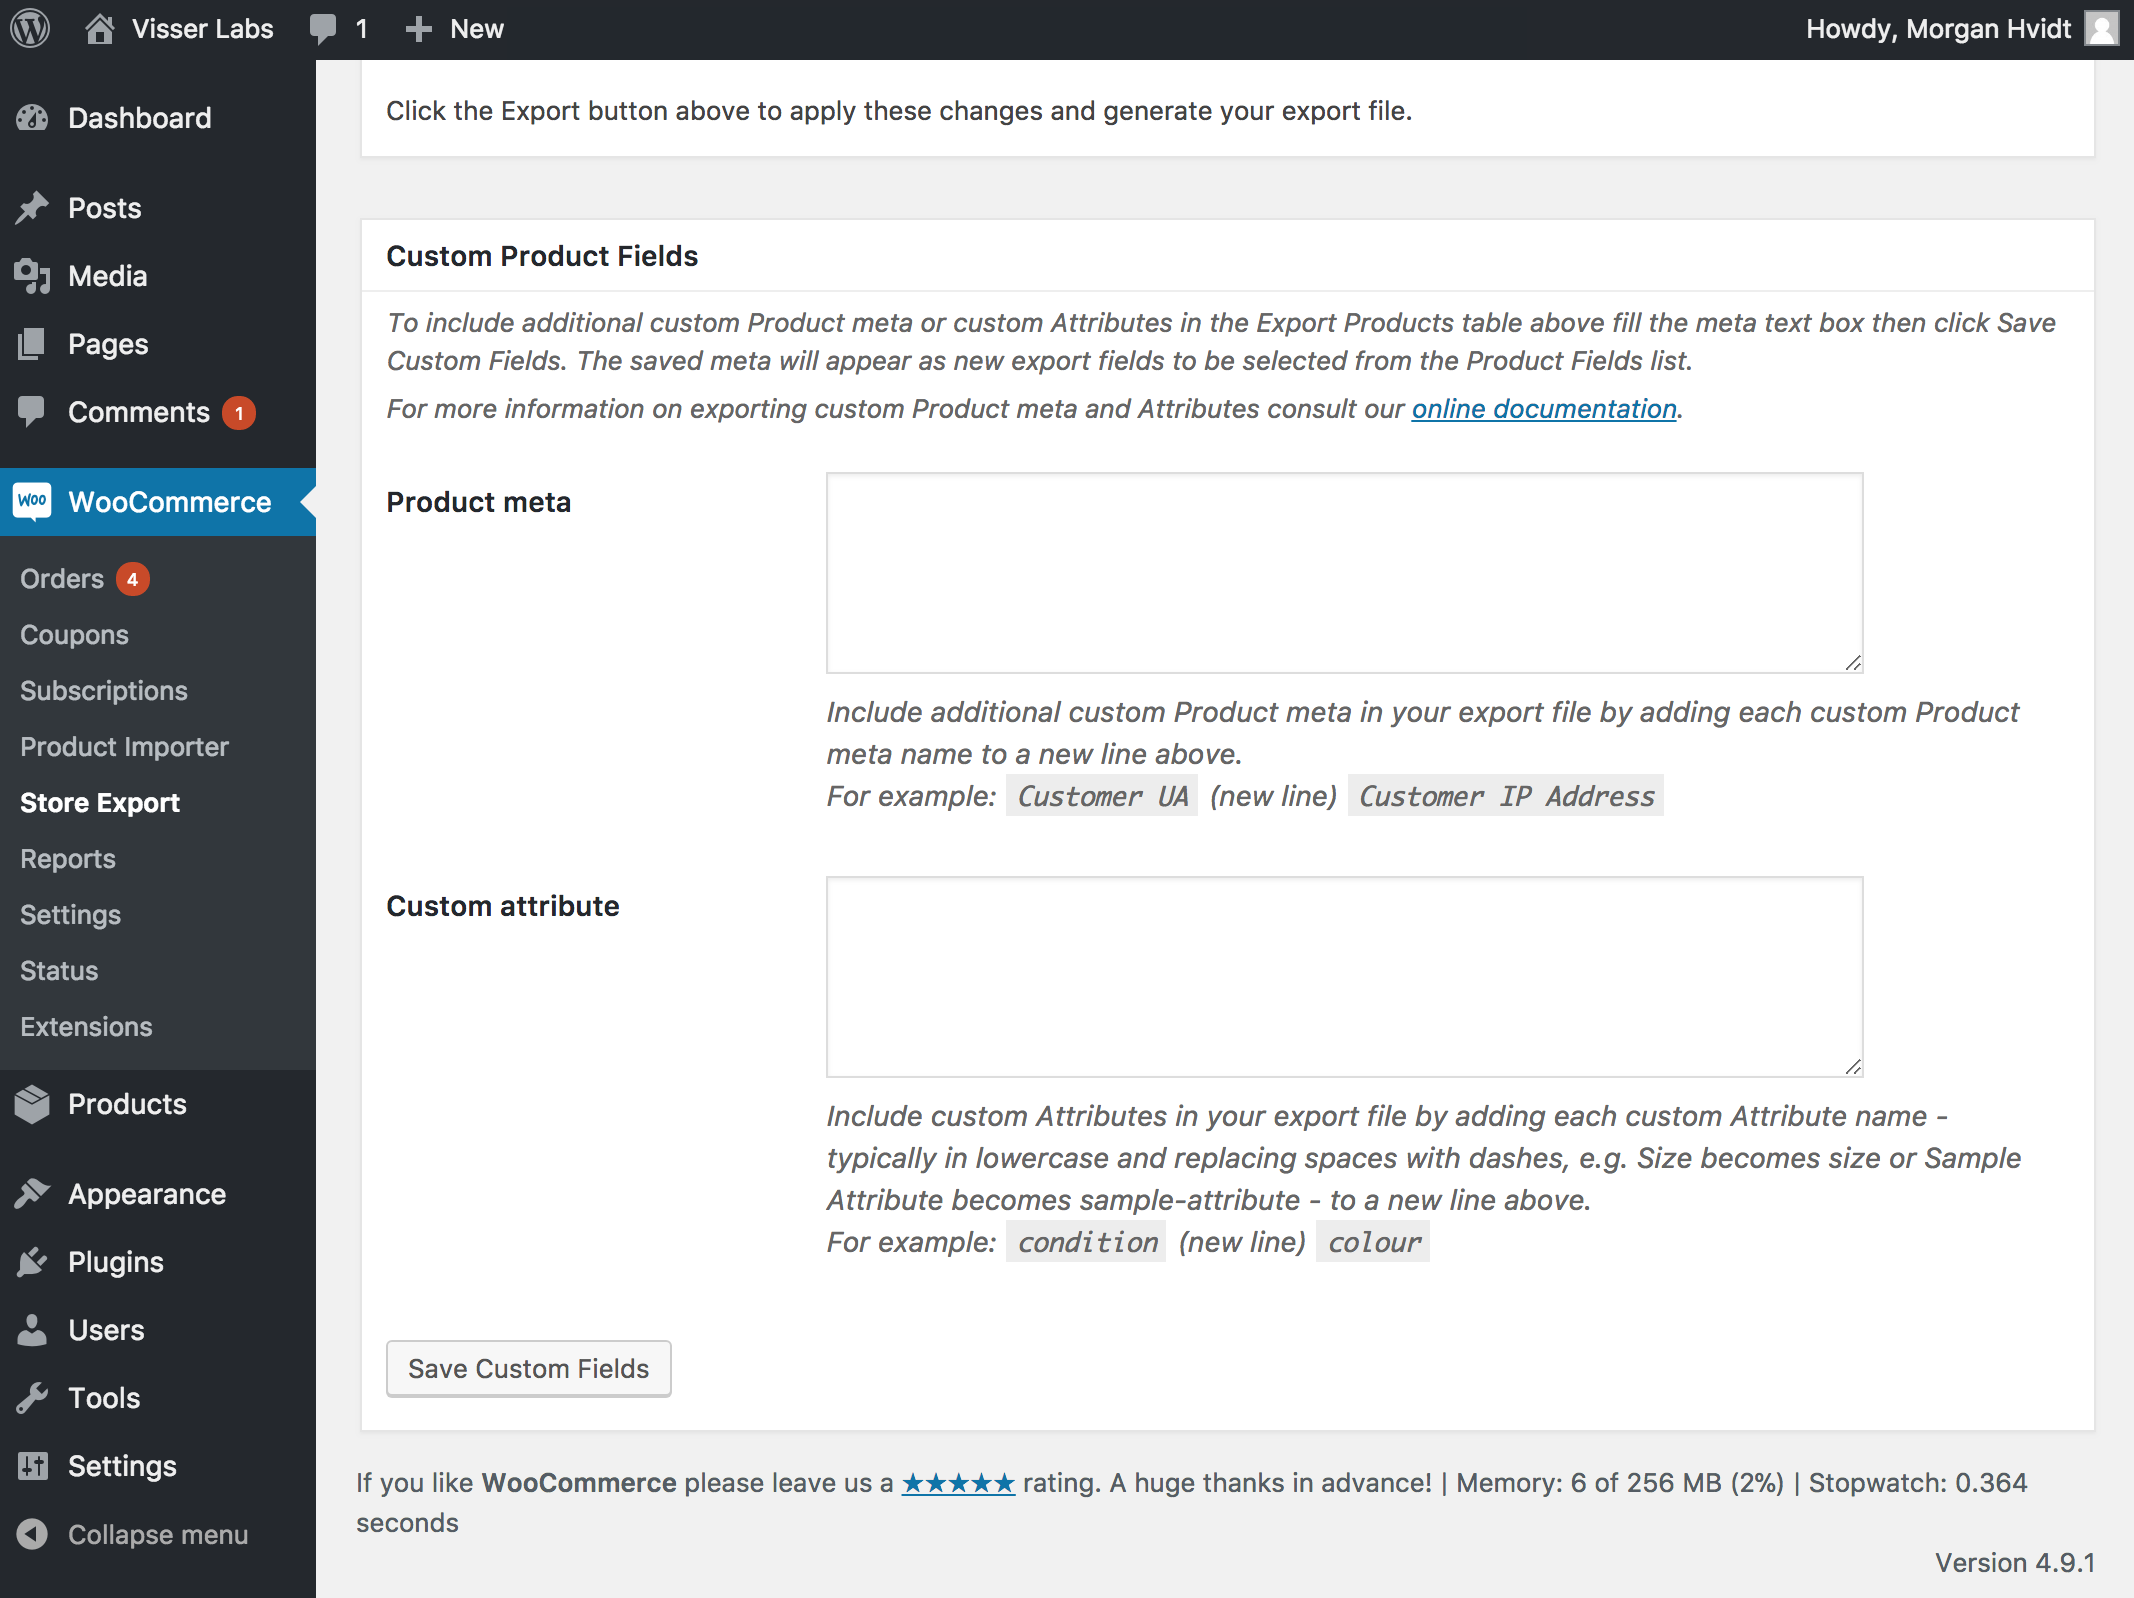
Custom meta fields
Store Exporter Deluxe detects custom meta fields added by third-party plugins. These appear alongside the standard WooCommerce product fields. If you use plugins that store additional product data in custom fields, you can include those fields in your export.
Step 3 — Apply Filters
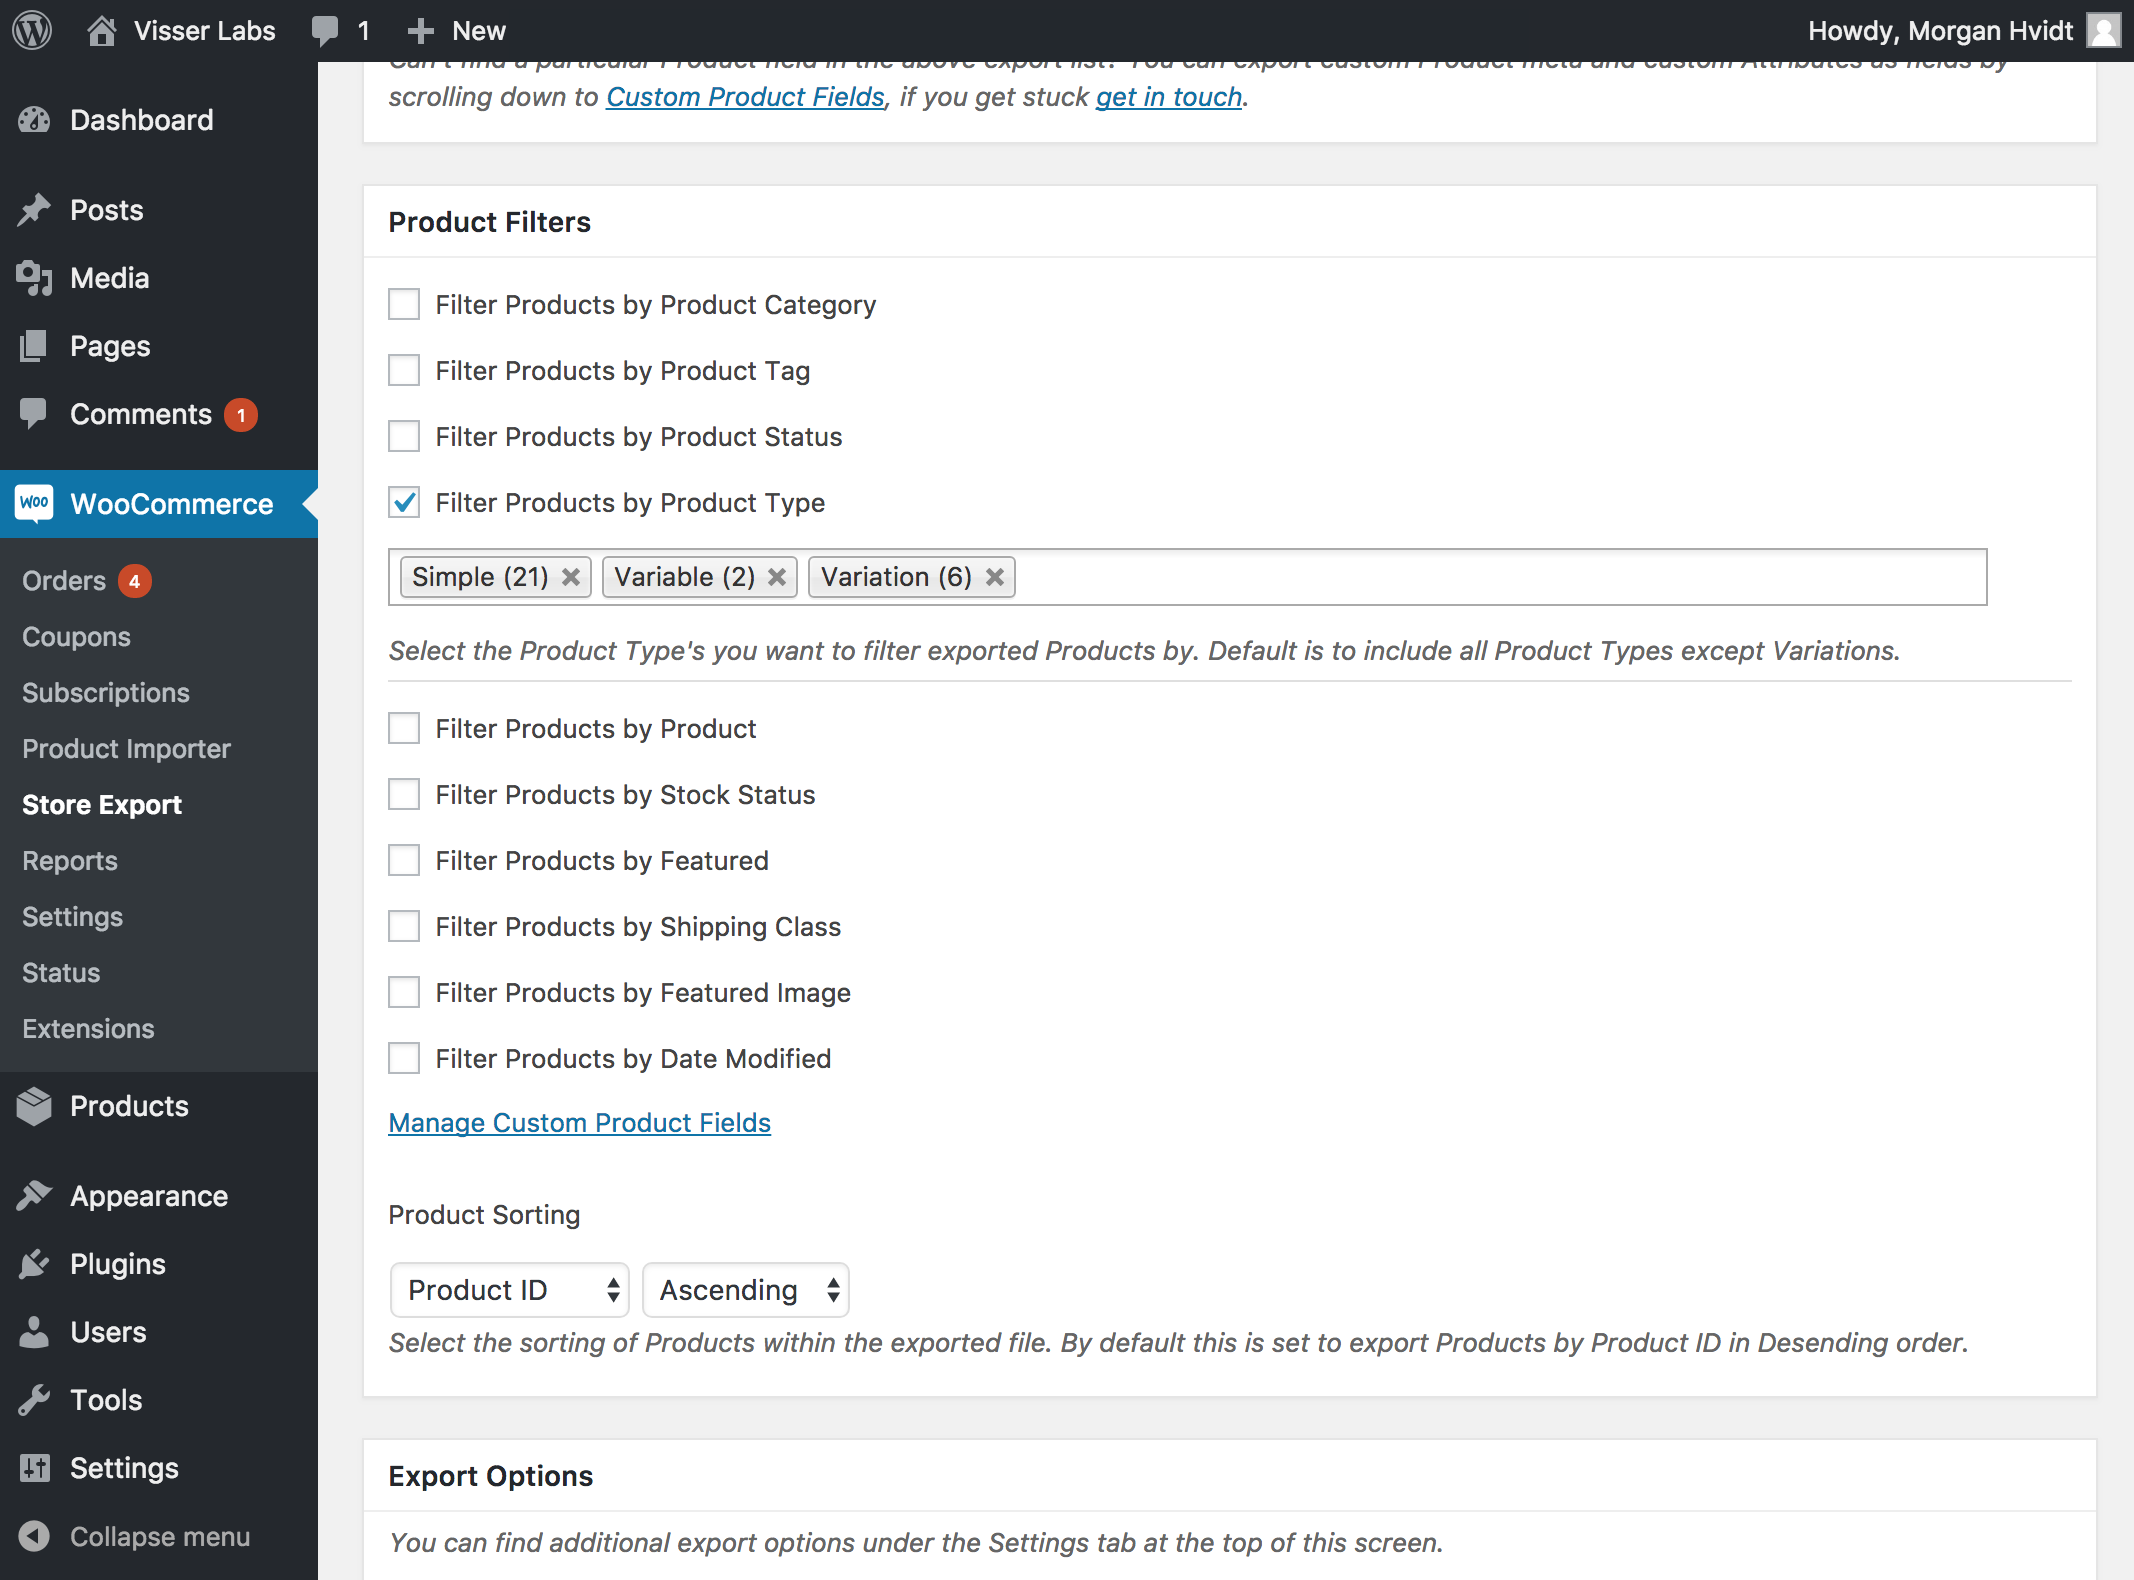
Filters let you narrow down which products are included in the export. Instead of exporting your entire product catalog, you can target a specific subset. Expand the Product Filtering section to see the available options.
Filter by product category. Select one or more categories to export only products assigned to those categories. This is useful when you need to update a specific section of your catalog.
Filter by product type. Choose from Simple, Variable, Grouped, or External/Affiliate product types. For example, you might export only Variable products when working on variation-level pricing updates.
Filter by product status. Limit the export to Published, Draft, Pending, or Private products. This is helpful when you want to review draft products in a spreadsheet before publishing them.
Filter by date range. Set a start and end date to export only products created or modified within a specific time period. Use this when you need a snapshot of recent changes.
One thing we commonly see: store owners export their entire catalog when they only need a handful of products, then spend time deleting rows in the spreadsheet. Using filters upfront saves that extra work and produces a cleaner file.
Step 4 — Choose Your Export Format
Store Exporter Deluxe supports four export formats. Choose the one that matches how you plan to use the data.
| Format | Best For | Notes |
|---|---|---|
| CSV | General use, Google Sheets, bulk editing | Most universal format. Opens in Excel, Google Sheets, and most data tools. |
| XLS | Excel 97-2003 compatibility | Use when working with older versions of Excel or systems that require the legacy format. |
| XLSX | Modern Excel workflows | Native Excel 2007+ format. Supports larger datasets and preserves formatting better than XLS. |
| XML | Data feeds, integrations, developer workflows | Structured format used for product feeds, third-party system imports, and custom integrations. |
CSV is the most common choice and works well for the majority of product export tasks. If you plan to open the file in Excel or Google Sheets for review and editing, CSV is the simplest option. Choose XLSX if you need native Excel features like multiple sheets or cell formatting. XML is typically used for automated data feeds or system-to-system integrations.
Step 5 — Run The Export
Once you’ve selected your fields, applied filters, and chosen a format, click the Quick Export button at the bottom of the page. The export file will be generated and downloaded to your computer immediately.
Scheduled exports for recurring needs
If you need to export products on a regular basis (for example, a daily inventory feed or a weekly catalog update), use the Scheduled Exports tab instead of Quick Export. Scheduled exports run automatically at the interval you set and can deliver the file without manual intervention.
Delivery options
Store Exporter Deluxe offers multiple ways to deliver your export file beyond the standard browser download:
- Email attachment — send the export file to one or more email addresses
- FTP/SFTP — upload directly to a remote server
- WordPress media directory — save the file to your site’s media library
- Fixed file path — save to a specific directory on your server
- POST to remote endpoint — send the file to a cloud service or external API
These delivery options are especially useful when combined with scheduled exports. For example, you can schedule a nightly product export that uploads automatically to your fulfillment partner’s SFTP server.
Exporting Variable Products And Variations
WooCommerce variable products have a parent product and one or more variations, each with its own price, SKU, stock level, and attributes. Store Exporter Deluxe handles both levels of the product hierarchy.
When you export variable products, the parent product row contains the shared data (title, description, categories), while each variation appears as its own row with variation-specific data (price, SKU, stock, attribute values). This gives you full visibility into every purchasable option.
To include variation-specific attributes in your export, make sure the relevant attribute fields are checked in the field selection step. Attributes like size, color, or material will appear as separate columns in your export file.
A mistake we’ve seen repeatedly is store owners exporting variable products and only seeing the parent row in their spreadsheet. If your variations aren’t appearing, check that you’ve included the variation export fields and that your product type filter isn’t excluding variations.
Saving And Reusing Export Templates
If you run the same type of export regularly, you don’t need to configure your fields and filters from scratch each time. Store Exporter Deluxe lets you save your current field selections and filter settings as a reusable export template.
To save a template, configure your export settings (fields, filters, format) and save the template with a descriptive name. The next time you need to run the same export, select the saved template and your settings will be restored automatically.
This is particularly useful when you have multiple export workflows. For example, you might save one template for a full catalog export with all fields, another for a pricing-only export with just SKU and price fields, and a third for an inventory export focused on stock quantities.
Troubleshooting Common Issues
Export file is empty
If your export file downloads but contains no product data (only headers or a blank file), check your filters first. A filter combination that matches zero products will produce an empty export. Try removing all filters temporarily and running the export again to confirm products are exporting correctly, then add filters back one at a time.
Export times out or fails
Large catalogs (thousands of products) can exceed your server’s PHP memory limit or execution time. To resolve this, try reducing the number of products per batch in the plugin settings. You can also ask your hosting provider to increase the memory_limit and max_execution_time values in your PHP configuration.
Fields missing from the export
If a field you expected is not appearing in your export file, go back to the field selection step and confirm it’s checked. Some fields are added by third-party plugins and only appear when those plugins are active. If a plugin-specific field is missing, verify that the plugin is installed, activated, and that Store Exporter Deluxe has detected its fields.
Special characters appear corrupted
If product names or descriptions with accented characters, currency symbols, or non-Latin text appear garbled in your spreadsheet, this is typically a character encoding issue. Make sure your export uses UTF-8 encoding. When opening a CSV file in Excel, use File > Import (or the Text Import Wizard) and select UTF-8 as the encoding rather than double-clicking the file directly, which may default to a different encoding.
Need Store Exporter Deluxe? View pricing and get started with a 14-day money-back guarantee.
