
Whether you’re managing CRM integrations, launching targeted email campaigns, handling tax and accounting requirements, or just backing up your customer list, Store Exporter Deluxe lets you export exactly the user data you need, in the format you need it, straight from your WordPress admin.
Below covers a one-off Quick Export of your users. If you need the same export to run automatically on a schedule, see How to schedule exports instead.
Prerequisites
| Requirement | Details |
|---|---|
| Plugin | Store Exporter Deluxe is active and licensed |
| WordPress | At least one registered user account to export |
| Administrator access | You’ll need an account with access to the WordPress admin dashboard |
Where to find Quick Export
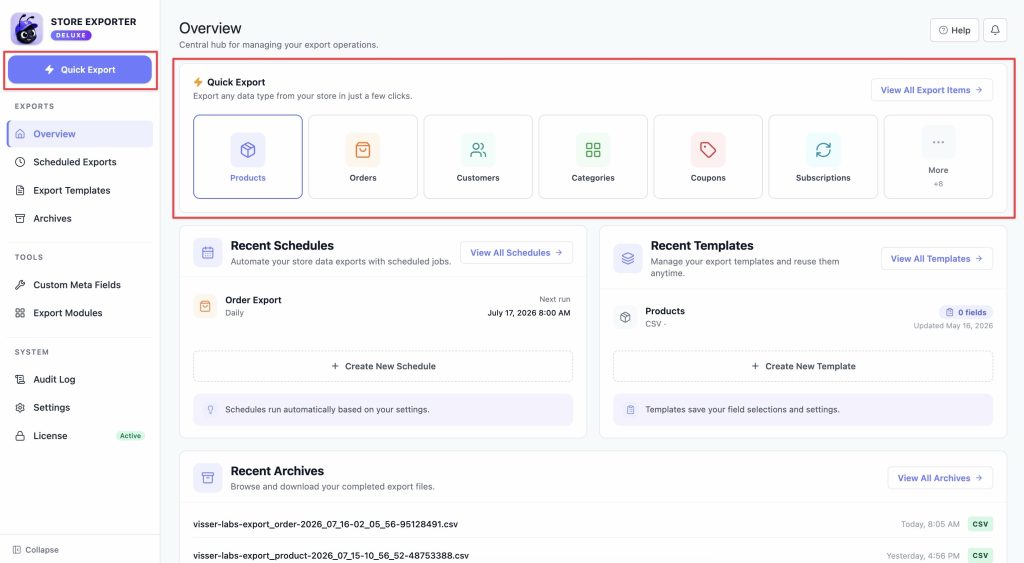
Open WooCommerce → Store Export from the WordPress admin menu. This opens the Store Exporter Deluxe dashboard. Click the Quick Export button near the top of the sidebar to start a new export.
Step 1: Choose Users as your export type
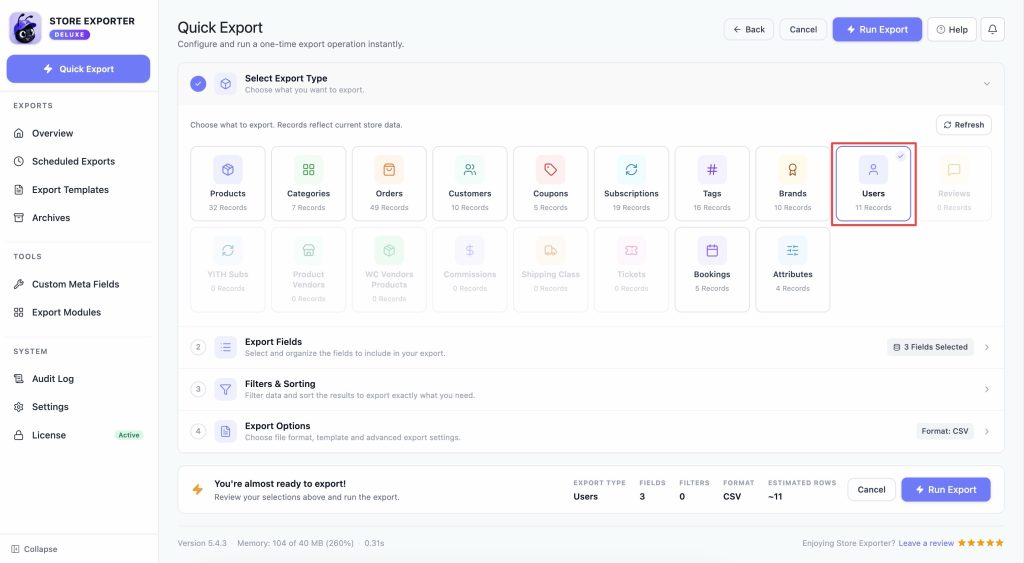
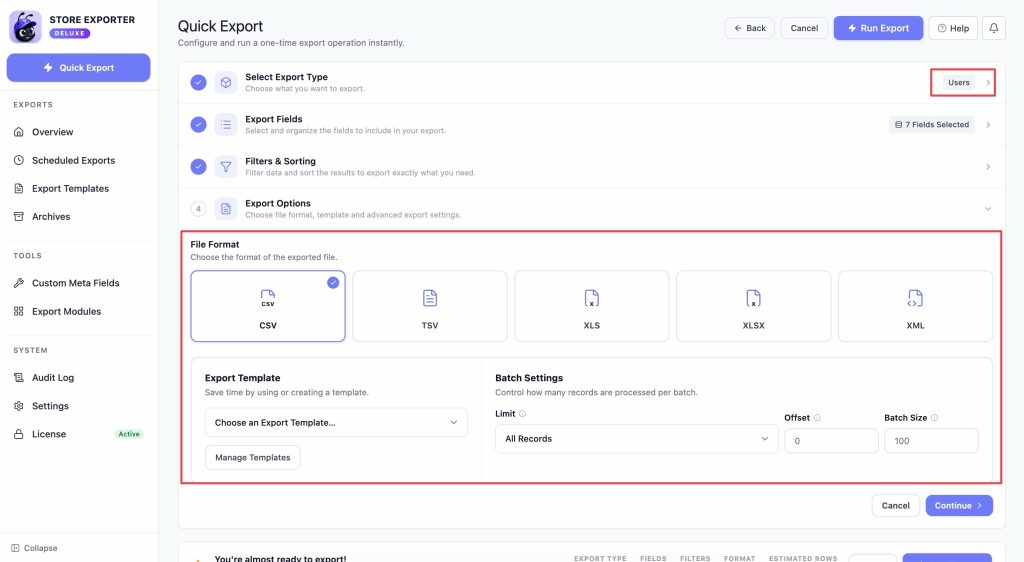
On the Select Export Type step, choose the Users tile. Each tile shows a live count of the matching records in your store, so you can confirm you’re exporting from the right data set before continuing.
Step 2: Select your export fields
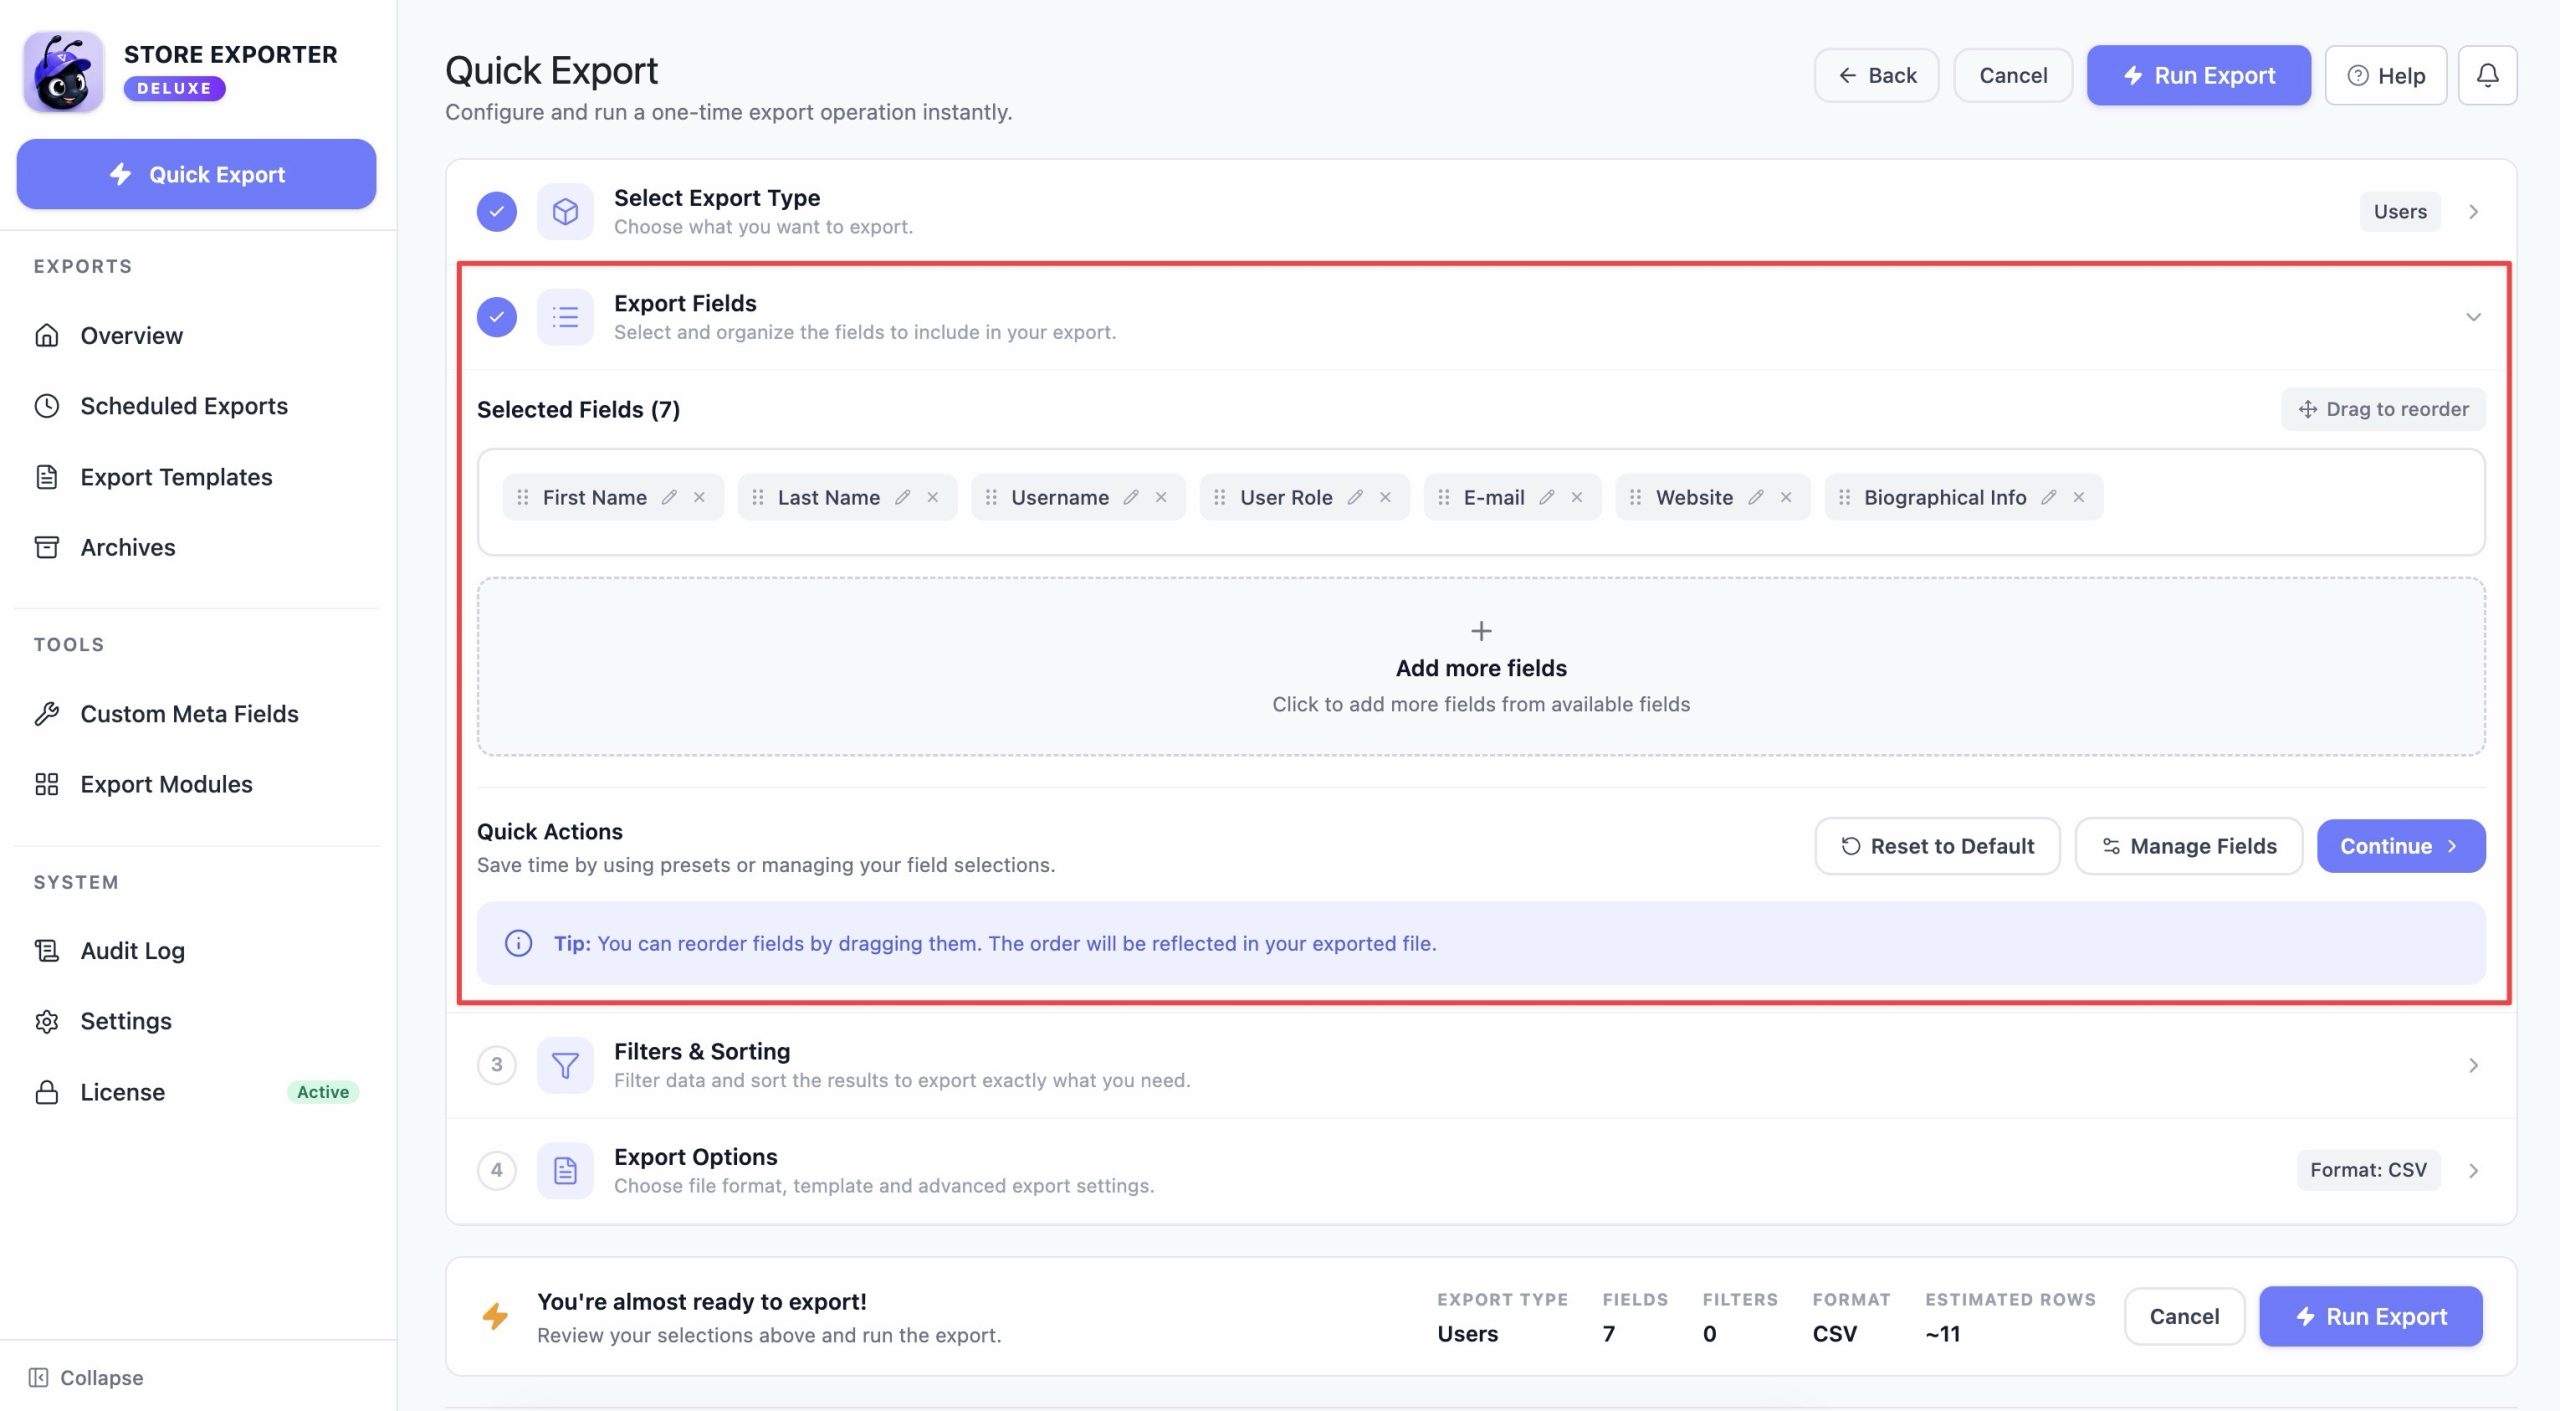
On the Export Fields step, the fields you’ll export appear as chips. The default fields include:
- User ID, Username, User Role
- First Name, Last Name, Full Name, Nickname
- E-mail, Website
- Orders, Money Spent
- Date Registered, Last Updated
- Biographical Info
- Click the Add more fields tile to open the field picker and add any field not already included.
- Click the pencil icon on a chip (or double-click it) to rename that column’s header without changing the underlying data.
- Click the X on a chip to remove that field from the export.
- Use Reset to Default to discard your changes and start over with the default field set.
Step 3: Filter and sort your export
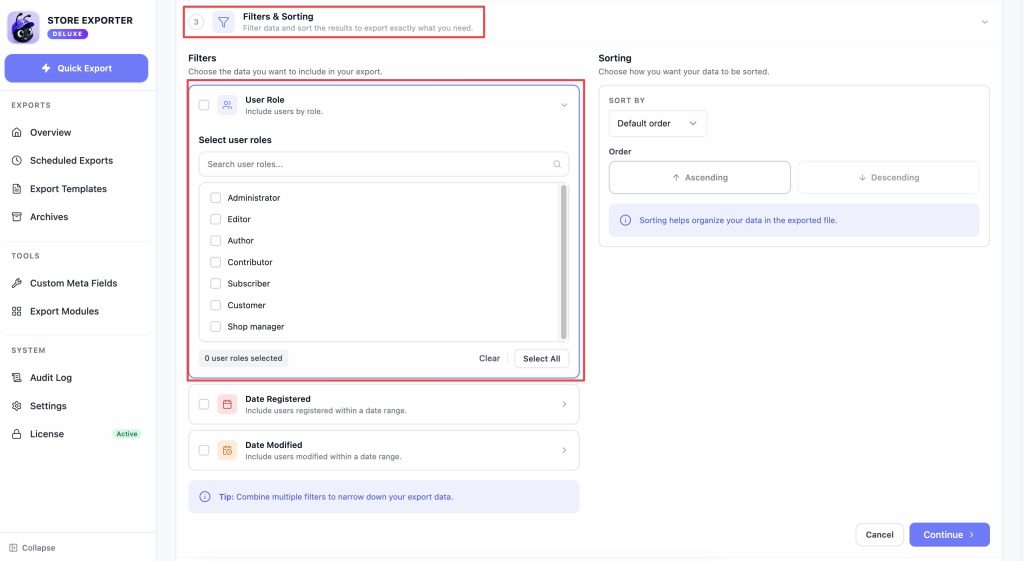
On the Filters & Sorting step, expand any of the filter cards to narrow down your export:
- User Role: export users by specific roles, such as Customer or Author.
- Date Registered: include users who registered within a specific date range.
- Date Modified: include users whose profile was last updated within a specific date range.
Leave a filter card collapsed and untouched to skip it. With no filters applied, the export includes every registered user.
The same step also has a Sort by option (ID, Display Name, Username, Email, Nicename, URL, Date Registered, or Random) to control the order rows appear in the final file.
Step 4: Choose your export format and finish up
On the Export Options step, choose a File Format:
| Format | Best for | Notes |
|---|---|---|
| CSV | General use, Google Sheets, bulk editing | Most universal; opens in Excel, Google Sheets |
| TSV | Tab-separated workflows | Useful when your data contains commas |
| XLS | Excel 97-2003 compatibility | Legacy format support |
| XLSX | Modern Excel workflows | Native Excel 2007+ format |
| XML | Data feeds, integrations | Structured format for automation |
CSV is recommended for most tasks.
If you’ve already saved an Export Template, apply it from the dropdown on this step to reuse the same fields, filters, and format instead of setting them up again.
This step also has a Limit option to cap the number of users included, an Offset to skip a number of users from the start of the dataset, and a Batch Size that controls how many records the plugin processes at once. These are useful for exporting in smaller chunks or resuming an export from a specific point.
Click Run Export to generate and download your file.
Custom user fields
If the field you need isn’t in the default list, you can export any custom user meta by adding it as a custom field first.
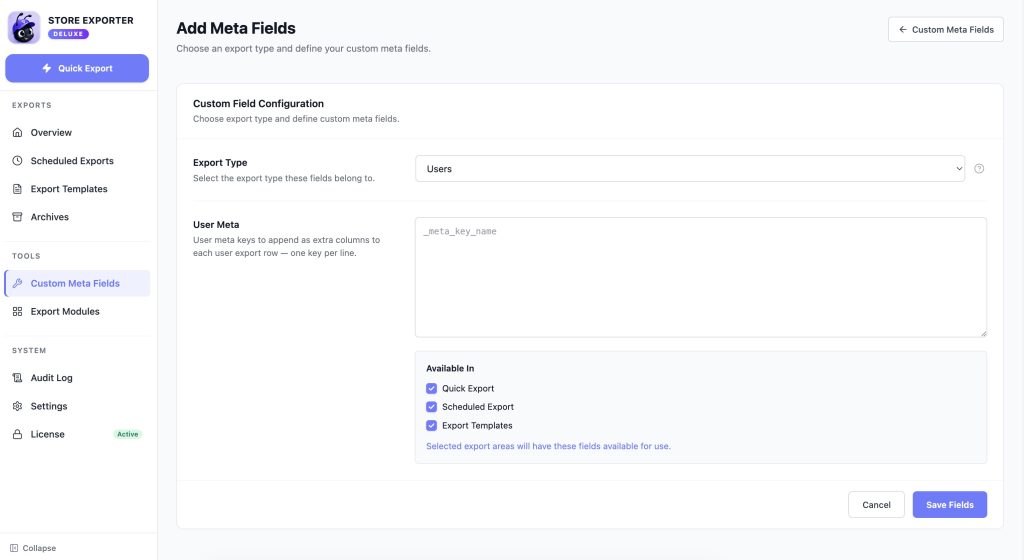
- Open WooCommerce → Store Export, then select Custom Meta Fields from the TOOLS section of the sidebar.
- Choose Users from the export type list.
- In the User Meta box, enter one meta key per line (for example,
_billing_company). - Click Save Fields.
The keys you added now appear as available fields on the Export Fields step, ready to add as chips like any other field.
Scheduling recurring user exports
For recurring or delayed exports, Scheduled Exports let you automate the same export on a timer instead of running it by hand. Choose Users from the Export Type dropdown when creating the schedule, then pick All Fields, Use Template, or Saved Selection to reuse the fields you selected in Quick Export.
For detailed instructions, see How to schedule exports.
Troubleshooting
Related articles
Need more help?
If you’re using Store Exporter Deluxe and run into an issue this article doesn’t cover, open a support ticket and our team will help you get your user export working.
If you’re using the free Store Exporter plugin, ask on the WordPress.org support forum and our team will get back to you there.
