
Your customers pick a delivery date at checkout, and now your warehouse or courier needs that list. Instead of opening every order to copy the date by hand, you can export it.
Store Exporter Deluxe reads the dates that YITH WooCommerce Delivery Date Premium saves on each order. This guide shows you how to check the integration is on, add the delivery fields to an Orders export, and filter the export by delivery date.
Prerequisites
| Requirement | Details |
|---|---|
| Store Exporter Deluxe | Version 5.4.5 or later, installed and active. The Delivery Date filter in Step 3 needs this version. |
| YITH WooCommerce Delivery Date Premium | Installed and active. Store Exporter Deluxe looks for this plugin when it builds the field list. |
| Admin access | An account that can manage WooCommerce exports. Administrators have this by default. |
What the integration adds
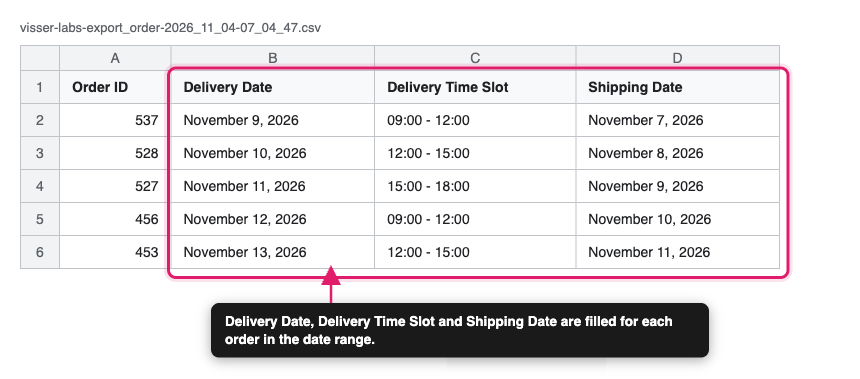
When YITH WooCommerce Delivery Date Premium is active, Store Exporter Deluxe adds three fields to the Orders export type:
| Field | What it contains |
|---|---|
| Shipping Date | The shipping date YITH saved on the order |
| Delivery Date | The delivery date your customer picked at checkout |
| Delivery Time Slot | The delivery time slot, written as the start time and end time with a dash between them |
It also adds a Delivery Date filter to the Orders export, so you can export only the orders due for delivery in a date range.
These fields belong to the Orders export only. Other export types, like Products or Customers, don’t get them.
Check that the integration is active
- Go to WooCommerce → Store Export.
- In the sidebar, click Export Modules.
- Type
YITHin the Search modules… box. - Find YITH WooCommerce Delivery Date Premium and check that its Status reads Active.
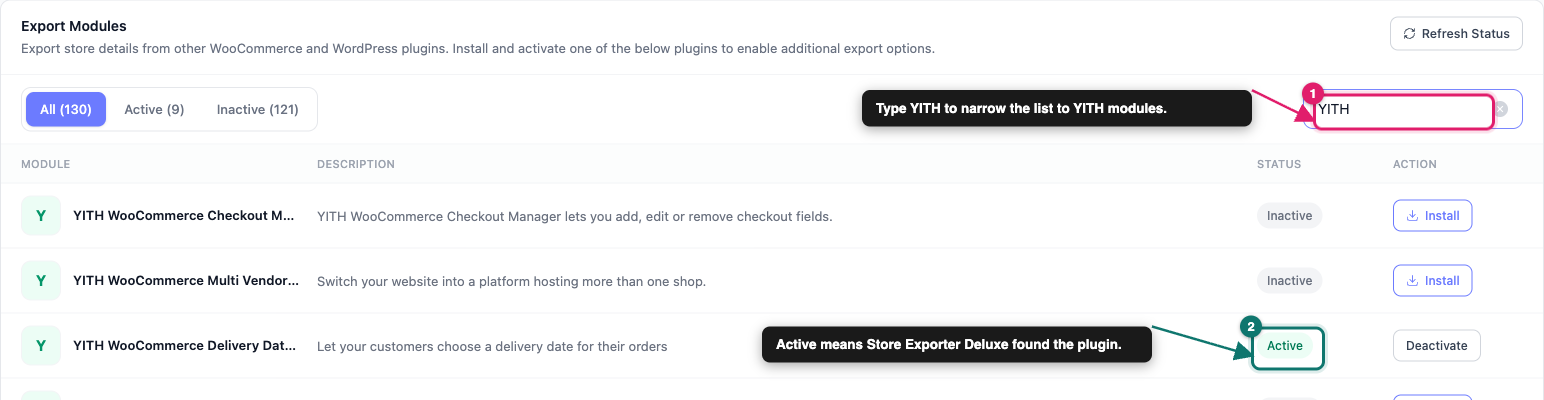
If the status reads Inactive and you just activated the YITH plugin, click Refresh Status to check again.
Export delivery dates with Quick Export
Step 1: Choose the Orders export type
- In the Store Exporter Deluxe sidebar, click Quick Export.
- On the Select Export Type step, click Orders.
For more on the Orders export itself, see How to export WooCommerce orders with Store Exporter Deluxe.
Step 2: Add the delivery fields
- On the Export Fields step, click Add more fields.
- Type
deliveryin the Search fields… box. - Select Delivery Date and Delivery Time Slot.
- (Optional) Type
shipping datein the Search fields… box. - (Optional) Select Shipping Date.
- Click Save Fields.
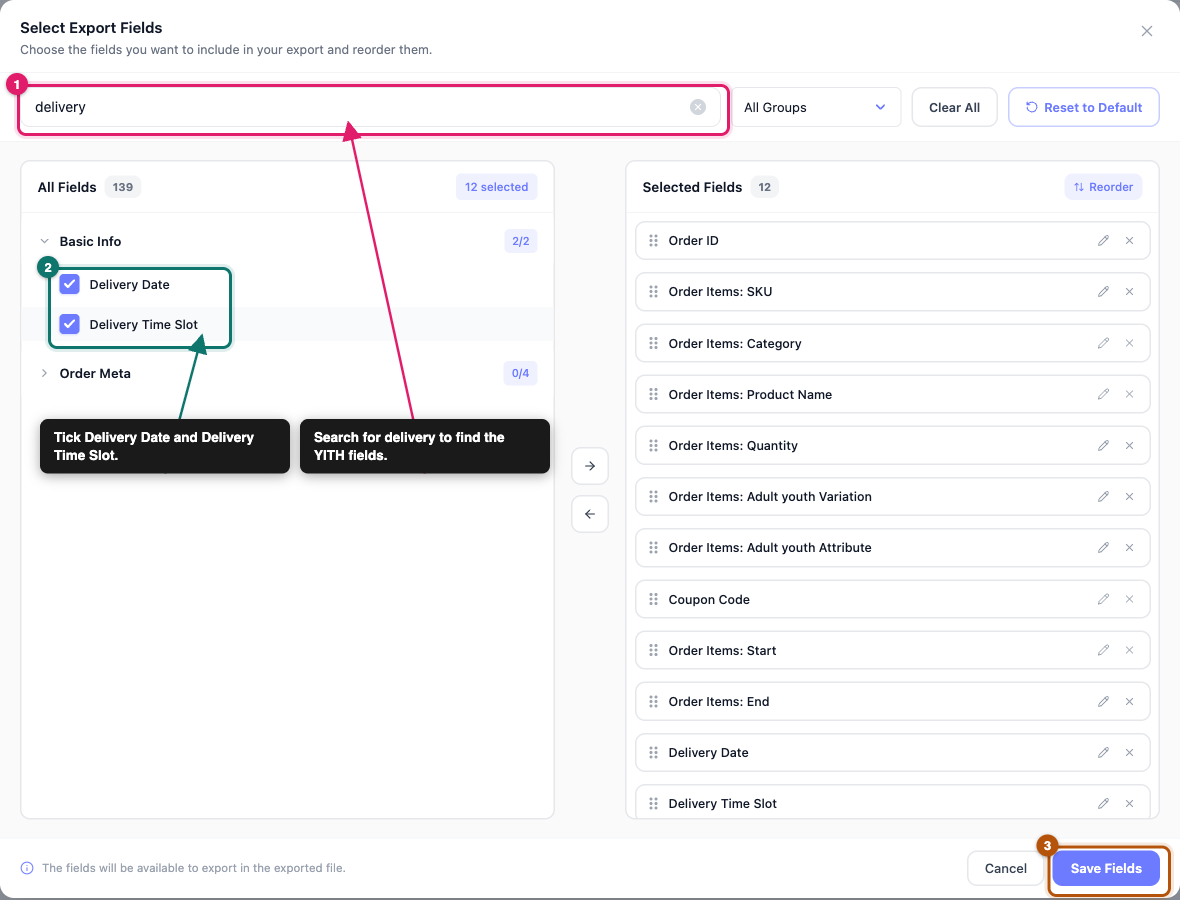
The new fields are added as chips under Selected Fields in the Export Fields step. To change the column order, click the Export Fields header to open it again, then drag a chip.
Step 3: Filter by delivery date (optional)
Skip this step if you want every order in the file. The Filters & Sorting step opens after you click Save Fields.
- If the Filters & Sorting step is closed, click its header to open it.
- Select the checkbox next to Delivery Date.
- Pick Custom range.
- Set the From and To dates for the deliveries you need.
- Click Continue.
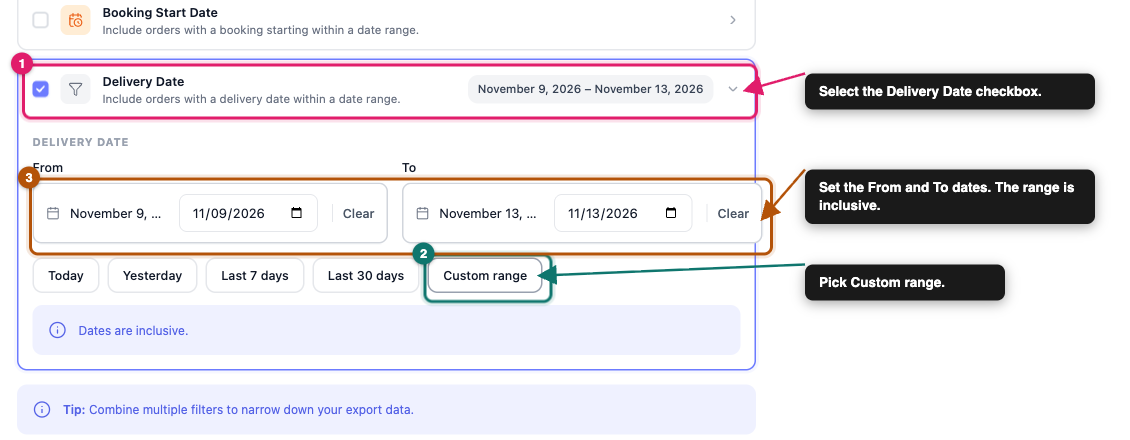
Dates in the range are inclusive. Orders that have no delivery date are left out of the file while this filter is on.
Step 4: Run the export
- If you skipped Step 3, click Continue until the Export Options step opens.
- Under File Format, pick a format. CSV works with nearly every spreadsheet.
- Click Run Export.
- In the Export in Progress window, click Download File.
Send a fixed delivery date range on a schedule
A scheduled export saves the Delivery Date range as fixed dates, and the range stays the same on every run until you edit the schedule. Use a schedule when you need the same date range sent on repeat, for example a weekly copy to your accounts team. For a new day each time, run Quick Export.
- In the Store Exporter Deluxe sidebar, click Scheduled Exports.
- Click New Schedule.
- On the General step, enter a Schedule Name.
- Set Export Type to Orders.
- Under Export Fields, keep All Fields, or choose a template or Saved Selection that includes the delivery fields.
- On the Filters step, open the Date Filters group.
- In the Delivery date row, choose Custom Range and pick your dates.
- On the Method step, choose how the file is delivered after each run.
- On the Scheduling step, set how often the export runs.
- Click Create Schedule.
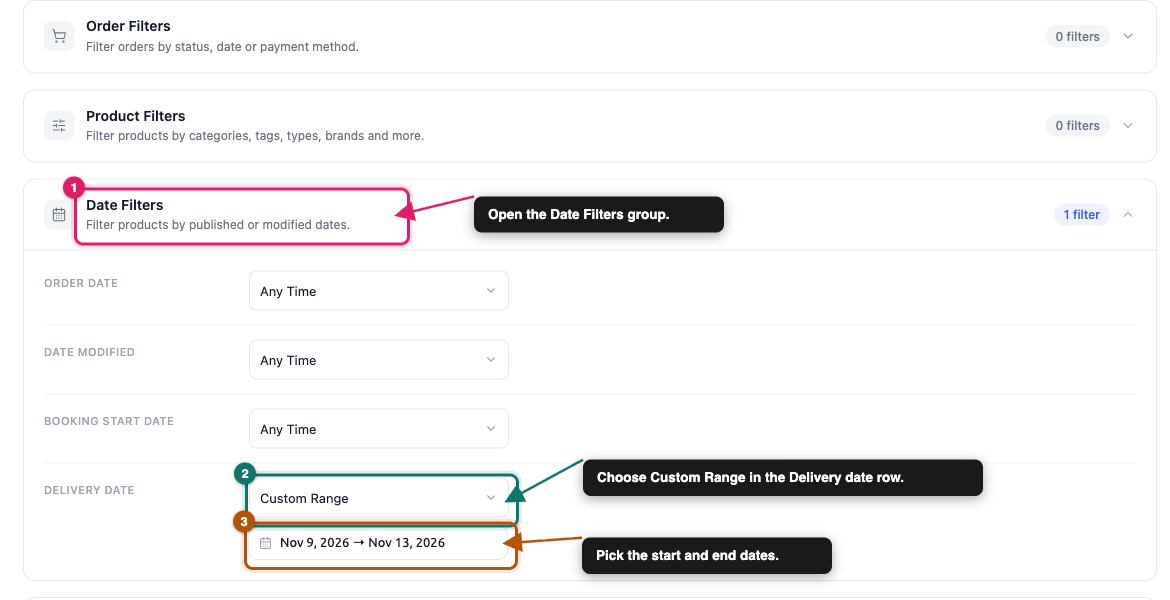
For the full setup, see How to schedule exports in Store Exporter Deluxe.
Known limitations
Date format. Shipping Date and Delivery Date follow the Date Format in Settings → General in WordPress. If your version of YITH can’t format dates this way, the date exports exactly as YITH saved it on the order.
Time slots. Delivery Time Slot is only filled when the order has both a start time and an end time. The times export as YITH saved them, with no reformatting.
One delivery plugin for the filter. The Delivery Date filter reads one delivery plugin at a time. If Order Delivery Date for WooCommerce or Order Delivery Date Pro for WooCommerce is also active, the filter reads that plugin’s dates, not YITH’s.
Troubleshooting
Frequently asked questions
Related articles
- How to export WooCommerce orders with Store Exporter Deluxe
- How to schedule exports in Store Exporter Deluxe
- Store Exporter Deluxe supported plugins list
- Available export fields in Store Exporter Deluxe
Need help?
If you’re using Store Exporter Deluxe, open a support ticket and our team will help you get your delivery date export working.
If you’re using the free Store Exporter plugin, ask on the WordPress.org support forum and our team will get back to you there.