
Handing an export file to another system by hand, whether that’s a reporting tool, an inventory system, or a script you run yourself, means someone has to log in, download the file, and upload it again. Store Exporter Deluxe can do that last step for you. Each time a Scheduled Export runs, it sends the finished file to a web address you choose using an HTTP POST request.
Below, you set up POST to URL, see exactly what your endpoint receives, and confirm each file arrived. Developers also get a way to add headers such as an API token.
Prerequisites
| Requirement | Details |
|---|---|
| Plugin | Store Exporter Deluxe is active |
| Scheduled exports | Scheduled exports are turned on under Settings → Scheduling → Enable Scheduled Exports. If they are off, the Scheduled Exports screen shows “Scheduled exports are currently disabled.” with an Enable Scheduled Exports button. |
| Receiving endpoint | A web address (URL) that accepts POST requests and is reachable from your site’s server |
| Endpoint access | A way to check the receiving system’s own logs, so you can confirm files arrive |
How it works
When a schedule using POST to URL runs, Store Exporter Deluxe builds the export file as usual and then sends it to your Remote POST URL in a single HTTP POST request. The request is always a POST. There’s no setting to switch it to another method.
What your endpoint receives
Your endpoint gets the export file contents as the raw body of the request. It doesn’t arrive as a file upload form, so there’s no form field to read the file from. If the Remote URL Settings description on your screen mentions a multipart POST request, go by this section: the file is the raw request body.
| Part of the request | What it contains |
|---|---|
| Method | POST |
| Body | The full export file contents, exactly as they’d appear in the downloaded file |
content-type header | The MIME type that matches your Export Format (see the table below) |
accept header | The same MIME type as the content-type header |
user-agent header | WordPress/ followed by your WordPress version |
Store Exporter Deluxe doesn’t send the file name, extra form fields, or any login details. It waits up to 60 seconds for a reply and doesn’t follow redirects, so enter the final address of your endpoint.
The content-type header depends on the Export Format you choose for the schedule:
| Export Format | content-type value |
|---|---|
| CSV | text/csv |
| TSV | text/tab-separated-values |
| Excel (XLS) | application/vnd.ms-excel |
| Excel (XLSX) | application/vnd.openxmlformats-officedocument.spreadsheetml.sheet |
| XML | application/xml |
| RSS 2.0 | application/rss+xml |
Setting up POST to URL
The steps below cover creating a new Scheduled Export. To change an existing schedule instead, open it from the Scheduled Exports screen. For more on creating and managing schedules, see How to schedule exports in Store Exporter Deluxe.
Step 1: Open the new schedule form
- Go to WooCommerce → Store Export.
- In the Store Exporter sidebar, click Scheduled Exports.
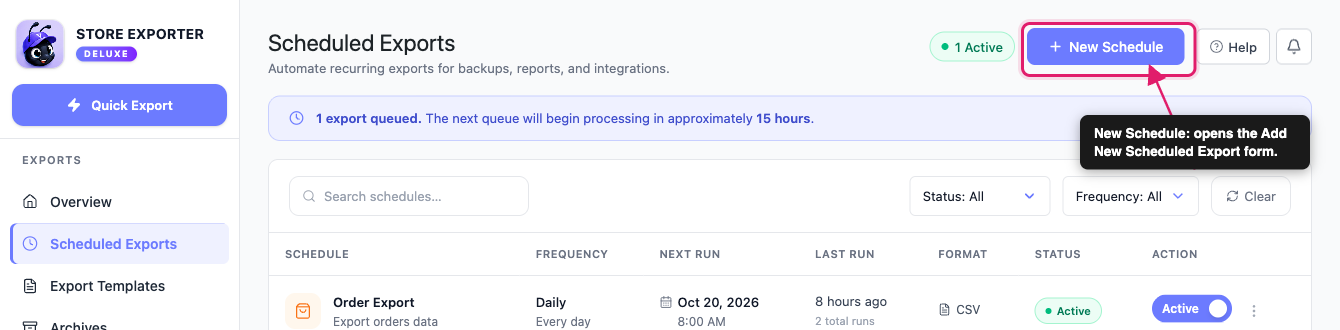
- Click New Schedule. The form opens with the heading Add New Scheduled Export and five steps across the top: General, Filters, Method, Scheduling, and Advanced.
Step 2: Choose what to export
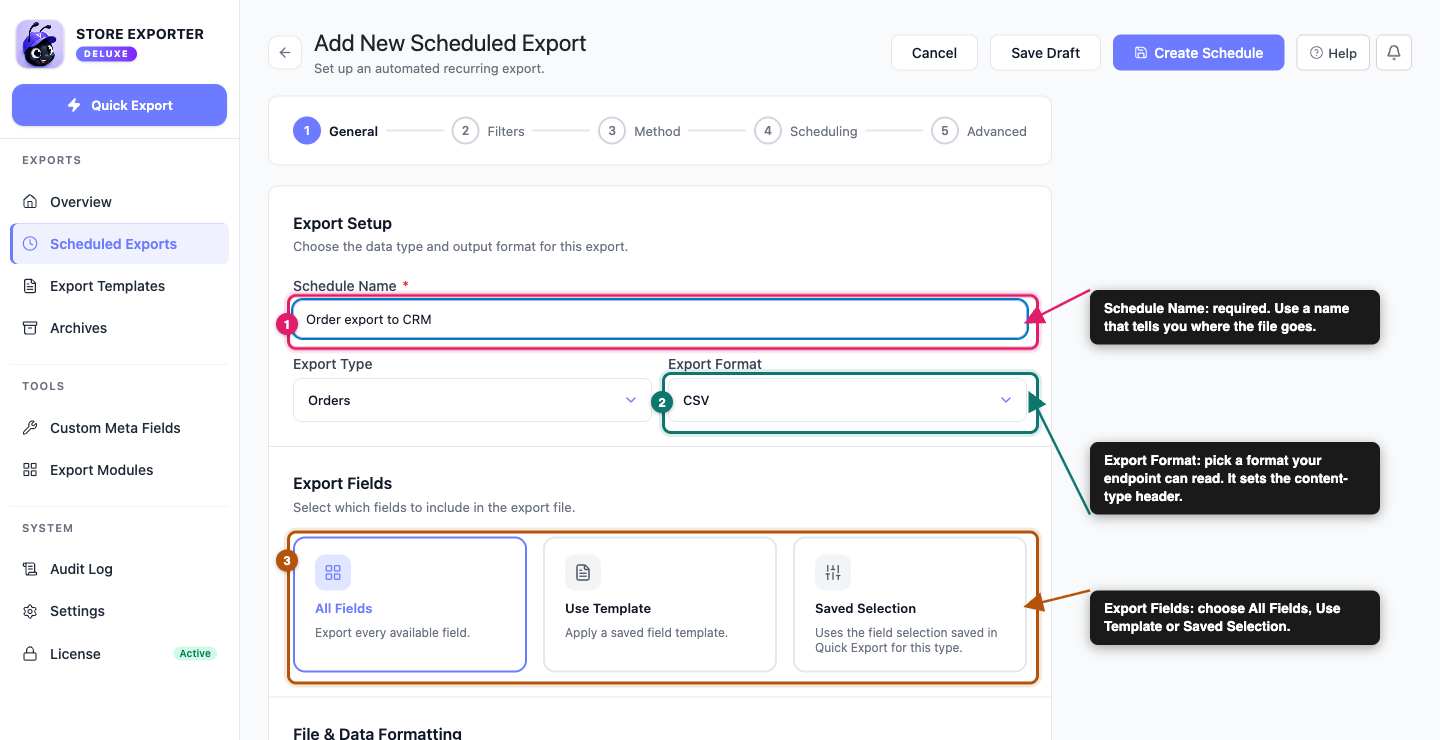
On the General step, set up the export itself.
- Enter a name in Schedule Name. This field is required.
- Pick the data type from Export Type, such as Products or Orders.
- Pick the file type from Export Format. Choose a format your endpoint can read from the Export Format table under “What your endpoint receives” above.
- Under Export Fields, choose All Fields, Use Template, or Saved Selection.
The General step also has file and data formatting options, such as the column delimiter and header formatting. Leave these alone unless your endpoint expects a particular layout.
Step 3: Narrow the export with filters (optional)
Open the Filters step if you only want some records sent, for example orders with a certain status. Skip it to send every matching record.
Step 4: Choose POST to URL
- Click the Method step.
- Under Delivery Method, select the POST to URL card.
- Under Remote URL Settings, enter your endpoint’s address in Remote POST URL, for example
https://example.com/webhook/receive.
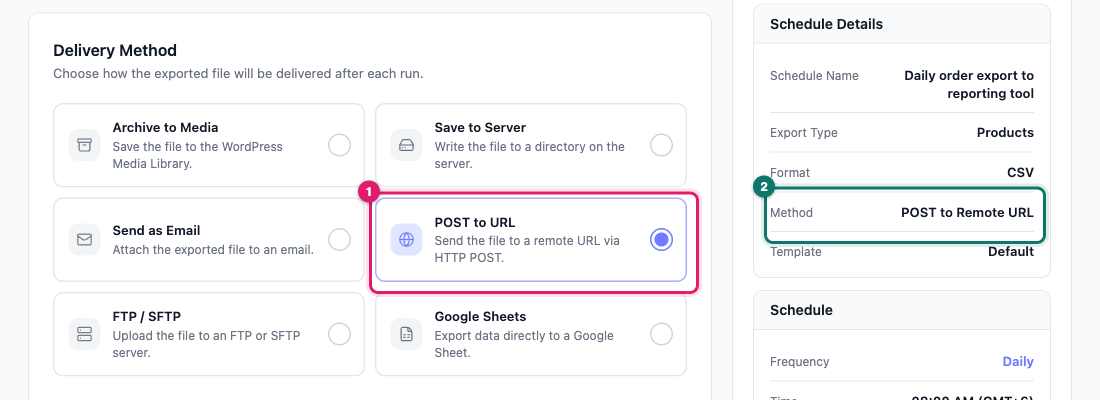
The Schedule Summary panel on the right updates to show POST to Remote URL once the card is selected.

The Remote POST URL field is the only setting this delivery method has. Use the full address, including https://.
Step 5: Set when it runs
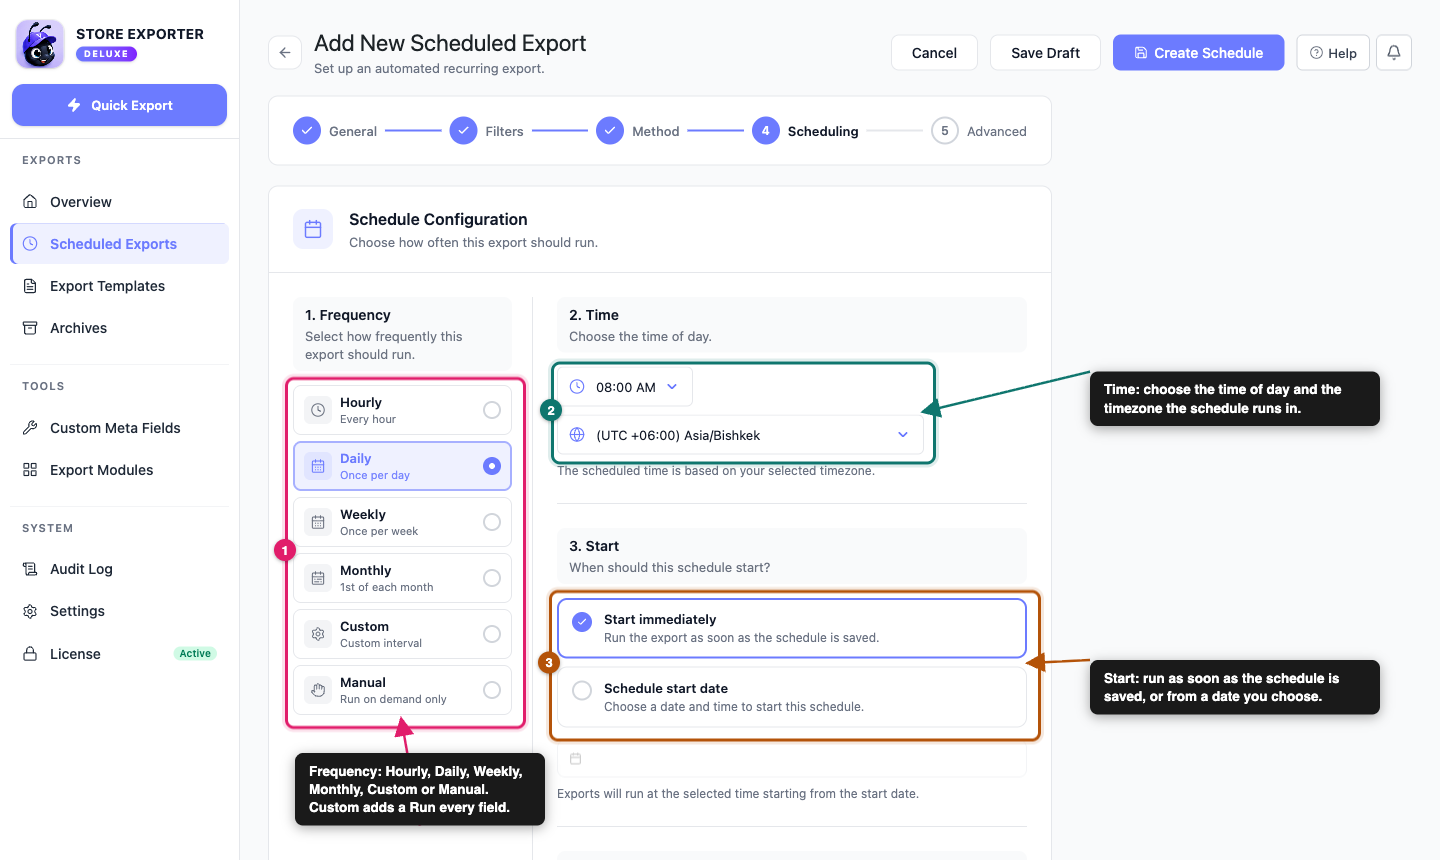
On the Scheduling step, choose how often the export runs.
- Hourly: every hour.
- Daily: once per day.
- Weekly: once per week.
- Monthly: on the 1st of each month.
- Custom: a repeating interval you set in Run every.
- Manual: only when you run it yourself.
Pick a time and timezone for the run, and choose whether it starts immediately or on a date you set. To run at your store’s local time, see How to schedule exports by your local time.
Step 6: Review the advanced options
The Advanced step has more options, such as file naming, archive management, and logging. Two of them matter most for POST to URL:
- Filename Pattern: names the export file inside your site. The file name isn’t sent to your endpoint.
- Log level: sets how much detail the Audit Log records for this schedule. This option appears only when the Audit Log is enabled and the Scheduled Exports log source is not set to None (Settings → Audit Log → Log Sources).
Step 7: Save the schedule
- Check the Schedule Summary panel on the right. Method should read POST to Remote URL.
- Click Create Schedule. On an existing schedule, this button reads Save Schedule.
Checking that the file arrived
Store Exporter Deluxe records whether it could reach your endpoint, but it doesn’t read your endpoint’s reply. So check both sides:
- Open your endpoint’s own request log, or the receiving tool, and look for a POST request at the time the schedule ran.
- Confirm the request body is the export file and that it opens correctly.
- In WordPress, go to Scheduled Exports in the Store Exporter sidebar. The Recent Activity list there shows each run. Click Errors Only, next to All Activity, to show failed runs only. Click All Activity to see every run again.
- For more detail, open the Audit Log from the same sidebar and find the run.
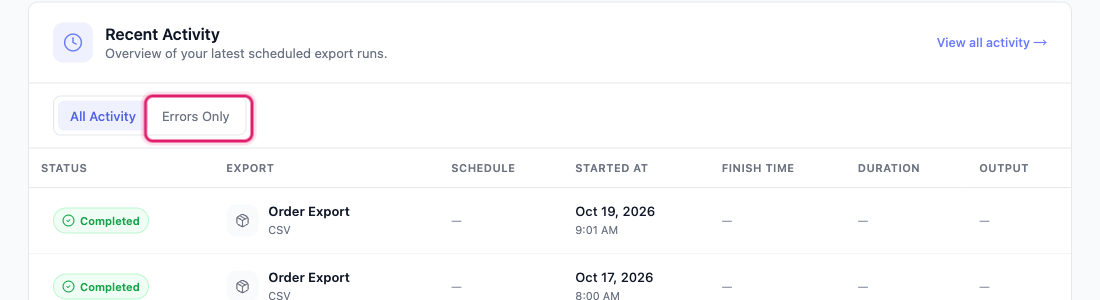
To test without waiting for the next scheduled run, point Remote POST URL at a request-catching service while you set things up. On the Scheduled Exports screen, click the three-dot menu in the schedule’s row and click Execute Now, then check what arrived. Then switch the address to your real endpoint.
If a request can’t connect at all, for example because the address is mistyped, the server is down, or the connection times out, the run is marked as failed in the Audit Log. Store Exporter Deluxe sends the file once per run. The next scheduled run builds and sends a fresh file.
Adding an API key or other headers (developers)
The settings screen has no fields for authentication headers. If your endpoint needs an API key or token, a developer can add headers with the wsed_scheduled_export_post_args filter. Add this code to a custom plugin or your child theme’s functions.php file:
add_filter( 'wsed_scheduled_export_post_args', function ( $args ) {
    $args['headers']['Authorization'] = 'Bearer YOUR_API_TOKEN';
    return $args;
} );
Replace YOUR_API_TOKEN with the token your endpoint expects. The code adds to the existing headers instead of replacing them, so the content-type header stays in place.
Troubleshooting
https://. Then confirm the receiving server is online and doesn’t block requests from your hosting provider’s IP address. Store Exporter Deluxe records a failure when it can’t connect to your endpoint.https:// address if your endpoint redirects from http://.Frequently asked questions
wsed_scheduled_export_post_args filter. See the developer section above.content-type header that matches the export format.Need help?
If you have a question or run into any issues, we’re here to help.
- Premium users: Open a support ticket
- Free users: Visit our community forum