
If you need a WooCommerce export that opens straight in Excel, with bold column headers and even embedded product images, a plain CSV won’t get you there. Store Exporter Deluxe lets you export your products, orders, customers, or any other supported data type directly to the XLS and XLSX spreadsheet formats, so the file opens ready to use.
This article walks you through the settings that are specific to Excel files, choosing between XLS and XLSX, and running the export. It also covers how to fix the two issues that come up most often with Excel exports.
Prerequisites
| Requirement | Details |
|---|---|
| Plugin | Store Exporter Deluxe is active and licensed |
| WooCommerce | Active, with at least one record of the type you want to export |
| Administrator access | You’ll need an account with access to the WordPress admin dashboard |
| Spreadsheet software | Excel, LibreOffice Calc, or Google Sheets to open the exported file |
Step 1: Configure the Excel-specific export settings
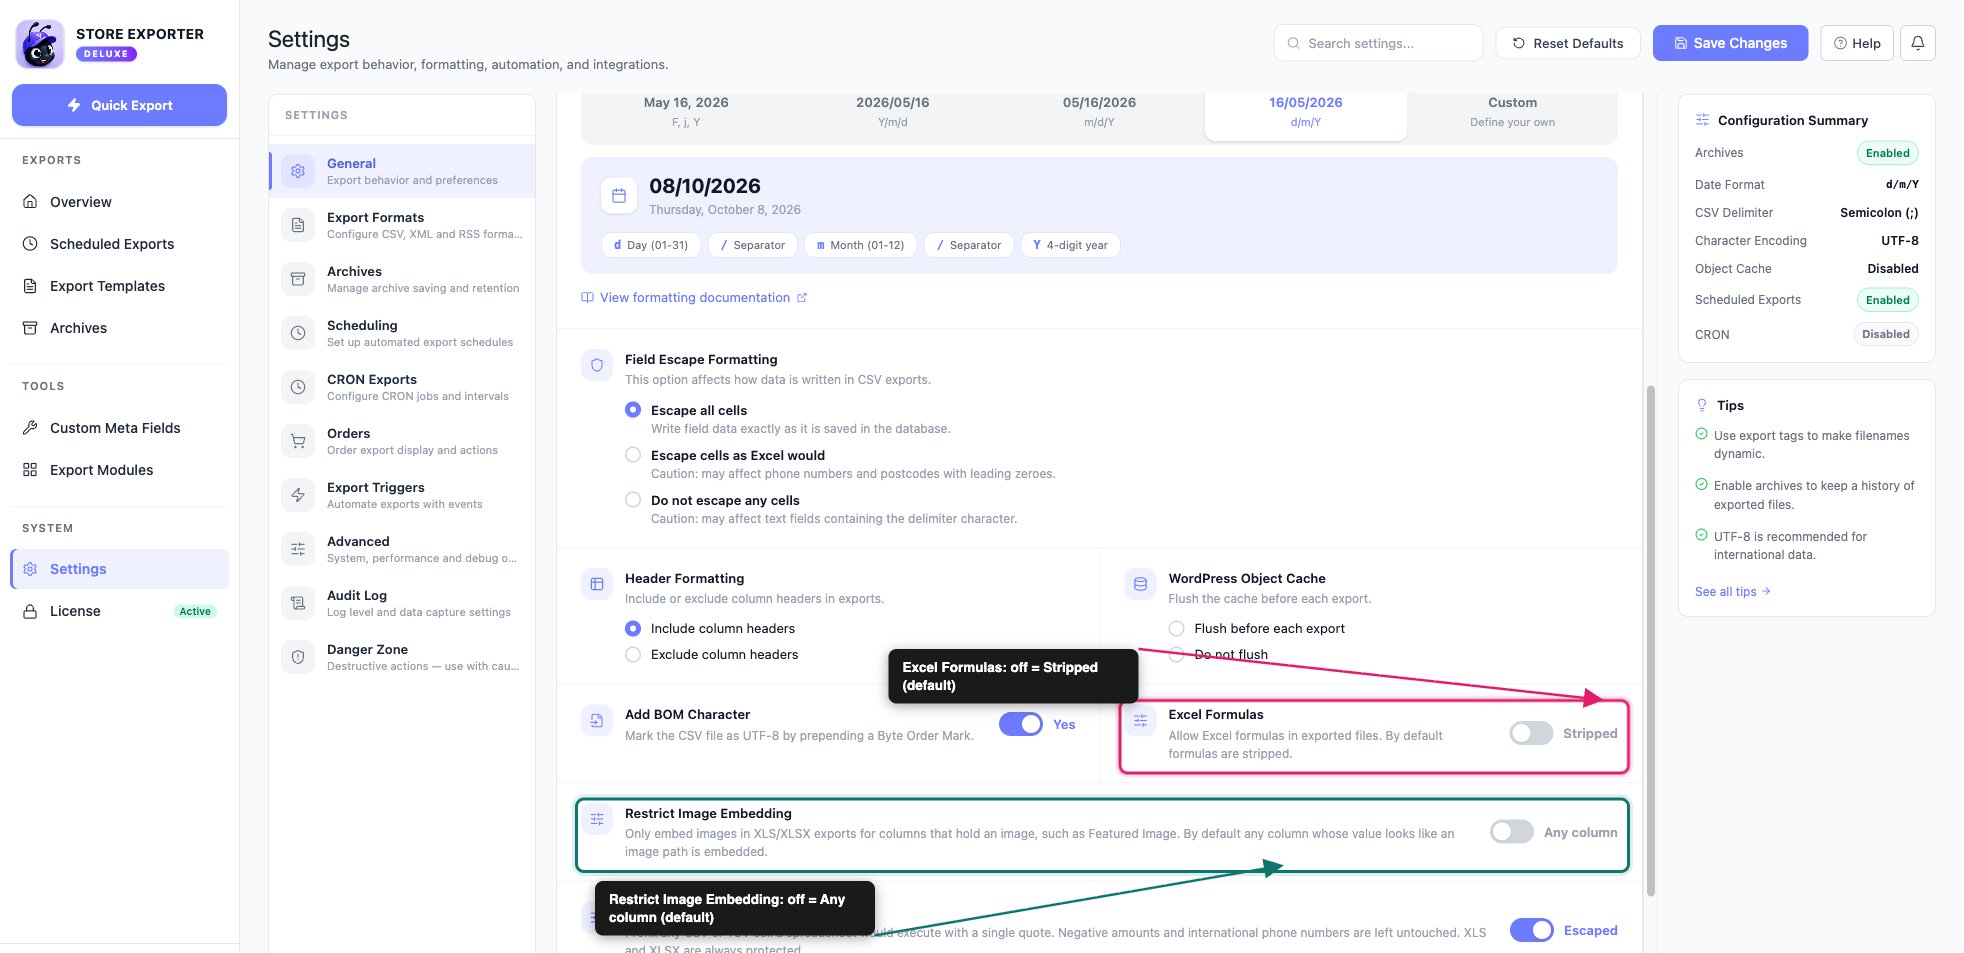
A few settings only apply to Excel exports. They live in Settings → General, not in the export screen, so set them before you run the export.
- Go to WooCommerce → Store Export in your WordPress admin.
- Click Settings in the sidebar.
- Open the General section.
- Set Excel Formulas. Leave it at Stripped unless you intentionally export live formulas.
- (Optional) Turn on Restrict Image Embedding (it then shows Image fields only) if you only want images in image columns.
- Click Save Changes if you changed anything.
Here is what the two Excel settings do:
Excel Formulas: controls whether a cell value starting with = is written as a live, calculating formula or as plain text. It defaults to Stripped, which is the safer choice: a product name or custom field that happens to start with = is written as plain text instead of being treated as a formula. Switch it to Allowed only if you intentionally export live formulas and trust every value that reaches the file.
Restrict Image Embedding: a toggle that controls what happens when an exported value ends in an image extension (.gif, .jpg, .jpeg, .png, or .bmp). Off, it shows Any column, meaning any text value with one of those endings is treated as a candidate image and embedded into the spreadsheet if it resolves to a real file in your uploads folder. Turn it on to show Image fields only, which limits embedding to columns that are genuinely meant to carry an image, such as Featured Image (Embed). See the troubleshooting entry below for when this matters.
Other settings in this panel, including Character Encoding, Add BOM Character, Field Escape Formatting, and Escape Formulas in CSV/TSV, only affect CSV, TSV, XML, and RSS exports. They have no effect on XLS or XLSX files. See the troubleshooting entry below for why Excel exports don’t need a character encoding setting at all.
Step 2: Choose XLS or XLSX as your export format
- Click Quick Export in the sidebar.
- Under Select Export Type, choose the data you want to export, such as Products, Orders, or Customers.
- Choose your columns under Export Fields, and any filters under Filters & Sorting.
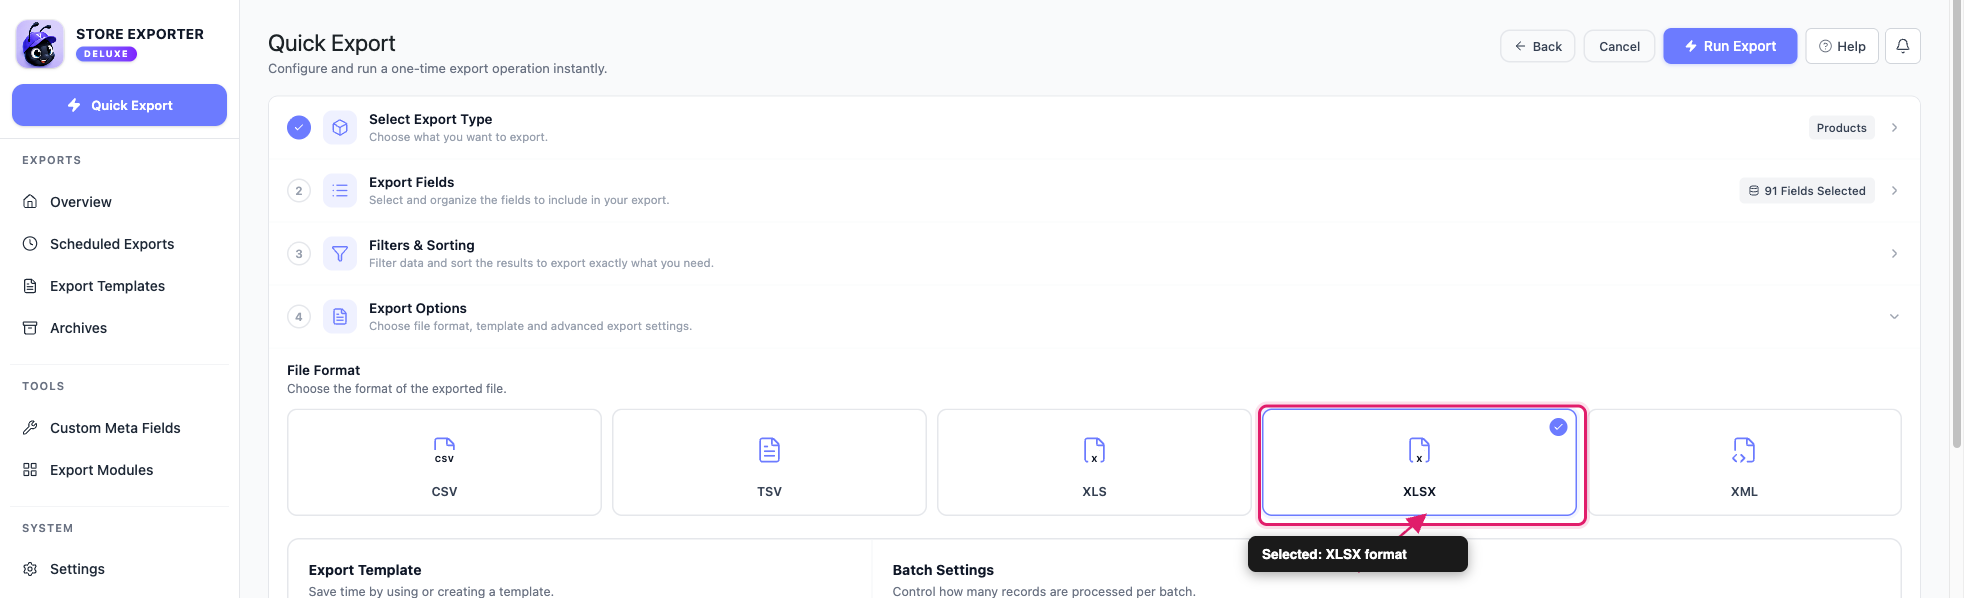
- Under Export Options, select the XLS or XLSX tile in File Format.
You can also set up an Export Template with an Excel format if you want to reuse the same export later. Use this table to pick the right format:
| Format | Best for |
|---|---|
| XLS | Opening in Excel 97-2003, or any older spreadsheet software that doesn’t support XLSX |
| XLSX | Modern Excel (2007 and later), Google Sheets, and LibreOffice Calc |
Choose XLSX unless you specifically need compatibility with a very old version of Excel. It’s the more modern format and handles larger exports better.
Step 3: Run the export
- Click Run Export.
- Wait for the Export in Progress dialog to finish.
- Click Download File to save the file.
Store Exporter Deluxe builds the spreadsheet with your selected fields and filters, and applies the formatting from Step 1.

If you’d rather have this export run automatically, see How to schedule exports. Scheduled exports offer the same XLS and XLSX formats, plus their own per-schedule Excel Formulas setting that overrides the General Settings default for that one schedule.
Troubleshooting
.gif, .jpg, .jpeg, .png, or .bmp as a possible image. If that value resolves to a real file in your uploads folder, the image is embedded instead of the text. A value that isn’t a real path, such as a product named “Summer Collection.jpg”, still exports as plain text.FAQ
Related articles
Need more help?
If you’re using Store Exporter Deluxe and run into an issue this article doesn’t cover, open a support ticket and our team will help you get your Excel export working.
If you’re using the free Store Exporter plugin, ask on the WordPress.org support forum and our team will get back to you there.
