
Sometimes the field you need for an export isn’t one of Store Exporter Deluxe’s default columns. Custom order notes, a UTM source saved by WooCommerce’s Order Attribution feature, a saved phone number, or any other piece of custom meta your store or a third-party plugin adds to a product, order, or order item won’t show up in your export until you tell Store Exporter Deluxe where to find it.
The Custom Meta Fields tool lets you register any WordPress meta key as an export field for products, orders, order items, users, customers, and several other record types. Once saved, it appears alongside the built-in fields on the Export Fields step of Quick Export, ready to include in any export or scheduled export.
Prerequisites
| Requirement | Details |
|---|---|
| Plugin | Store Exporter Deluxe is active and licensed |
| Meta key | You’ll need the exact WordPress meta key the data is stored under (for example, _wc_order_attribution_utm_source) |
| Administrator access | You’ll need an account with access to the WordPress admin dashboard |
Where to find Custom Meta Fields
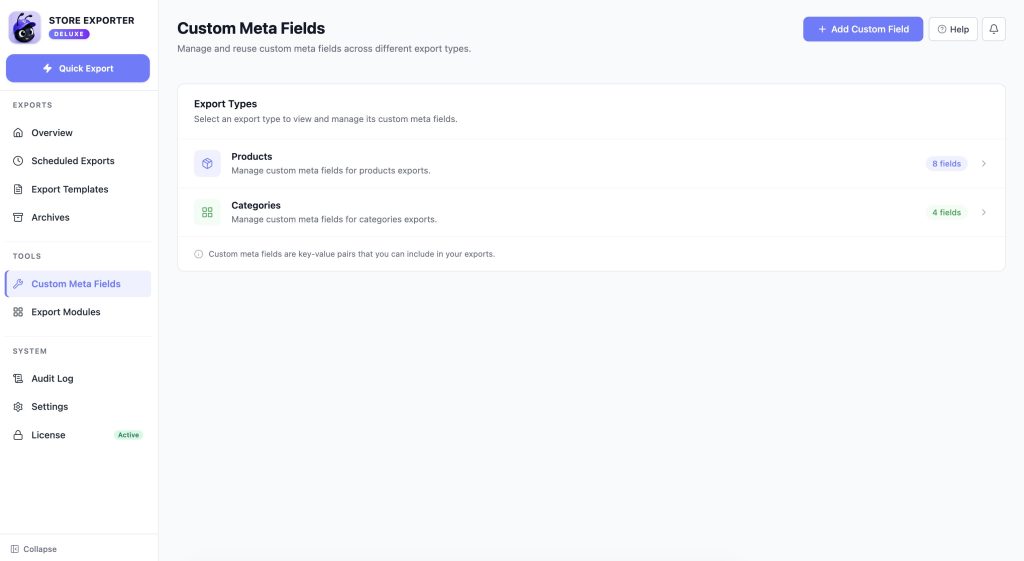
Open WooCommerce → Store Export from the WordPress admin menu. In the sidebar, click Custom Meta Fields under the TOOLS group. This opens a list of every export type you’ve already configured a custom field for.
If you haven’t configured any yet, click Add Custom Field to start. If you’re adding a field for a type you’ve already configured, click that type’s row in the list instead to edit it.
Step 1: Choose your export type
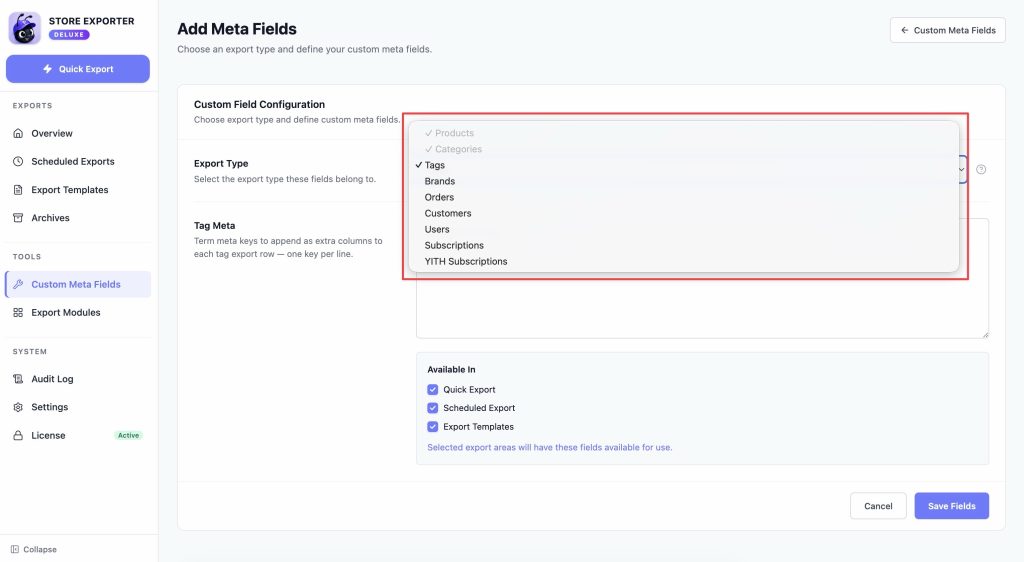
If you clicked Add Custom Field, choose the record type you’re adding a custom field for from the Export Type dropdown. Store Exporter Deluxe supports custom meta for Product, Category, Tag, Brand, Order, Subscription, YITH Subscription, User, and Customer, along with any other export type registered in your store. Types you’ve already configured show a checkmark and can’t be selected again here, since you edit those from the list instead.
If you’re editing an existing type, this dropdown doesn’t appear. You go straight to that type’s fields.
Step 2: Enter your meta keys
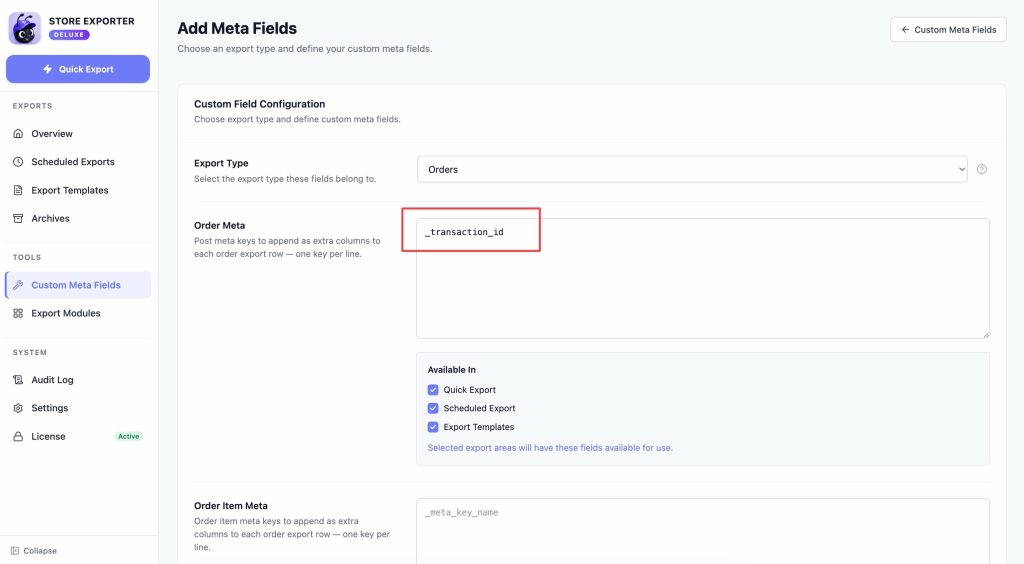
Below the export type selector, you’ll see one or more meta key boxes depending on the type you chose. Most types (Category, Tag, Brand, Subscription, YITH Subscription, User, Customer) have a single box. Product and Order are the exceptions.
Product has two rows:
| Row | Pulls from | Use it for |
|---|---|---|
| Product Meta | Post meta stored on the product itself | Any custom product-level meta key |
| Product Attributes | WooCommerce attribute taxonomies | Attribute slugs you want exported as their own columns, using the taxonomy slug in lowercase with hyphens, for example pa_color |
Order has three rows:
| Row | Pulls from | Use it for |
|---|---|---|
| Order Meta | Meta stored on the order itself | Order-level data such as a payment gateway’s UTM or reference data |
| Order Item Meta | Meta stored on individual order line items | Per-line-item data, such as custom checkout add-on values saved against that item |
| Order Item Product Meta | The product’s own meta, read through each order’s line items | Product-level details (for example, a custom product attribute) that you want repeated on every order row containing that product |
In the matching box, type one meta key per line, exactly as it’s stored in the database (for example, _supplier_sku). Each box’s placeholder text reads _meta_key_name as a format reminder.
Step 3: Choose where the field is available
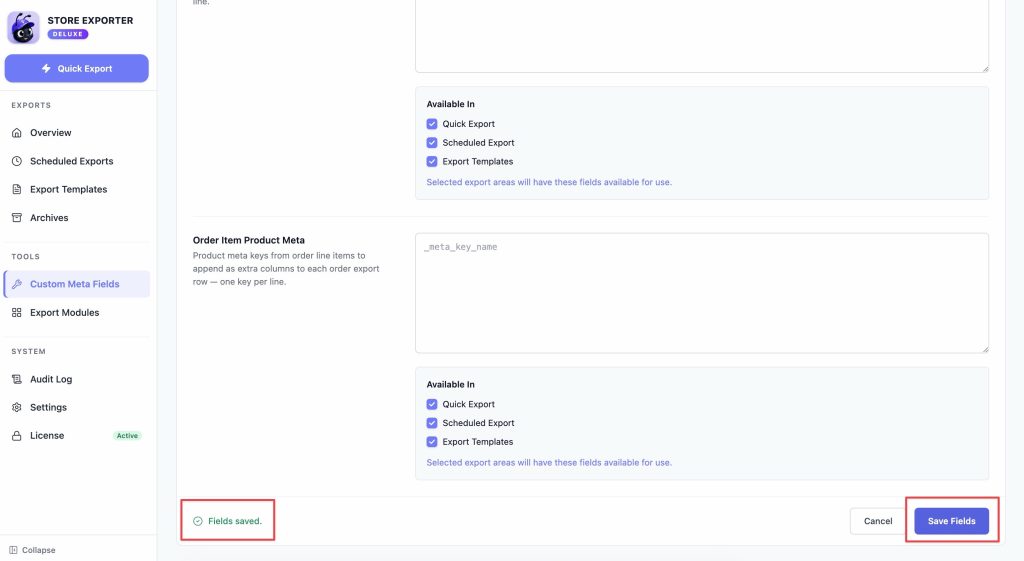
Each field has an Available In checkbox group that controls where it can be used: Quick Export, Scheduled Export, and Export Templates. All three are checked by default. Uncheck any you don’t want the field offered in.
Step 4: Save and use your field
Click Save Fields. A confirmation message reads “Fields saved.”
Your new field is now available on the Export Fields step of Quick Export (or Scheduled Export) for the type you configured it under. Add it as a field chip like any other, and it appears as its own column in your export.
Example: exporting the order’s UTM source
Here’s the full flow for adding WooCommerce’s own Order Attribution UTM source meta (_wc_order_attribution_utm_source) as an export field for orders. This key isn’t already a native Store Exporter Deluxe field, which makes it a realistic example of when you actually need Custom Meta Fields:
- Open WooCommerce → Store Export, then click Custom Meta Fields under TOOLS.
- Click Add Custom Field (or click the existing Order row if you’ve already configured one).
- If you’re adding a new one, choose Order from the Export Type dropdown.
- In the Order Meta box, type
_wc_order_attribution_utm_sourceon its own line. - Click Save Fields.
- Open Quick Export, choose Orders as your export type, and go to the Export Fields step. Add the new field as a chip, then continue through the rest of the wizard to run your export.
Custom Meta Fields only capitalizes the first letter of the generated label, it doesn’t title-case every word. So the chip for this key reads Wc order attribution utm source, not a neatly formatted title. That’s expected behaviour, not a bug, the underlying data still exports correctly under that column heading.
Identifying meta keys with the free Store Toolkit plugin
Since Custom Meta Fields has no built-in way to list existing meta keys, the free WooCommerce Store Toolkit plugin is the easiest way to find one. Once installed and active, it adds a separate meta box to each of the Edit Product, Order, and User screens, listing every custom meta key already saved against that record, with an Add to export button beside each one.
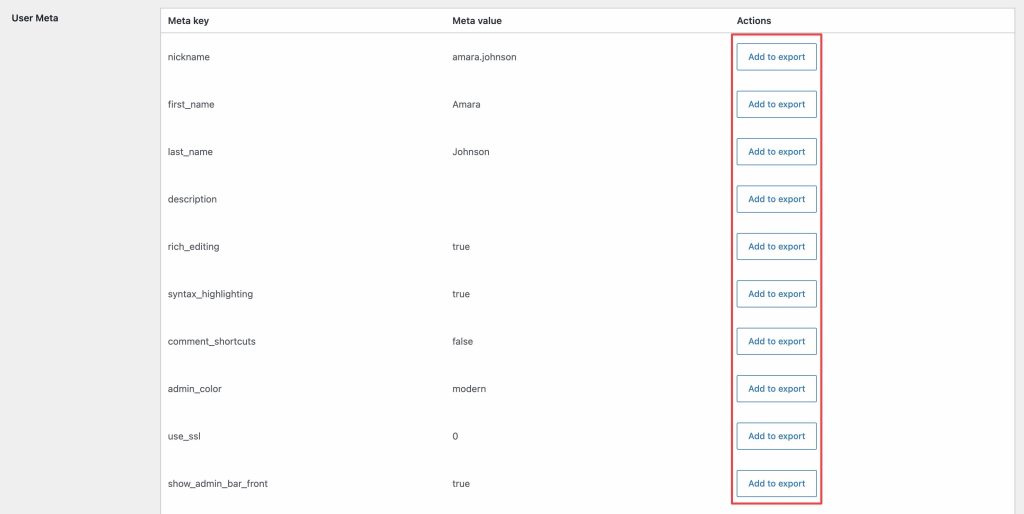
Clicking Add to export saves that key to the same underlying setting the Custom Meta Fields tool reads from. That means you can use either tool interchangeably: click Add to export from an Edit Product or Edit Order screen, or type the key manually into Custom Meta Fields. Either way, the field appears on the Export Fields step the same way.
To use it:
- Download and install WooCommerce Store Toolkit from WordPress.org.
- Activate it in your store.
- Open the Edit screen for a Product, Order, or User that already has the custom meta you want to export.
- Scroll to the meta box Store Toolkit adds to that screen and click Add to export beside the key you need.
Exporting Extra Product Options fields
If your store uses Themecomplete’s Extra Product Options plugin, Store Exporter Deluxe automatically pulls each order item’s Extra Product Options data into your Order exports. It appears as fields named after each option, with a matching price field alongside it. No setup in Custom Meta Fields is needed.
This only appears if Extra Product Options Pro is active and an order actually has Extra Product Options data saved against it. If you don’t see the fields you expect, confirm the plugin is active and that the order you’re testing with actually used that option at checkout.
Exporting Product Add-ons fields
If your store uses the official WooCommerce Product Add-ons plugin, Store Exporter Deluxe automatically pulls each order item’s Product Add-ons data into your Order exports, no setup in Custom Meta Fields needed. It appears as an Order Items: Product Add-ons summary field, plus a separate field for each individual add-on.
This only appears if WooCommerce Product Add-ons is active and an order actually has add-on data saved against it. If you don’t see the fields you expect, confirm the plugin is active and that the order you’re testing with actually used an add-on at checkout.
Troubleshooting
Related articles
- How to export WooCommerce products with Store Exporter Deluxe
- How to export users
- How to schedule exports
Need more help?
If you’re using Store Exporter Deluxe and run into an issue setting up a custom meta field, open a support ticket, and our team will help you get it exporting correctly.
If you’re using the free Store Exporter plugin, ask on the WordPress.org support forum, and our team will get back to you there.
