Export templates are a powerful tool for managing your WooCommerce store’s data. They allow you to save and reuse specific settings for exporting data, making the process efficient and straightforward.
In this guide, we’ll explore what these templates are, how to create them, and how you can use them to simplify your data export tasks. Specifically, we’ll focus on a powerful WooCommerce plugin: Visser Labs’ Store Exporter Deluxe. By the end, you’ll understand why this tool’s export templates can streamline your e-commerce operations.
So let’s get right to it!
I. What Are Export Templates In WooCommerce?
Export templates in WooCommerce are pre-configured setups that store your preferences for exporting specific types of data.
Basically, these templates allow you to define which data types and fields you want to export. Instead of manually configuring these options every time you export data, you can simply select an existing template that meets your needs. This not only saves time but also ensures consistency and accuracy in your data exports.
II. How To Create WooCommerce Export Templates
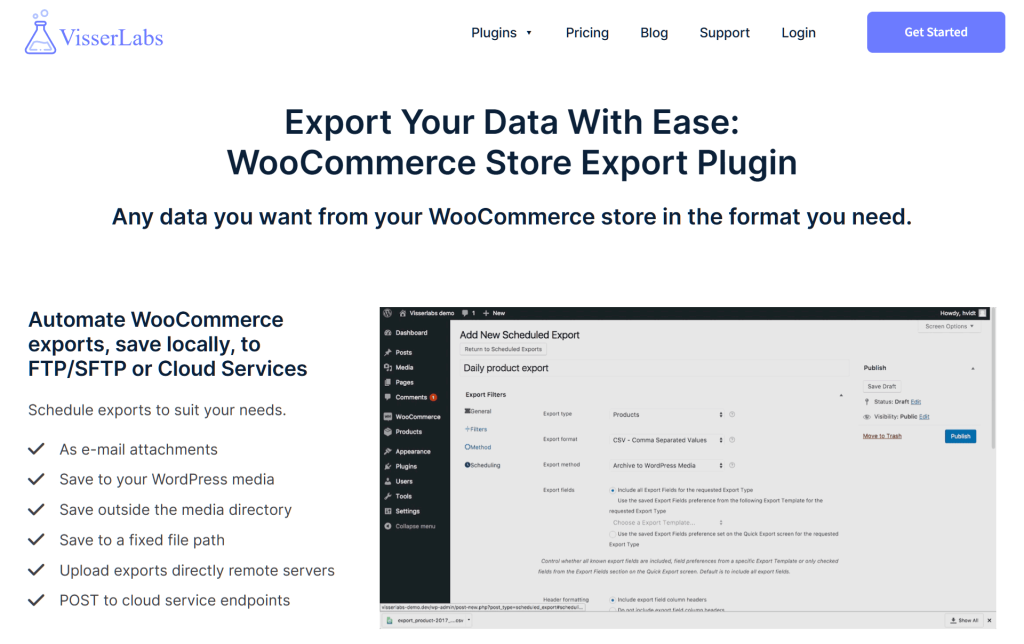
Creating and using export templates is easy as long as you have the right tool. This is where Visser Labs’ Store Exporter Deluxe comes in.
Store Exporter Deluxe boasts many tools that add convenience, efficiency, and security to the data export process. One of its best features happens to be Export Templates.
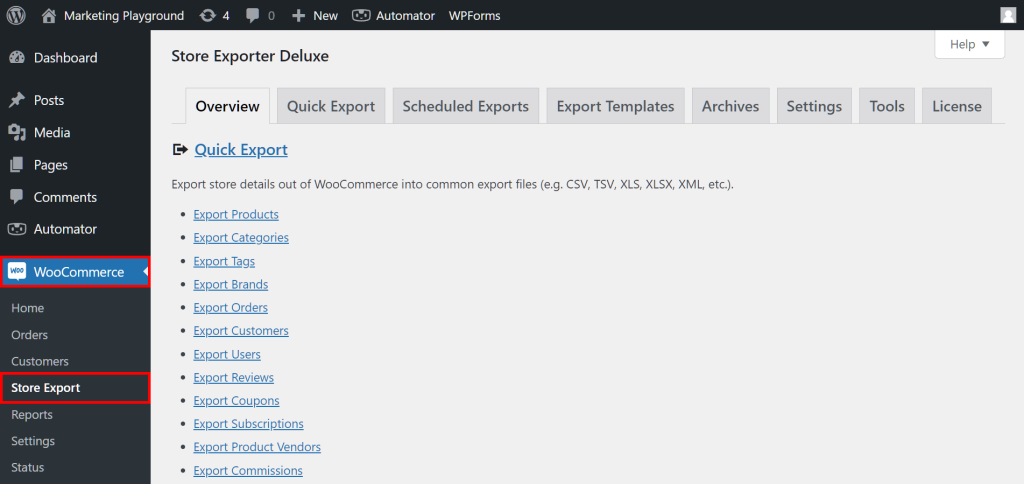
First things first: to access this feature, head to your WordPress dashboard. Then click WooCommerce > Store Export to go to the Store Exporter Deluxe page:
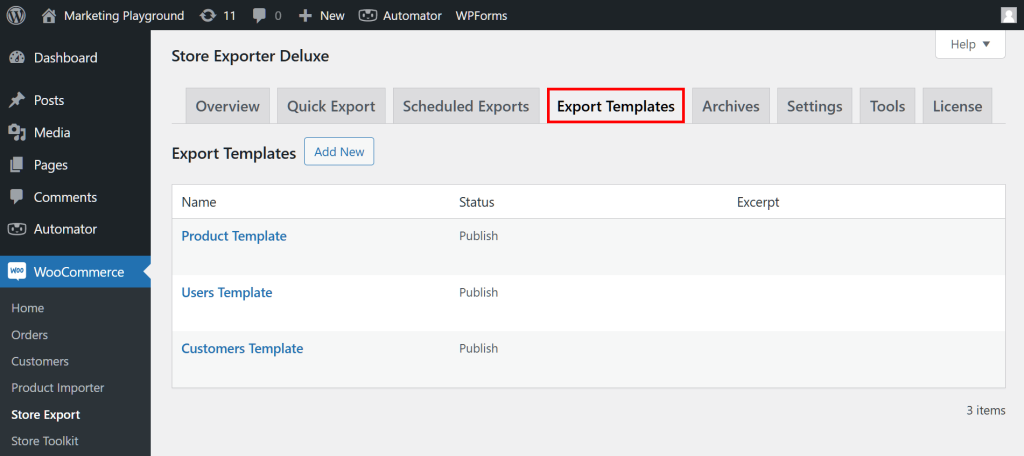
Now, click the Export Templates tab to reach the Export Templates page.
And we’re all set! Follow the steps below to create your first store data export template!
Step 1: Create a new export template
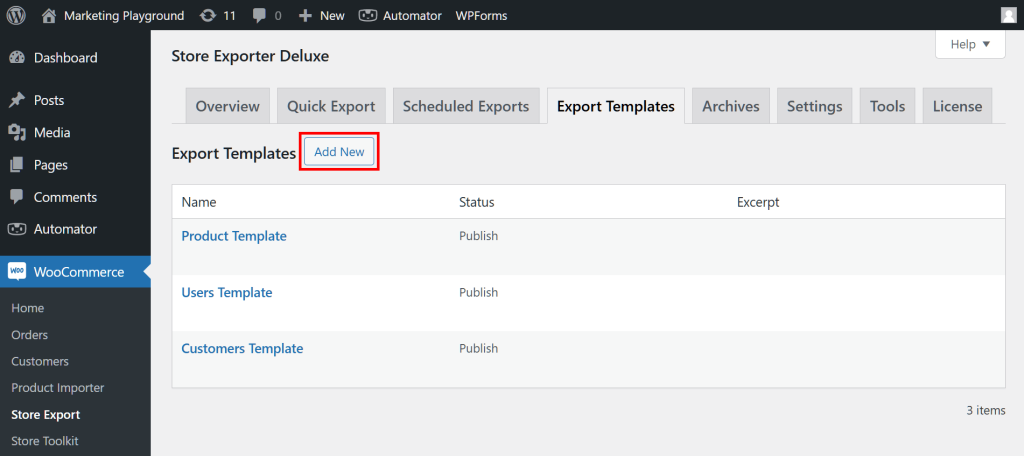
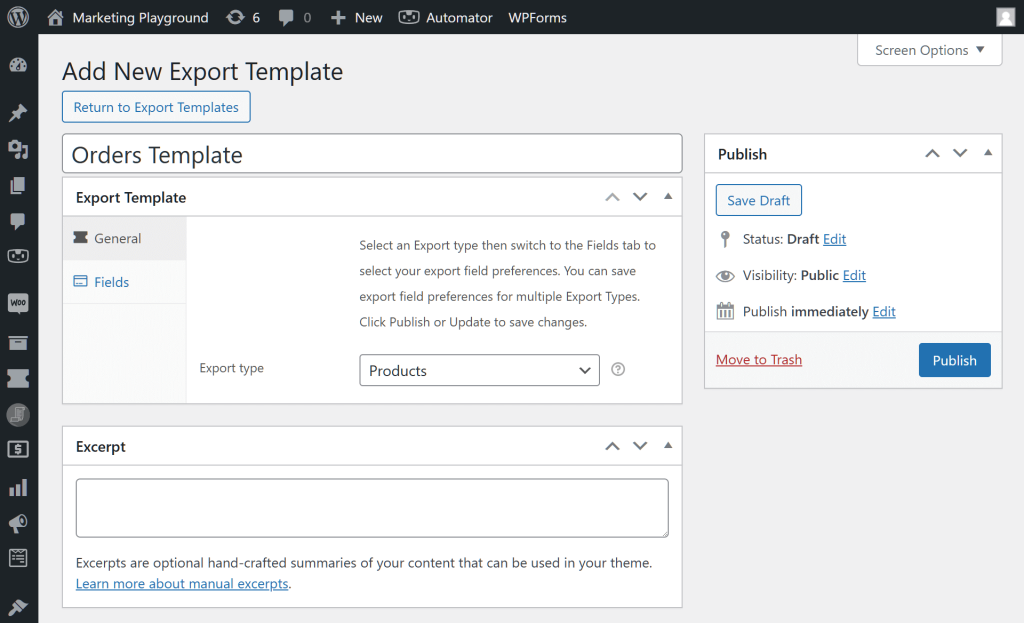
Click the Add New button above the export templates table (more on this table below).
This takes you to the Add New Export Template page. Here, you can give your template a name. For example, we’ll name ours “Orders Template.”
In addition, you can provide an excerpt that summarizes your template’s content.
Step 2: Select your Export type
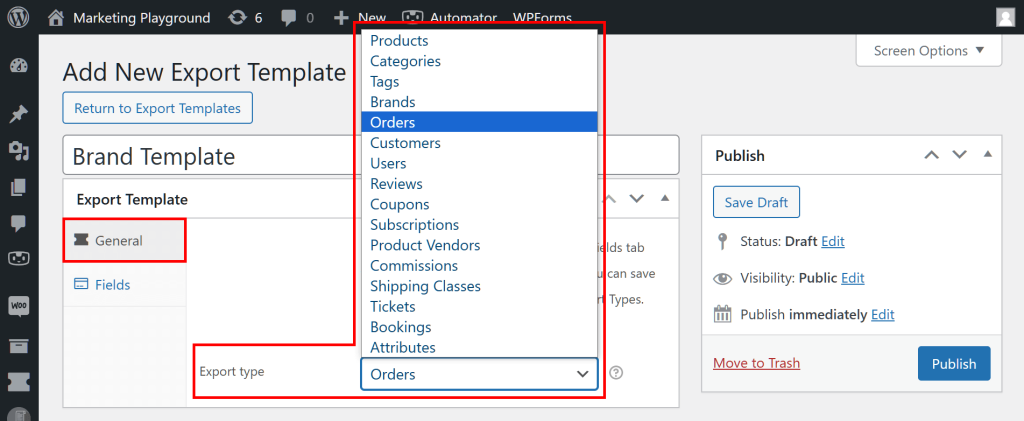
Making sure the General panel is selected, click the Export type dropdown menu. This opens up a huge list of data types. Simply select the data type you wish to export.
For instance, if you want to extract details about the orders placed in your e-commerce store, you can select “Orders” from this list.
Now, onto the next step!
Step 3: Choose the fields to export
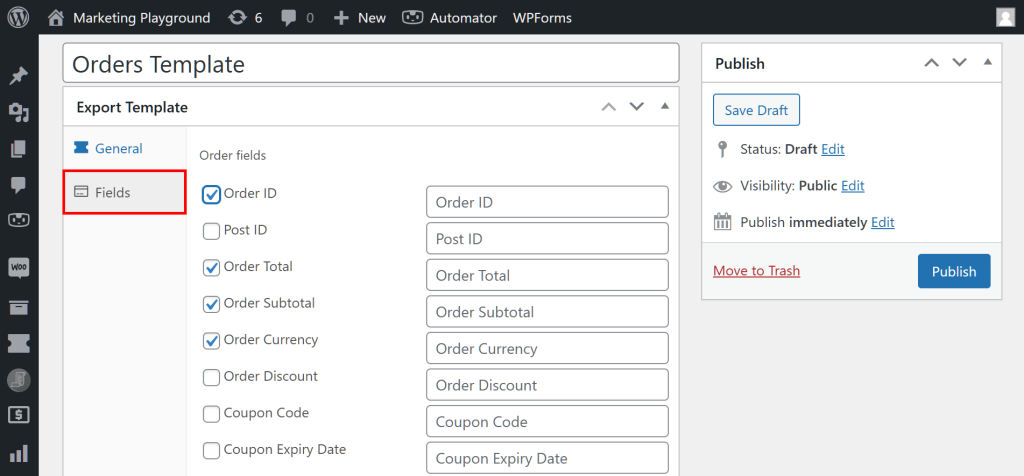
Click the Fields panel to access a list of fields.
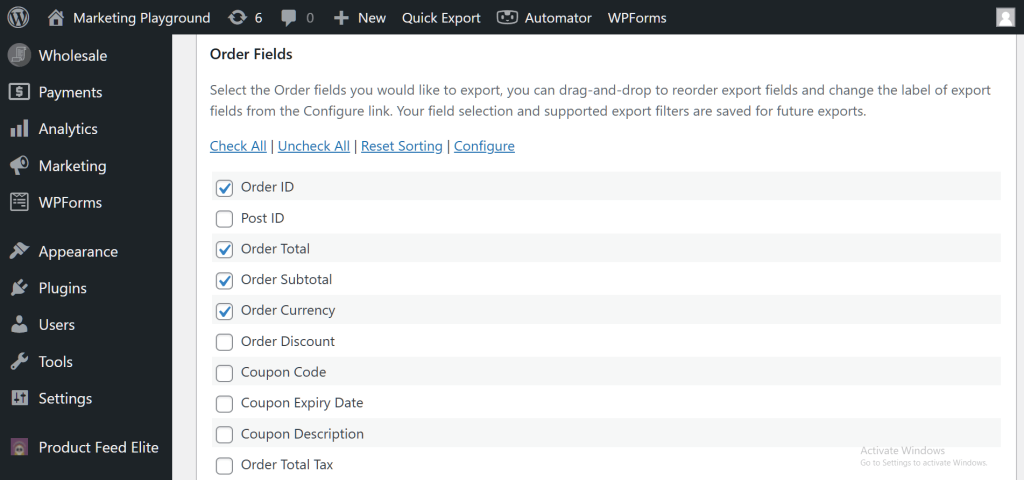
Fields are pieces of information about your chosen data type. As such, only fields associated with the data type you picked in the previous step will appear in the Fields area.
For example, because we selected the “Orders” data type, we can select fields such as:
- Order ID
- Post ID
- Order Total
- Coupon Code
- … and more!
Now, simply tick the checkbox of every field you want to export.
Step 4: Publish your export template
Lastly, go to the Publish box on the upper right side of the page and click the Publish button. This places it in the export templates table, making it available for use!
III. The Export Templates Table
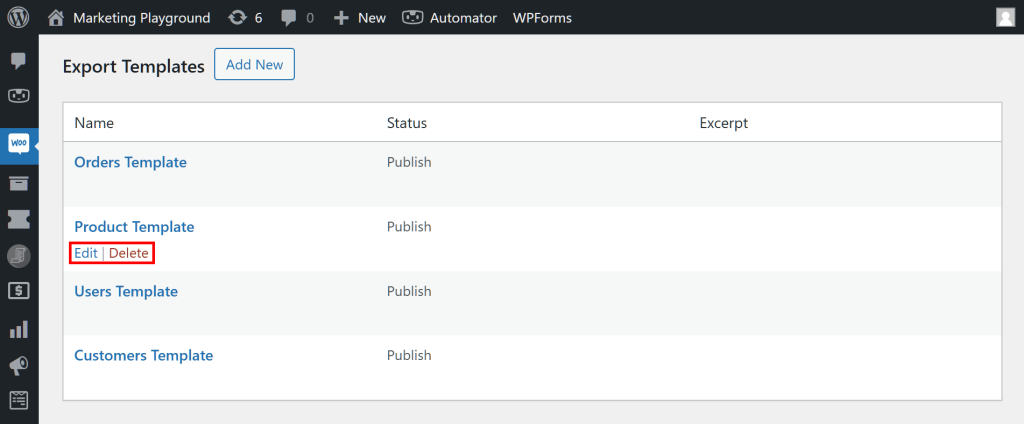
Simply put, the export templates table collects all the templates you’ve published.
You can use this table to edit or delete templates. To do this, simply hover the mouse cursor over the template’s name, then click either the Edit or Delete button that appears.
IV. How To Use WooCommerce Export Templates
You can use export templates in the Quick Exports section.
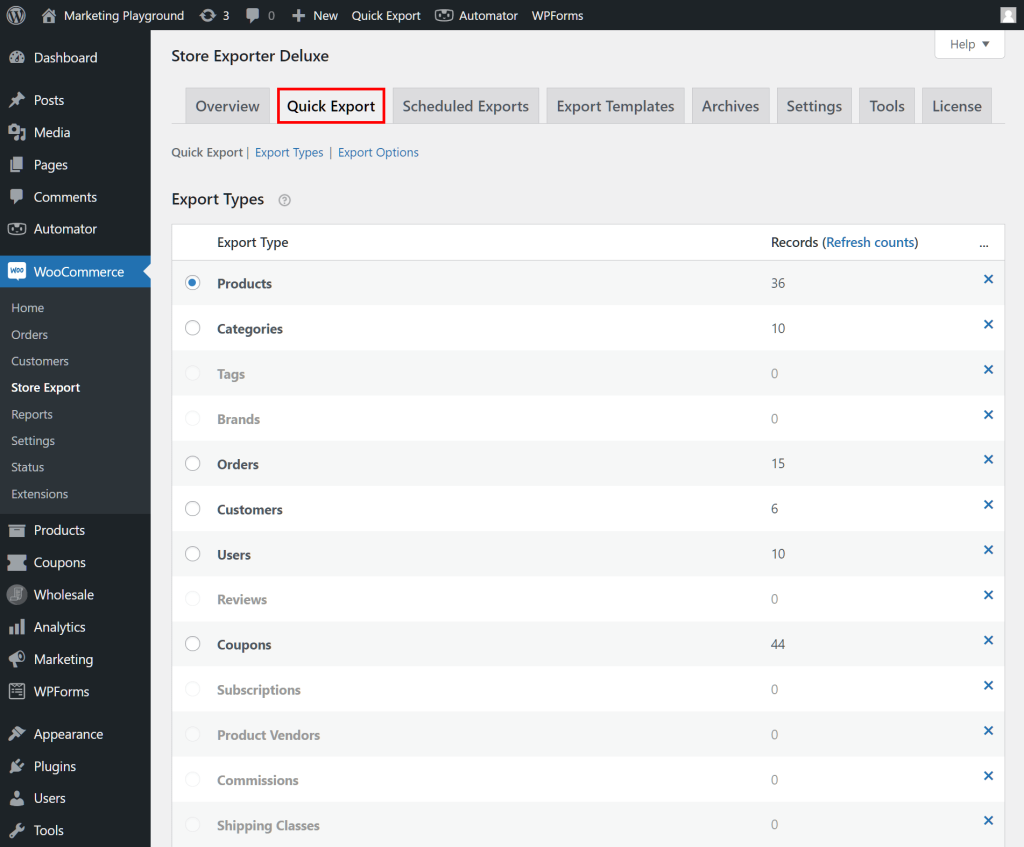
To see how it works, return to your WordPress dashboard and click WooCommerce > Store Export. This time, however, click the Quick Export tab.
Scrolling through the page, you’ll notice Quick Export is composed of five main areas:
- Export Types
- Fields
- Filters
- Export Options
- Custom Fields
To export store data, it’s often necessary to configure the first four areas (the fifth one being optional).
Thankfully, using a template allows you to skip configuring the second area: Fields. After all, you already configured this area while you were creating the template.
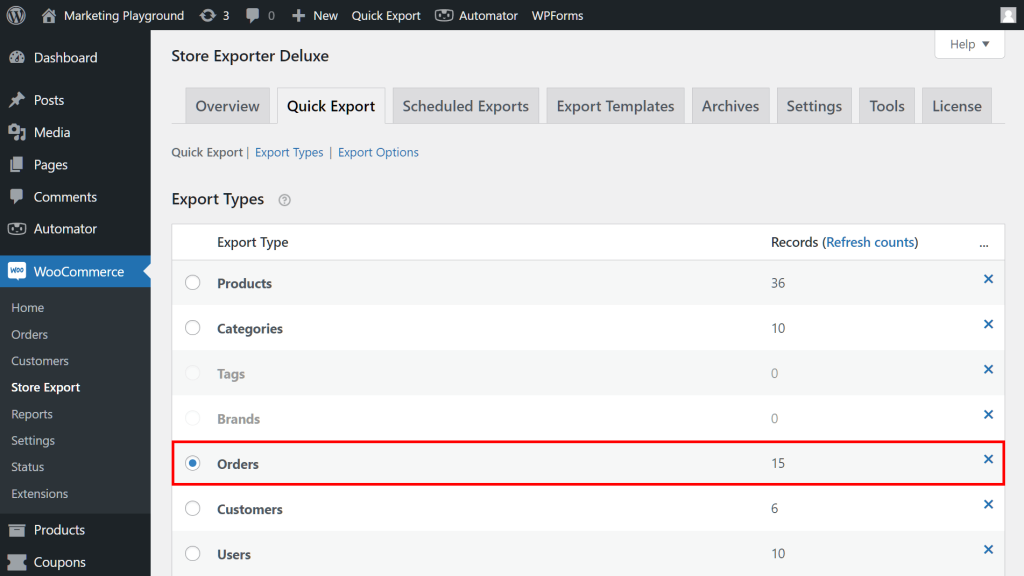
So, how do you use a template? First, go to the Export Types area and select the data type that matches the one you chose for your template. In our case, since we created a template for orders, we should choose “Orders.”
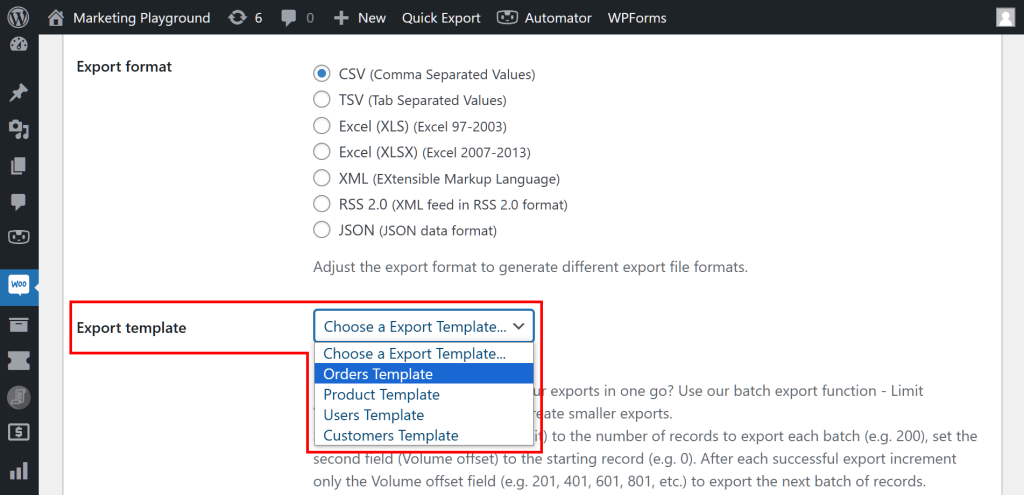
Next, scroll down to the Export Options area and click the Export template dropdown menu to access a list of your published templates. To use your preferred template, simply click it!
This replaces the current Fields settings with your template’s. Thus, you don’t have to reconfigure it from scratch.
Then, to start your export, scroll to the Export button and click it!
Congratulations! You now know how to create and use WooCommerce export templates to streamline your data export processes!
Conclusion
Understanding and using WooCommercce export templates can greatly boost the efficiency of your data management processes. By setting up and using these templates, you can quickly export the data you need without repeatedly configuring settings.
This guide has walked you through using Visser Labs’ Store Exporter Deluxe to create templates. To recap, the steps are:
- Create a new export template
- Select your Export type
- Choose the fields to export
- Publish your export template
Furthermore, we explained to you what export template tables are.
Lastly, we showed you how to use export templates, thus equipping you with the knowledge to make your data export tasks smoother and more effective.
Do you have any questions about what we discussed in this article? Reach out to us and let us know; we’d be happy to assist you!
