
For a WooCommerce import CSV to work, your file needs a header row, UTF-8 encoding, and values formatted the way WooCommerce expects them. The free built-in importer reads that file and handles simple products, variable products, categories, images from URLs, and custom fields. No paid plugin is required.
Almost every failed import traces back to the spreadsheet, not the importer. A value in the wrong format, a file saved in the wrong encoding, or a variation row that doesn’t point at its parent will each stop an import cold, usually without a useful error message.
This guide covers the exact format requirements column by column, the accepted values for each one, how to run the import, and the errors that catch most store owners on their first attempt. So, let’s get started!
Table of Contents
Why Importing Products Via CSV Matters For WooCommerce Stores
A CSV import replaces hours of manual product entry with a single upload. One spreadsheet can create or update hundreds of products at once, with consistent data and the same formatting rules applied to every row. Manual entry through the WordPress admin works fine for a small catalog, but once you pass 50 to 100 products it becomes the slowest and most error-prone part of running your store.
The trade-off is precision. The importer does exactly what your file tells it to, so the file has to say the right things. Get the format right and a thousand products load in minutes.
This guide walks through the format requirements, the methods for running the import, and the errors store owners hit most often.
WooCommerce Import CSV Format Requirements: What Your File Needs
A WooCommerce import CSV needs three things: a comma delimiter, UTF-8 encoding, and a header row naming each column. Everything else is flexible, because the importer’s Column Mapping screen lets you match your headers to WooCommerce fields by hand. Your columns do not have to be named exactly what WooCommerce calls them.
What’s actually required
Far less than most guides claim. A product row genuinely needs only a Name, and a Type if the product is anything other than simple.
- Name: the product title. This is the one column you can’t skip.
- Type:
simple,variable,variation,grouped, orexternal. Defaults to simple if left out. - SKU: strongly recommended, though not strictly required. WooCommerce generates one if it’s missing, and without it you have no reliable key for future updates.
Price, stock, and categories are all optional. A file with nothing but Name and Regular price will import.

Formatting rules for values
- Commas inside a value: wrap the field in double quotes, per RFC 4180, the CSV specification. This applies to any multi-value field.
- Yes/no columns: use
1and0, not “yes” and “no”. - Category hierarchy: use
>to nest, as inApparel > T-Shirts. Missing levels are created for you. - Referencing an existing product: prefix the product ID with
id:, as inid:100. A plain SKU needs no prefix. - Dates: use
YYYY-MM-DD, interpreted in your store’s local timezone. - Custom fields: prefix the header with
meta:, as inmeta:product_depth, and the value lands in that meta key.
Variable product columns
Variable products need one parent row plus one row per variation. The parent row uses type variable and lists every attribute value. Each variation row uses type variation, names the single value that applies to it, and points back at the parent.
- Parent: on each variation row, the parent’s SKU, or
id:plus the parent’s product ID. - Attribute 1 name / Attribute 1 value(s): repeat as Attribute 2, Attribute 3 and so on. On the parent row the values are comma-separated inside quotes, for example
"Red, Blue, Green". On a variation row, one value only. - Attribute 1 visible / Attribute 1 global:
1or0, controlling whether the attribute shows on the product page and whether it uses a global attribute taxonomy. - Attribute 1 default: the value preselected on the parent product page.
Separating attribute values with a pipe character is a convention from other import tools and it does not work here. Use commas. For more on structuring these files, see our variable product import guide.
Image URL formatting
Images import by URL. WooCommerce downloads each one into the Media Library and attaches it to the product, with the first URL becoming the featured image and the rest forming the gallery.
- URLs that 404 or redirect: test each one with
curl -Ifirst. Anything behind a login wall, hot-link protection, or a redirect chain fails silently. - Missing protocol: URLs need
https://orhttp://. Bare domains and relative paths break. - Multiple images in one cell: separate with commas and quote the field.
UTF-8 encoding, the silent killer
WooCommerce expects UTF-8. Files saved from older versions of Excel default to Windows-1252 or MacRoman, and every non-ASCII character (accented vowels, currency symbols, smart quotes) turns to garbled bytes on import.
- Excel (Windows/Mac): File → Save As → Browse → choose “CSV UTF-8 (Comma delimited)”.
- Google Sheets: File → Download → Comma-separated values (.csv). Exports UTF-8 by default.
- Apple Numbers: File → Export To → CSV. Exports UTF-8 by default.
- LibreOffice Calc: File → Save As → CSV, then set Character set to “Unicode (UTF-8)”.
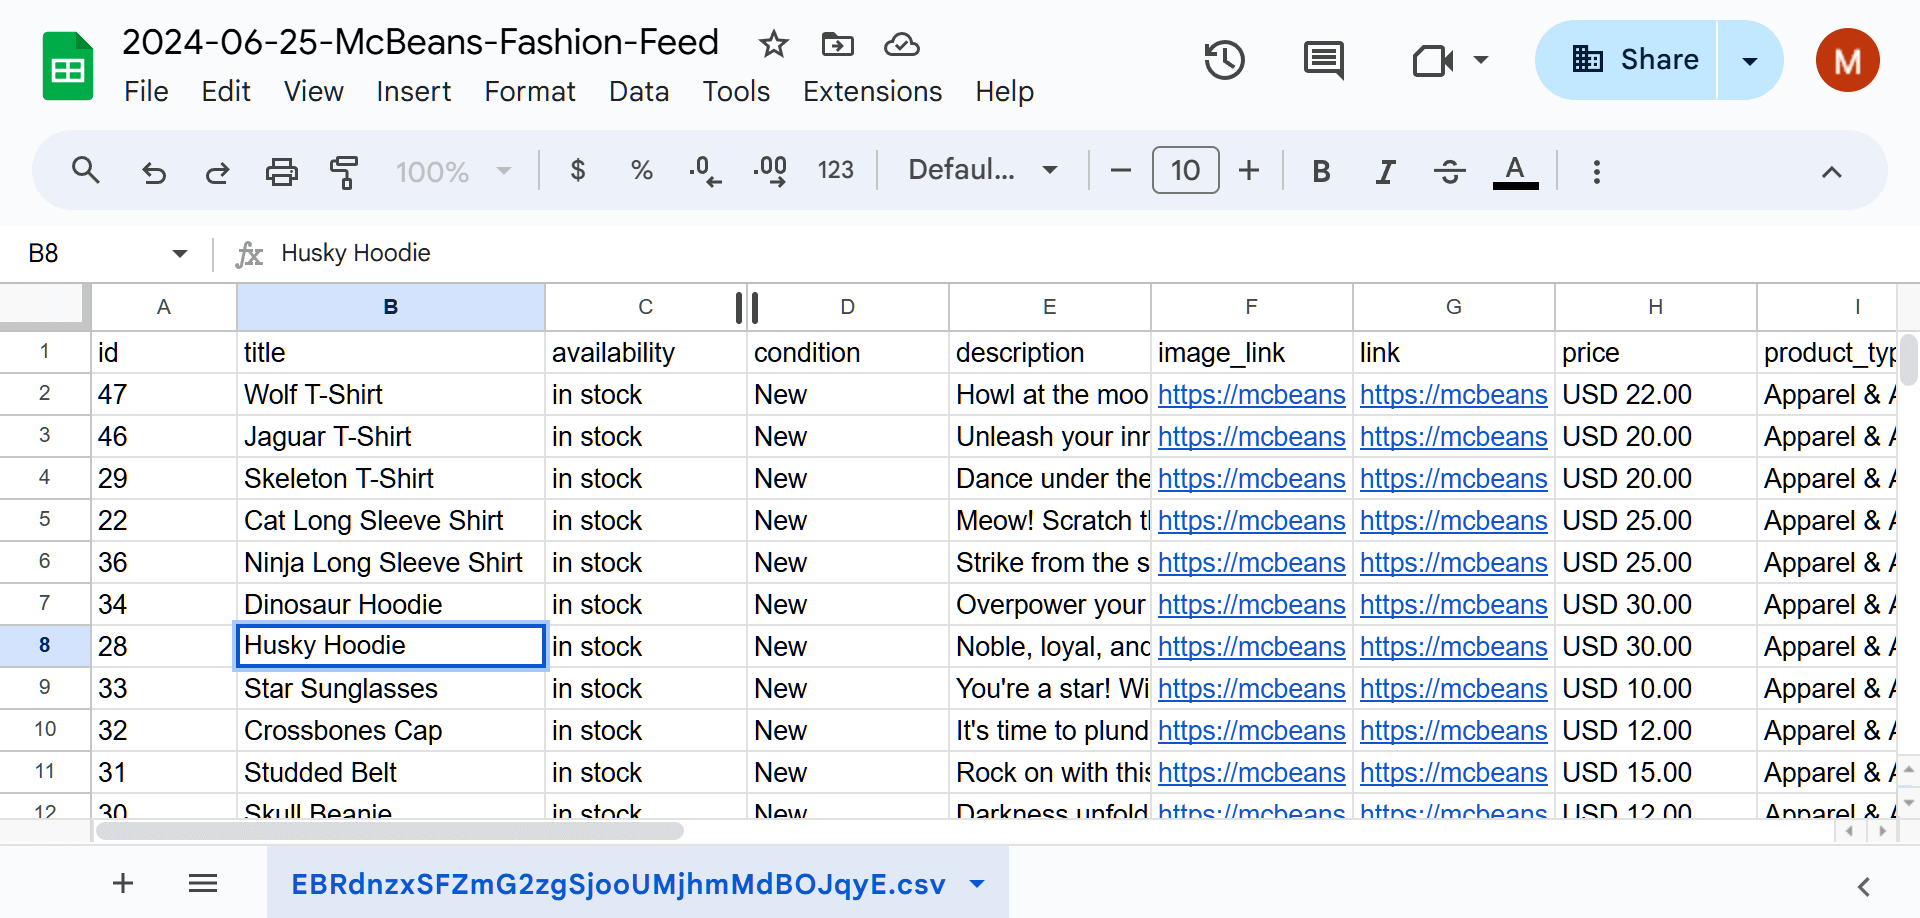
What We’ve Seen: A pattern we see constantly in support tickets is a CSV saved from Excel as plain “CSV”, imported, and product names with “café” landing as “café”. Re-saving as “CSV UTF-8 (Comma delimited)” and re-importing fixes it every time. It’s the most common CSV import problem we see, and the fix takes 10 seconds.
The Full Column Reference
Here is every column the WooCommerce product importer recognizes, with the values each one accepts. Use it as a checklist when you build your spreadsheet, because most import failures come from a value in the wrong shape rather than a missing column.
| Column | What it sets | Accepted values |
|---|---|---|
| ID | Existing product to update | Numeric product ID |
| SKU | Unique product key | Text. Auto-generated if blank |
| Name | Product title | Text (the one required column) |
| Type | Product type | simple, variable, variation, grouped, external, virtual, downloadable |
| Published | Publish state | 1 published, 0 private, -1 draft |
| Is featured? | Featured flag | 1 or 0 |
| Description | Full description | Text, HTML allowed |
| Short description | Catalog summary | Text, HTML allowed |
| Regular price | Standard price | Numeric, no currency symbol |
| Sale price | Discounted price | Numeric |
| Date sale price starts / ends | Sale window | YYYY-MM-DD, store timezone |
| In stock? | Stock status | 1 or 0 |
| Stock | Quantity | Numeric, parent for variations, blank to disable management |
| Low stock amount | Low stock threshold | Numeric or blank |
| Backorders allowed? | Backorder rule | 1, 0, or notify |
| Sold individually? | One per order | 1 or 0 |
| Weight / Length / Width / Height | Shipping dimensions | Numeric, store units |
| Categories | Product categories | Comma-separated, > for hierarchy |
| Tags | Product tags | Comma-separated |
| Images | Featured plus gallery | Full URLs, comma-separated, first is featured |
| Parent | Variation’s parent | Parent SKU or id: plus ID |
| Attribute N name | Attribute label | Text, or a global attribute name |
| Attribute N value(s) | Attribute values | Comma-separated in quotes on the parent, single value on a variation |
| Attribute N visible / global | Display and taxonomy flags | 1 or 0 |
| Attribute N default | Preselected variation | One of the attribute’s values |
| meta:your_key | Custom field | Any value, stored to that meta key |
You don’t need all of these. Include the columns you actually want to set and leave the rest out entirely, because a column you omit is simply skipped while a column left blank can overwrite existing data on an update.
How To Import A CSV Into WooCommerce: 3 Methods Compared
There are three ways to get a CSV into a WooCommerce store, and for most stores the first one is the answer. The built-in importer is free, handles every standard product type, and needs nothing installed.
Method 1: the built-in WooCommerce importer
WooCommerce ships with a CSV importer at Products → All Products → Import. It handles simple and variable products, categories and tags, images from URLs, and custom fields through the meta: prefix.
Its Column Mapping screen reads your header row and suggests a WooCommerce field for each column, with a dropdown to correct anything it guesses wrong. A header called “Product SKU” or “Item Code” maps fine, so you don’t need to rename your supplier’s columns before importing.
Its real constraints are operational rather than structural: it runs manually, reads CSV only, and processes your whole file in one pass, which server limits can cut short on very large catalogs.
Method 2: a dedicated import plugin
A third-party import plugin earns its cost when your workflow needs automation the built-in tool doesn’t offer: imports on a schedule, a supplier feed pulled straight from a URL or FTP server, or source files in XML or JSON.
If your imports are manual and occasional, this is money you don’t need to spend. The built-in importer covers the same product data.
Method 3: direct database import (advanced)
For one-off migrations of 50,000+ products, some developers write directly to the wp_posts and wp_postmeta tables, bypassing the importer entirely.
This is rarely the right approach. WooCommerce spreads product data across multiple tables with specific relationships, and direct writes skip the hooks that SEO, cache, and search plugins rely on to update their indexes. Stick with Method 1 unless you have a specific reason and a developer who knows the data model.
Step-By-Step CSV Import Walkthrough
Running a WooCommerce import CSV through the built-in importer takes six steps from spreadsheet to finished catalog. The whole flow lives in the WordPress admin and nothing needs installing first.
- Prepare your spreadsheet. Save as CSV UTF-8 and check your values against the column reference above.
- Open the importer. Go to Products → All Products and click Import.
- Choose your file. Upload it, or open Advanced options and give a server file path if the file is too big to upload.
- Decide new or update. Check Update existing products if this file should update your catalog rather than add to it.
- Map your columns. Review each suggested field on the Column Mapping screen and set anything marked “Do not import” that you actually want.
- Run it, then spot-check. Click Run the importer, then open 3 to 5 finished products and confirm the data, images, and variations landed correctly.
What We’ve Seen: Store owners often skip the spot-check because the importer says “success.” Then a customer hits a broken product page two weeks later. Always open a handful of imported products before assuming the import worked end to end.
Common WooCommerce CSV Import Errors And How To Fix Them
A WooCommerce import CSV usually fails for one of five reasons. Work through them in order, because the first two account for most failures.
- Non-UTF-8 encoding: garbled characters in names, descriptions, or categories almost always mean the file encoding. Re-save as UTF-8 and re-import.
- Columns left unmapped: anything the importer doesn’t recognize defaults to “Do not import” and is silently skipped. Read the Column Mapping screen before running it rather than clicking straight through.
- Image URLs that fail to fetch: test them with
curl -I. URLs behind authentication, hot-link protection, or redirects fail without warning. - Variation rows missing a parent: each variation needs a Parent value matching its parent’s SKU or ID. Without it, variations import as orphaned simple products.
- Timeouts on large files: PHP’s max_execution_time defaults to 30 seconds through a web server. Split the file into batches of 500 to 1,000 rows, or raise the limit in your PHP configuration.
For deeper troubleshooting, see our WooCommerce product import troubleshooting guide.
Next Steps
Get your WooCommerce import CSV right once and every import after it gets easier. Build your spreadsheet around the column reference above, save it as UTF-8, and run a test import of 5 to 10 rows before committing the full file. If the test lands cleanly, scale up.
For the full walkthrough of the importer itself, including variable products and bulk updates, see our guide on how to import WooCommerce products. If your source data lives in a spreadsheet, learn how to import products from Excel to WooCommerce step by step, including the XLS-to-CSV conversion.
Comparing formats first? See our CSV vs XML comparison. Already have products in your store and want a correctly structured file to start from, export your current catalog with Store Exporter Deluxe and edit that instead of building one from scratch.
Frequently Asked Questions
What format does WooCommerce need for CSV import?
WooCommerce needs a comma-delimited, UTF-8 encoded file with a header row. Only the Name column is genuinely required, plus Type for anything that isn’t a simple product. Your headers don’t need to match WooCommerce’s names exactly, because the Column Mapping screen lets you assign each one by hand.
Can WooCommerce import variable products from CSV?
Yes, the built-in WooCommerce importer handles variable products from CSV with no extra plugin. Your file needs one parent row with type variable listing all attribute values comma-separated in quotes, then one row per variation with type variation and a Parent value pointing at the parent’s SKU or ID.
What’s the maximum CSV file size for WooCommerce import?
The limit is set by your server, not by WooCommerce, through the PHP upload_max_filesize and post_max_size values. The import screen displays your current maximum. For anything larger, upload the file over FTP and point the importer at its server path through Advanced options, or split it into smaller batches.
Why is my WooCommerce CSV import not working?
The most common causes are non-UTF-8 encoding, columns left unmapped on the Column Mapping screen, image URLs that fail to fetch, variation rows missing a Parent value, and timeouts on large files. Our troubleshooting guide walks through each fix in detail.
Can I import images via CSV in WooCommerce?
Yes. Put full image URLs in the Images column, comma-separated and wrapped in quotes, and the importer downloads each one into your Media Library. The first URL becomes the featured image and the rest become the gallery. URLs must be publicly reachable, so local file paths and hot-link-protected images will fail.
Can I import custom fields in a WooCommerce import CSV?
Yes, prefix the column header with meta: and the importer writes the value to that meta key. A header of meta:product_depth populates the product_depth custom field on every row. You can also map an unrecognized column to a custom field manually from the Column Mapping screen.