
A scheduled export that silently stops delivering, or a Quick Export that finishes with fewer rows than you expected, is easy to miss until a customer or colleague asks where the file went. The Audit Log in Store Exporter Deluxe gives you a running record of every export your store runs, so you can check what happened, when, and why, without digging through server logs.
This article covers finding the Audit Log, reading what each entry tells you, controlling what gets logged, filtering and clearing entries, and setting how long entries stick around.
Prerequisites
| Requirement | Details |
|---|---|
| Plugin version | Store Exporter Deluxe 5.4.3 or later, which introduced the Audit Log along with the sidebar dashboard (not the older tab-bar admin) |
| Permissions | Your WordPress account needs the manage_woocommerce capability |
| Logging enabled | Audit logging is on by default. If your Audit Log sidebar item is missing, see Troubleshooting below |
Step 1: Open the Audit Log
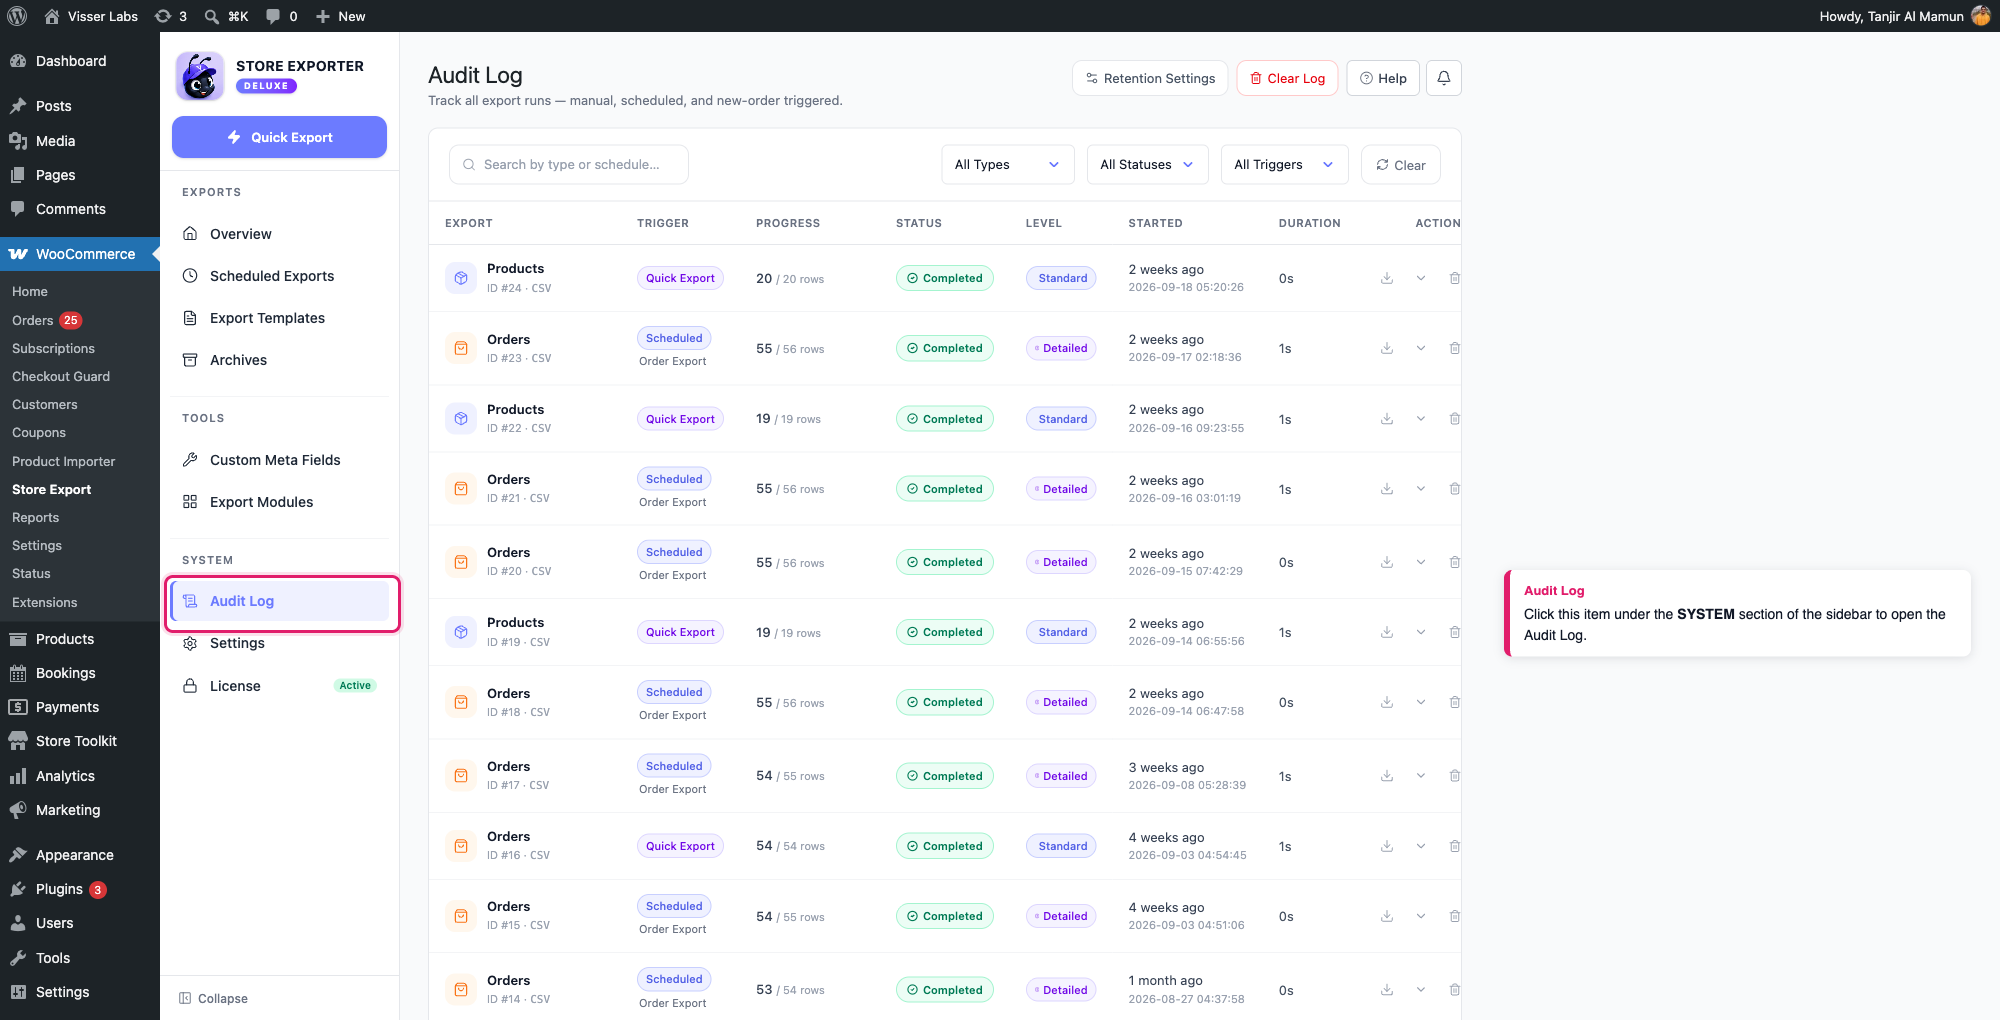
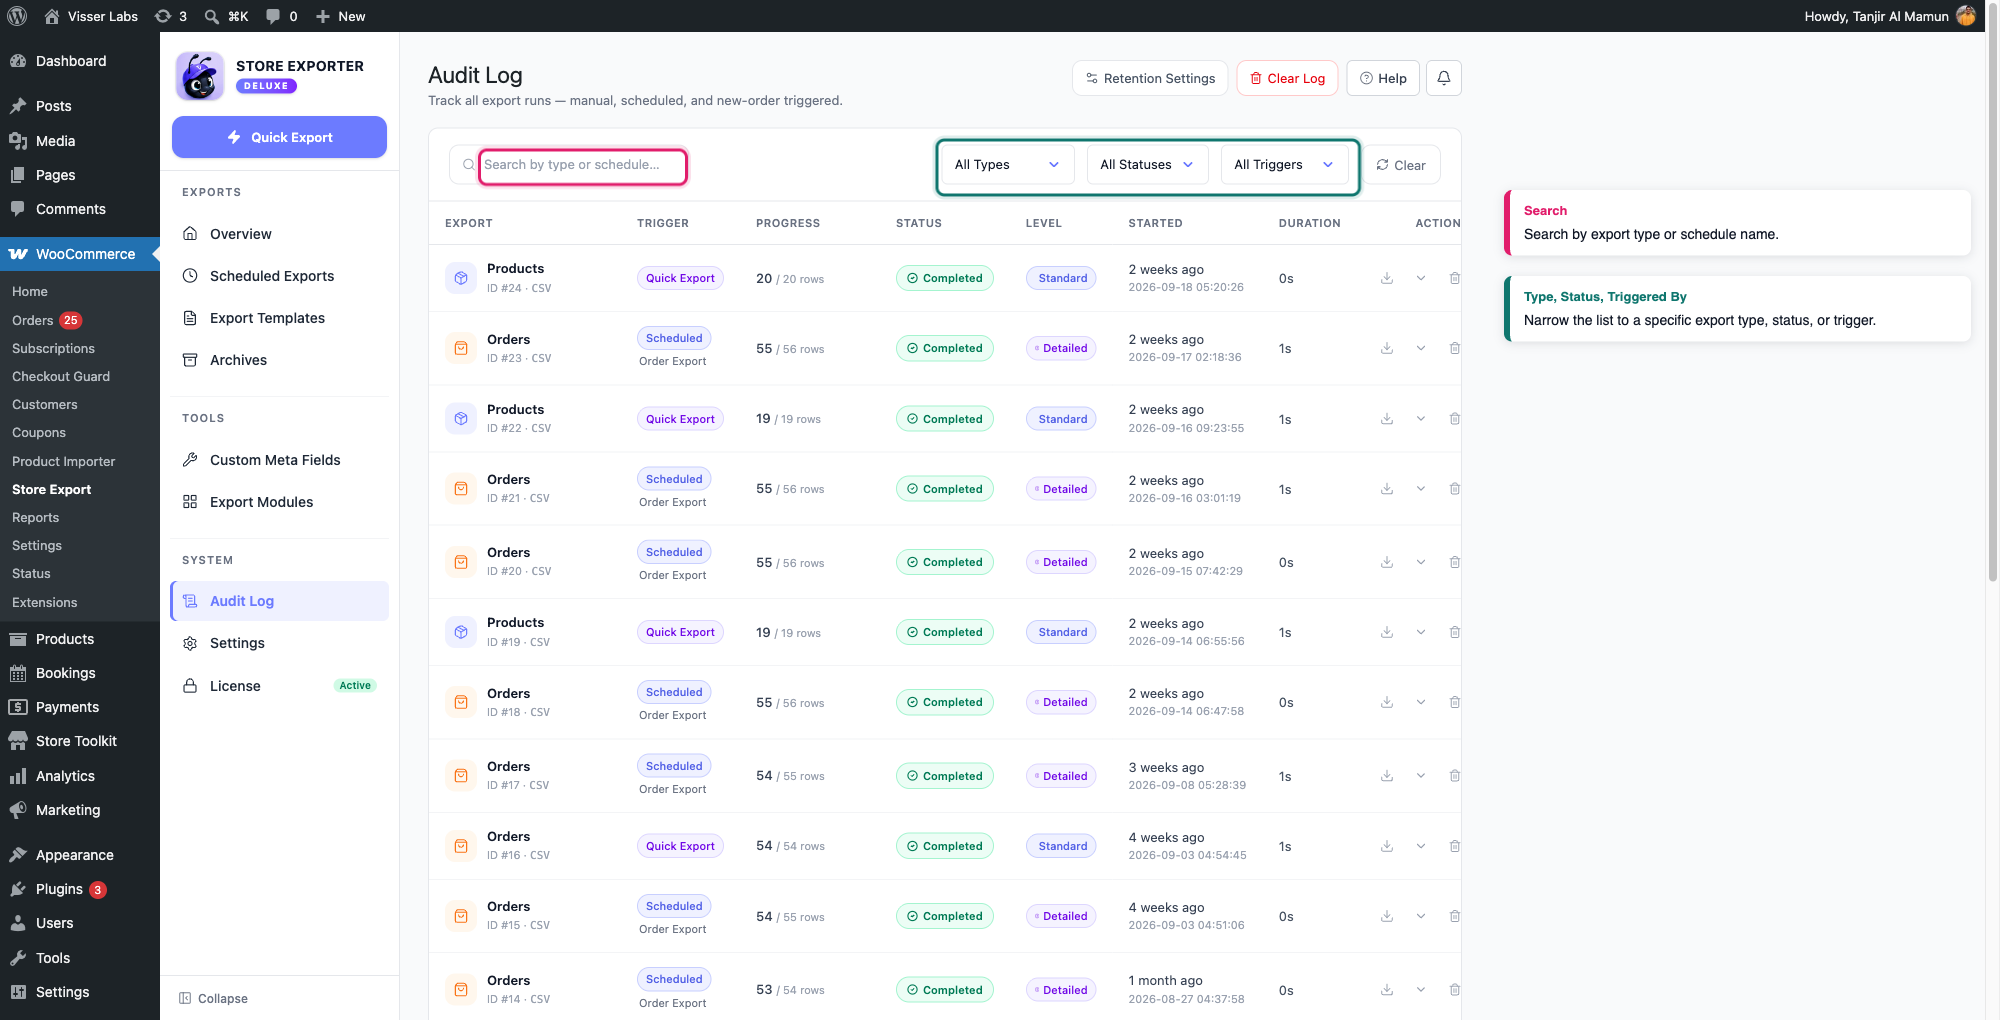
Open WooCommerce → Store Export from the WordPress admin menu, then select Audit Log from the SYSTEM section of the sidebar. This opens a table of every export run the plugin has recorded.
Step 2: Read an entry
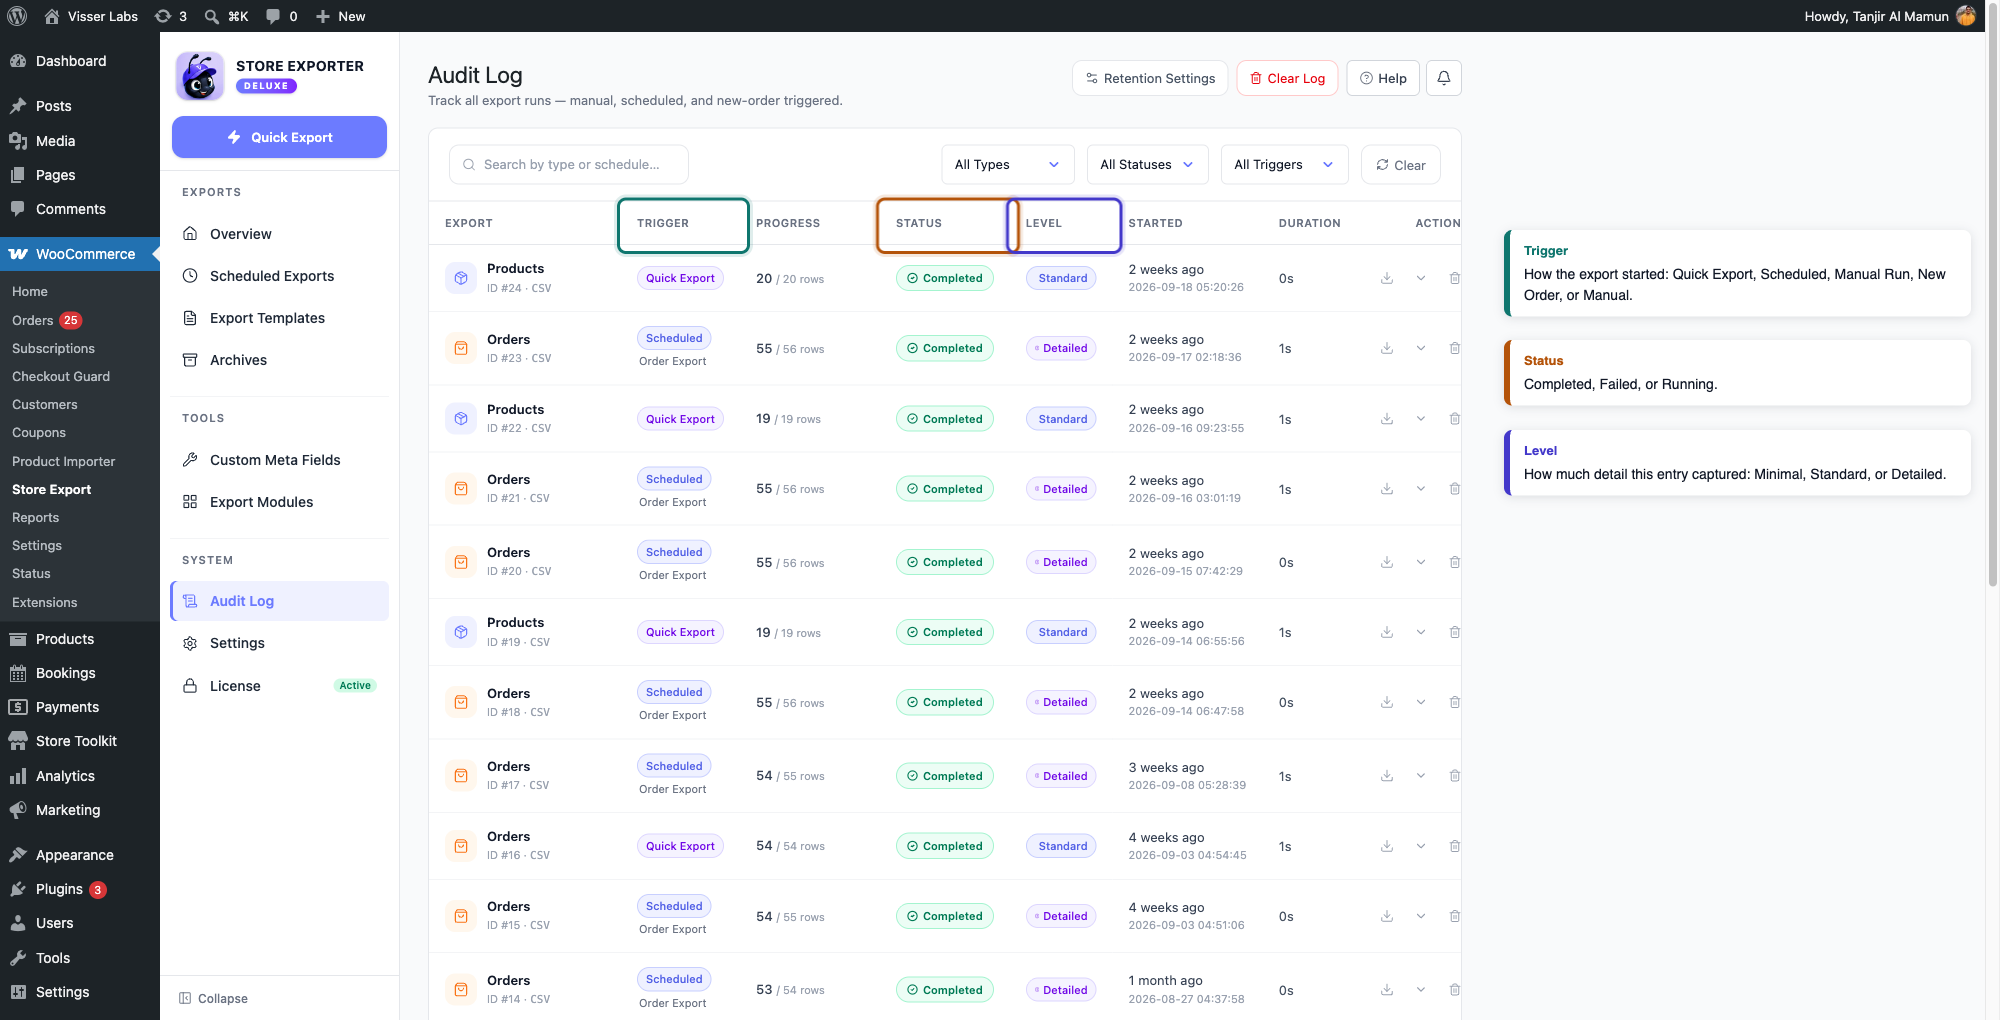
Each row in the table covers one export run, with these columns:
- Export: the export type (for example, Products), the export’s ID number, and the file format used
- Trigger: how the export started, shown as Quick Export, Scheduled, Manual Run, New Order, or Manual
- Progress: a live progress bar while the export is running, or the number of rows processed against the total once it’s known
- Status: Completed, Failed, Running, or Cancelled
- Level: how much detail was captured for this entry, Minimal, Standard, or Detailed
- Started: when the export began, as a relative time and the exact timestamp
- Duration: how long the export took to finish
- Actions: a download icon if the exported file is still available, a chevron to expand the row, and a delete icon for that entry
Step 3: Control what the Audit Log captures
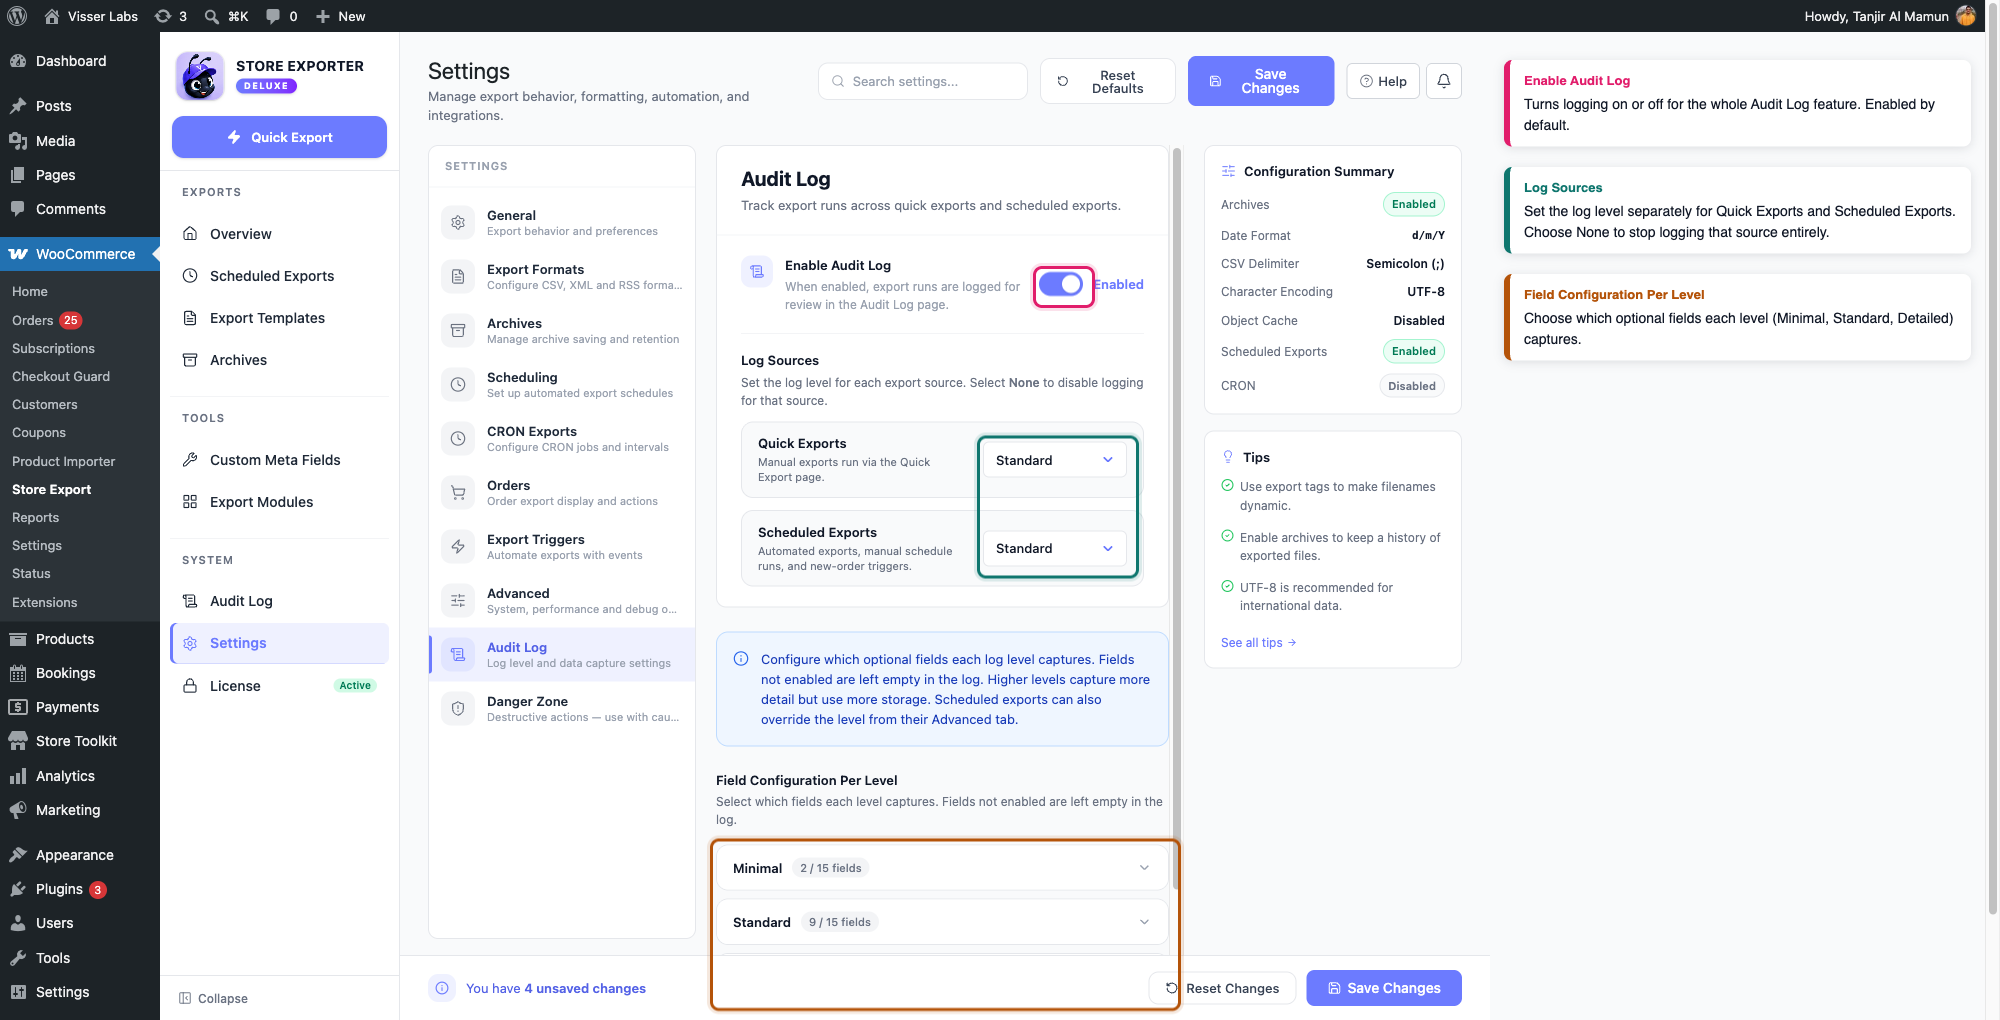
Head to Settings → Audit Log to decide whether logging runs at all and how much detail it records.
- Enable Audit Log: turns the whole feature on or off. It’s on by default, and switching it off removes the Audit Log item from the sidebar entirely.
- Log Sources: sets the log level separately for Quick Exports and Scheduled Exports. Choose None, Minimal, Standard, or Detailed for each. Setting a source to None stops it from being logged at all.
- Field Configuration Per Level: choose which optional fields each level captures. A field left unchecked for a level stays empty in the log, even for entries logged at that level.
Click Save Changes at the top right to apply your settings.
Step 4: Expand a row for more detail
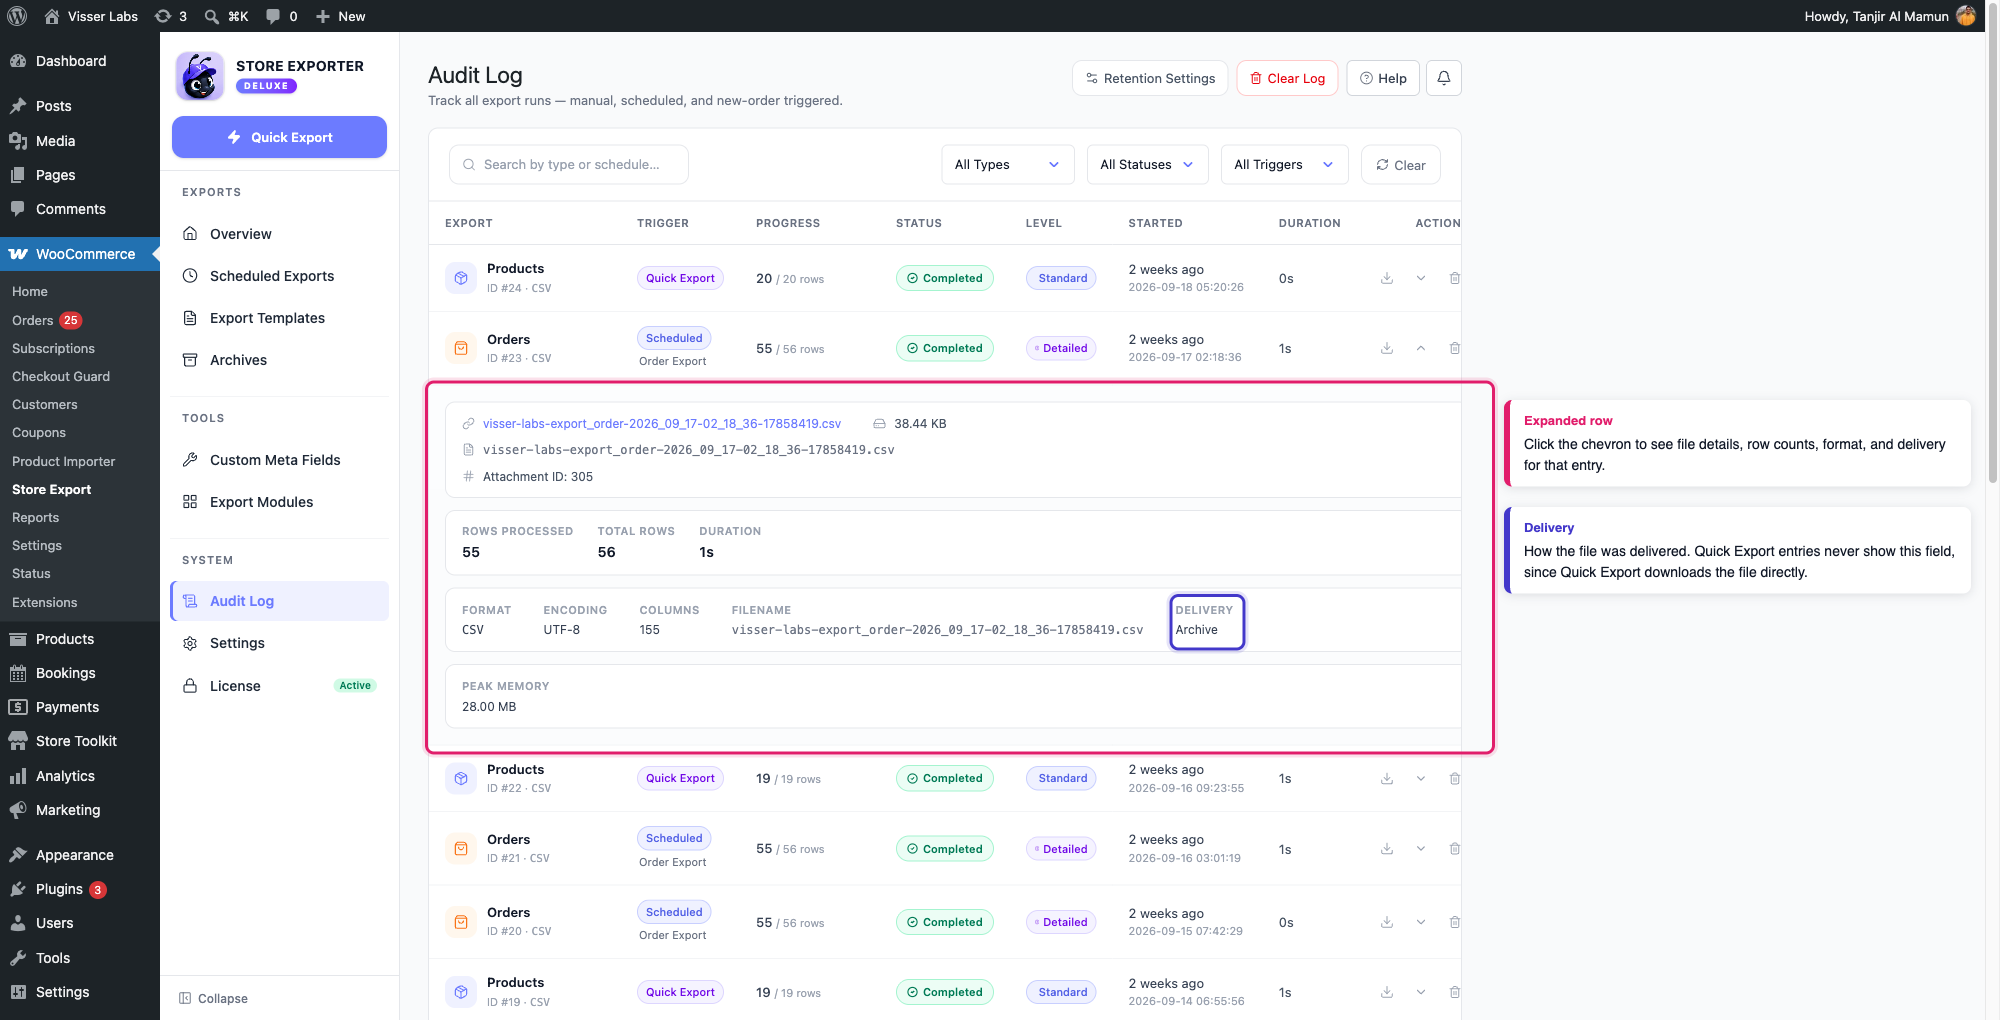
Click the chevron on a row to expand it. Depending on the entry’s log level, the expanded view can include:
- Error: the error message, if the export failed
- File: the exported file’s name, size, and media library attachment ID, with a direct download link
- Row counts: how many records were processed
- Export metadata: the format, encoding, columns, and filename used
- Delivery: how the file was delivered, archived, saved, emailed, or sent by FTP
- User and performance: who triggered the export, their IP address, and peak memory used
A Quick Export entry never shows a delivery method, since Quick Export downloads the file directly rather than delivering it elsewhere. Delivery details only appear on Scheduled, Manual Run, and New Order entries.
Step 5: Filter and search entries
Above the table, narrow down the list using the search box and the All Types, All Statuses, and All Triggers dropdowns. This is the fastest way to find a specific failed export or confirm which trigger ran a given export.
Step 6: Clear log entries
To remove a single entry, click its delete (trash) icon in the Actions column.
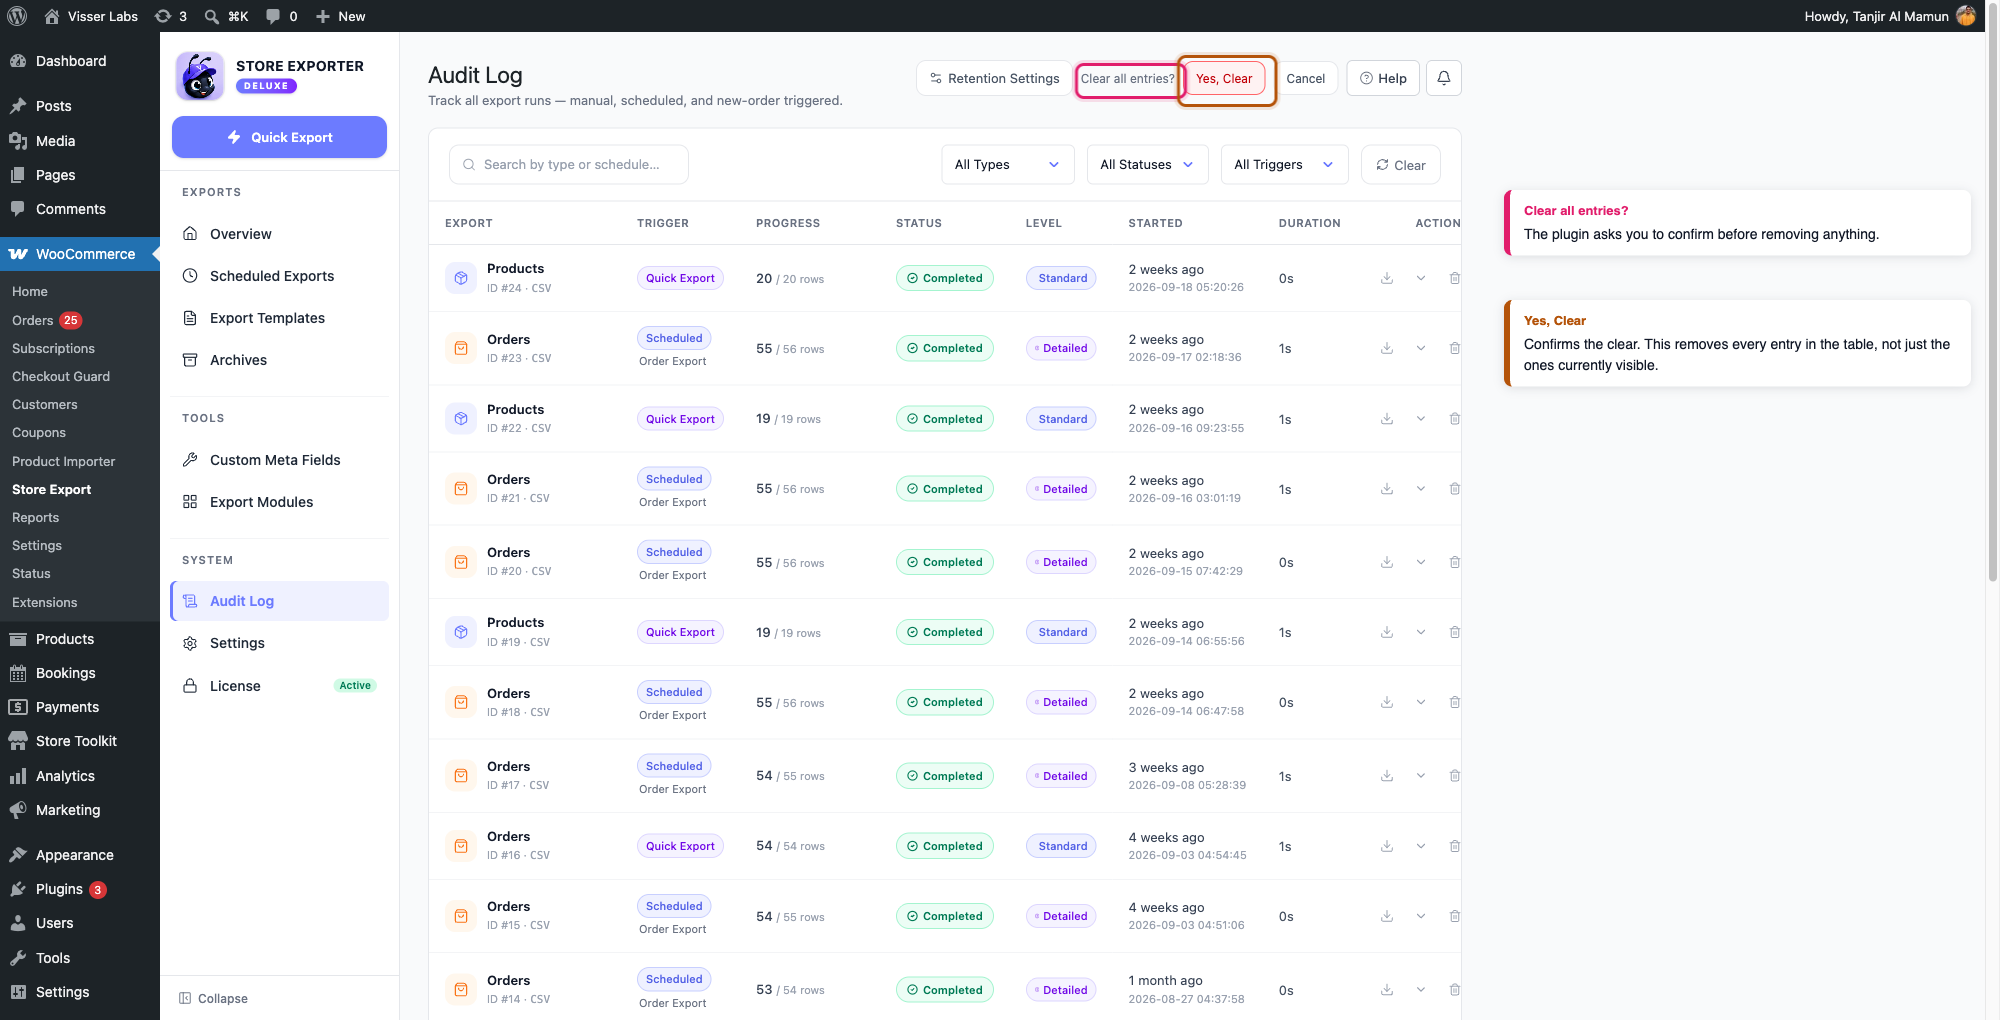
To clear everything, click Clear Log. The plugin asks you to confirm with Clear all entries? before removing anything. Click Yes, Clear to continue, or Cancel to back out.
Step 7: Set the retention period
Entries don’t need to be cleared manually to stay tidy. Click Retention Settings at the top of the Audit Log page to open the retention panel, then set Log Retention Period in days and click Save.
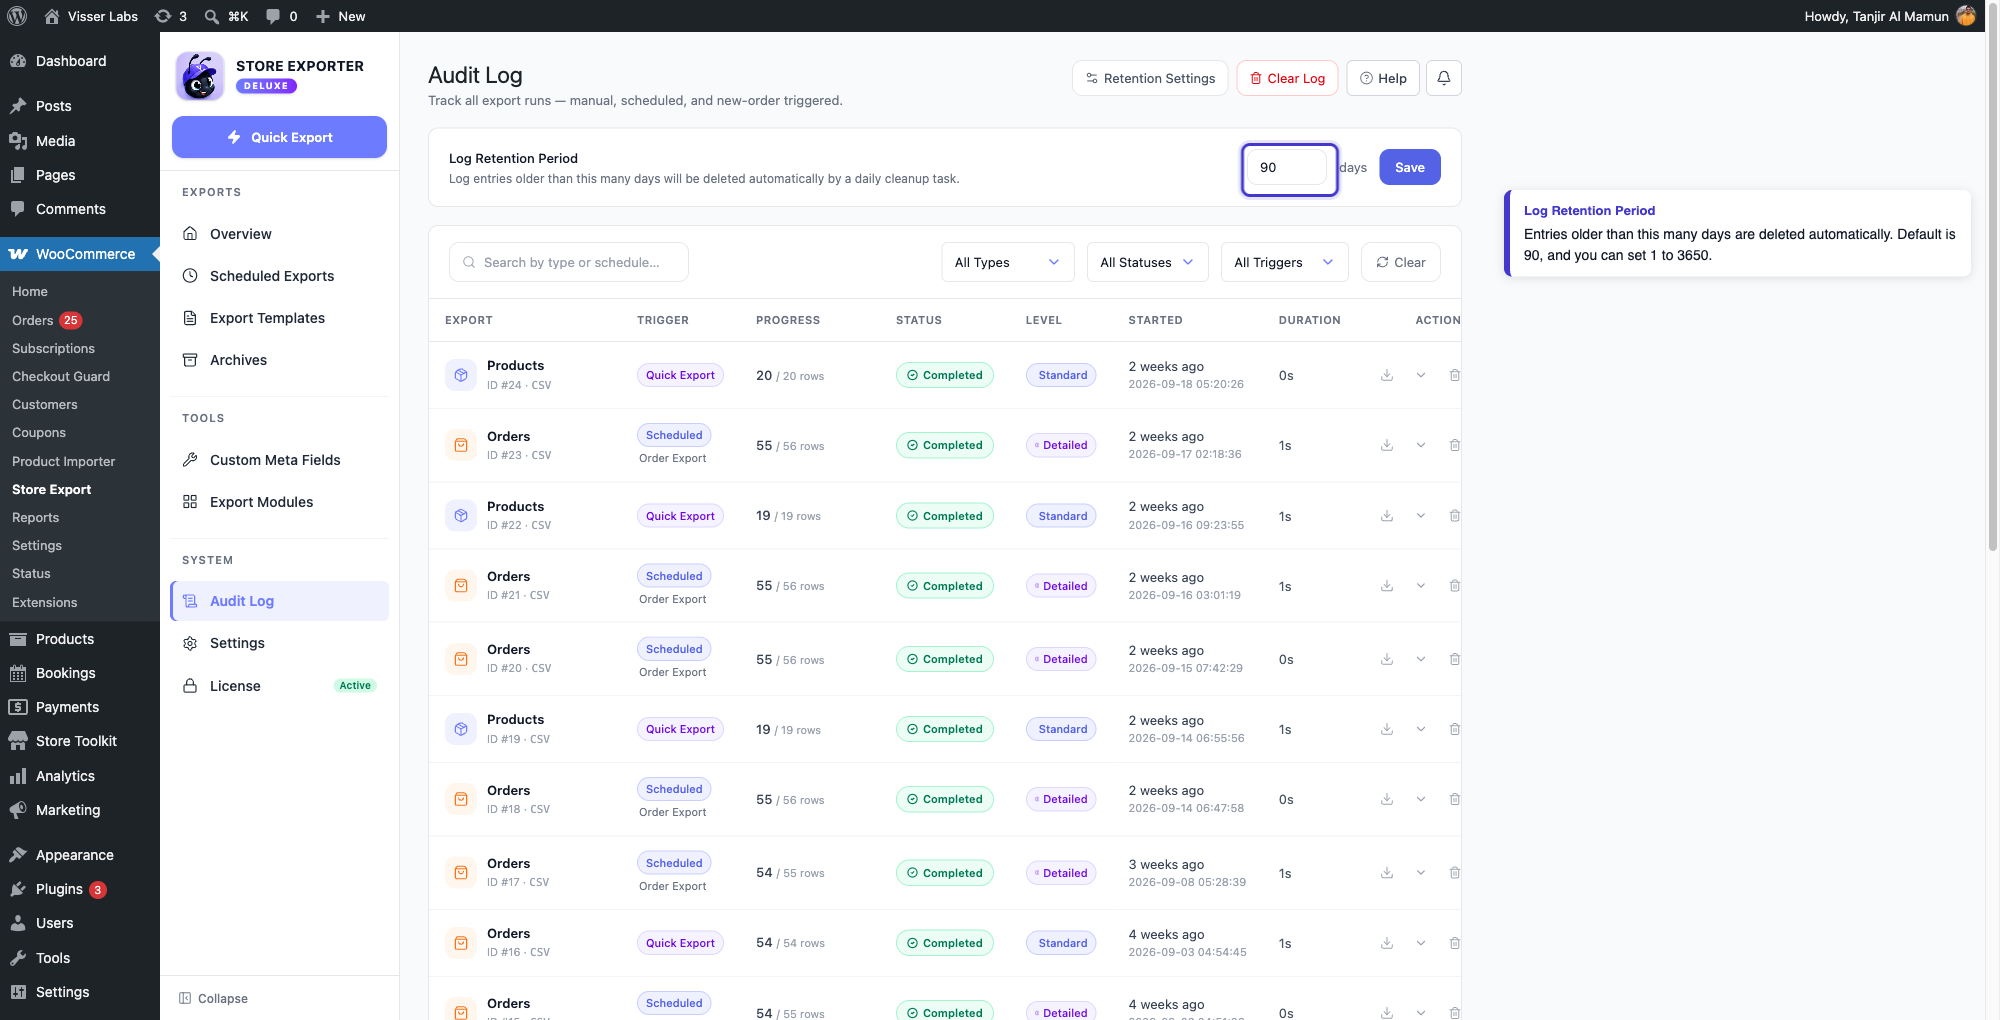
Store Exporter Deluxe keeps entries for 90 days by default, and you can set this anywhere from 1 to 3650 days. A background task checks the log once a day and removes anything older than your chosen period automatically, so you don’t need to come back and clear old entries yourself.
Troubleshooting
FAQ
Need more help?
If you’re using Store Exporter Deluxe and run into an issue with the Audit Log, open a support ticket, and our team will help you track down what happened.
If you’re using the free Store Exporter plugin, ask on the WordPress.org support forum, and our team will get back to you there.
