
Most of what you’ll ever do in Store Exporter Deluxe starts on one screen. Whether you need a one-off backup of your products, a customer list for a mailing tool, or a quick order report before a call with your accountant, Quick Export is where you’ll do it. It’s the plugin’s main entry point, so knowing your way around it makes every other export task faster.
This article covers the Quick Export screen’s layout, its step-by-step wizard, and how it’s different from a Scheduled Export.
Prerequisites
| Requirement | Details |
|---|---|
| Plugin | Store Exporter Deluxe is active and licensed |
| WooCommerce | Active, since Quick Export pulls its data from your WooCommerce store |
| Account access | An Administrator or Shop Manager account |
Where to find Quick Export
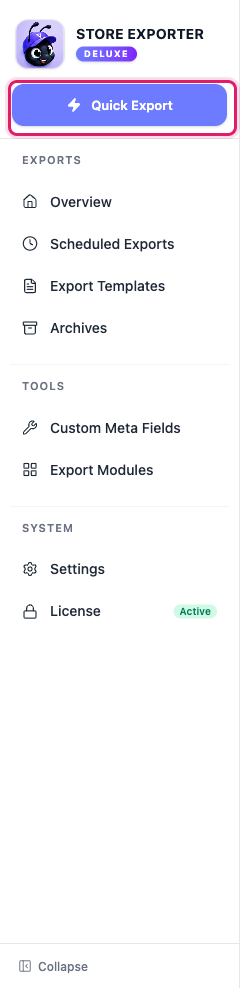
Open WooCommerce → Store Export from the WordPress admin menu. In the sidebar, click Quick Export. This is a standalone button above the EXPORTS group, not one of the items inside it, since it’s the fastest path into the plugin rather than a saved export type.
The Quick Export wizard
Quick Export runs as a single accordion page with three steps: Select Export Type, Export Fields, and Export Options. A fourth step, Filters & Sorting, slots in between fields and options once you choose a type that supports filtering, and the numbering shifts to match. Each step expands when you click its header, and a summary appears next to a step once you’ve filled it in. Steps build on each other, so the steps after Select Export Type stay locked until you’ve completed it first.
Step 1: Select Export Type
Choose what you want to export from the tiles shown, for example, Products, Orders, Users, or Coupons. Each tile shows how many records are available for that type.

Some types only appear with real data if a related plugin is active. For example, the Subscriptions tile needs WooCommerce Subscriptions, and the Bookings tile needs WooCommerce Bookings. Without the matching plugin active, that type’s tile shows 0 records and stays greyed out (not selectable). If a type you already selected has 0 records, for example after you click Refresh, a “No records to export” notice appears below the step. Pick a different type, or add data and click Refresh.
Step 2: Export Fields
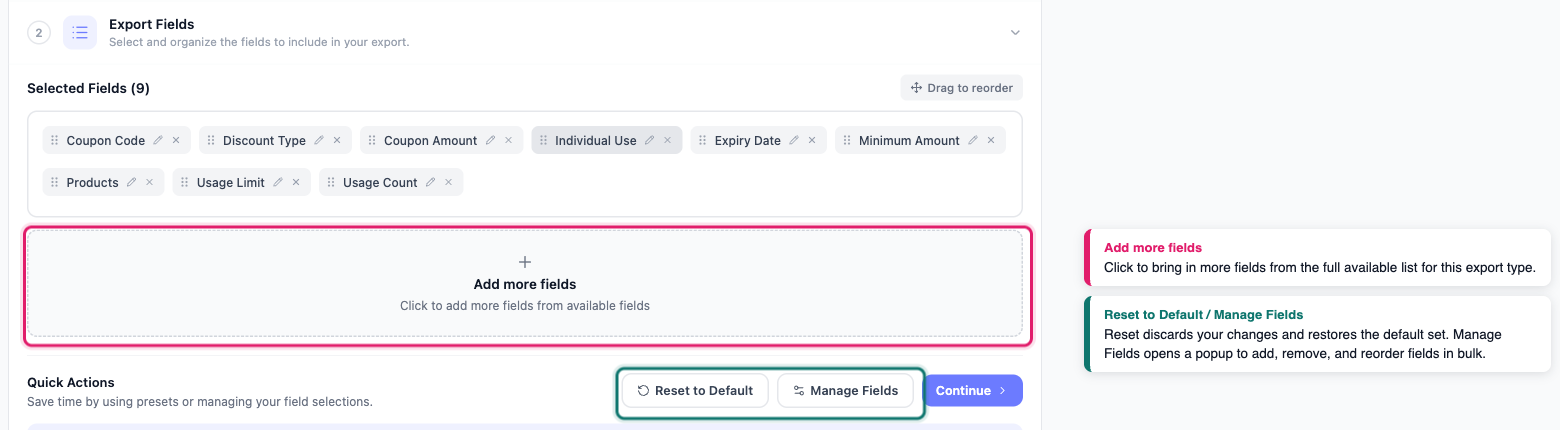
Choose which columns your export includes. Enabled fields appear as chips, in the order they’ll appear as columns in your file. Drag a chip to reorder it.
Click Add more fields to bring in additional fields, or click Manage Fields to open a popup where you can add, remove, and reorder fields in bulk. If you’ve added any custom meta fields for this export type, they’re available here alongside the built-in ones. Click Reset to Default at any point to discard your changes and start over with the type’s default field set.
Step 3: Filters & Sorting
This step appears only for export types that support filtering, so on other types you’ll go straight from Export Fields to Export Options, and that step becomes Step 3 instead. Narrow down which records get included and choose how they’re ordered. Each filter is a card with a checkbox, for example Stock Status or Published Date. Tick the checkbox to turn a filter on, and click the card to open its options. A card shows how many values you’ve selected, or the date range you picked. Depending on the filter, its control is a dropdown, a multi-select list, a date range with quick presets, a number comparison, or a plain text field.
These filter cards are available from Store Exporter Deluxe 5.4.4:
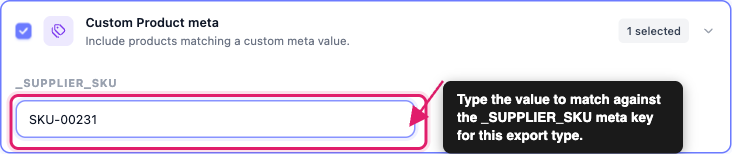
- Custom Product meta (on Product exports) and Custom Order meta (on Order exports) let you include only records where a specific custom meta key holds a value you enter. These cards only appear if you’ve already registered at least one meta key for that export type using the Custom Meta Fields tool. If you don’t see the card, register a meta key there first, then come back to Quick Export.
- User Membership (on User exports) lets you include only users belonging to specific membership plans, chosen from a Membership plans multi-select. This card only appears when WooCommerce Memberships is active, and you have at least one membership plan set up. If you don’t see the card, confirm WooCommerce Memberships is active and that a plan exists.
Term dropdown limit: The Categories, Tags, Brands and Shipping Class filters on Product exports, and the Product Category and Product Tag filters on Order exports, list up to 200 terms by default. If your store has more terms than that for one of these taxonomies, any term past the 200th won’t appear in the dropdown.
From Store Exporter Deluxe 5.4.5, a developer can raise or remove this limit with the woo_ce_quick_export_term_choices_limit filter, which receives the taxonomy slug as its second argument. Return -1 or 0 for no limit, or a whole number for a specific cap:
function my_custom_quick_export_term_choices_limit( $limit, $taxonomy ) {
    $brand_taxonomy = apply_filters( 'woo_ce_brand_term_taxonomy', 'product_brand' );

    return $taxonomy === $brand_taxonomy ? -1 : $limit;
}
add_filter( 'woo_ce_quick_export_term_choices_limit', 'my_custom_quick_export_term_choices_limit', 10, 2 );
This example raises the limit for brands only, and leaves categories, tags, and shipping classes at the default 200. The Product Brand filter on Order exports isn’t affected either way, since it already lists every brand with no cap. If your store has thousands of terms, return that number instead of -1, so a large selection is not cut short.
In the Sorting panel next to the filters, use Sort by and Order to control how your export is sorted.
Step 4: Export Options
Choose how the exported file itself is put together:
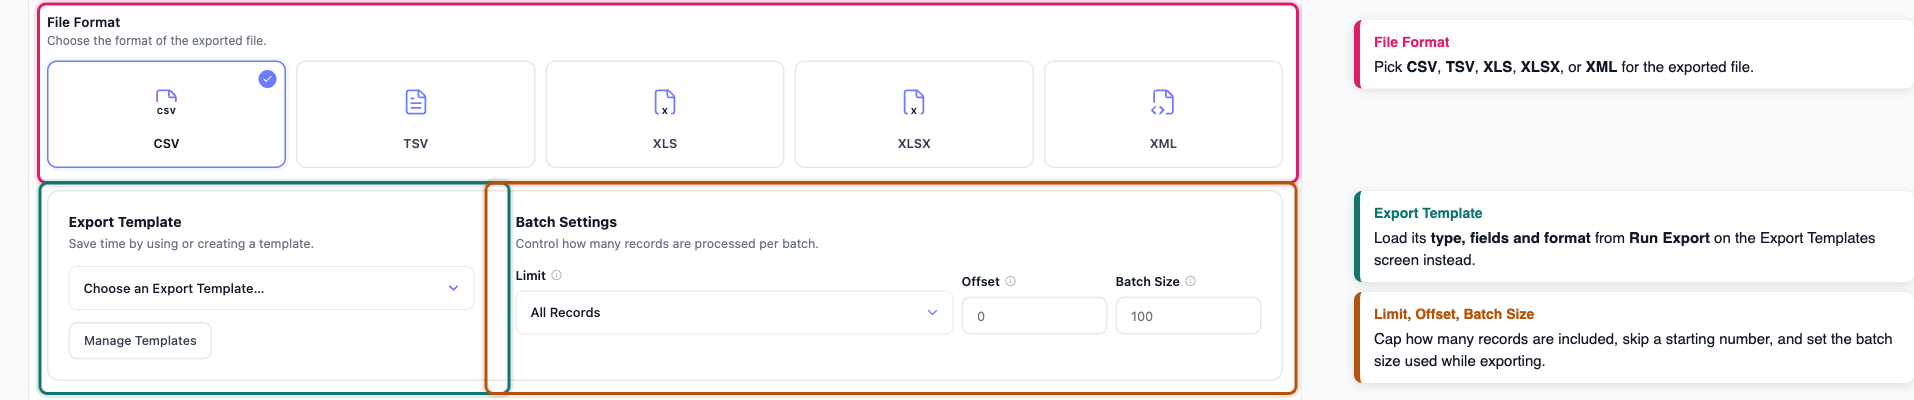
- File Format: pick CSV, TSV, XML, XLS, or XLSX from the format tiles.
- Description/Excerpt formatting: on Product, Order, Category, Tag, and Brand exports, choose to keep or strip the HTML tags in descriptions and excerpts. Product exports show more formatting options here too.
- Export Template: optionally apply a saved export template’s column labels (see How to use Export Templates in Store Exporter Deluxe). To load a template’s export type, fields, and format instead of setting them by hand, click Run Export on the template in Export Templates.
- Limit: cap the number of records included, using a preset or a custom number.
- Offset: skip a set number of records from the start of the results before applying the limit.
- Batch Size: set how many records are processed per batch while the export runs.
Running the export
As soon as you select an export type, a summary bar appears showing your chosen export type, field count, filter count, format, and an estimated row count. Click Run Export to start.
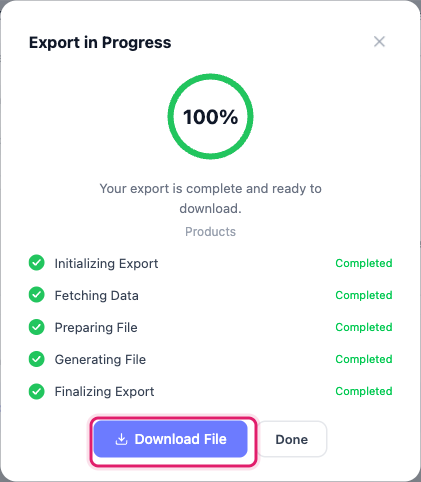
A progress dialog tracks the export through initializing, fetching data, preparing the file, generating the file, and finalizing the export. When it finishes, click Download File to save the export to your computer. Click Cancel at any point before running to discard your current selections and return to the Overview screen.
Quick Export vs. Scheduled Exports
Quick Export and Scheduled Exports both use the same underlying export engine and filters, but they solve different problems.
| Feature | Quick Export | Scheduled Exports |
|---|---|---|
| When it runs | Immediately, when you click Run Export | On a recurring schedule you set, or on demand |
| Setup saved for next time | Field selection is remembered per export type; filters aren’t, and you choose them again each time (or load an Export Template with Run Export) | Yes, saved as its own schedule with its own settings |
| Output | Downloads directly to your computer | Delivered by your chosen method: Media Library, server, email, POST to URL, or FTP/SFTP |
| Best for | A one-off export you need right now | A recurring export you don’t want to run by hand every time |
If you find yourself running the same Quick Export over and over, that’s usually a sign to set it up as a Scheduled Export instead. For detailed instructions, see How to schedule exports in Store Exporter Deluxe.
Troubleshooting
woo_ce_quick_export_term_choices_limit filter, covered above in Step 3: Filters & Sorting.FAQ
Related articles
- How to schedule exports in Store Exporter Deluxe
- Exporting custom product, order, and order item meta
- How to export users
- How to export WooCommerce products with Store Exporter Deluxe
Need more help?
If you’re using Store Exporter Deluxe and run into an issue on the Quick Export screen, open a support ticket, and our team will help you get your export running.
If you’re using the free Store Exporter plugin, ask on the WordPress.org support forum, and our team will get back to you there.
