
Running a marketplace with WooCommerce Product Vendors means your vendor details live in one place and your products and orders in another. When you need a vendor list for an accountant, a payout check, or a move to another system, copying it by hand takes far too long.
Store Exporter Deluxe fixes that with a dedicated Product Vendors export type. It also adds vendor columns to your Products and Orders exports, so you can see which vendor owns what.
This article covers how to confirm the integration is active, how to export your vendors, and which fields you get.
How the integration works
When WooCommerce Product Vendors is active, Store Exporter Deluxe detects it and fills the Product Vendors export type with your vendor records. It also adds vendor fields to the Products and Orders export types. These extra fields appear only while the plugin is active.
Prerequisites
| Requirement | Details |
|---|---|
| Plugin | Store Exporter Deluxe is installed and active |
| Required plugin | WooCommerce Product Vendors is installed and active |
| Vendor data | At least one vendor created in WooCommerce Product Vendors. With none, the export has nothing to include. |
| Admin access | An account that can manage WooCommerce exports. Administrators and Shop Managers have this by default. |
Confirm the integration is active
Before you export, check that Store Exporter Deluxe has picked up WooCommerce Product Vendors.
- Go to WooCommerce → Store Export in the WordPress admin menu.
- Click Export Modules in the TOOLS group of the sidebar.
- Type “Product Vendors” in the Search modules… box.
- Check that the Product Vendors row shows Active under Status.
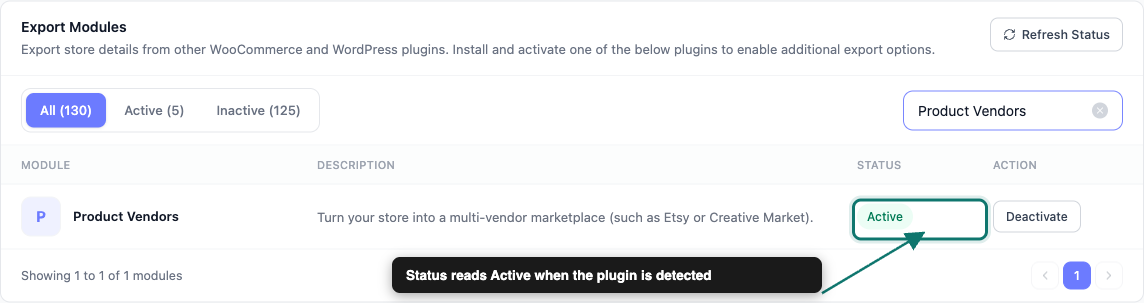
If the row shows Inactive, activate WooCommerce Product Vendors from Plugins, or click Install in that row if the plugin isn’t on your site yet. Then click Refresh Status on the same screen.
Step 1: Choose the Product Vendors export type
- Go to WooCommerce → Store Export.
- Click Quick Export in the sidebar.
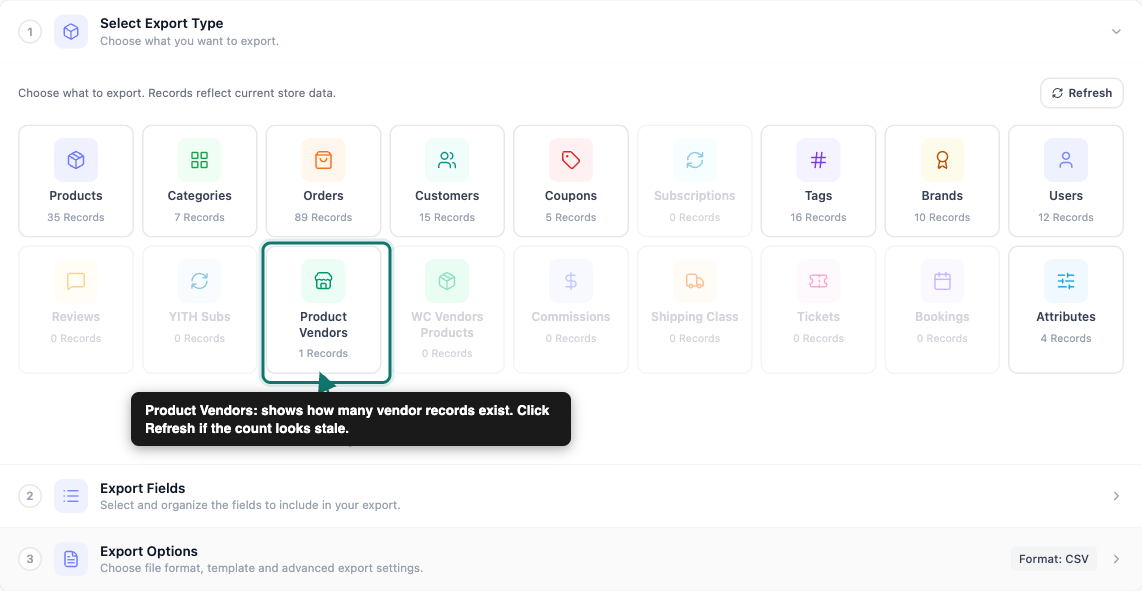
- On the Select Export Type step, click the Product Vendors tile. It sits next to the WC Vendors Products and Commissions tiles.
Step 2: Pick your export fields
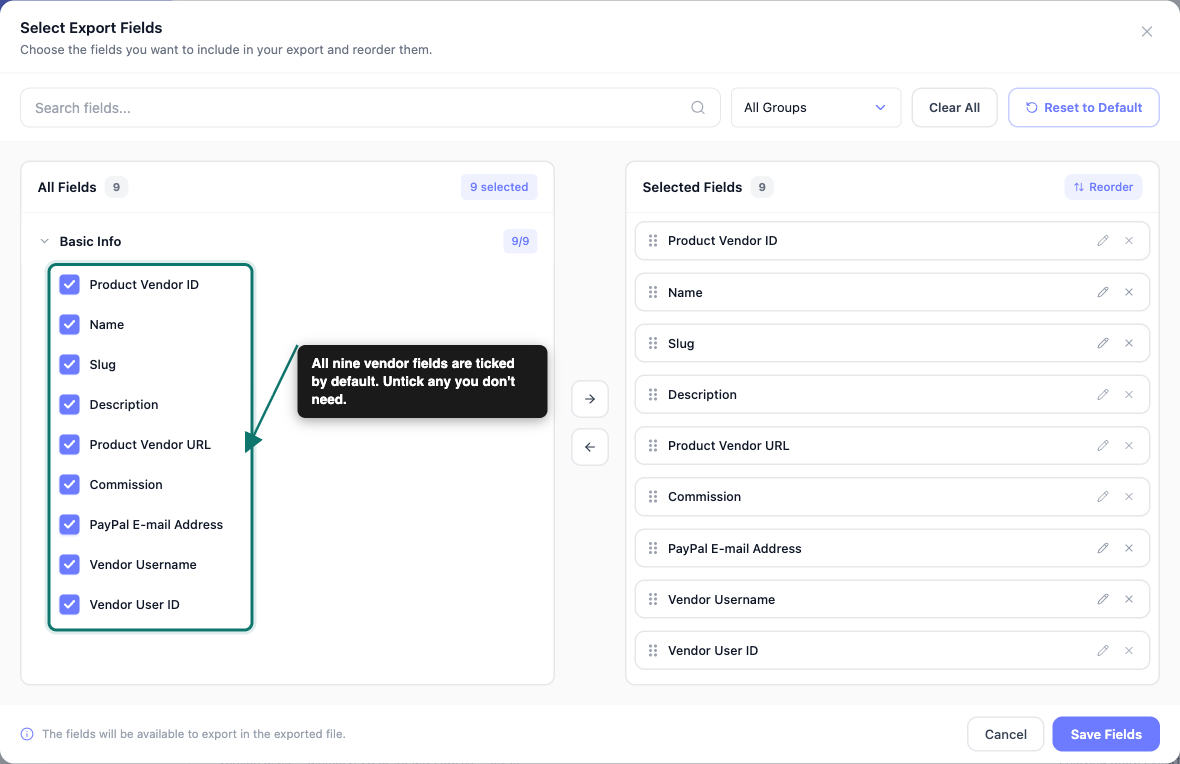
On the Export Fields step, your columns appear as chips under Selected Fields. A Product Vendors export starts with all nine fields selected. Here’s how to shape the list:
- Click Add more fields to open the Select Export Fields popup and add any field that isn’t already a chip.
- Click Manage Fields to open the same popup with the full list.
- Drag a chip to change the column order in your file.
- Click the pencil icon on a chip to rename that column heading. The underlying data stays the same.
- Click the X on a chip to drop that column.
- Click Save Fields in the popup to apply your selection.
The Product Vendors export type offers these nine fields, all under the Basic Info group in the popup:
| Field | What it contains |
|---|---|
| Product Vendor ID | The vendor’s ID in WooCommerce |
| Name | The vendor’s name |
| Slug | The vendor’s URL-friendly name |
| Description | A vendor notes value. It is often blank. |
| Product Vendor URL | The link to the vendor’s page on your store |
| Commission | The vendor’s commission rate. A percentage rate ends in %. |
| PayPal E-mail Address | The PayPal email saved on the vendor |
| Vendor Username | The username of each vendor admin |
| Vendor User ID | The WordPress user ID of each vendor admin |
If a vendor has more than one admin, Vendor Username and Vendor User ID list them all in the same cell.
When your fields are set, click Continue to open Export Options.
Step 3: Set your format and run the export
On the Export Options step:
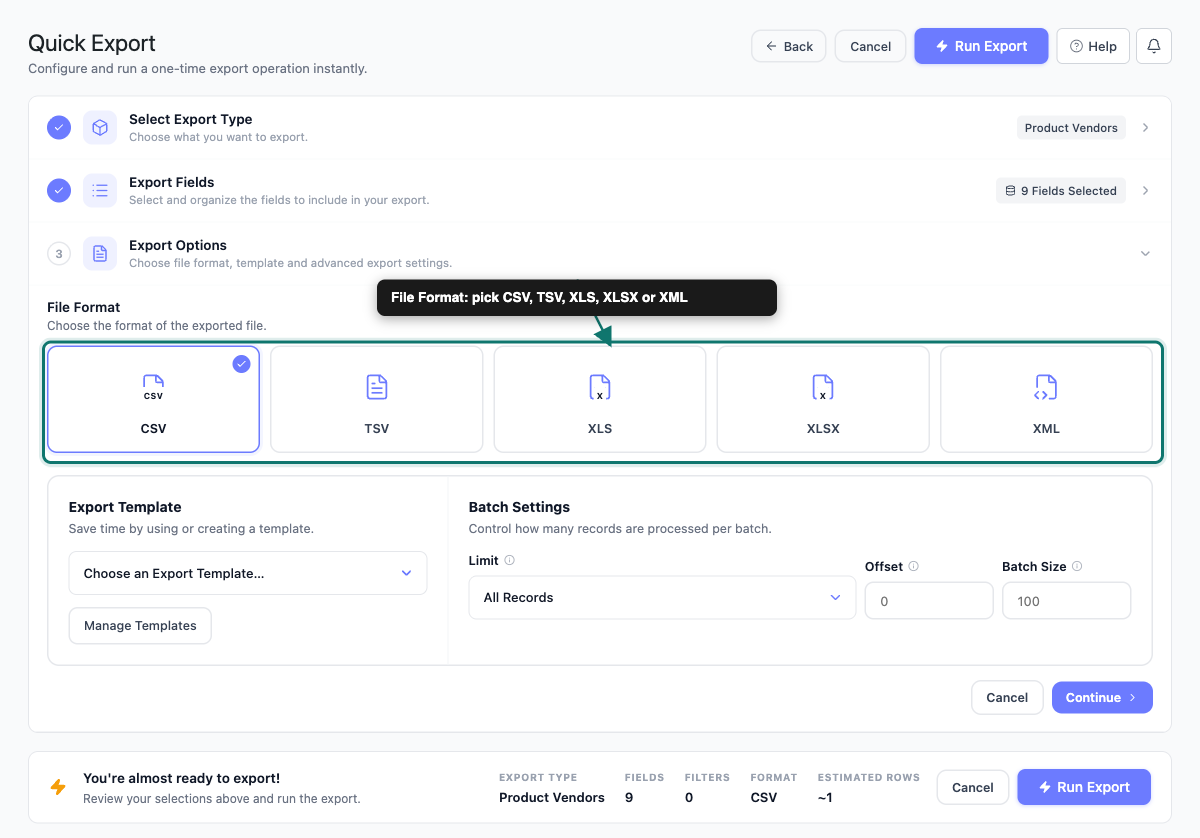
- Pick a file format: CSV, TSV, XLS, XLSX or XML. CSV suits most jobs, since nearly every spreadsheet and import tool reads it.
- Optional: if you’ve saved a setup on the Export Templates screen, apply it from the Export Template dropdown instead of rebuilding your field list.
- Check the summary bar at the bottom of the page.
- Click Run Export.
- When the export finishes, click Download File in the export dialog to save your file.
The summary bar shows EXPORT TYPE, FIELDS, FILTERS, FORMAT, and ESTIMATED ROWS. FILTERS reads 0 for a Product Vendors export, so every vendor is included.
Export vendor data in Products and Orders exports
Vendor details also show up outside the Product Vendors export type. Use these when you want to see the vendor next to each product or order.
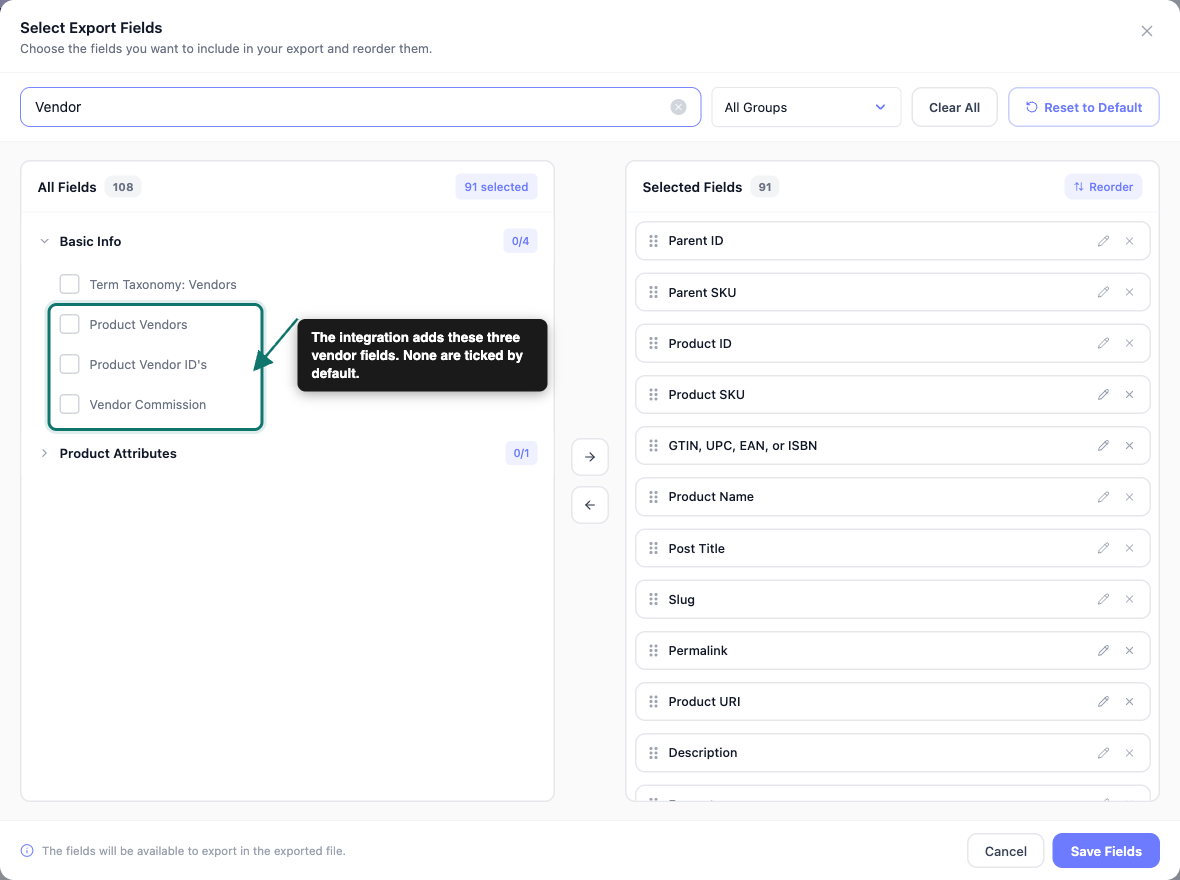
In a Products export, click Manage Fields and search for “Vendor” in the Select Export Fields popup. The integration adds three fields. None are selected by default, so tick the ones you need:
| Field | What it contains |
|---|---|
| Product Vendors | The name of the vendor that owns the product |
| Product Vendor ID’s | The vendor’s ID. A product with several vendors lists each one. |
| Vendor Commission | The commission rate saved on the product. The cell is blank when the product has no rate of its own. |
The search also lists Term Taxonomy: Vendors. That’s a generic product taxonomy field, not one the integration adds.
In an Orders export, the Order Items: Product Vendor field shows the vendor for each item on the order.
To export only some vendors’ products, open the Filters & Sorting step of a Products export. Then enable the Product Vendor filter and pick one or more vendors. That filter appears only when at least one vendor has products.
What the export includes and leaves out
Keep these points in mind when you read your file:
Vendor fields are limited to the table above: The Product Vendors export type covers only those fields. Other details you may have stored with a vendor, such as its commission type, aren’t part of this export.
Description is often empty: The Description column reads the old vendor notes field. From WooCommerce Product Vendors 2.6.0, that field was moved into a separate notes timeline, which this column doesn’t read. If your file shows it blank, you can remove that chip.
Commission can be blank: A vendor with no commission saved gives an empty cell.
Commission payments are not included: Payment records and totals aren’t part of this file.
Troubleshooting
Frequently asked questions
Related articles
- How to export WooCommerce products with Store Exporter Deluxe
- Store Exporter Deluxe supported plugins list
- Available export fields in Store Exporter Deluxe
- How to schedule exports
Need help?
If you have a question or run into any issues, we’re here to help.
- Premium users: Open a support ticket
- Free users: Visit our community forum