
If a supplier, marketplace, or accounting system expects your WooCommerce data dropped onto a server at a set time, emailing a file or downloading it by hand doesn’t scale. Store Exporter Deluxe can push a Scheduled Export straight to an FTP or SFTP server instead, so the file just lands where it needs to be, on its own, every time the schedule runs.
This article covers setting up the FTP / SFTP delivery method on a Scheduled Export: every field on the form, how to run the schedule once to confirm it connects before trusting it to a timer, and what the plugin’s error messages mean when a connection fails.
Prerequisites
| Requirement | Details |
|---|---|
| Plugin | Store Exporter Deluxe is active and licensed |
| Scheduled export | You’ve already created a Scheduled Export. For detailed instructions, see How to schedule exports in Store Exporter Deluxe |
| Server details | Have the host, port, username, and password from your hosting or FTP provider ready before you start. Only password authentication is supported, see the note below if your SFTP server requires a private key |
Choosing FTP / SFTP as the delivery method
- Open WooCommerce → Store Export → Scheduled Exports.
- Open the schedule you want to configure, or click New Schedule to create one.
- Click the Method step at the top of the form.
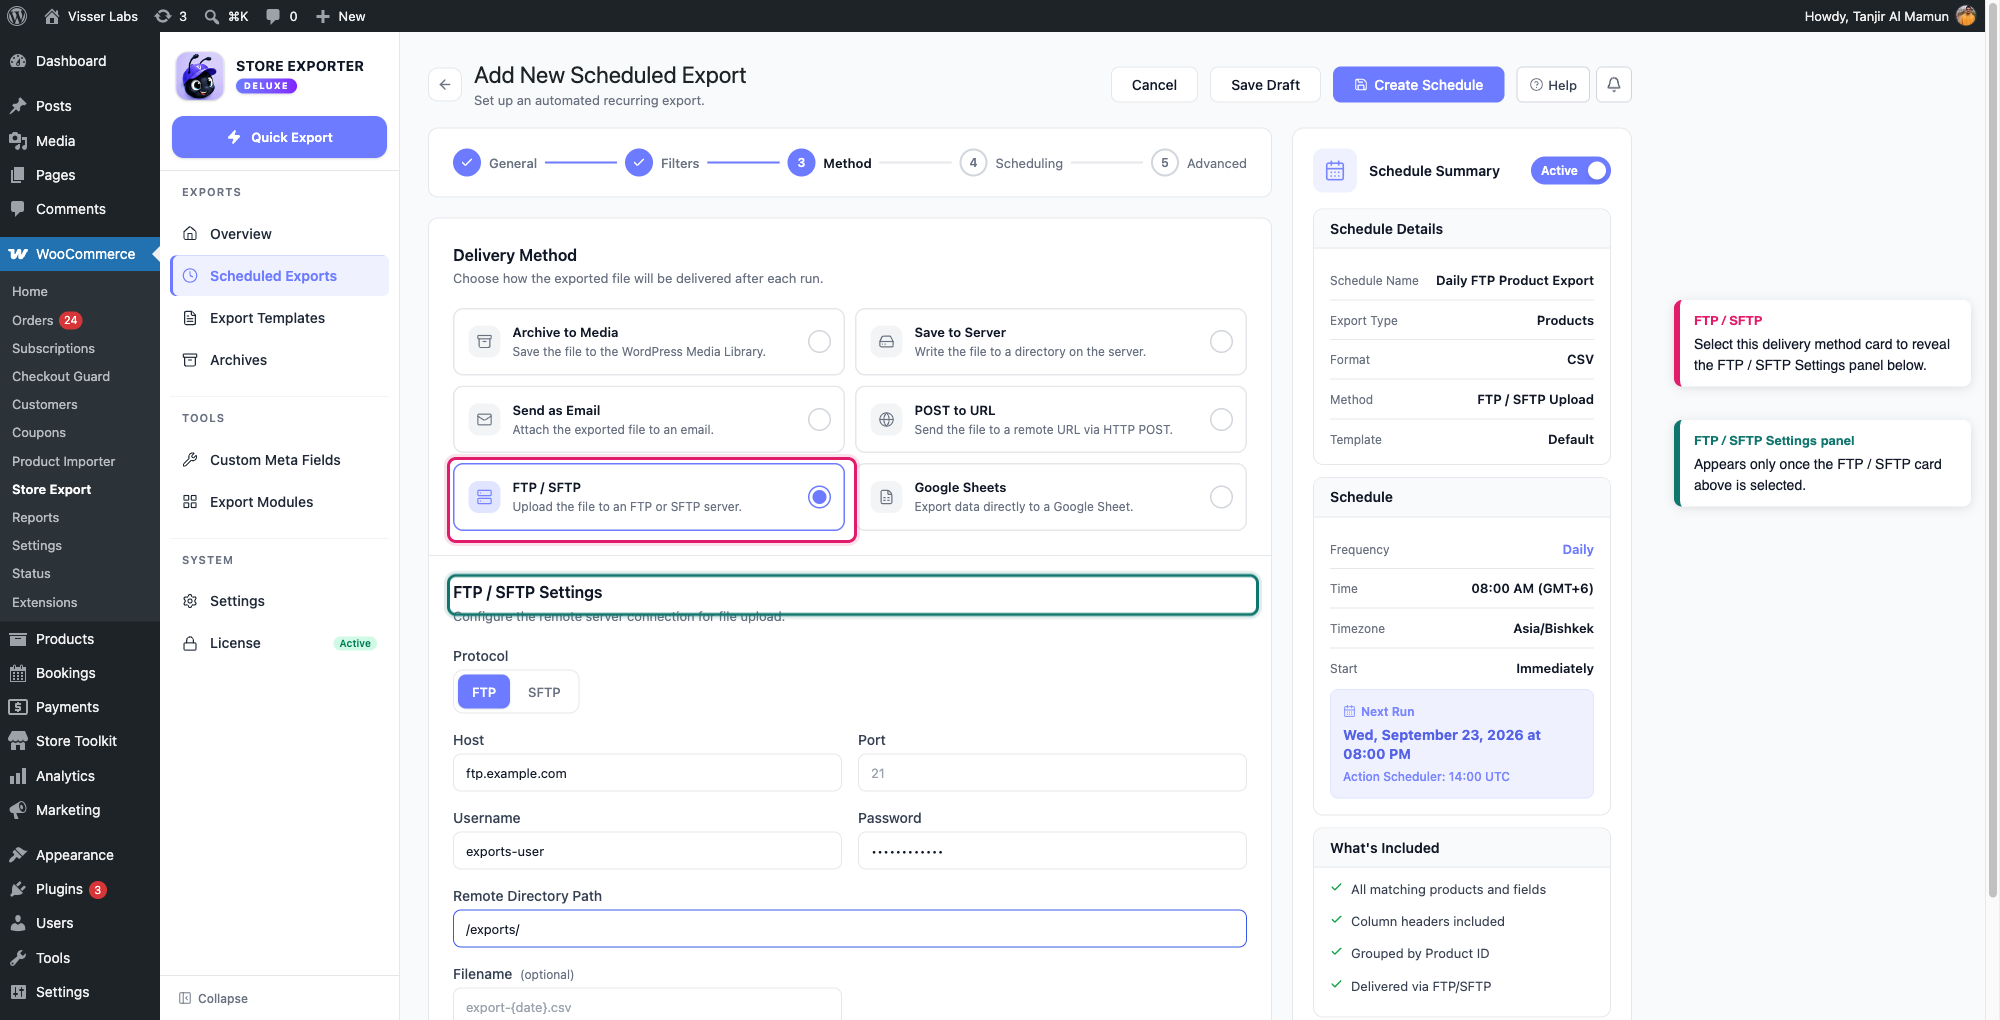
- Select the FTP / SFTP card.
Selecting it reveals an FTP / SFTP Settings panel below the delivery method cards.
Configuring the connection
The FTP / SFTP Settings panel has these fields:
- Protocol: choose FTP or SFTP. SFTP encrypts the connection over SSH and is the safer choice if your host offers it.
- Host: the FTP or SFTP server’s address, for example
ftp.example.com. - Port: the server’s connection port. Leave this blank to use the protocol’s usual default, which the field shows as placeholder text:
21for FTP,22for SFTP. - Username: the account username your FTP or SFTP provider gave you.
- Password: the account password. Once a schedule has a saved password, this field shows dots instead of the real value and a note that a password is already saved. Leave it blank to keep that saved password, or type a new one to replace it.
- Remote Directory Path: the folder on the remote server to upload into, for example
/exports/. - Filename (optional): overrides the name of the uploaded file. Leave it blank to use the export’s default filename.
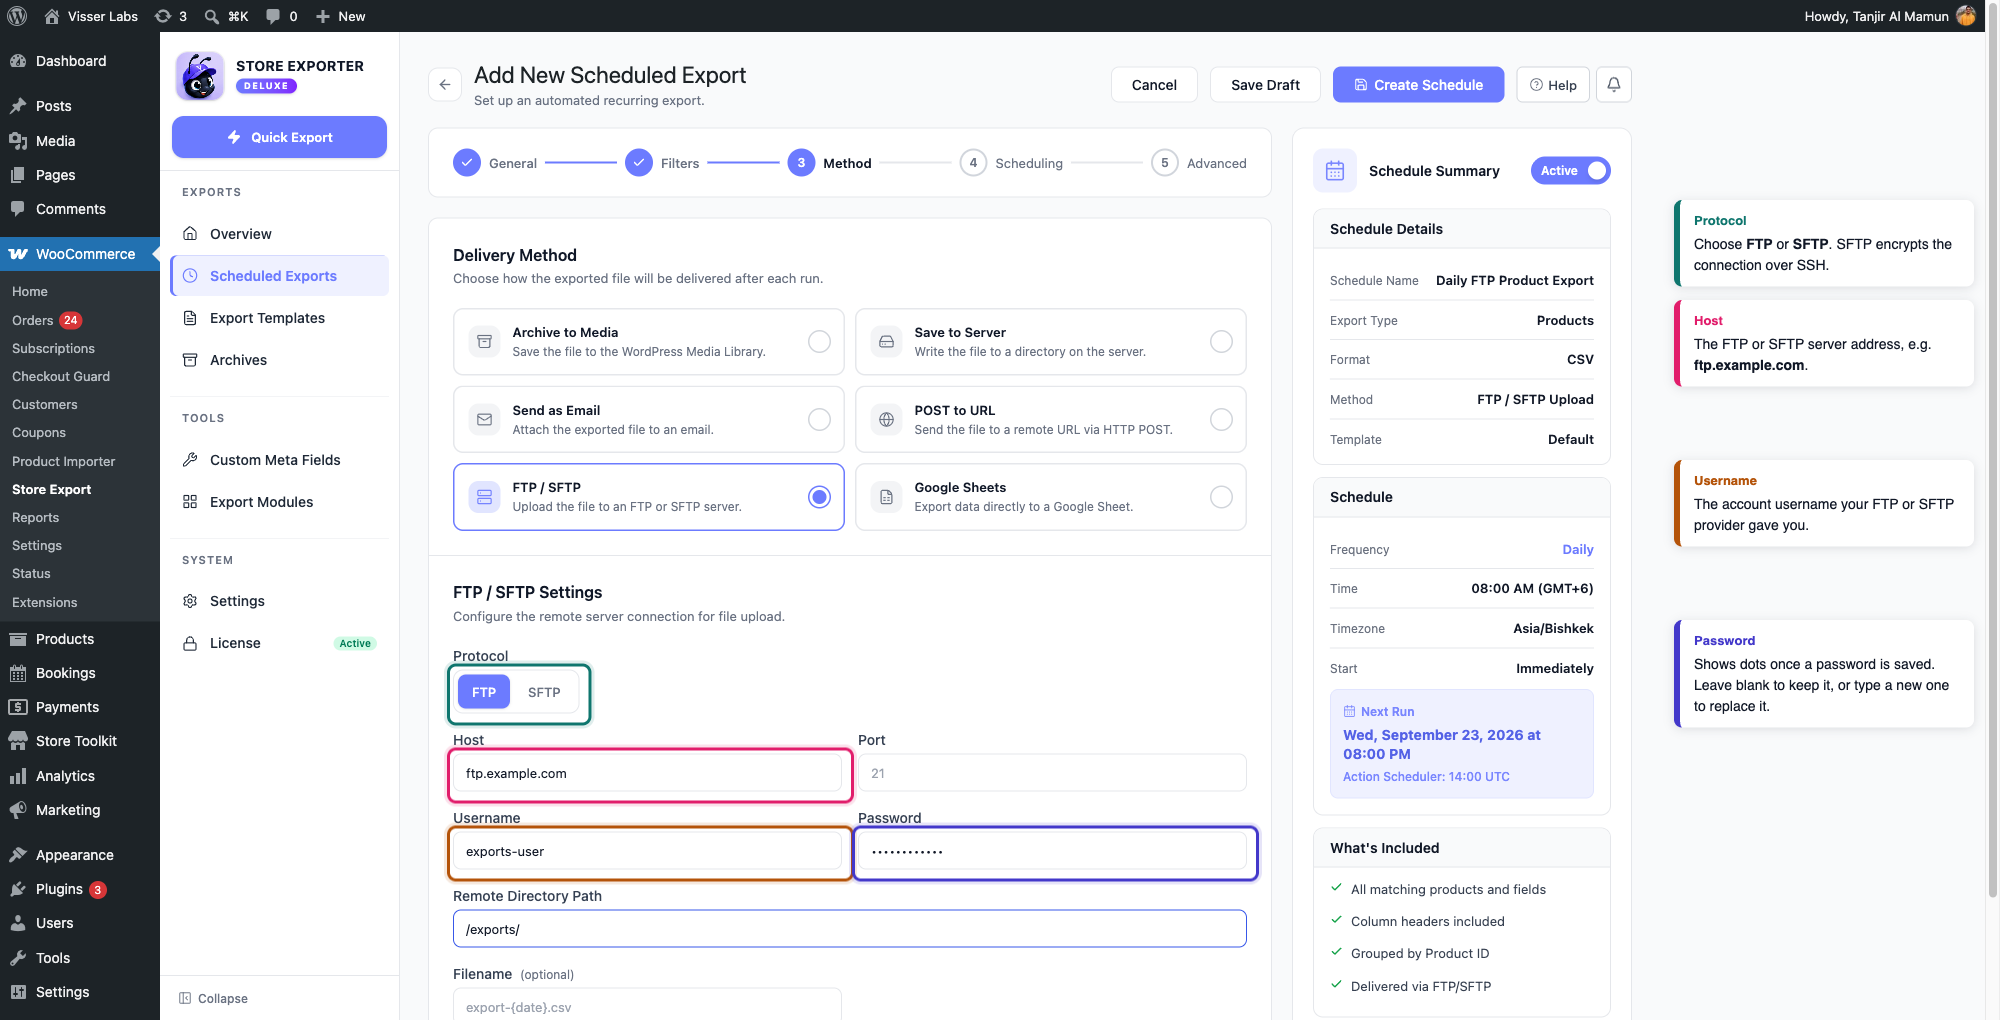
Once you’ve filled these in, click Create Schedule (or Save Schedule on an existing one) to save.
Testing the connection before you rely on the schedule
There’s no separate Test Connection button on the FTP / SFTP form. Instead, save the schedule with its connection details filled in, then trigger a real run on demand rather than waiting for its schedule to come around:
- On the Scheduled Exports screen, find the schedule you just saved.
- Open its row’s action menu (the ⋮ button) and click Execute Now.
- Watch the Recent Activity panel on the same screen. The run shows as In Progress, then updates to Completed or Failed.
A Completed status confirms the file reached your FTP or SFTP server. If it shows Failed, the exact reason is in the Audit Log:
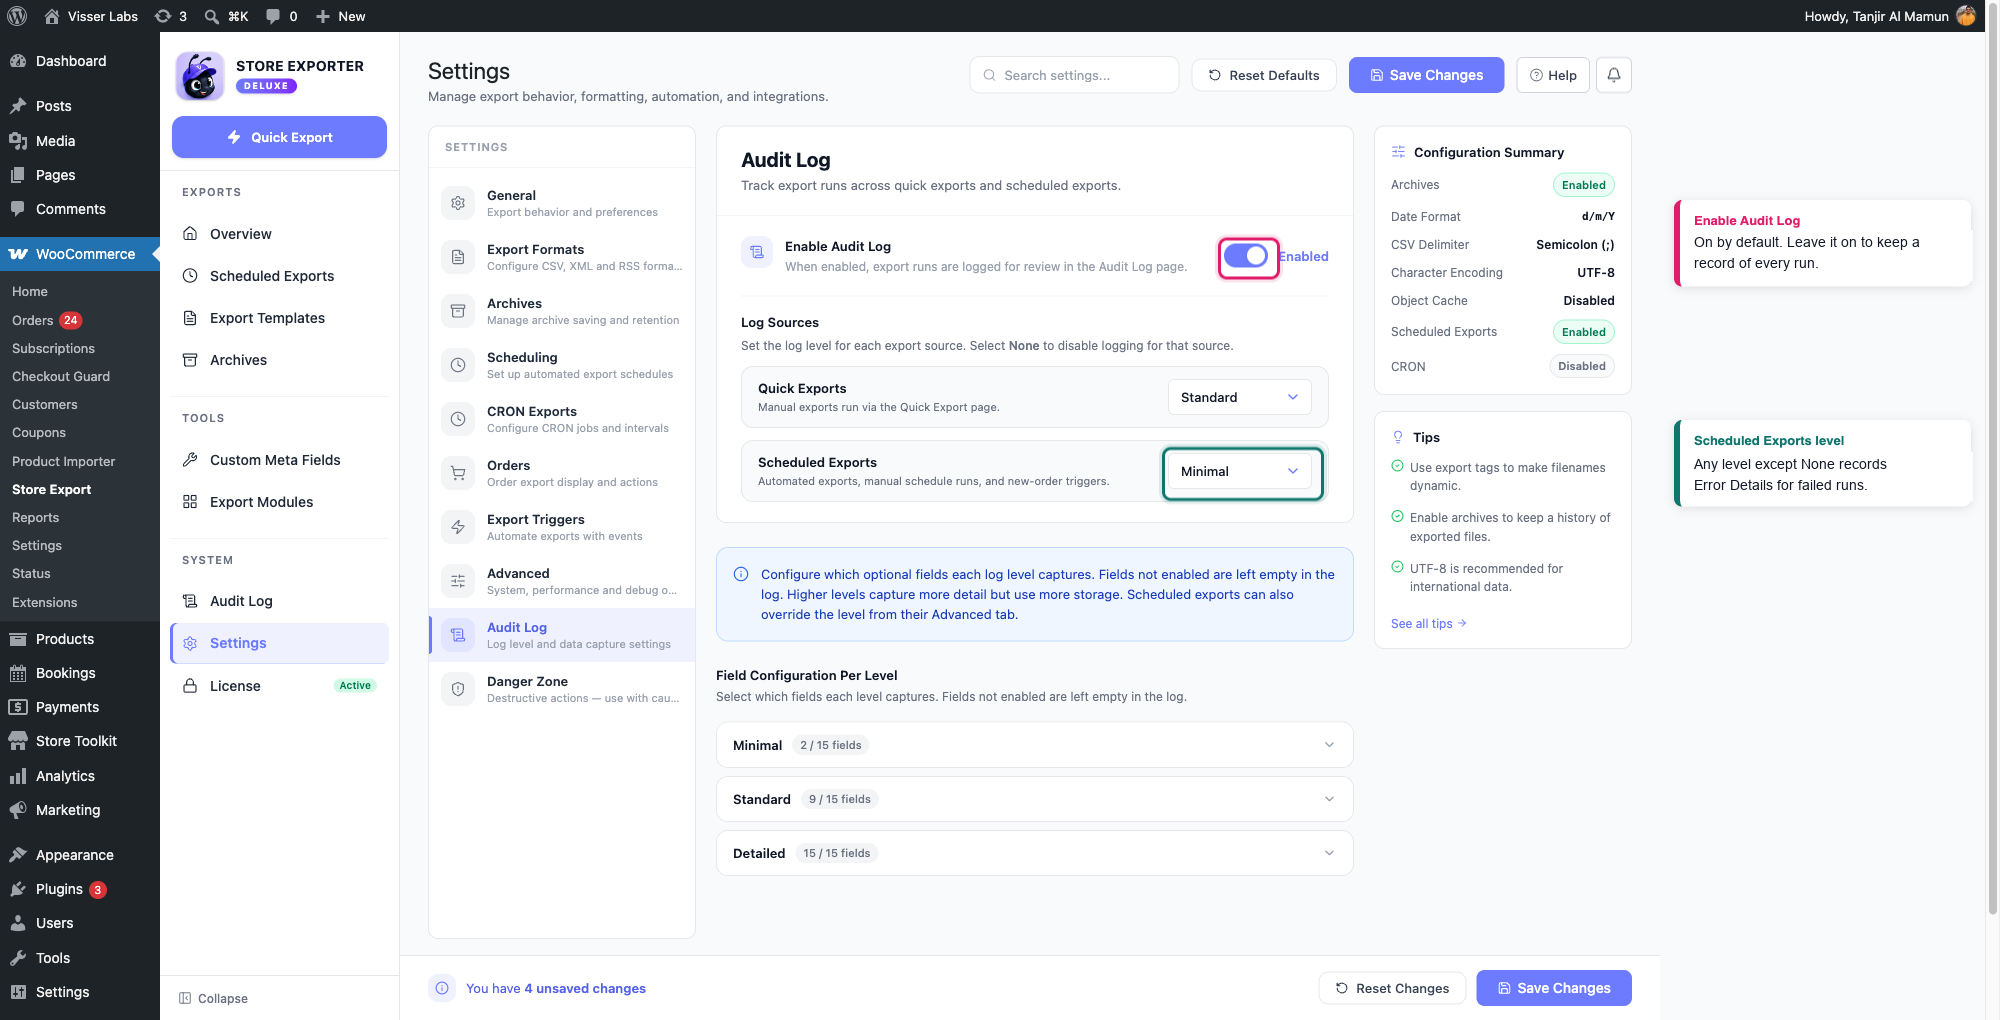
- Open WooCommerce → Store Export → Settings and select the Audit Log section.
- Check that Enable Audit Log is on (it’s on by default) and that Scheduled Exports is not set to None. By default, every other level, including Minimal, captures Error Details, the field that holds the plugin’s exact error message.
- Open Audit Log in the Store Export sidebar and expand the failed run’s entry to read the error message. If there’s no entry for that run, correct the settings from step 2 and run Execute Now again.
Troubleshooting
22 by default), and confirm with your hosting or SFTP provider that the server accepts SFTP connections from your site’s server.FAQ
Related articles
- How to schedule exports in Store Exporter Deluxe: for creating the scheduled export itself and comparing all six delivery methods
Need more help?
If you’re using Store Exporter Deluxe and run into an issue this article doesn’t cover, open a support ticket and our team will help you get your export delivered.
If you’re using the free Store Exporter plugin, ask on the WordPress.org support forum and our team will get back to you there.
