
Downloading a fresh export file every time you need to hand it to a supplier, accountant, or teammate adds a manual step to something that should just happen on its own. Store Exporter Deluxe can send a Scheduled Export straight to an inbox instead, with the file already attached, so nobody has to log in and download it.
This article covers setting up the Send as Email delivery method on an existing Scheduled Export: the recipient, subject, and message fields, what to do if you’d rather not email the file at all, and what to check when an email doesn’t show up.
Prerequisites
| Requirement | Details |
|---|---|
| Plugin | Store Exporter Deluxe is active and licensed |
| Scheduled export | You’ve already created a Scheduled Export. For detailed instructions, see How to schedule exports in Store Exporter Deluxe |
| Recipient addresses | Have the email address (or addresses) you’re sending to ready |
Choosing Send as Email as the delivery method
- Open WooCommerce → Store Export → Scheduled Exports.
- Open the schedule you want to configure, or click New Schedule to create one.
- Click the Method step at the top of the form.
- Select the Send as Email card.
Configuring the email settings
Selecting Send as Email reveals an Email Settings panel with these fields:
- Send To: the recipient’s email address. Separate multiple addresses with commas to send the same file to several people at once.
- CC (optional): additional recipients who receive a visible copy of the email.
- BCC (optional): additional recipients who receive a copy without appearing to the other recipients.
- Subject: the email’s subject line.
- Email Heading (optional): a heading shown inside the email body, above your message.
- Message Body (optional): the main text of the email.
- Attachment Filename (optional): overrides the name of the attached export file. Leave it blank to use the export’s default filename.
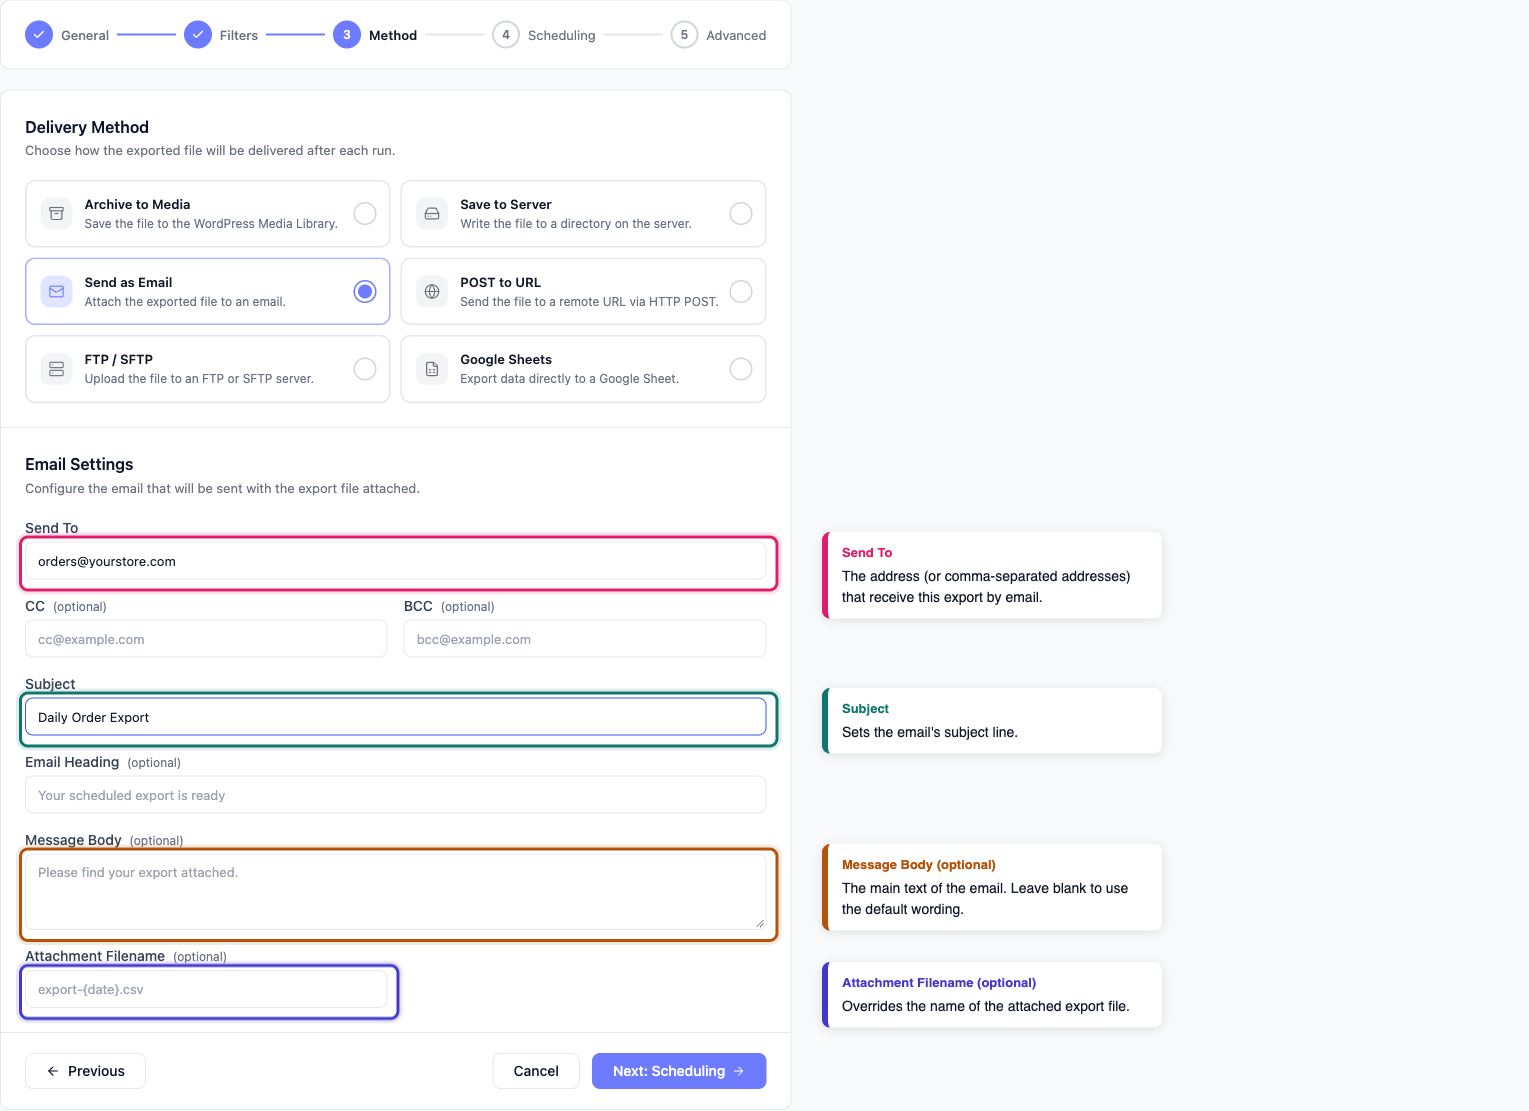
Once you’ve filled these in, click Create Schedule (or Save Schedule on an existing one) to save.
Getting the file to someone without emailing it
Some mail servers reject or strip large attachments, and some teams would rather pull a file than receive it as an email attachment. Which alternative works depends on who needs the file:
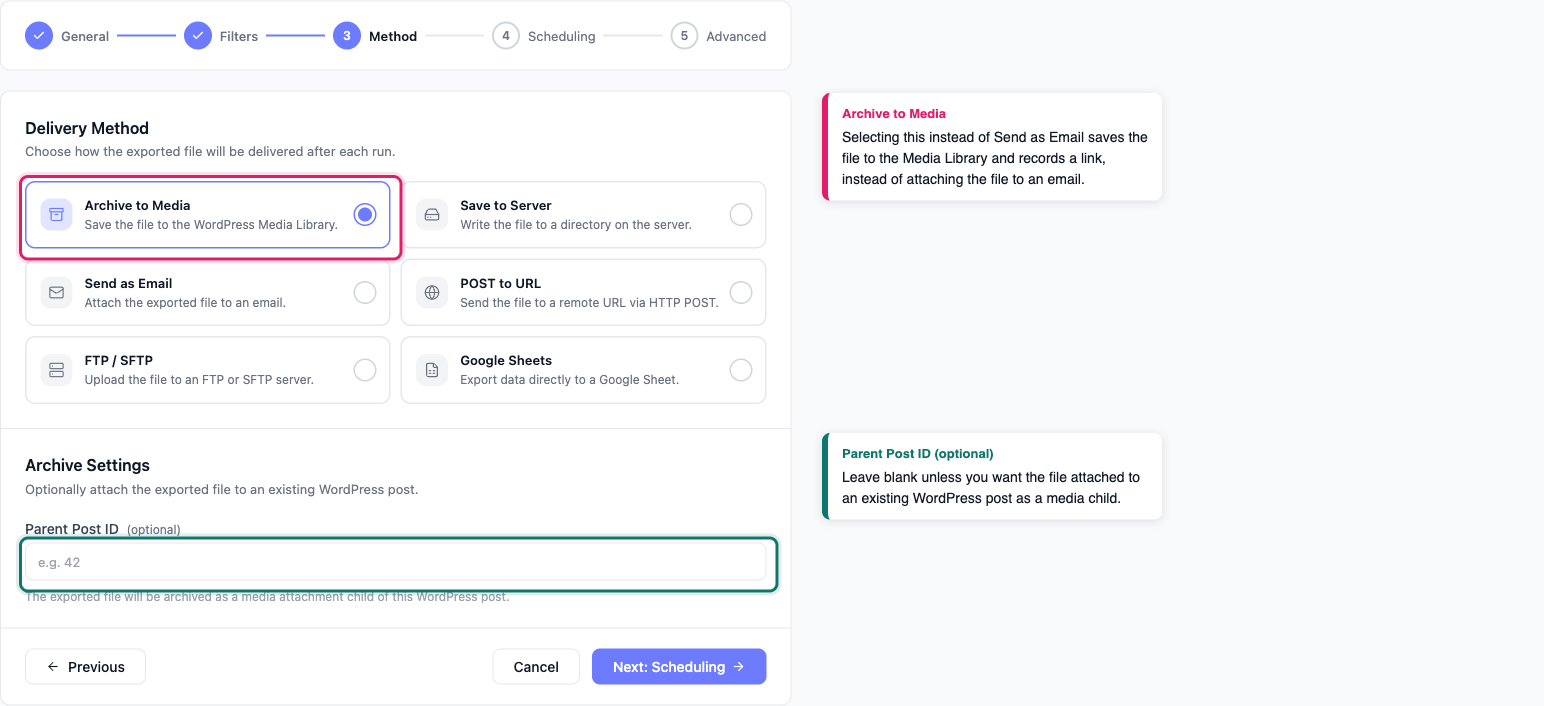
A teammate with access to your WordPress admin can use Archive to Media instead of Send as Email:
- On the Method step, select Archive to Media.
- Save the schedule as usual.
Each time this schedule runs, Store Exporter Deluxe saves the file to your WordPress Media Library and records the run in the Recent Activity panel on the Scheduled Exports screen. The download link there only opens for a logged-in admin with access to Store Export, so it isn’t something you can forward to someone outside your site.
A supplier, accountant, or anyone without wp-admin access needs a delivery method that doesn’t depend on a WordPress login. Use Google Sheets to keep the data in a spreadsheet you can share directly, or FTP / SFTP to deliver the file to a location they already have access to.
Troubleshooting
- Check the spam or junk folder of every recipient, not just your own inbox.
- If your site doesn’t already use a dedicated SMTP plugin, many hosts silently drop or heavily rate-limit mail sent through PHP’s default mail function. Installing an SMTP plugin configured with a real email provider (your Google Workspace account or a transactional email service, for example) fixes this in most cases.
- Add a recipient at a different email provider, for example a Gmail or Outlook address, to check whether the problem is specific to one provider’s spam filtering.
FAQ
Related articles
- How to schedule exports in Store Exporter Deluxe: for creating the scheduled export itself and comparing all six delivery methods
Need more help?
If you’re using Store Exporter Deluxe and run into an issue this article doesn’t cover, open a support ticket and our team will help you get your export delivered.
If you’re using the free Store Exporter plugin, ask on the WordPress.org support forum and our team will get back to you there.
