
Your export is downloaded, but the spreadsheet shows missing zeros, odd characters, or everything in one column. Most of these problems come from how Excel or Google Sheets reads the file, not from the data itself. This guide shows you which file format to pick in Store Exporter Deluxe, how to open it in Excel or Google Sheets, and how to fix the most common display problems.
Prerequisites
- Store Exporter Deluxe is active and licensed.
- You know how to run an export. See How to use Quick Export in Store Exporter Deluxe.
- Microsoft Excel on your computer, or a Google account with access to Google Sheets.
Step 1: Choose the right file format
The format you pick before you export decides how much clean-up you need afterwards. Use this table to choose:
| Format | Best for |
|---|---|
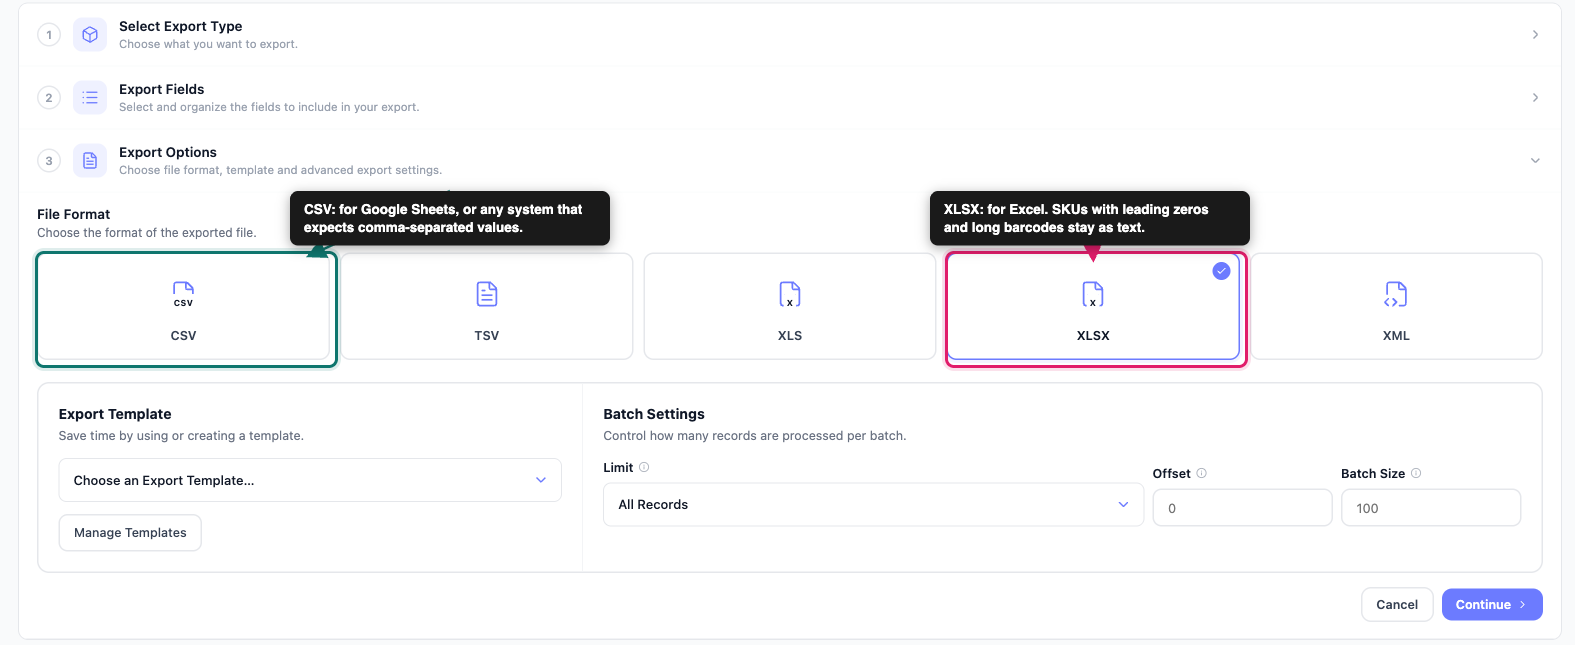
| XLSX | Opening in Excel. Values such as SKUs with leading zeros and long barcodes stay as text, so Excel doesn’t change them. |
| CSV | Importing into Google Sheets, or into another system that expects comma-separated values. |
| TSV | Systems that expect tab-separated values. Each cell is separated by a tab instead of a comma. |
| XLS | Only for very old versions of Excel (97-2003) that can’t open XLSX. XLS holds at most 255 columns. |
To set the format:
- Go to WooCommerce > Store Export.
- Click Quick Export in the sidebar.
- Complete Select Export Type and Export Fields as usual.
- Open Export Options.
- Under File Format, select the XLSX or CSV tile.
- Click Run Export.
- Click Download File when the export finishes.
For more on Excel-specific export settings, see How to export WooCommerce data to Excel (XLS/XLSX).
Step 2: Open an XLSX export in Excel
Double-click the downloaded XLSX file. It opens in Excel as a normal workbook with one row per record and, if Include column headers is selected in WooCommerce > Store Export > Settings > General, a header row at the top.
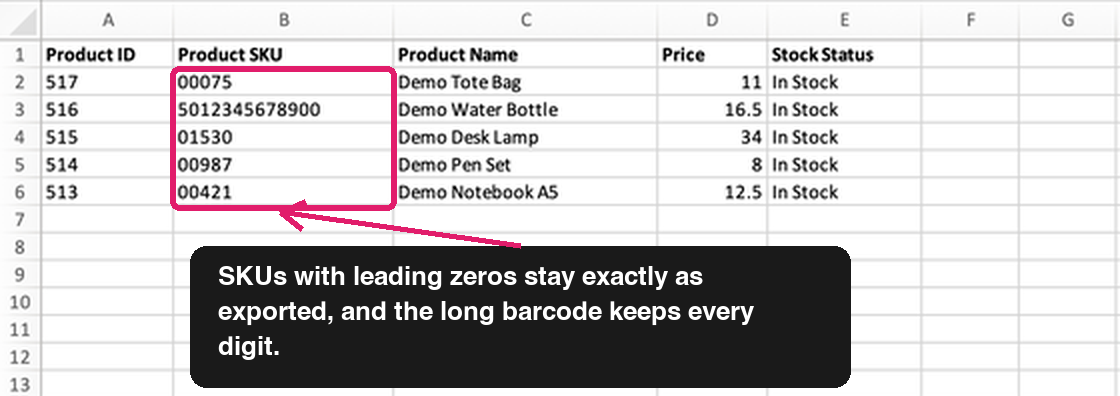
You don’t need any import steps for XLSX. Store Exporter Deluxe saves values that start with a zero, and long all-digit values such as barcodes, as text, so Excel shows them exactly as they are stored in WooCommerce.
Step 3: Open a CSV export in Excel
If you double-click a CSV file, Excel guesses how to read it. That guess can shorten long numbers, drop leading zeros in some versions, or show accented letters wrongly. Importing the file gives you control over how each column is read.
Import the CSV with From Text/CSV
These steps use the Windows menus. In Excel for Mac, choose Data > Get Data (Power Query) > Text/CSV, click Browse to select your CSV export, and click Next. The preview screen that follows matches steps 4 and 5.
- Open a blank workbook in Excel.
- On the Data tab, in the Get & Transform Data group, click From Text/CSV.
- Select your CSV export and click Import.
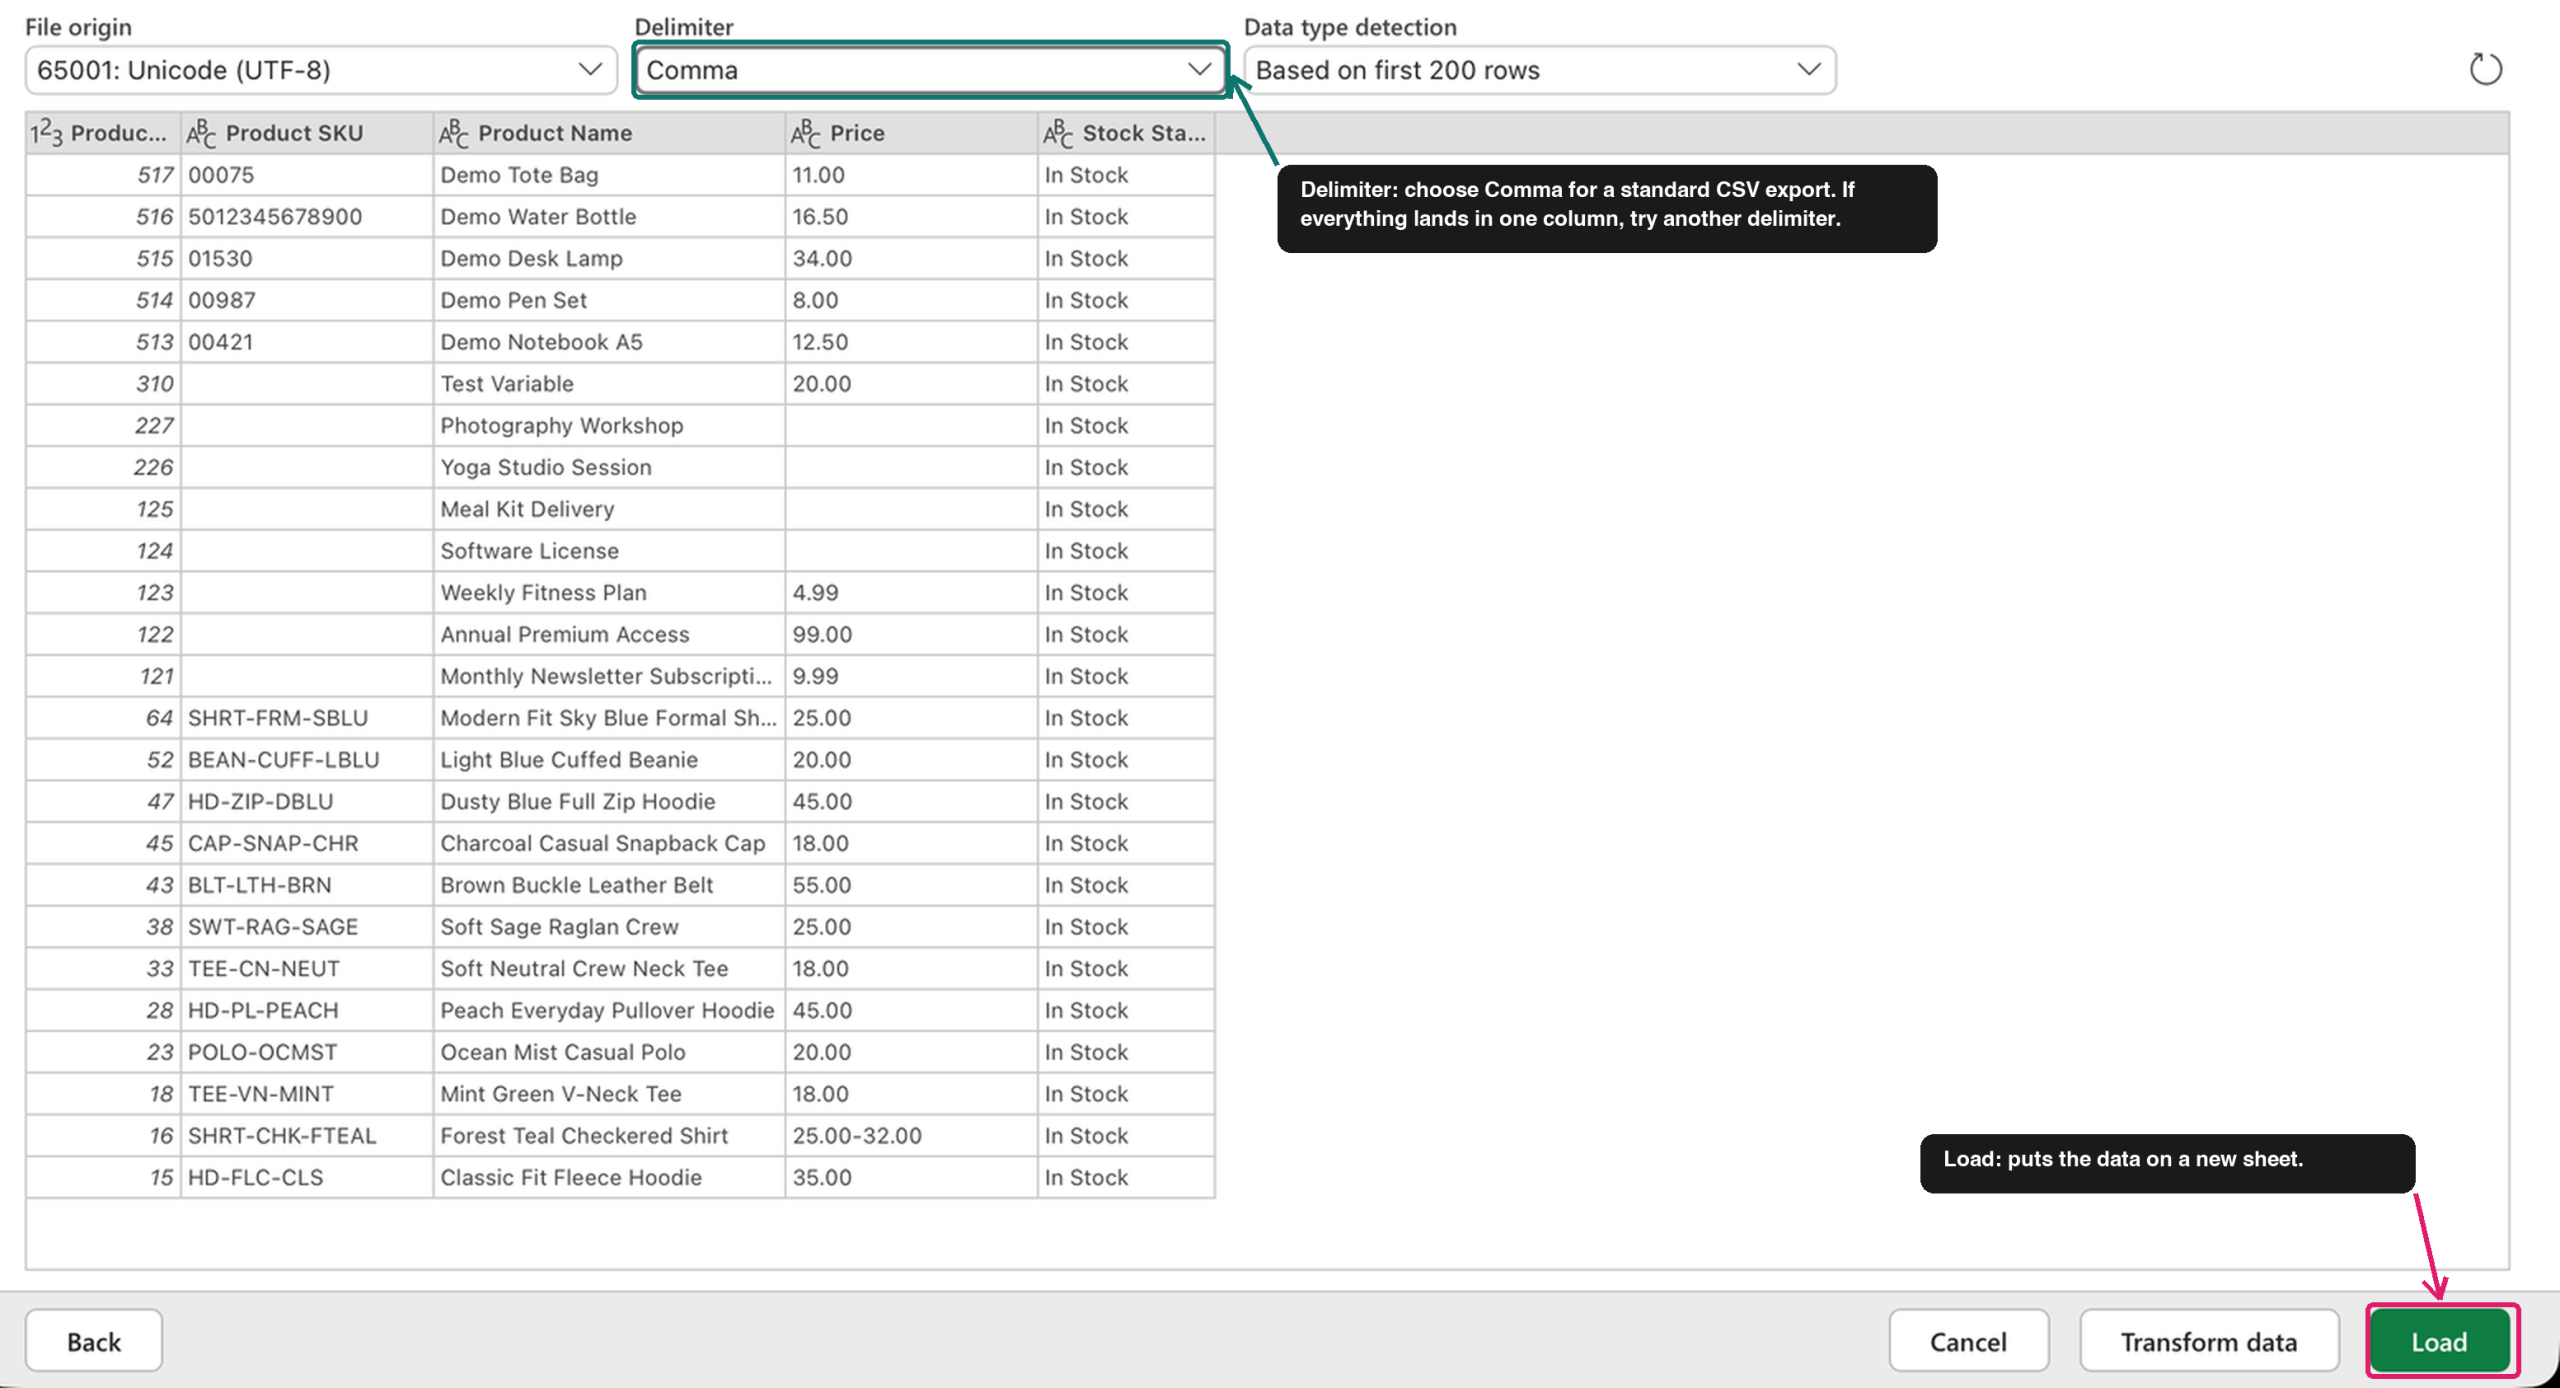
- In the preview, check that the columns are split correctly. If they aren’t, pick Comma from the Delimiter list.
- Click Load.

Keep leading zeros with the Text Import Wizard
Use this method when a column such as SKU, postcode, or phone number must keep its leading zeros, or when accented letters look wrong after a normal import.
These steps use the Windows menus. In Excel for Mac, skip the one-time setup below and choose Data > Get Data (Power Query) > From Text (Legacy) in step 1 of Run the wizard.
Turn on the legacy wizard (one time)
- In Excel, go to File > Options > Data.
- Under Show legacy data import wizards, select From Text (Legacy).
- Click OK.
Run the wizard
- On the Data tab, click Get Data > Legacy Wizards > From Text (Legacy).
- Double-click your CSV export.
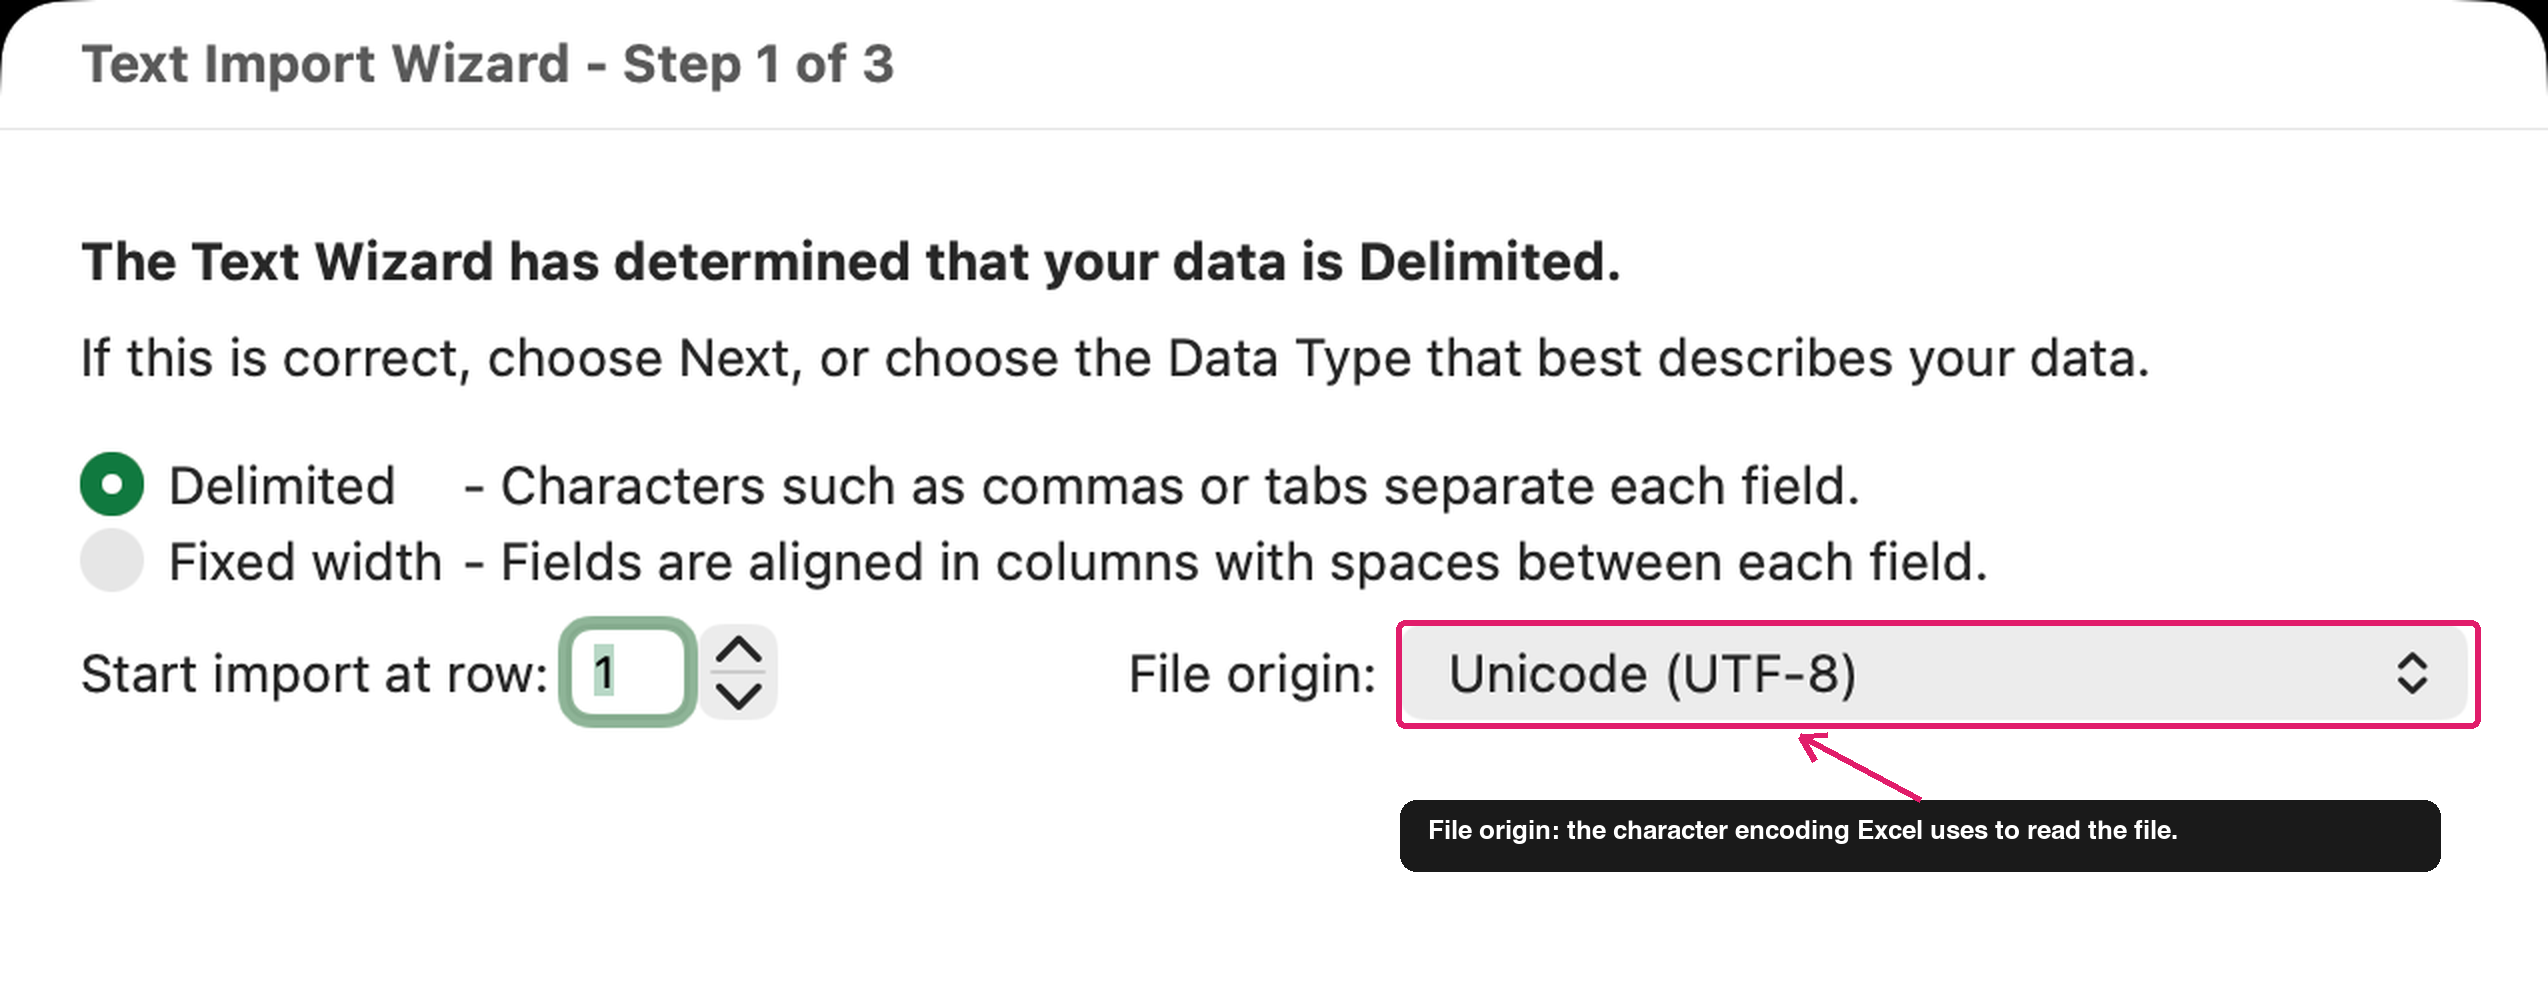
- In File origin, select Unicode (UTF-8). On Windows the entry can appear as 65001 : Unicode (UTF-8).
- Choose Delimited and continue to the delimiter step.
- Select Comma as the delimiter and continue.
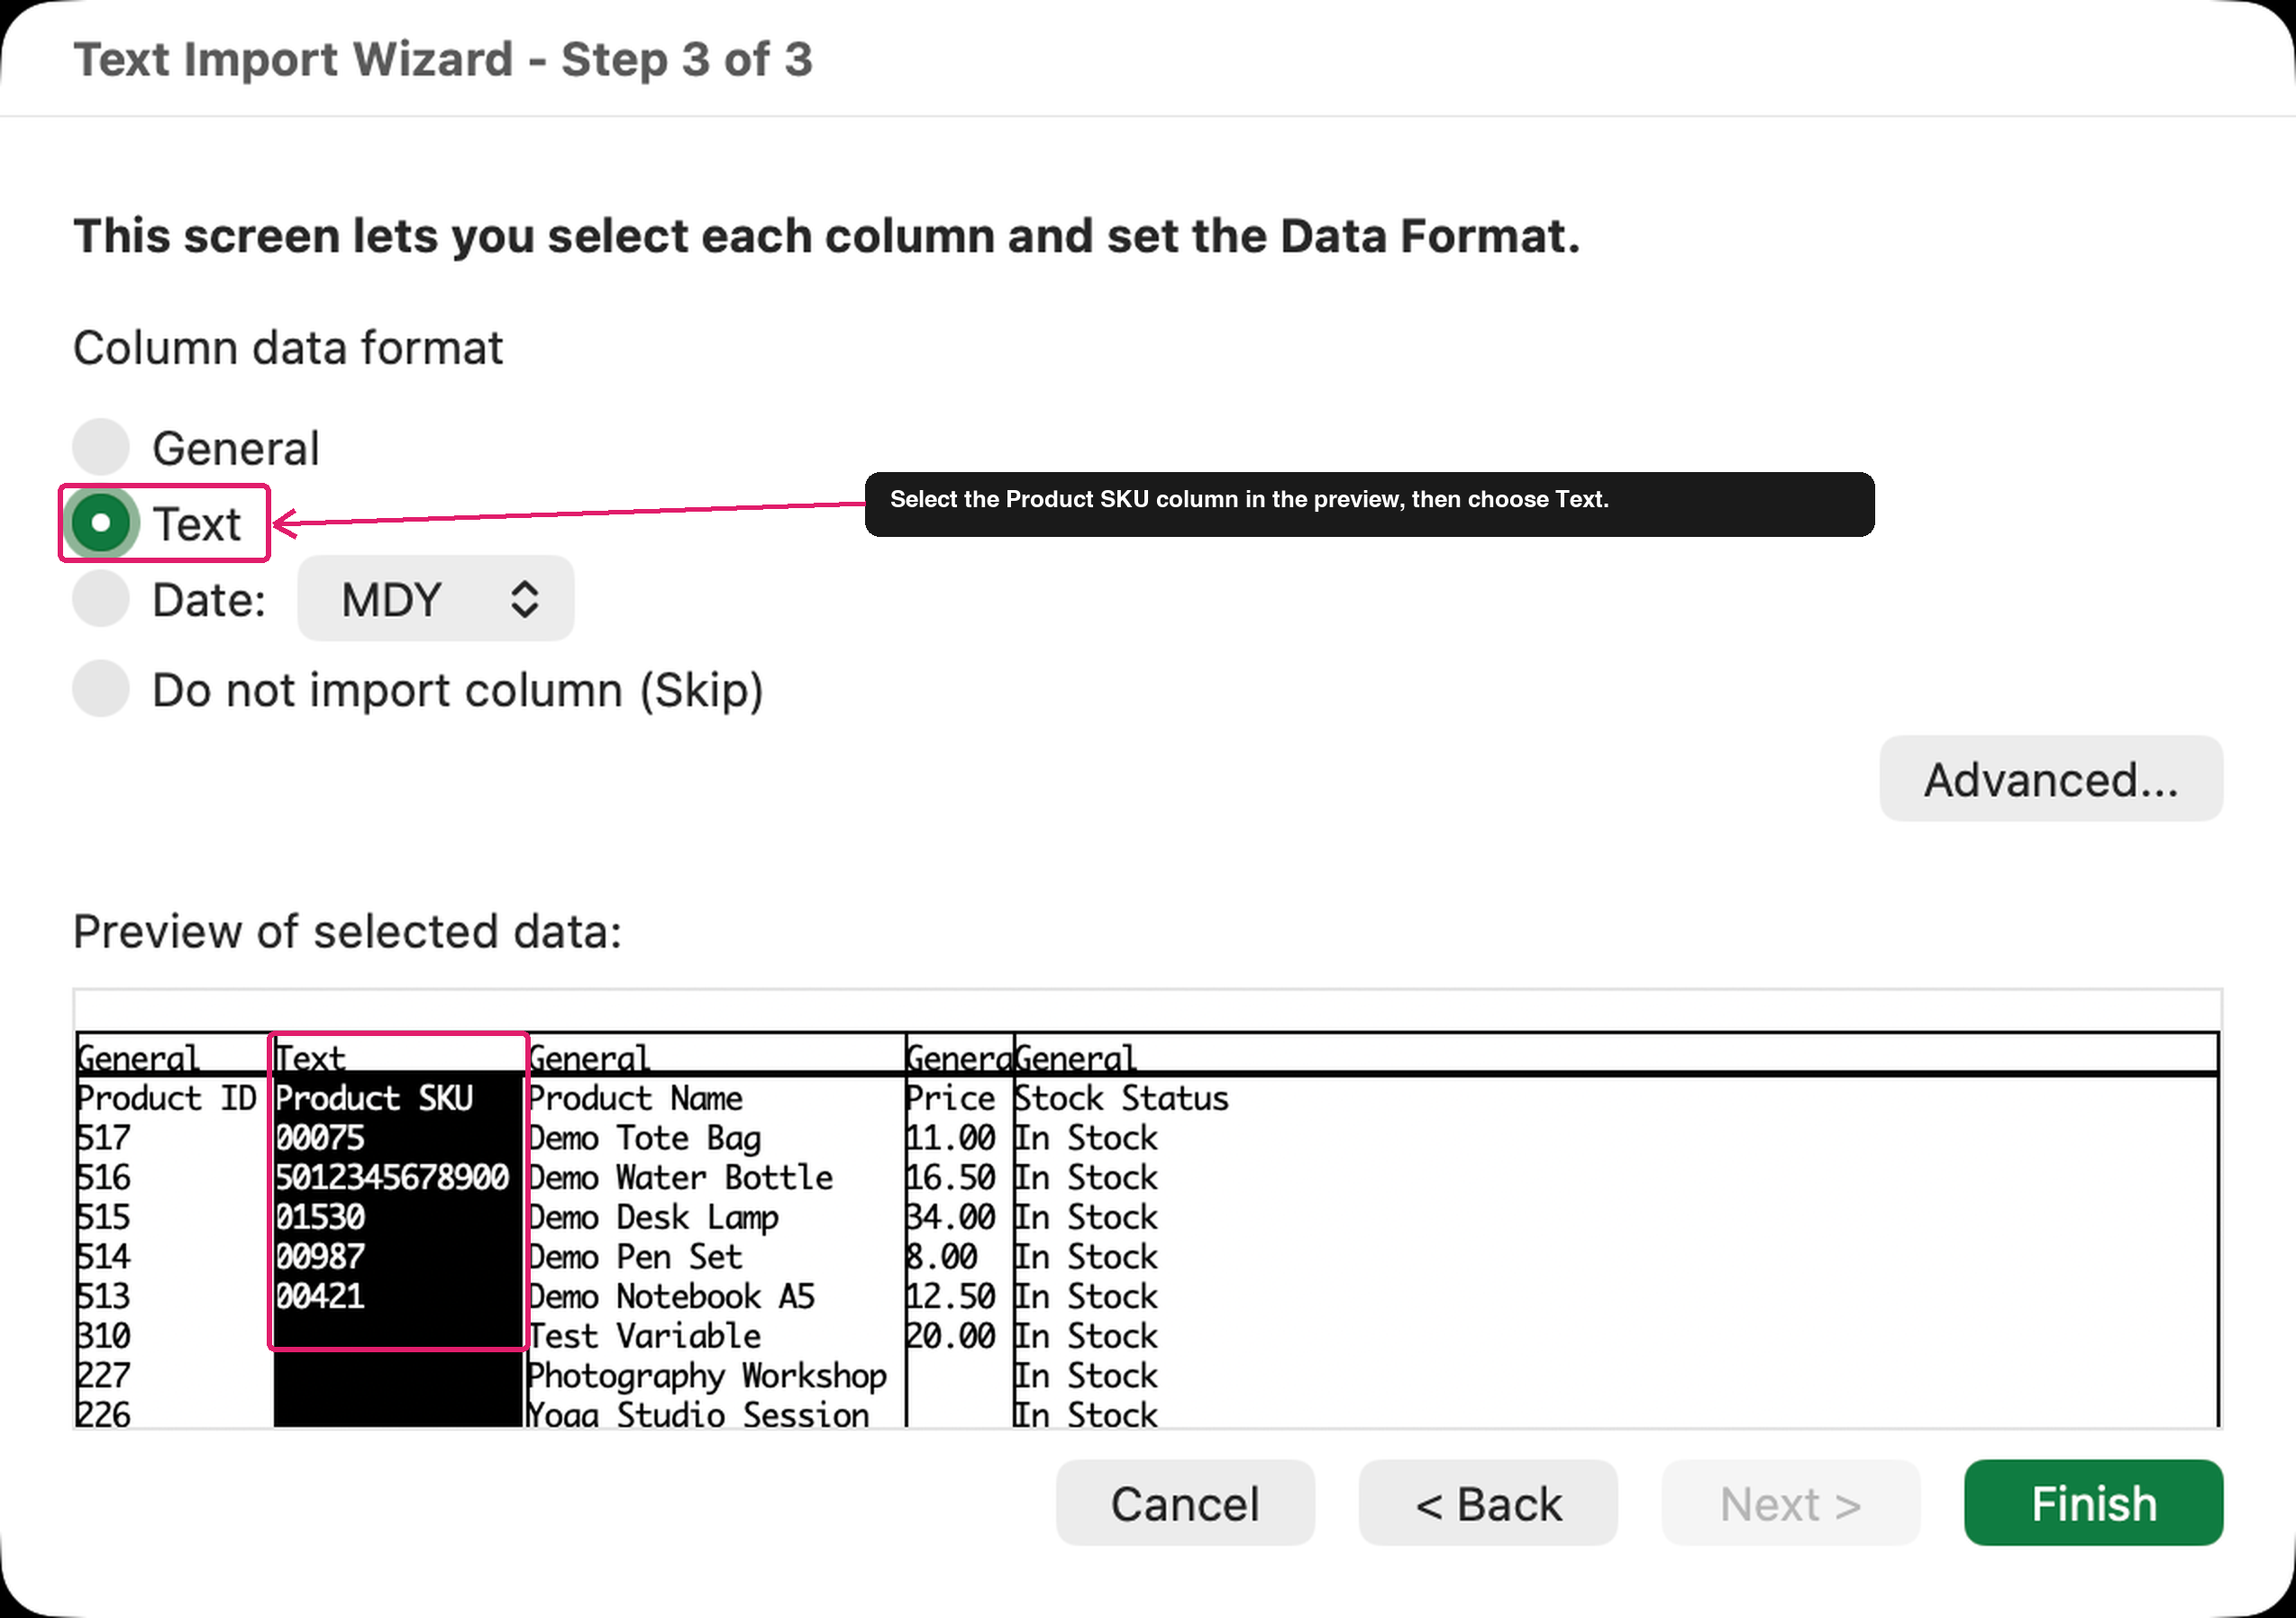
- Click a column that must keep leading zeros.
- Under Column data format, select Text. Repeat the last two steps for each column that must keep leading zeros.
- Click Finish.
- In the Import Data dialog, choose where to put the data.
- Click OK.
Step 4: Import a CSV export into Google Sheets
Import the CSV into a sheet. The import screen lets you control how Google Sheets reads each value.
- Open Google Sheets and create a blank spreadsheet.
- Click File > Import.
- Upload your CSV export.
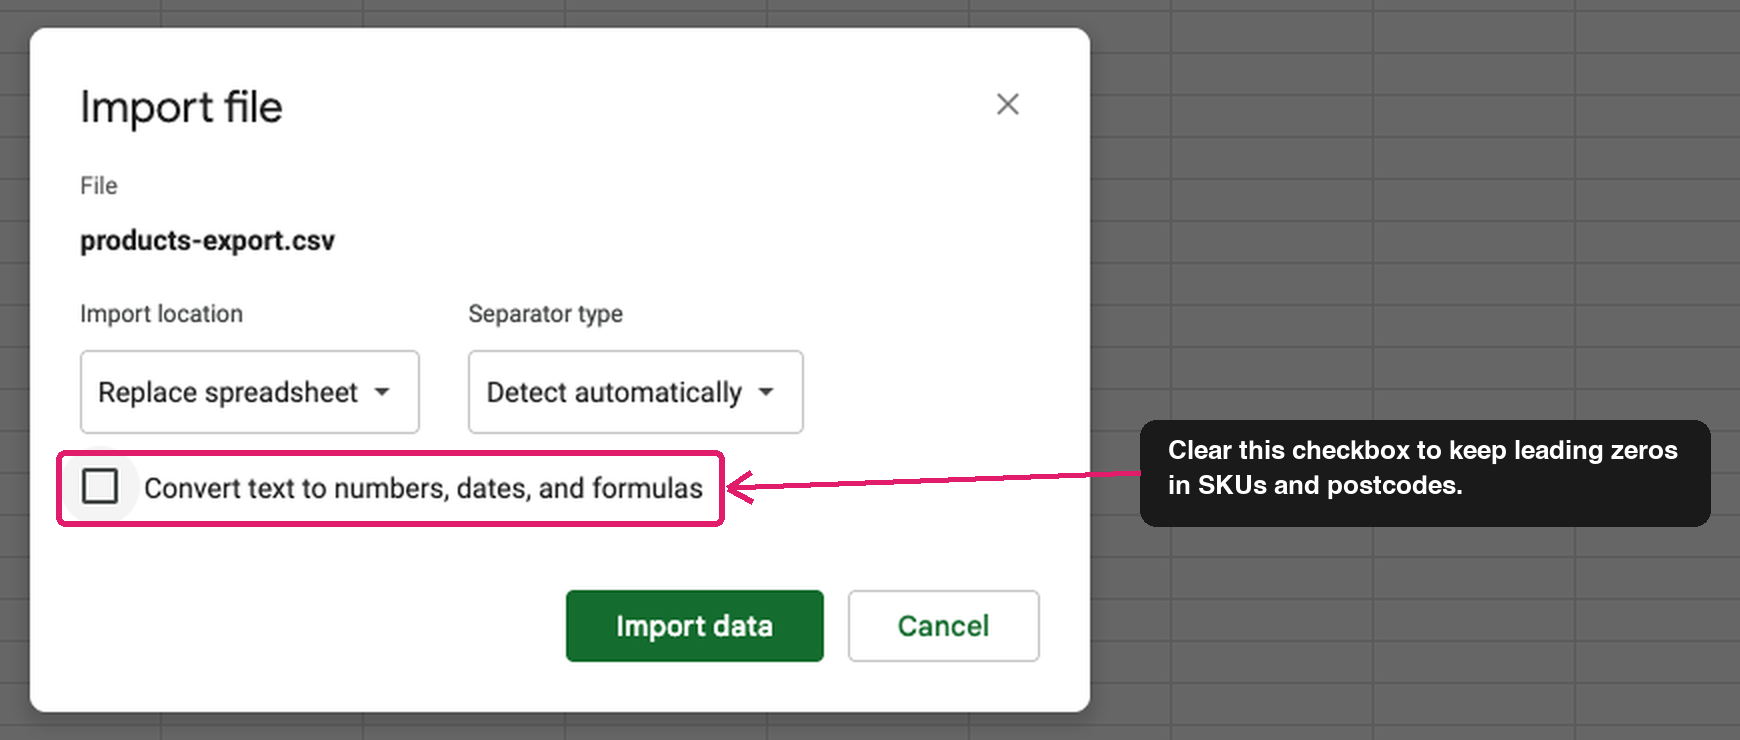
- Under Import location, choose where the data goes, for example Insert new sheet(s) or Replace spreadsheet.
- Leave Separator type on Detect automatically.
- To keep leading zeros, clear the Convert text to numbers, dates, and formulas checkbox.
- Click Import data.
Your export data now sits in a Google Sheet that you can sort, filter, and share like any other sheet.
Settings that change how your file opens
These two settings in WooCommerce > Store Export > Settings change how a spreadsheet opens your CSV. The Troubleshooting answers below use them.
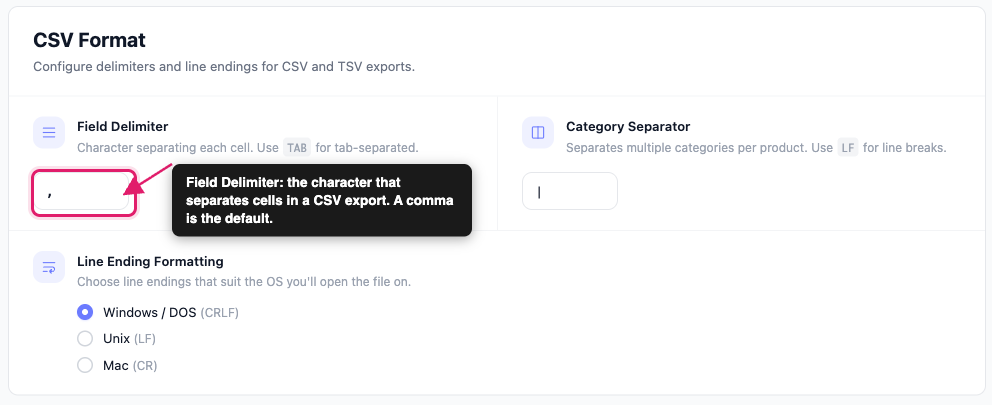
Under Settings > Export Formats, Field Delimiter in CSV Format sets the character that separates cells. A comma is the default.
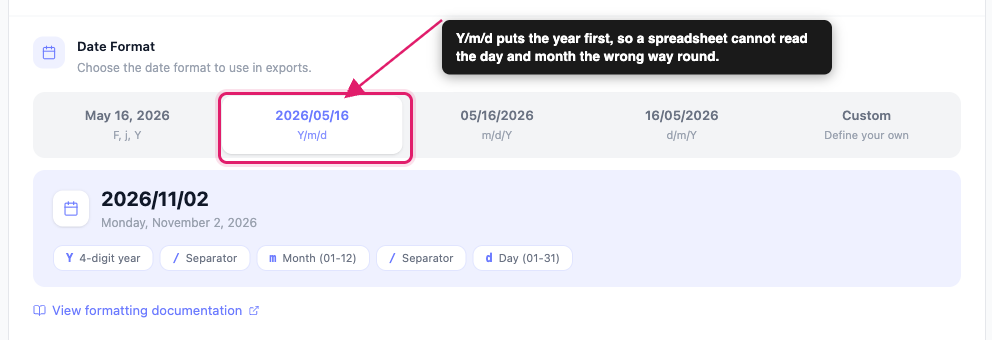
Under Settings > General, Date Format sets how dates are written. The 2026/05/16 (Y/m/d) option puts the year first.
Troubleshooting
=, +, -, or @. Negative amounts and international phone numbers aren’t changed.Y/m/d). Click Save Changes and export again. A date like 04/05 can mean April 5 or May 4, depending on your computer’s region settings, but a year-first date can’t be misread that way.Frequently asked questions
Need help?
If you have a question or run into any issues, we’re here to help.
- Premium users: Open a support ticket
- Free users: Visit our community forum