
Your store might carry products from a dozen different brands, but WooCommerce has no built-in way to pull that list out as a file. If you need to hand a brand list to a supplier, check which brands actually have products attached, or back up your brand descriptions and logos before a redesign, you’re stuck copying rows by hand from Products → Brands.
Store Exporter Deluxe gives you a proper export instead. Pick the fields you want, choose a format, and download every brand on your store in one file.
This article covers a one-off Quick Export of your brands first, then how to run the same export automatically on a schedule.
Which brands does this export?
A Brands export reads one brand source:
- WooCommerce Brands, the brands you manage in Products → Brands. This is the default.
- YITH WooCommerce Brands Add-On. When this plugin is active, the export reads its brands instead of WooCommerce Brands.
A Brand product attribute isn’t part of the Brands export. If you store brands as an attribute, those values don’t appear in this file. For the full list of plugins Store Exporter Deluxe supports, see Store Exporter Deluxe supported plugins list.
Prerequisites
| Requirement | Details |
|---|---|
| Plugin | Store Exporter Deluxe is installed and active |
| WooCommerce | Version 9.6 or later, which includes the built-in Brands feature. You can use YITH WooCommerce Brands Add-On instead. |
| Brand data | At least one brand exists in Products → Brands, or in YITH WooCommerce Brands Add-On if you use it. An empty brand list has nothing to export. |
| Admin access | An account that can manage WooCommerce exports. Administrators have this by default. |
Where to find Quick Export
Open WooCommerce → Store Export from the WordPress admin menu. That opens the Store Exporter Deluxe dashboard.
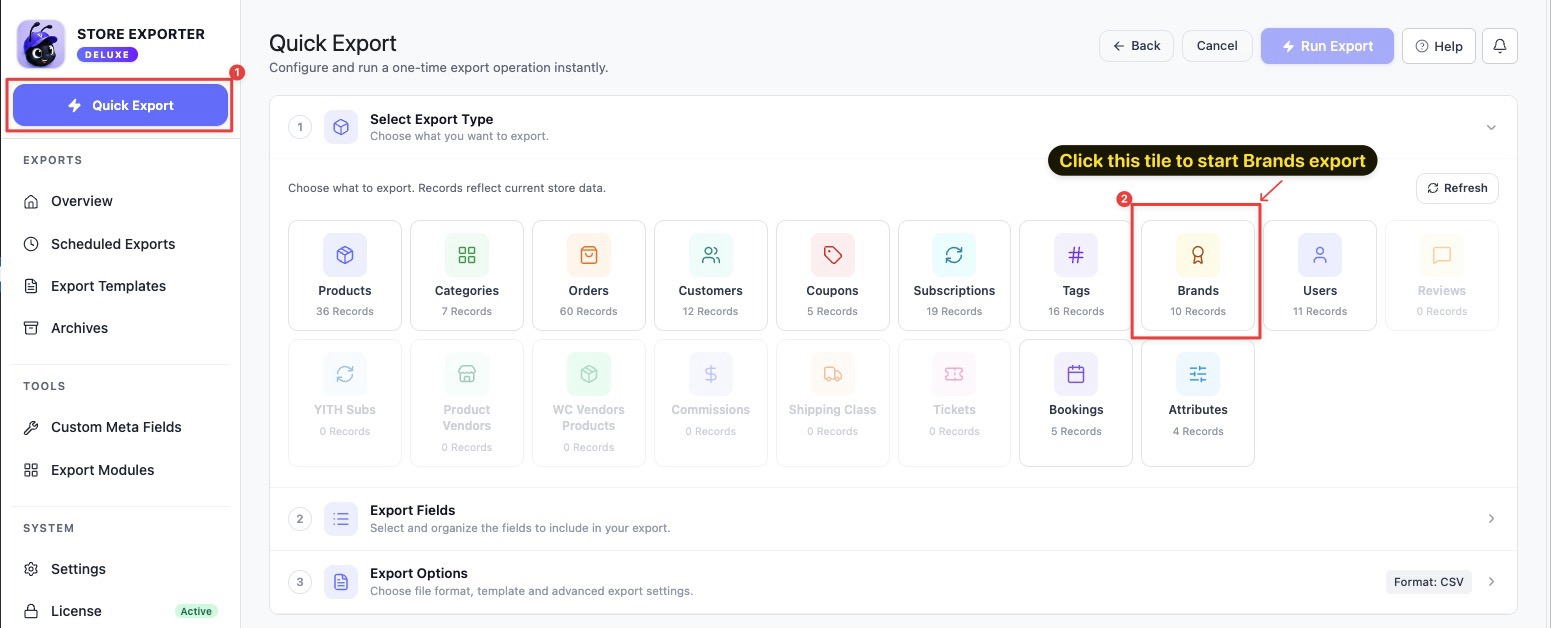
In the sidebar, Quick Export is its own button near the top, above the EXPORTS group. Click it to start a new export.
Step 1: Choose the Brands export type
On the Select Export Type step, click the Brands tile. You can also get here from All Export Items, where every export type is listed with a short description.
Step 2: Pick your brand fields
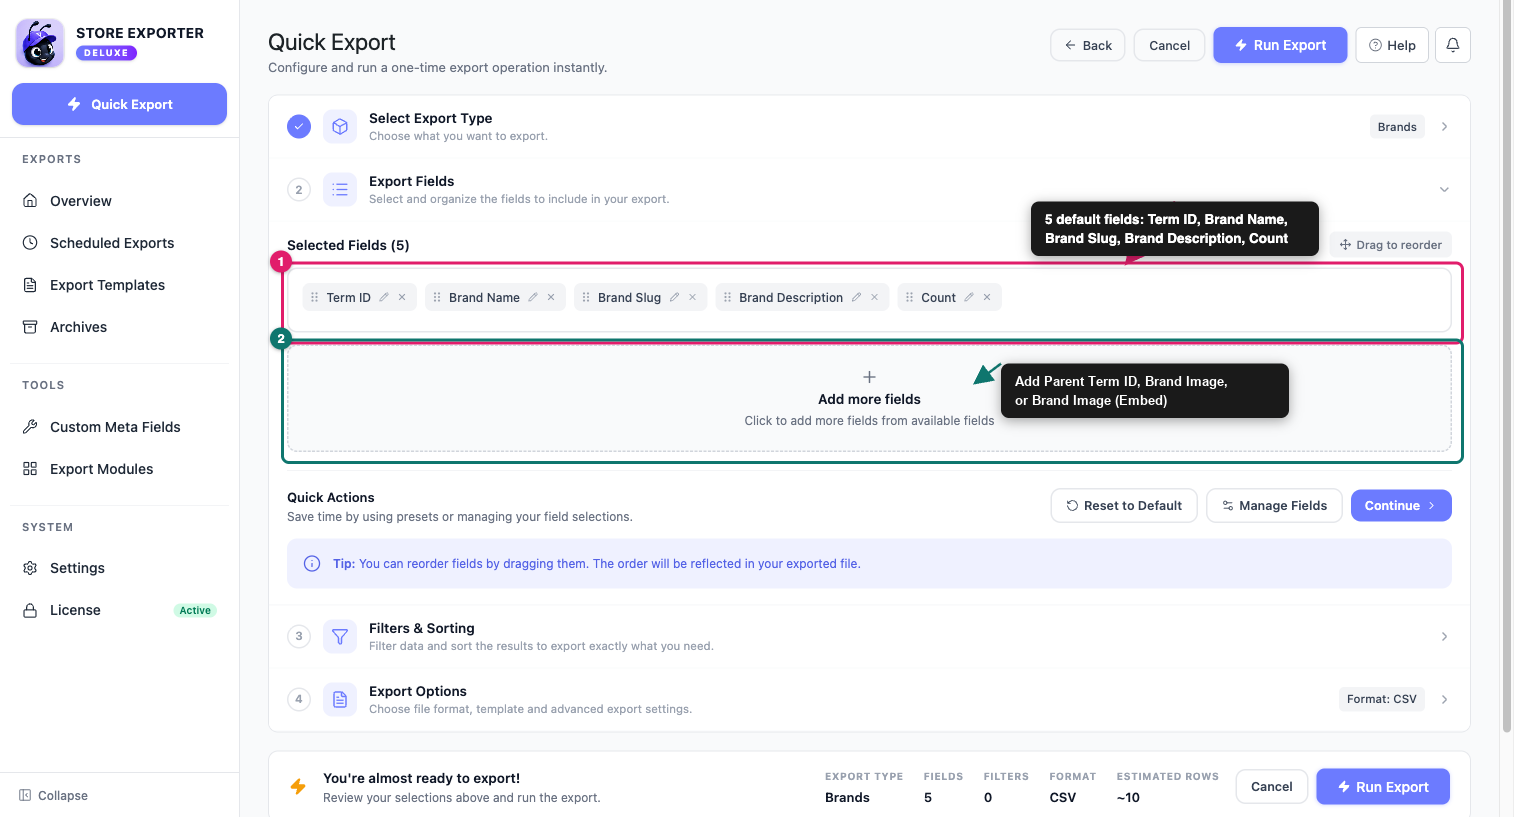
On the Export Fields step, the columns you’re about to export appear as chips under Selected Fields. Brands start with five of them:
- Term ID
- Brand Name
- Brand Slug
- Brand Description
- Count
From there you can shape the column list:
- Click Add more fields to open the Select Export Fields popup and add anything that isn’t already a chip.
- Click Manage Fields to open the same popup with the full list.
- Drag a chip to change the column order in your file.
- Click the pencil icon on a chip to rename that column heading. The underlying data stays the same.
- Click the X on a chip to drop that column.
- Use Reset to Default to go back to the starting five.
Available brand fields:
| Field | What it is |
|---|---|
| Term ID | The brand term’s internal WordPress ID |
| Brand Name | The brand’s display name |
| Brand Slug | The URL-friendly version of the name |
| Parent Term ID | The term ID of the parent brand, for brand hierarchies |
| Brand Description | The description text entered on the brand’s term page |
| Brand Image | The brand’s image, as a URL |
| Count | How many products are assigned to that brand |
For the full list across every export type, see Available export fields in Store Exporter Deluxe.
Step 3: Sort your brands
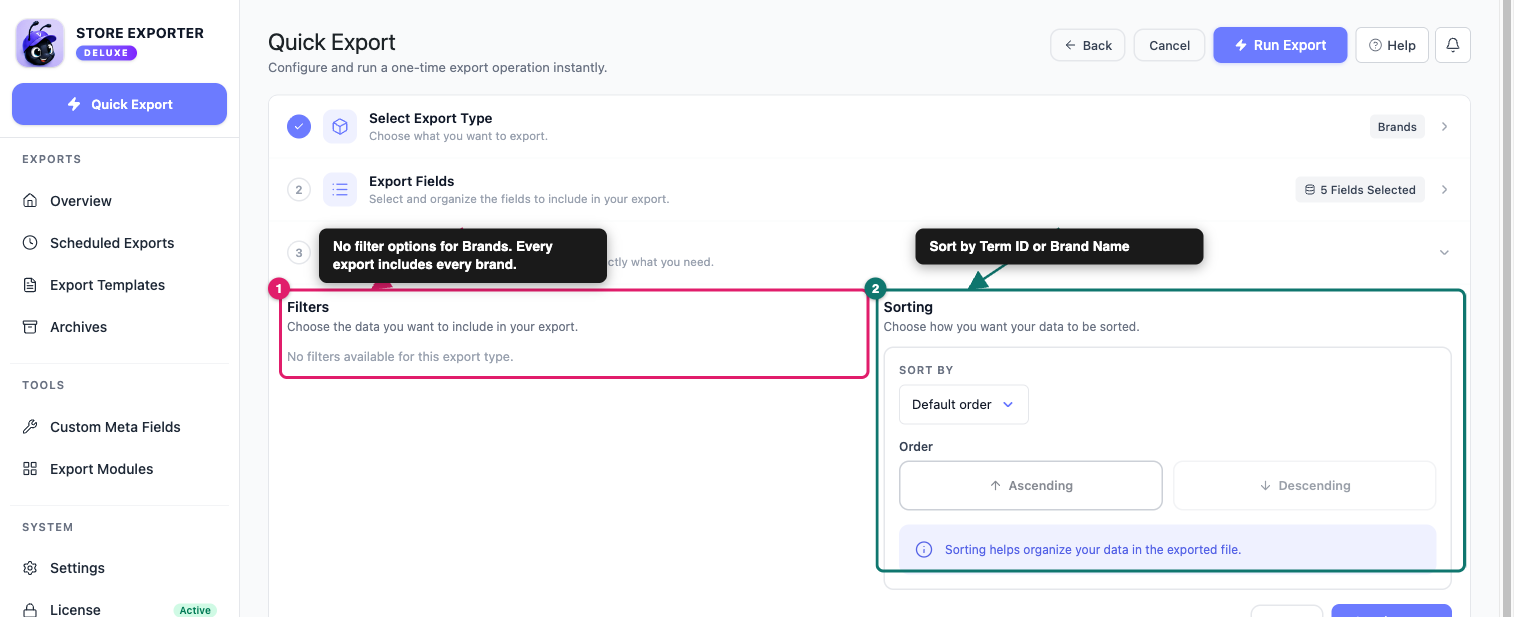
Open the Filters & Sorting step. The left panel shows “No filters available for this export type.”
Sorting does work. In the Sorting panel on the right:
- Pick a field in Sort by. Your options are Term ID and Brand Name, or leave it on Default order.
- Under Order, click Ascending or Descending. Both buttons stay greyed out until you’ve chosen a Sort by value.
Step 4: Set your format and run the export
- On the Export Options step, pick a file format. CSV suits most jobs, since nearly every spreadsheet and import tool reads it.
- Optional: if you saved a setup on the Export Templates screen, pick it from the Export Template dropdown. This saves you from rebuilding your field list by hand.
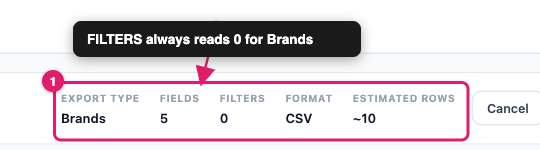
- Check the summary bar. It shows EXPORT TYPE, FIELDS, FILTERS, FORMAT, and ESTIMATED ROWS. FILTERS always reads 0 on a Brands export, because Brands exports don’t have filters.
- Click Run Export.
- In the Export in Progress window, click Download File.
Exporting brands on a schedule
If you need a fresh brand list every week for a supplier or a syncing tool, build it as a scheduled export instead of running Quick Export by hand each time.
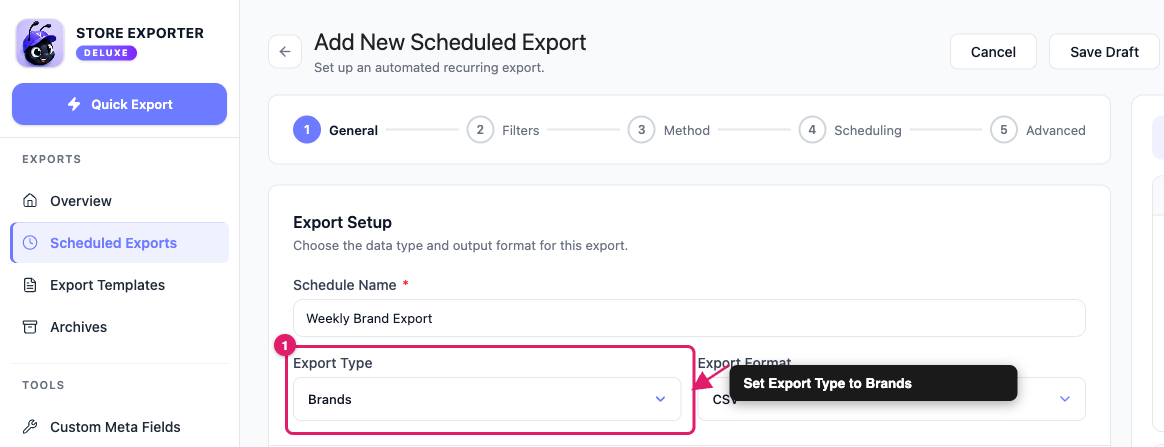
- Go to Scheduled Exports in the EXPORTS group.
- Click New Schedule.
- Set Export Type to Brands.
The Filters step has the same Sort by options as Quick Export, and you get a full delivery setup on top: email, FTP/SFTP, Google Sheets, and more. For detailed instructions on building a schedule, see How to schedule exports in Store Exporter Deluxe.
Troubleshooting
FAQ
Related articles
- How to export WooCommerce products with Store Exporter Deluxe
- How to export WooCommerce customers with Store Exporter Deluxe
- Store Exporter Deluxe supported plugins list
- Available export fields in Store Exporter Deluxe
- How to schedule exports in Store Exporter Deluxe
Need more help?
If you’re using Store Exporter Deluxe, open a support ticket and our team will help you get your brand export working.
If you’re using the free Store Exporter plugin, ask on the WordPress.org support forum and our team will get back to you there.
