
If another system on your server, like an accounting tool or a custom script, expects your WooCommerce data to just show up in a folder, downloading a file by hand every time doesn’t scale. Store Exporter Deluxe can write a Scheduled Export straight to a folder on your own server instead, so the file is already there and ready to be picked up the moment the schedule runs.
This article covers setting up the Save to Server delivery method on an existing Scheduled Export: the Directory Path and Filename fields (including an important gap between what those fields’ placeholder text suggests and what they actually do), what happens if the folder can’t be written to, and why the plugin never overwrites a file it already saved.
Prerequisites
| Requirement | Details |
|---|---|
| Plugin | Store Exporter Deluxe is active and licensed |
| Scheduled export | You’ve already created a Scheduled Export. For detailed instructions, see How to schedule exports in Store Exporter Deluxe |
| Scheduled exports turned on | Enable Scheduled Exports is turned on under WooCommerce → Store Export → Settings → Scheduling. It is off by default, and while it is off the Scheduled Exports screen shows “Scheduled exports are currently disabled.” You can also turn it on from that screen by clicking Enable Scheduled Exports in the banner. |
| Server write access | The folder you want to save into must be writable by your web server. If you’re not sure which folder that is yet, you can leave the path blank at first and use the plugin’s own default folder, covered below |
Step 1: Choose Save to Server as the delivery method
- Open WooCommerce → Store Export → Scheduled Exports.
- Open the schedule you want to configure, or click New Schedule to create one.
- Click the Method step at the top of the form.
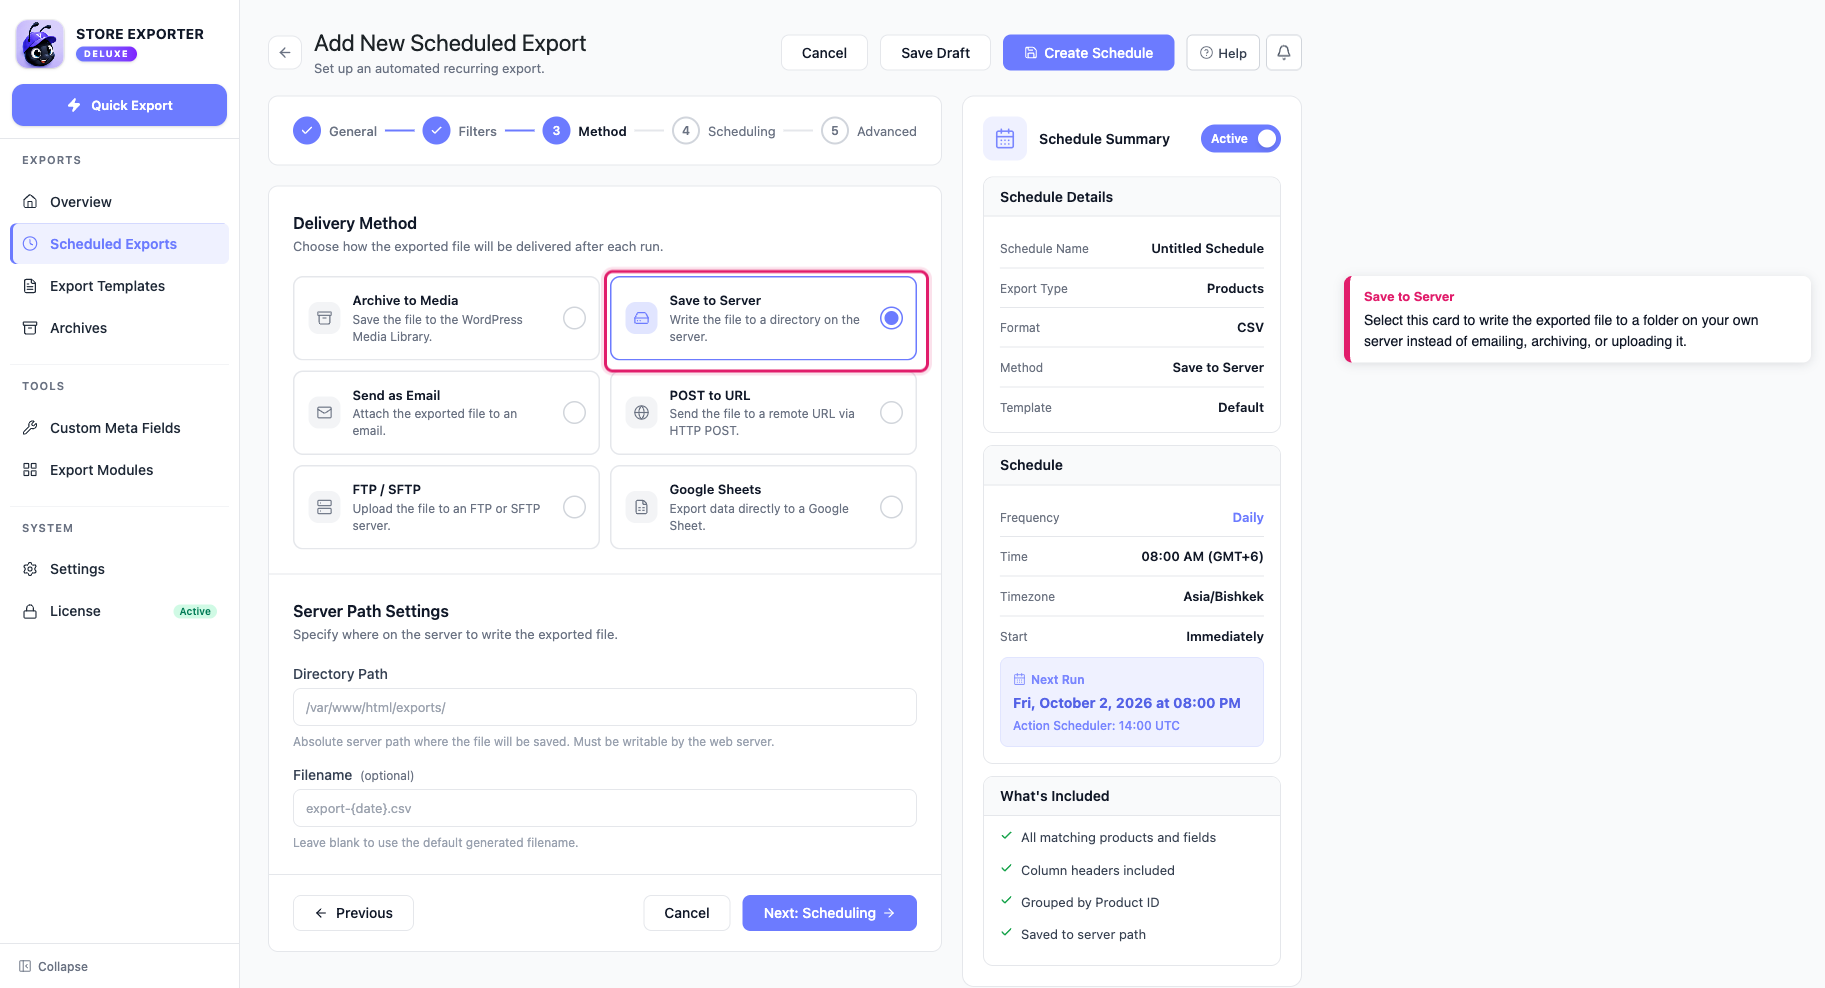
- Select the Save to Server card.
Selecting it reveals a Server Path Settings panel below the delivery method cards.
Step 2: Set the folder and filename
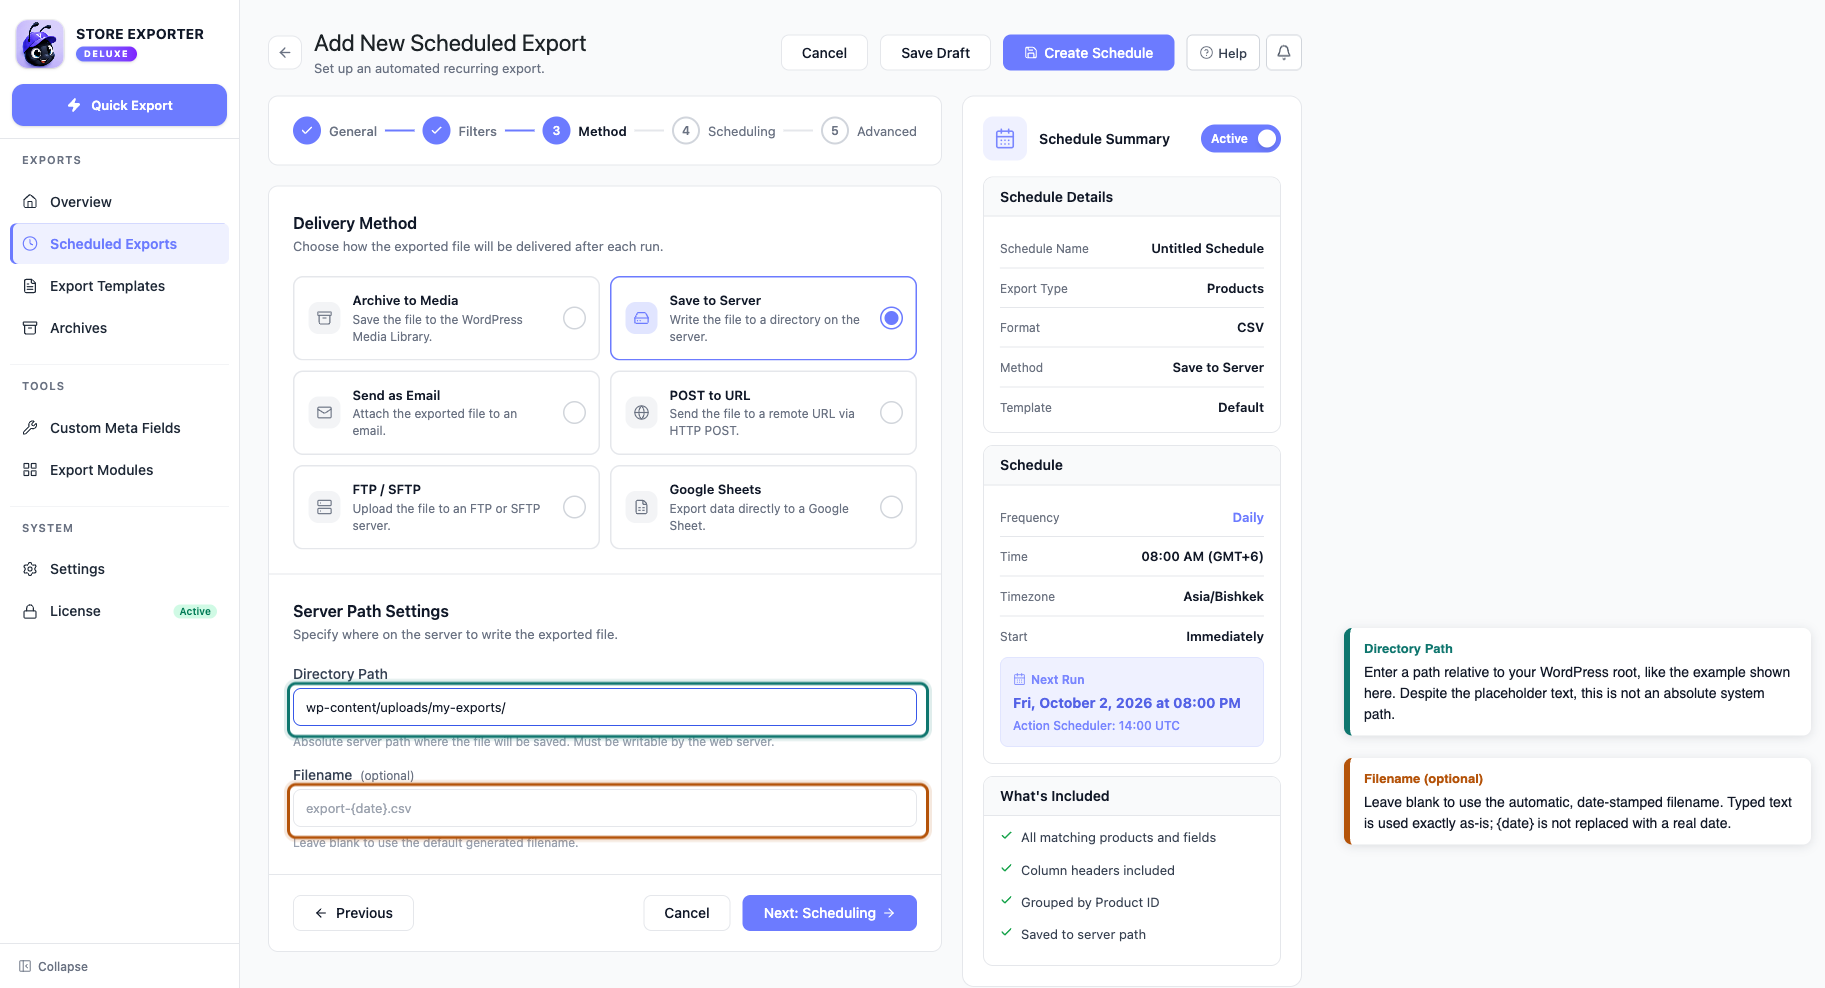
The Server Path Settings panel has two fields:
- Directory Path: the folder to save the export into. Leave this blank to use the plugin’s own default folder,
wp-content/store-exporter/. - Filename (optional): overrides the name of the saved file. Leave it blank to use the export’s default, automatically generated filename. Leave the extension off: Store Exporter Deluxe adds it for you, so typing
report.csvsaves a file namedreport.csv.csv.
Once you’ve filled these in, click Create Schedule (or Save Schedule on an existing one) to save.
Step 3: Confirm the file saved
There’s no download link or email for this delivery method, so you confirm a run the same way you’d confirm any Scheduled Export:
- On the Scheduled Exports screen, find the schedule you just saved.
- Watch the Recent Activity panel. The run shows as In Progress, then updates to Completed or Failed.
- If it shows Completed, open the folder you set in Directory Path (relative to your WordPress root) through FTP, SFTP, or your hosting provider’s file manager to confirm the file is there.
A Completed status only confirms the plugin wrote the file somewhere. Check the actual folder at least once after setting this up, so you know the path you entered points where you expect.
Troubleshooting
- Open WooCommerce → Store Export → Settings and select the Audit Log section.
- Turn on the audit log, and make sure Scheduled Exports is set to at least the Minimal level. Minimal already captures Error Details, the field that holds the plugin’s exact error message.
- Open the schedule’s row action menu (the ⋮ button) and click Execute Now, then open the failed run’s log entry to read the Error Details field. A message like “Could not save the export file.” confirms the plugin reached the folder but couldn’t write to it, usually a file or folder permissions issue your host or developer can fix.
wp-content/uploads/my-exports/, then run the schedule again. The Error Details field shows “The provided file path is invalid or resolves outside the allowed directory.” when the path you entered points outside your WordPress root, for example with .././var/www/ or /home/. As explained above, Store Exporter Deluxe always treats this field as relative to your WordPress root, so an absolute-looking path gets nested onto that root instead of being used as-is. Re-enter the path relative to your WordPress root, for example wp-content/uploads/my-exports/, and check that folder after the next run.export.csv becomes export-1.csv on the next run, export-2.csv after that, and so on. If you don’t want files accumulating, clear the folder out periodically yourself, or point Directory Path at a folder your other system empties after it picks each file up.FAQ
Related articles
- How to schedule exports in Store Exporter Deluxe: for creating the scheduled export itself and comparing all six delivery methods
Need more help?
If you’re using Store Exporter Deluxe and run into an issue this article doesn’t cover, open a support ticket and our team will help you get your export delivered.
If you’re using the free Store Exporter plugin, ask on the WordPress.org support forum and our team will get back to you there.
