
If your store uses PDF Invoices & Packing Slips for WooCommerce to generate invoices, you can pull the invoice number and invoice date straight into your order exports with Store Exporter Deluxe. Exports from the WooCommerce → Orders screen and scheduled exports set to All Fields pick these up automatically. Getting them into Quick Export or an export template takes one extra setup step.
Prerequisites
| Requirement | Details |
|---|---|
| Plugin | Store Exporter Deluxe 5.4.5 or later is installed and active |
| Plugin | PDF Invoices & Packing Slips for WooCommerce is installed and active |
| Invoice data | At least one order needs an invoice already generated. The field stays empty for any order where an invoice hasn’t been created yet |
Export invoice data with no setup
- Go to WooCommerce → Orders.
- If you don’t see the Actions column, open Screen Options at the top of the Orders screen and tick Actions.
- In the Actions column, click a download icon for the order (for example Download as CSV).
Hover an icon to see its label: Download as CSV, Download as TSV, Download as XLS, Download as XLSX, and Download as XML are all available.
To export several orders at once, select them and choose Download as CSV from the Bulk actions dropdown instead.
The file includes a PDF Invoice Number and a PDF Invoice Date column automatically, no configuration needed.

Include the invoice fields in a scheduled export
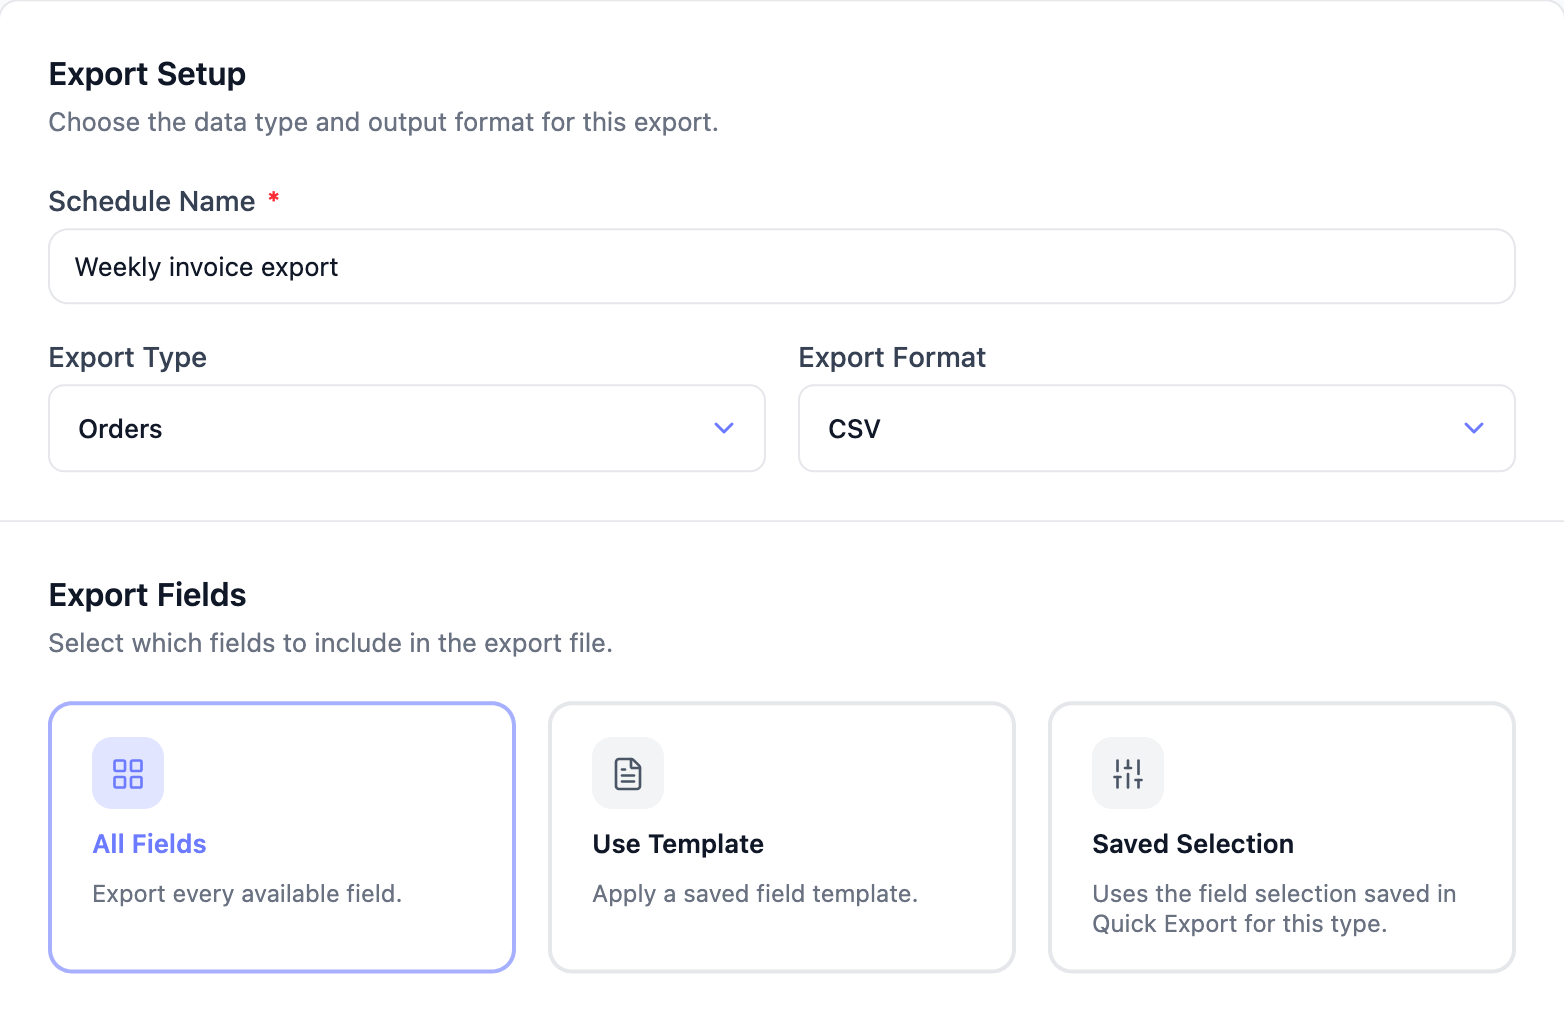
A scheduled export has no field picker of its own. In the schedule’s Export Fields section, choose All Fields. The file then includes PDF Invoice Number and PDF Invoice Date, with no extra setup. To export only some fields, choose Use Template and pick an export template that has the invoice fields (see the next section). Saved Selection also works, once you’ve run a Quick Export that includes the invoice fields.
Add the invoice fields to Quick Export or an export template
By default, the Orders screen actions above don’t share their field list with Quick Export or export templates. Those need the invoice fields added through the Custom Meta Fields tool. For the full walkthrough, see How to export custom product, order, and order item meta. Here’s the specific setup for invoice data:
Register the invoice keys in Custom Meta Fields
- Open WooCommerce → Store Export.
- Click Custom Meta Fields under TOOLS.
- Click Add Custom Field (or click the existing Orders row if you’ve already configured one).
- If you’re adding a new one, choose Orders from the Export Type dropdown.
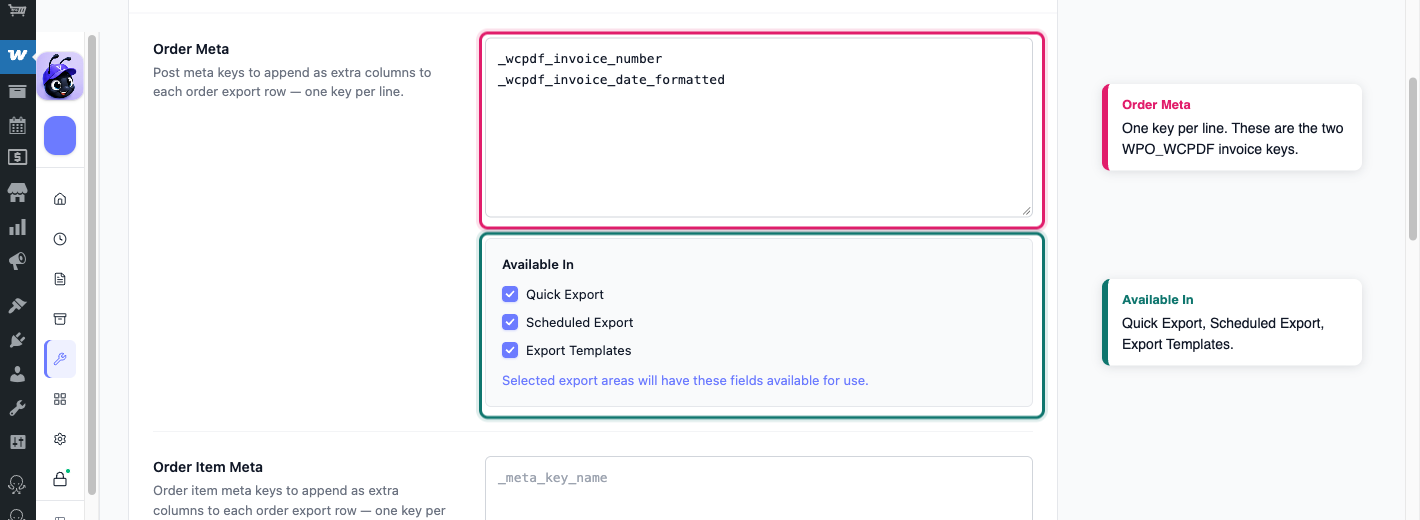
- In the Order Meta box, type these two meta keys, one per line:
_wcpdf_invoice_numberand_wcpdf_invoice_date_formatted. - Under Available In in the Order Meta box, tick each place you want the fields: Quick Export, Scheduled Export, or Export Templates.
- Click Save Fields.
Add the invoice fields to a Quick Export
- Open Quick Export and choose Orders as your export type.
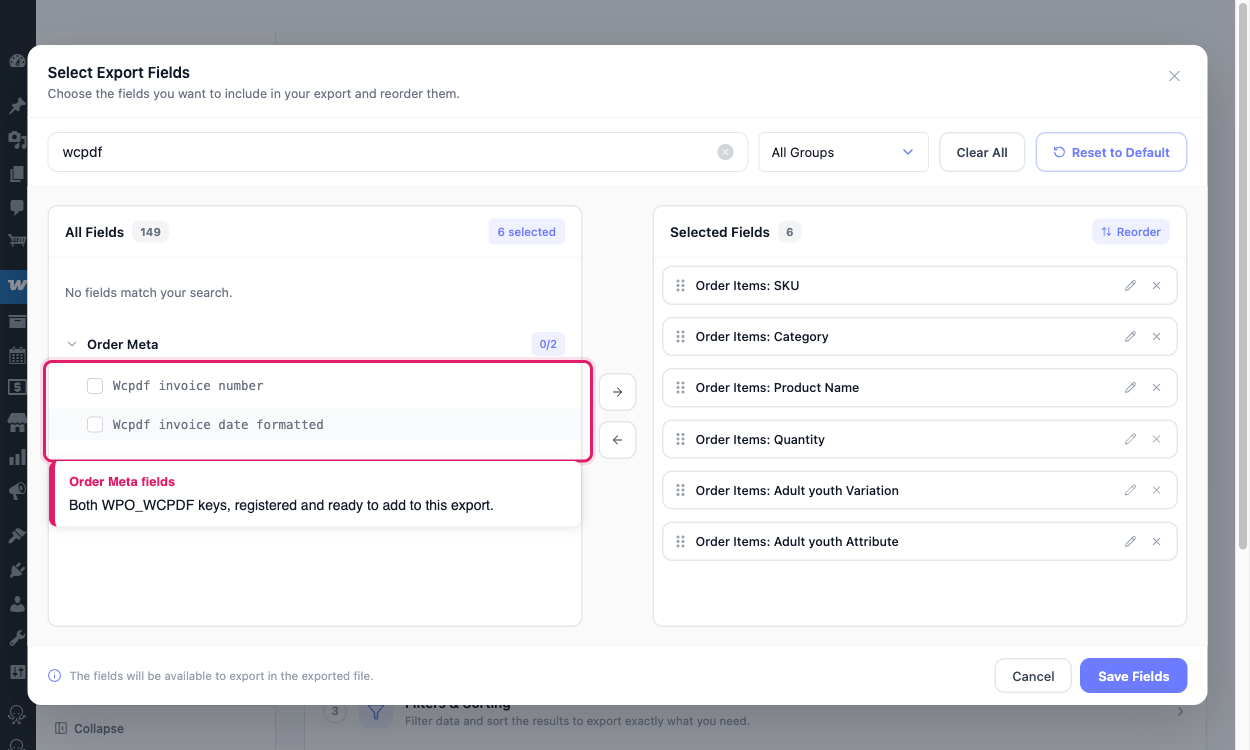
- On the Export Fields step, click Add more fields.
- In the Select Export Fields dialog, tick Wcpdf invoice number and Wcpdf invoice date formatted under Order Meta.
- Click Save Fields, then continue through the wizard to run your export.
Add the invoice fields to an export template
- Open the export template and go to its Export Fields step.
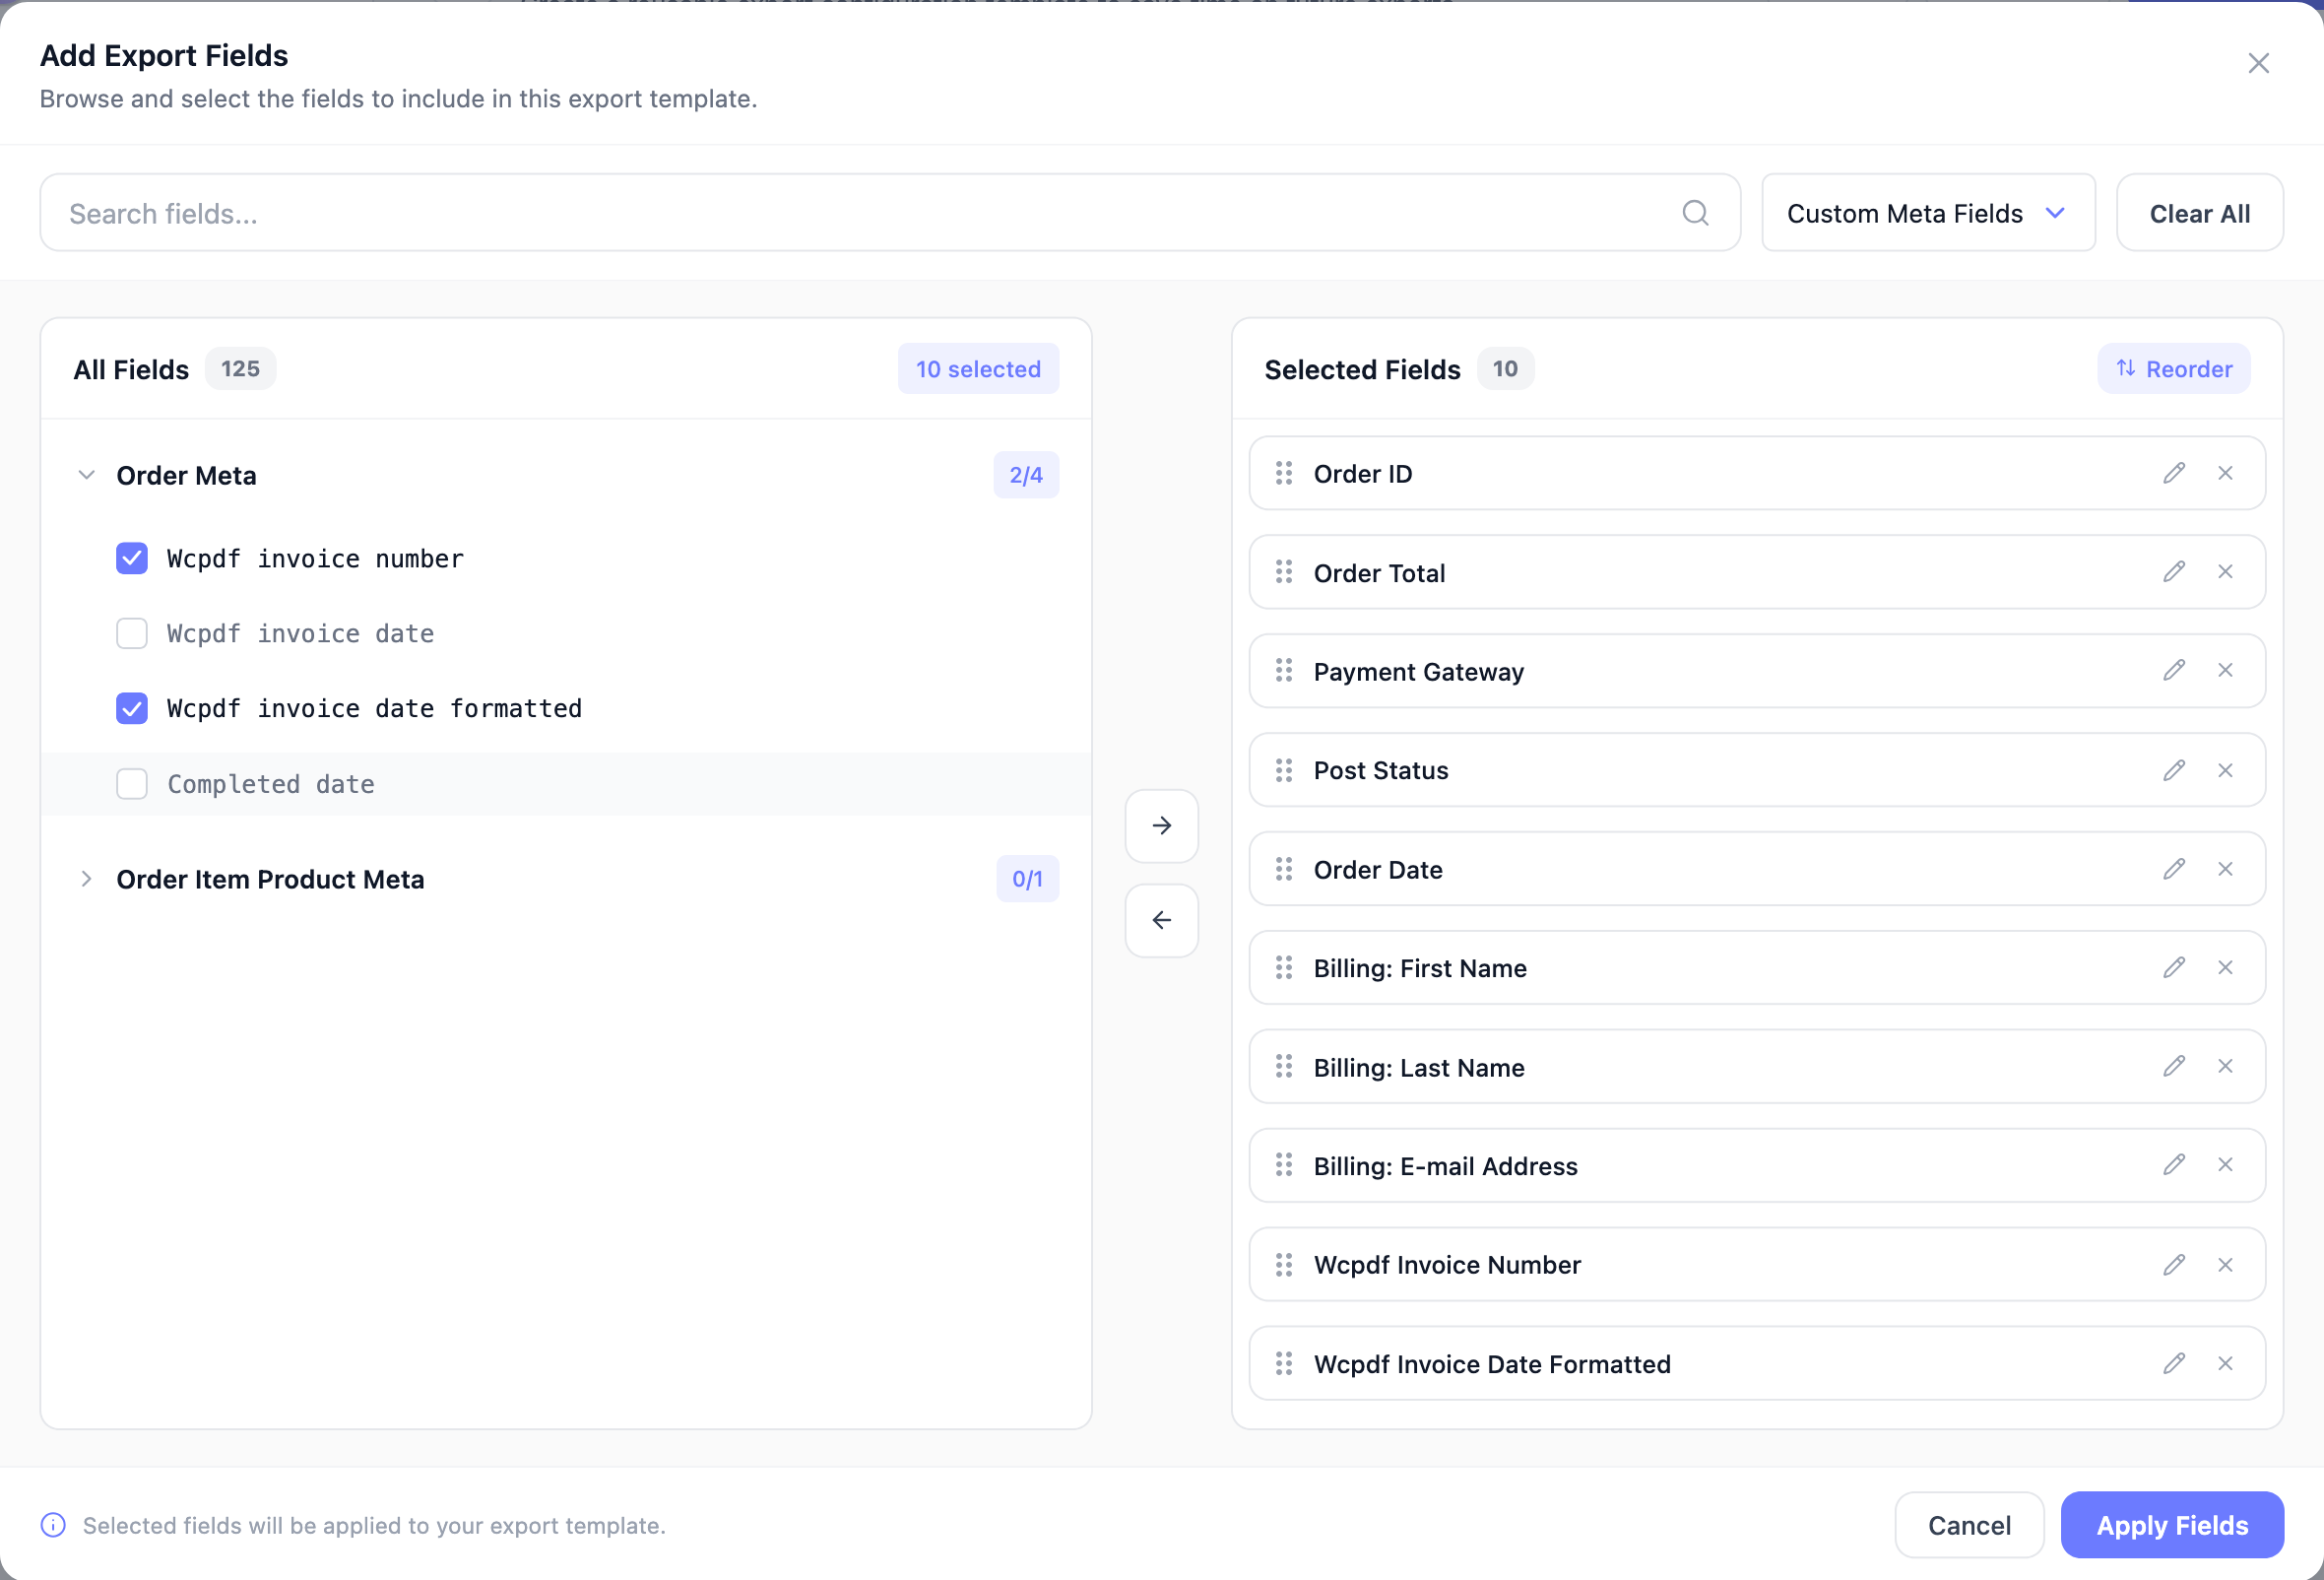
- Click Add More Fields.
- In the Add Export Fields dialog, choose Custom Meta Fields from the group dropdown. Then tick Wcpdf invoice number and Wcpdf invoice date formatted under Order Meta.
- Click Apply Fields, then save the template.
Troubleshooting
Frequently asked questions
Need help?
If you’re using Store Exporter Deluxe and these fields still aren’t exporting correctly, open a support ticket, and our team will help you get it sorted.
If you’re using the free Store Exporter plugin, ask on the WordPress.org support forum, and our team will get back to you there.