
If your store takes appointments, rentals, or reservations through WooCommerce Bookings, you’ll eventually need those records outside WordPress. Maybe it’s for a calendar sync, a staff roster, or a backup of your reservation history. Store Exporter Deluxe lets you pull that data out as a dedicated Bookings export, either on demand or on a recurring schedule.
Prerequisites
| Requirement | Details |
|---|---|
| Plugin | Store Exporter Deluxe is active and licensed |
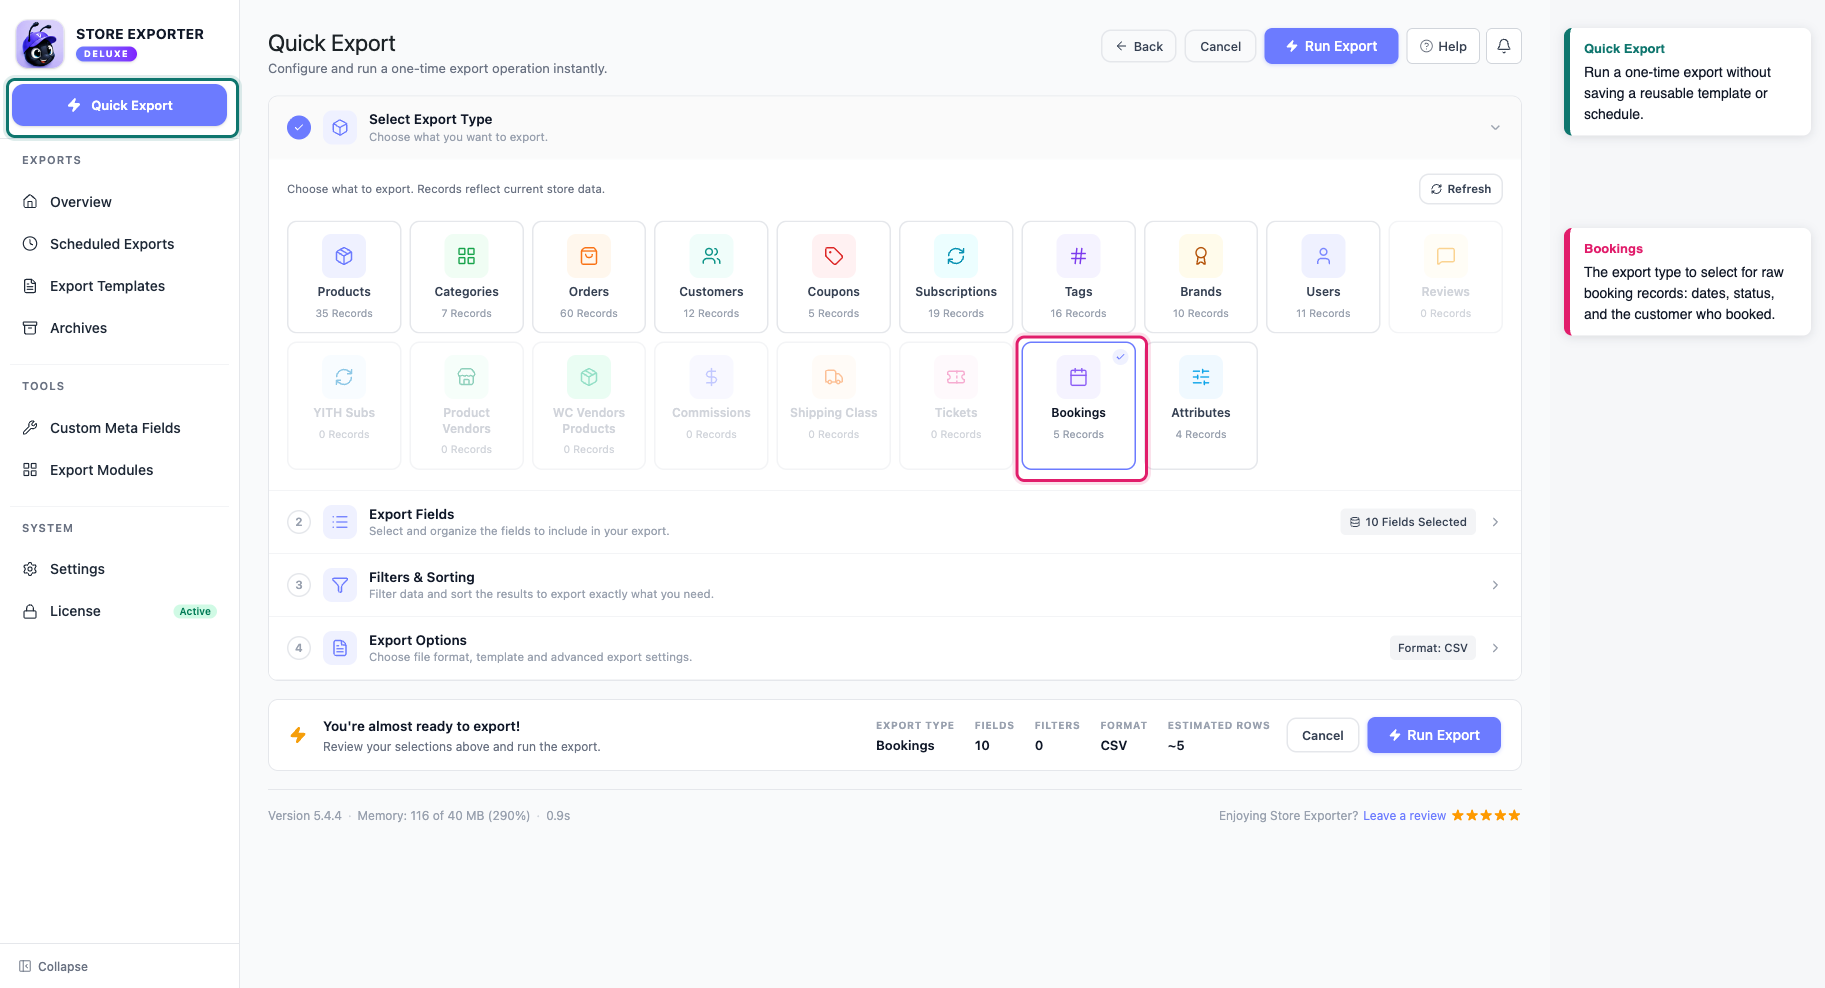
| WooCommerce Bookings | Installed and active. Without it, the Bookings tile shows 0 records and is greyed out (not selectable). |
| WooCommerce | Active, with at least one booking to export |
| Administrator access | You’ll need an account with access to the WordPress admin dashboard |
Step 1: Choose Bookings as the export type
- Go to WooCommerce → Store Export.
- Click Quick Export in the sidebar.
- Under Select Export Type, click the Bookings tile.
The Export Fields step opens automatically once you pick the tile.
Step 2: Choose the booking fields
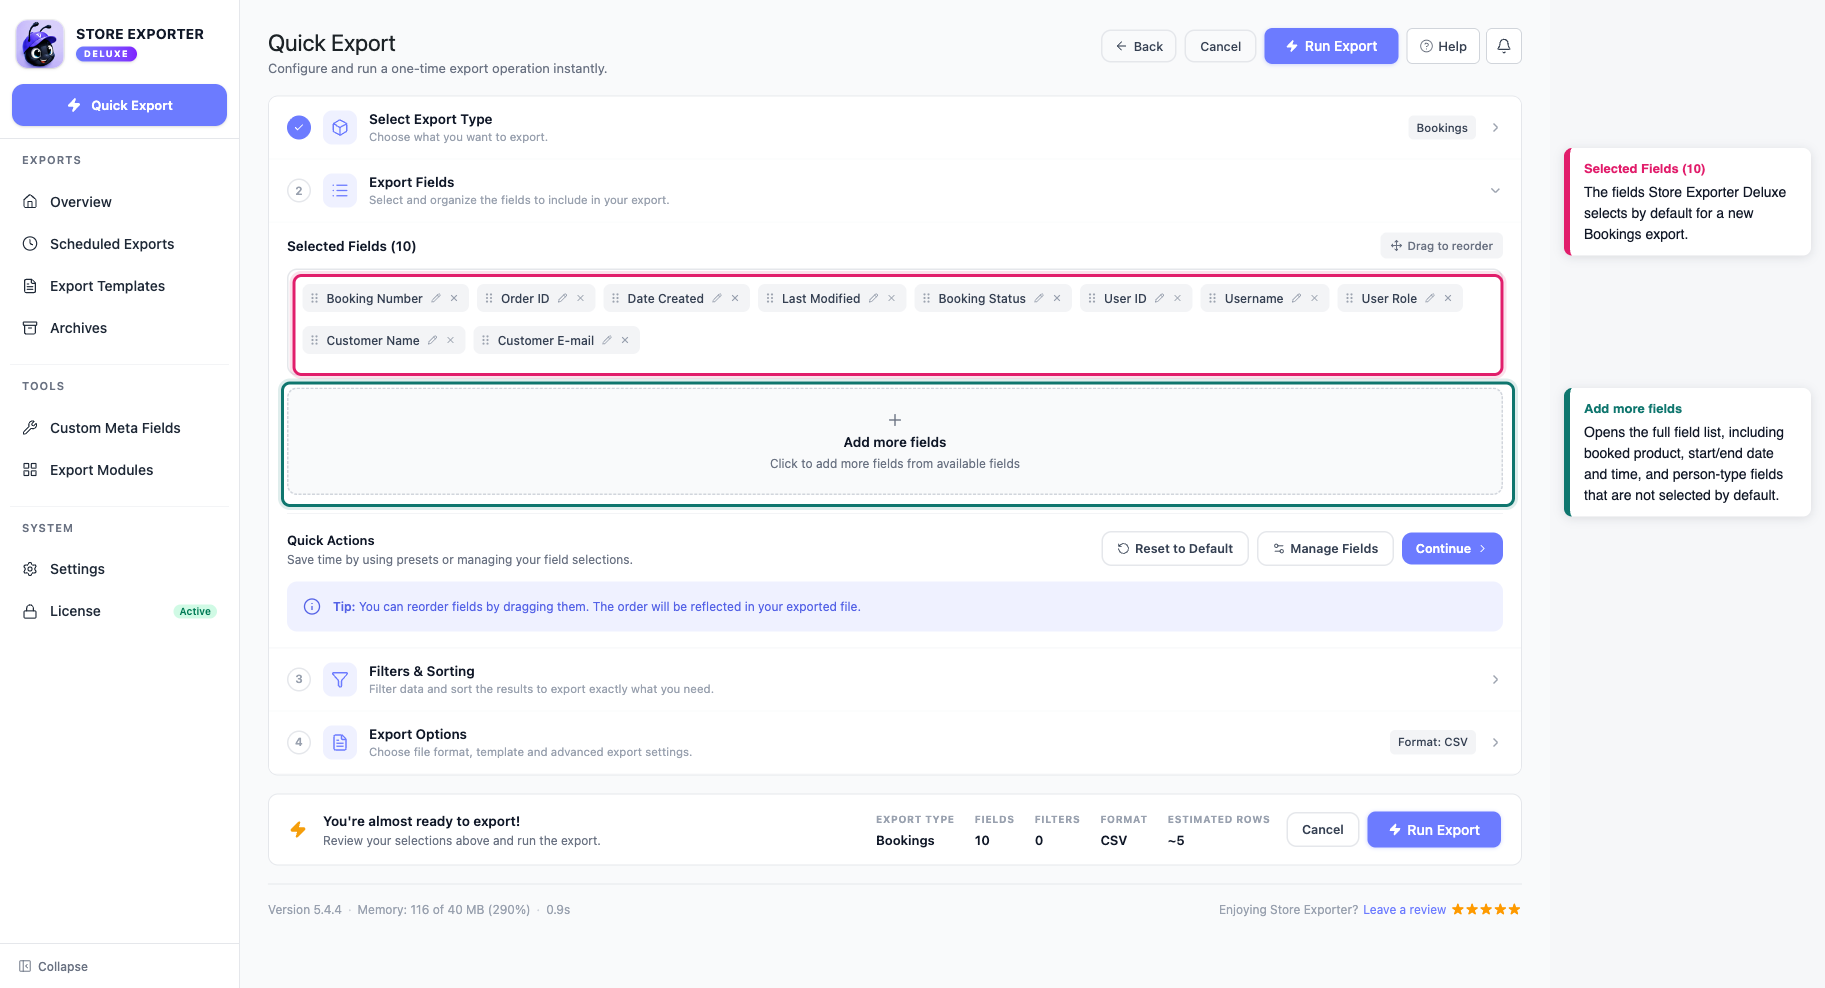
- In the Export Fields step, review the 10 fields that are already selected.
- Remove any field you don’t need.
- Click Add more fields to add booking dates, product details, or person types.
- (Optional) Click the Rename (pencil) icon next to a field and type a new column header.
Renaming a column helps when a downstream system expects specific column names. See Available booking fields below for the default and optional fields.
Step 3: Choose the file format
- Click Export Options to open the step.
- Under File Format, pick CSV, TSV, XLS, XLSX, or XML.
Step 4: Run the export
- Click Run Export.
- Wait for the Export in Progress dialog to finish.
- Click Download File to save the export.
Run Export is available as soon as you pick an export type. Any step you don’t open keeps its default settings.
Export only some bookings
To work with only some bookings, include the field you want to filter by in Step 2. Then filter the file in your spreadsheet after you download it.
- By status: use the Booking Status field, which is selected by default. It shows each booking’s status, such as Paid, Confirmed or Cancelled.
- By booking date: click Add more fields and add the Booking Start Date field.
- By customer: use the Customer E-mail field, which is selected by default.
- By product: click Add more fields and add the Booked Product SKU field.
Quick Export doesn’t offer a Sort by option for Bookings. Sort the rows in your spreadsheet after you download the file.
Available booking fields
A new Bookings export starts with these 10 fields selected:
- Booking Number
- Order ID
- Date Created
- Last Modified
- Booking Status
- User ID
- Username
- User Role
- Customer Name
- Customer E-mail
Click Add more fields to bring in any of these, which aren’t selected by default:
- Booked Product ID, Booked Product SKU, Booked Product
- Parent Booking ID, Order Item ID
- Booking Start Date, Booking Start Time, Booking End Date, Booking End Time, All Day Booking
- Person Type, Person Type Count
Schedule a recurring bookings export
- Go to WooCommerce → Store Export.
- Click Scheduled Exports in the sidebar.
- Create a new schedule.
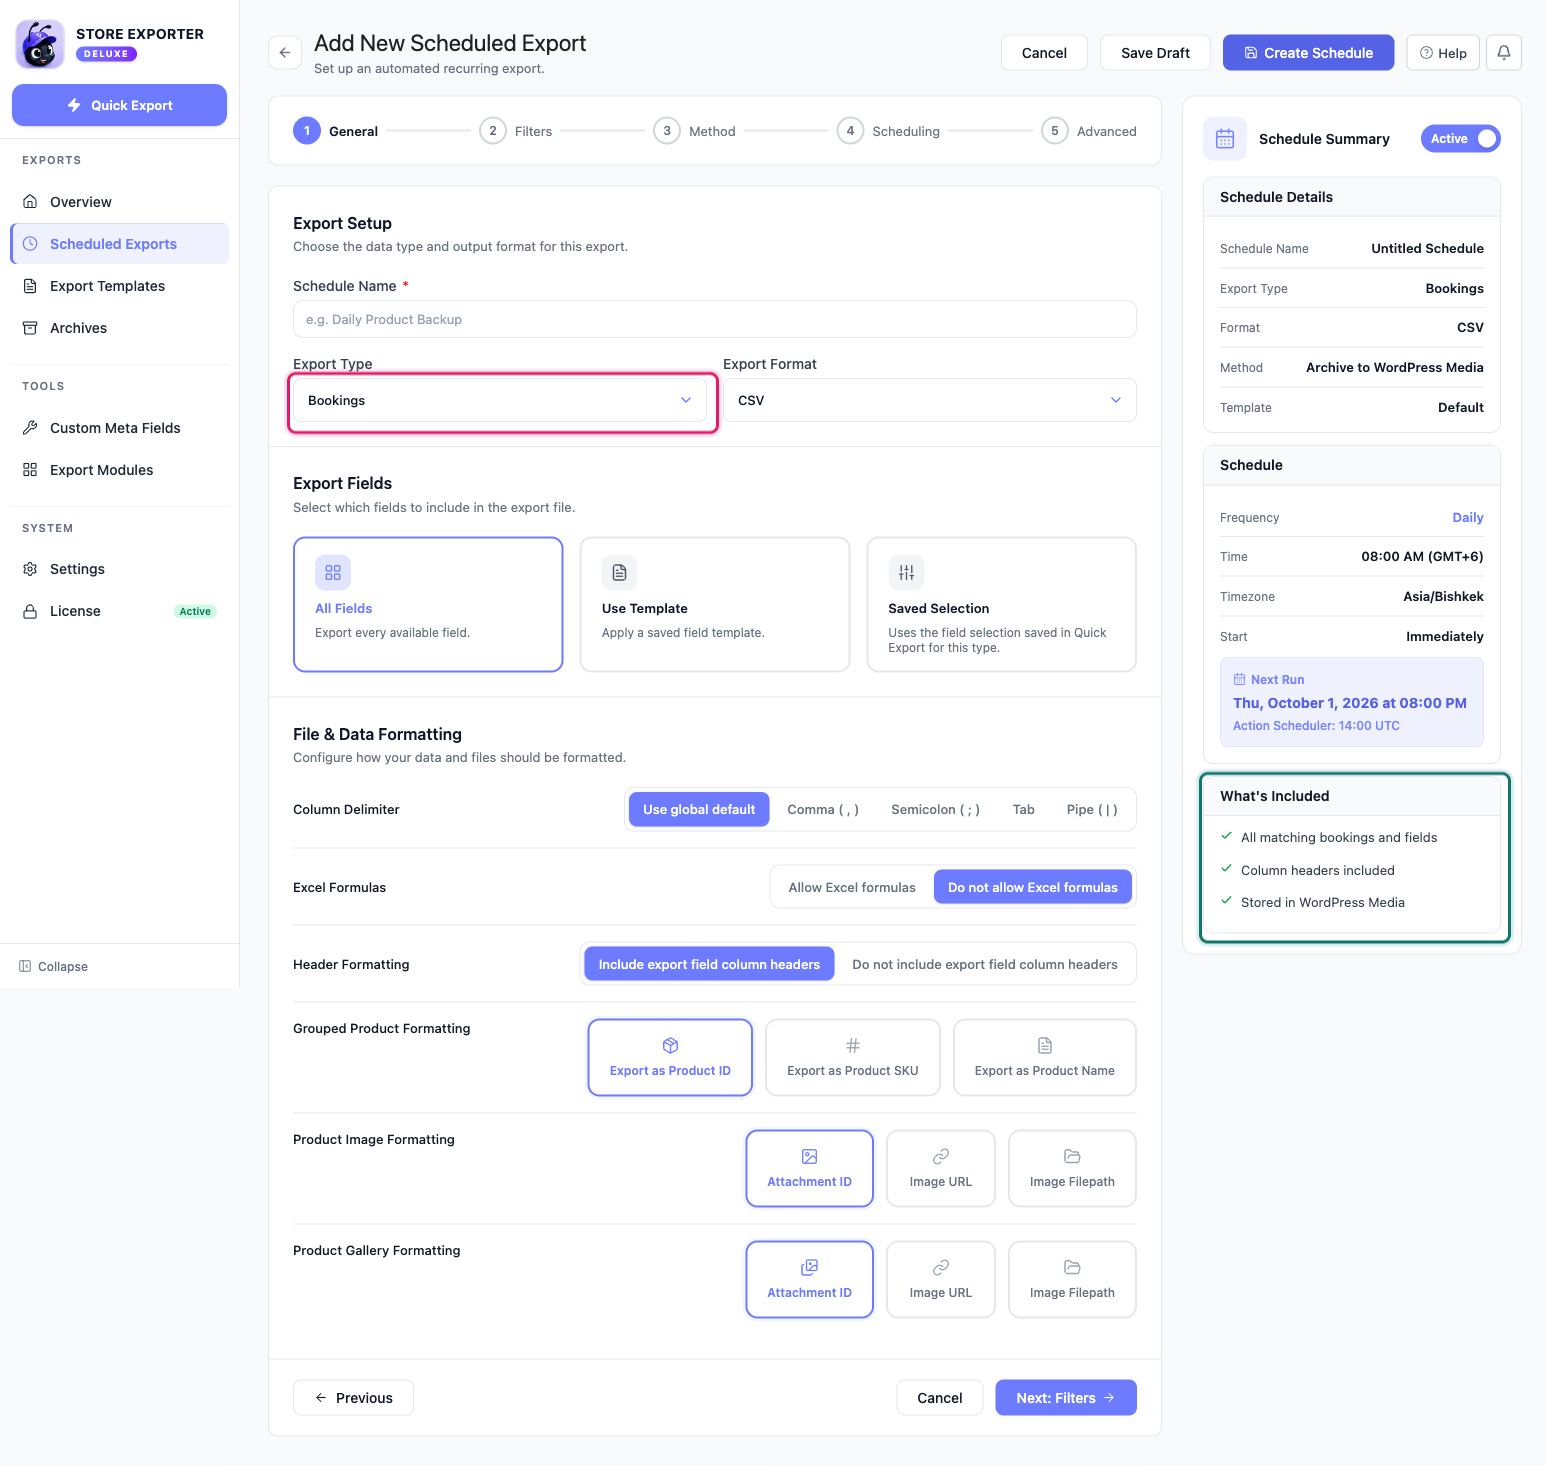
- On the General step, set Export Type to Bookings.
- Choose an Export Format.
- Under Export Fields, pick All Fields, Use Template, or Saved Selection.
Saved Selection reuses the fields you saved in Quick Export for Bookings. Then set:
- Frequency: Hourly, Daily, Weekly, Monthly, Custom, or Manual.
- Delivery method: Archive to Media, Save to Server, Send as Email, POST to URL, or FTP / SFTP.
Google Sheets is not a supported delivery method. Pick one of the methods above.
For detailed instructions on building a schedule, see How to schedule exports in Store Exporter Deluxe.
Supported export formats
Quick Export offers CSV, TSV, XLS, XLSX, and XML for Bookings exports. Scheduled Exports offers all of those plus RSS 2.0 and JSON. If you need JSON or RSS output, set up a scheduled export instead of using Quick Export.
Exporting bookable product settings
A booking record (what’s covered above) is different from a bookable product’s own settings, like its base cost or whether it requires confirmation. If you want those settings for every bookable product in your catalog, export your Products instead. When WooCommerce Bookings is active, Store Exporter Deluxe adds these fields to the Products export automatically:
- Booking Has Persons, Booking Has Resources
- Booking Base Cost, Booking Block Cost, Booking Display Cost
- Booking Requires Confirmation, Booking Can Be Cancelled
For the full list of fields every supported plugin adds, see Store Exporter Deluxe supported plugins list and Available export fields in Store Exporter Deluxe.
Troubleshooting
Frequently asked questions
Related resources
- How to schedule exports in Store Exporter Deluxe
- How to export WooCommerce orders
- Store Exporter Deluxe supported plugins list
- Available export fields in Store Exporter Deluxe
- Store Exporter Deluxe product page
Need more help?
If you’re using Store Exporter Deluxe and run into an issue this article doesn’t cover, open a support ticket and our team will help you get your bookings export working.
If you’re using the free Store Exporter plugin, ask on the WordPress.org support forum and our team will get back to you there.
