
After you install Custom Login for WooCommerce, activate your license so the plugin can get updates and you can get support. You need two things: your license key and the email you used to buy the plugin.
This guide shows you where to find both, how to activate them on the License tab, what each license status means, and how updates work once your license is active.
Prerequisites
| Requirement | Details |
|---|---|
| Custom Login for WooCommerce | Version 1.0.3 or later, installed and active. Earlier versions don’t have a License tab. To install the plugin, see Getting started with Custom Login for WooCommerce. |
| WooCommerce | WooCommerce installed and active. The plugin’s settings live under the WooCommerce menu |
| Access | An account that can manage WooCommerce settings. On a multisite network, you need to be a network (super) admin |
| License key and purchase email | Both are in your Visser Labs account |
Step 1: Find your license key and activation email
- Log in to your Visser Labs account.
- Open the Downloads page.
- Copy your Custom Login for WooCommerce license key.
- Note the email address you used to buy the plugin.
The license server checks the key and the email together, so you need both. For more detail, see How Do I Retrieve My License Keys?
Step 2: Open the License tab
- In your WordPress admin, go to WooCommerce → Custom Login.
- Click the License tab.
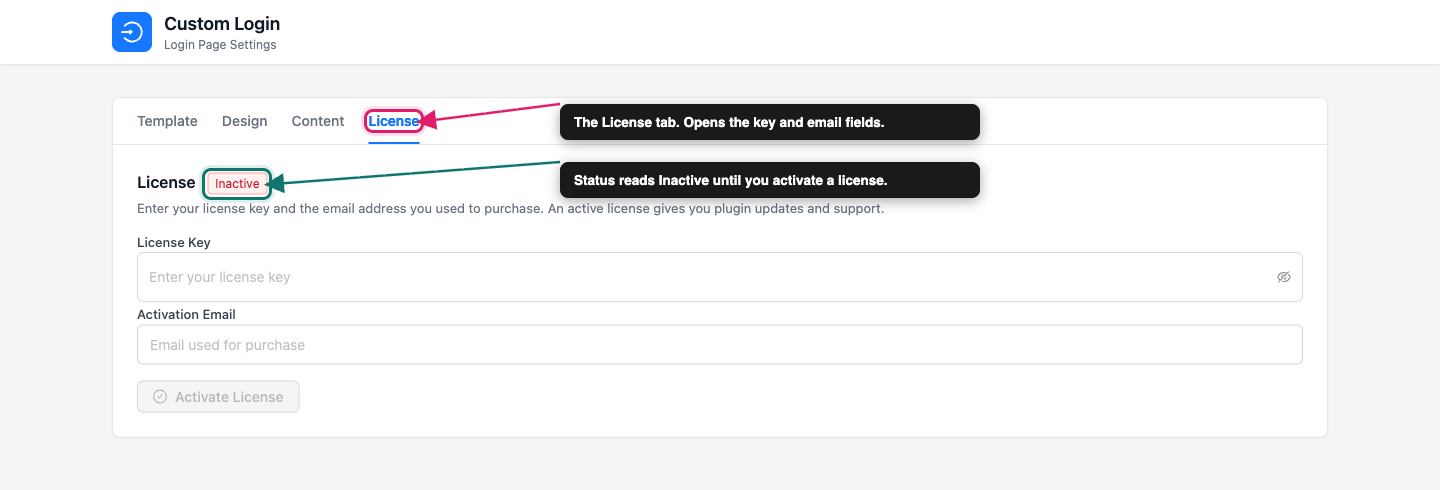
Step 3: Enter your license key and email
- Paste your license key into the License Key field.
- Enter your purchase email into the Activation Email field.
- Click Activate License.
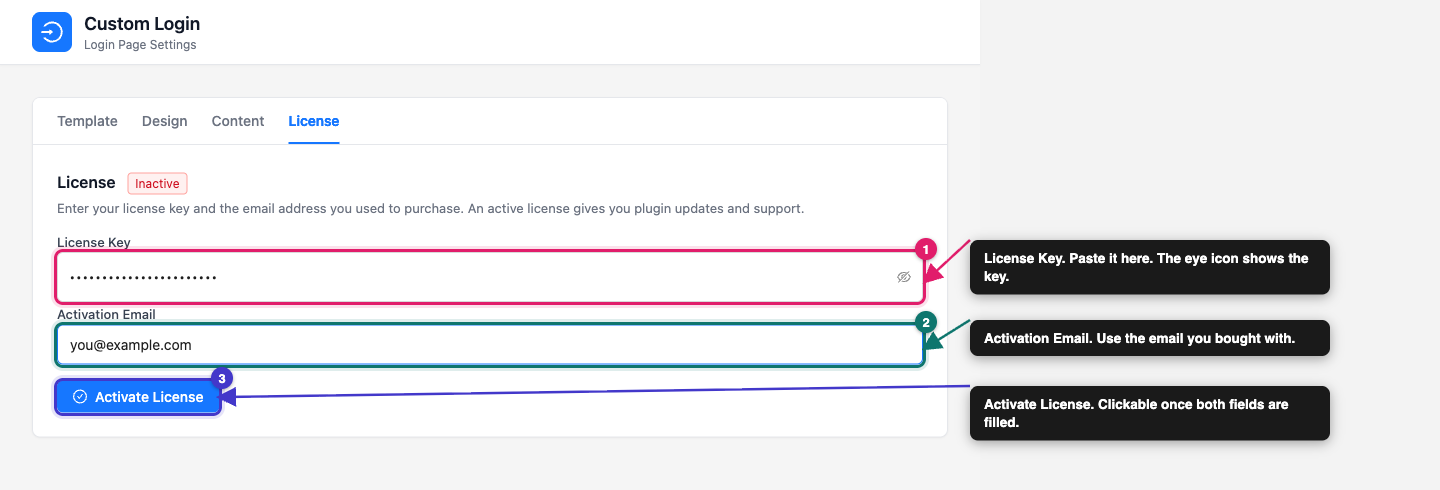
The Activate License button stays greyed out until both fields have a value. The License Key field hides what you type, like a password field. Click the eye icon in the field to check the key you pasted.
You don’t need to click Save Settings. That button isn’t shown on the License tab, and activation saves your key and email by itself.
What happens after you activate
Custom Login for WooCommerce sends your key and email to the Visser Labs license server. The server checks them, and the status tag next to the License heading updates straight away. You don’t need to reload the page.
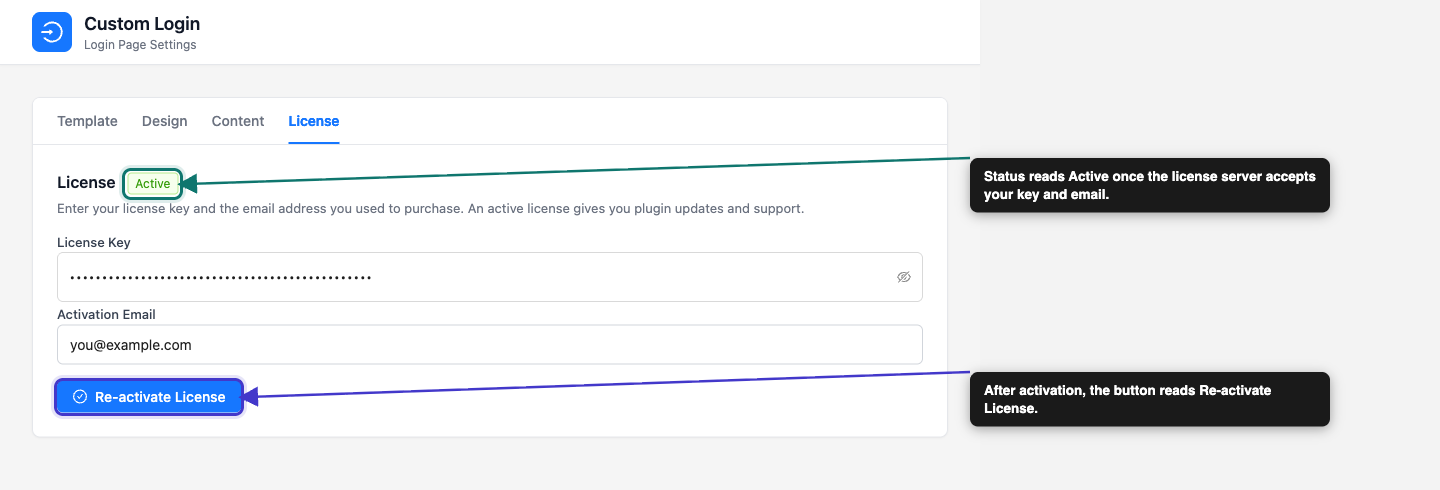
| Status | What it means |
|---|---|
| Active (green) | Your license is valid. The plugin can get updates, and you can get support. |
| Inactive (red) | The license hasn’t been activated yet, or the last activation attempt didn’t succeed. |
| Expired (orange) | The license server reports that your license has expired. Renew it to get updates and support again. |
If the activation works, you see a success message and the status changes to Active. The message disappears after a few seconds, so check the status tag if you miss it. After that, the button reads Re-activate License. Use it if you change your license key or email later.
If the activation doesn’t work, you see one of these messages:
An error message from the license server. Your site reached the server, but the server rejected the details. Read the message, then check the key and the purchase email for typos.
“Could not connect to the license server. Please try again later.” Your site couldn’t reach the license server. Wait a few minutes and try again. In this case, the plugin doesn’t save the key and email you entered.
How updates work after activation
While your license is Active, new versions of Custom Login for WooCommerce show up in Dashboard → Updates and on the Plugins page, like any other plugin. Your site checks for a new version every few hours.
You can also turn on automatic updates for the plugin. On the Plugins page, find Custom Login for WooCommerce and click Enable auto-updates.
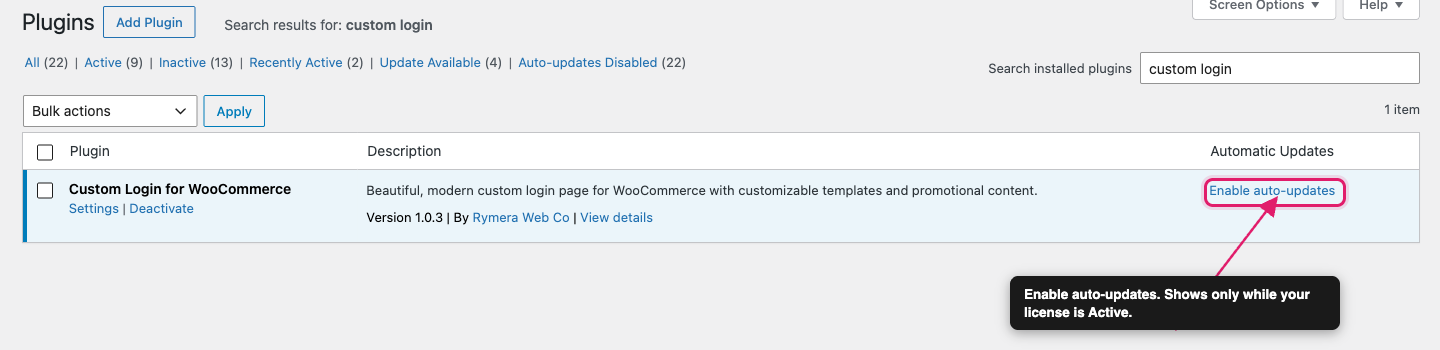
If your license isn’t active, the plugin doesn’t offer updates. Your login page keeps working either way. For what changes when a license lapses, see What Happens If My License Expires?
The activation notice
Until your license is active, Custom Login for WooCommerce shows a red notice at the top of your admin screens. It reads: “Custom Login for WooCommerce requires a license key to receive updates and support. Activate your license to get started.”

Click Activate your license in the notice to go straight to the License tab. The notice disappears once your license is active.
You can also close the notice with its close icon. This hides it for your user account only. Other admins who can manage the license still see it until the license is active.
Troubleshooting
Frequently asked questions
Need help?
Custom Login for WooCommerce is a premium plugin, so if you run into trouble, open a support ticket and our team will help you get set up.