
The default WooCommerce login form sits inside your theme’s My account page. It looks like every other store and doesn’t carry your branding. Custom Login for WooCommerce replaces it with a dedicated, branded login page at /login, and sends logged-out visitors there automatically.
By the end, you’ll have a branded login page at /login, the My account redirect working, and your logo in place. Template, colour, and promo content options live on other tabs and have their own articles.
Prerequisites
| Requirement | Details |
|---|---|
| WordPress | Version 5.8 or later |
| WooCommerce | Version 6.0 or later, installed and active |
| PHP | Version 7.4 or later |
| Access | An account that can manage WooCommerce settings |
| Logo file | A PNG or JPG image (or the address of an SVG that is already online). The plugin recommends 200x60px |
Step 1: Activate the plugin
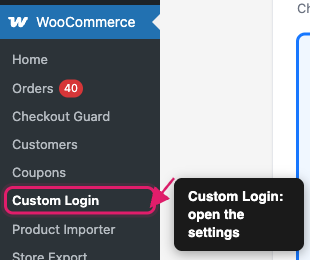
Install and activate Custom Login for WooCommerce the same way you would any other WordPress plugin. Once it’s active, a Custom Login item appears under the WooCommerce menu in your admin sidebar. You can also click Settings under the plugin’s name on the Plugins screen.
On activation, the plugin creates a published page titled Login with the slug login, unless a page with that slug already exists. Your login page is then live at yourstore.com/login.
Step 2: Activate your license
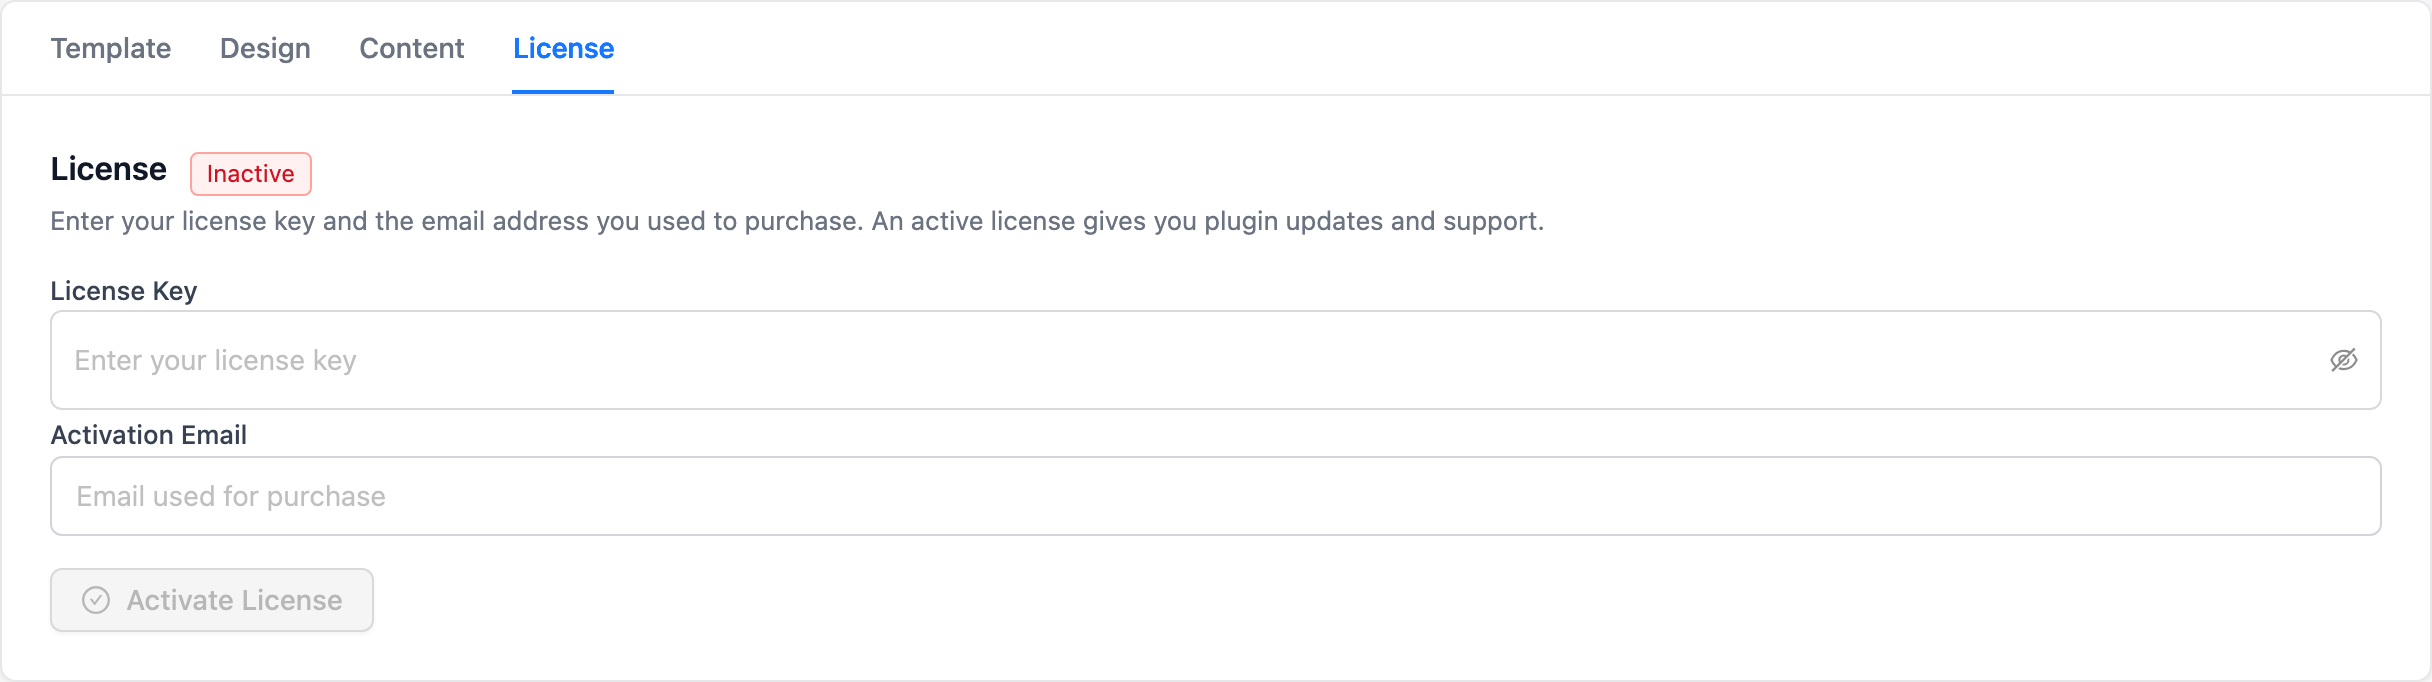
After activation, the plugin shows a red admin notice asking you to activate your license. A license gives you plugin updates and support.
- Go to WooCommerce → Custom Login.
- Click the License tab.
- Enter your License Key and the Activation Email you used to purchase.
- Click Activate License.
Step 3: Check your login page
Log out of your site, or open a private browser window. Then visit yourstore.com/login.
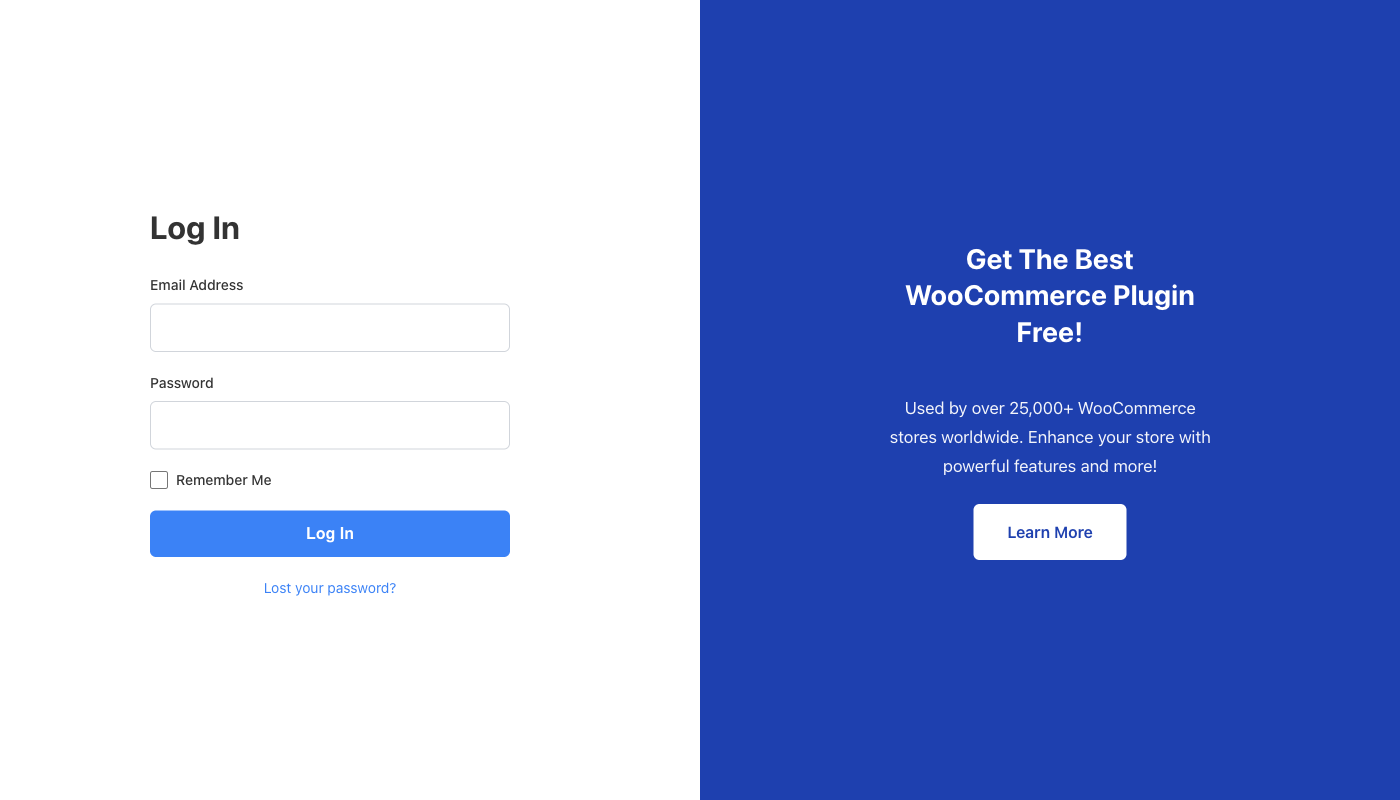
The plugin’s login page opens instead of your theme’s layout. The default design is Classic Split, with the login form on the left and a promotional panel on the right. The form includes Email Address and Password fields (customers can log in with either their username or email address), a Remember Me checkbox, and a Lost your password? link. You can rename these labels later on the Design tab.
If you’re already logged in when you visit /login, the plugin sends you straight to your My account page instead.
Step 4: Check the My account redirect
You don’t need to set anything up for the redirect. To see it work, open your My account page in a private browser window. You land on /login. Once the plugin is active, the redirect works like this:
Logged-out visitors. Anyone who opens your My account page without being logged in goes to /login instead. The plugin passes a redirect_to value, so they return to My account after they log in.
Lost password links. The Lost your password? page still opens normally, so customers can reset a password without being sent back to the login page.
Logging out. The logout link sends customers to /login with the message “You have been logged out successfully.”
After logging in. Customers land on My account, unless they came from another page that passed its own redirect_to value.
Step 5: Add your logo to the Media Library
Your logo appears above the login heading. The plugin has no upload button, so you add the image to your Media Library first, then point the plugin at it in Step 6.
- Go to Media → Add Media File in your WordPress admin.
- Upload your logo as a PNG or JPG file.
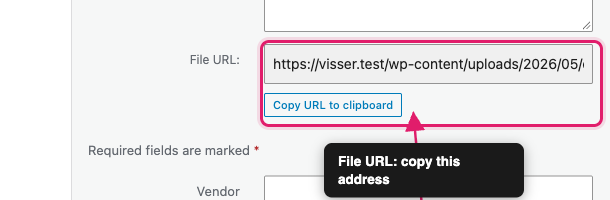
- Next to the uploaded file, click Edit.
- Copy the File URL.
Step 6: Point the plugin at your logo
- Go to WooCommerce → Custom Login.
- Click the Design tab.
- Under Logo & Heading, paste the address into the Logo URL field.
- Click Save Settings.
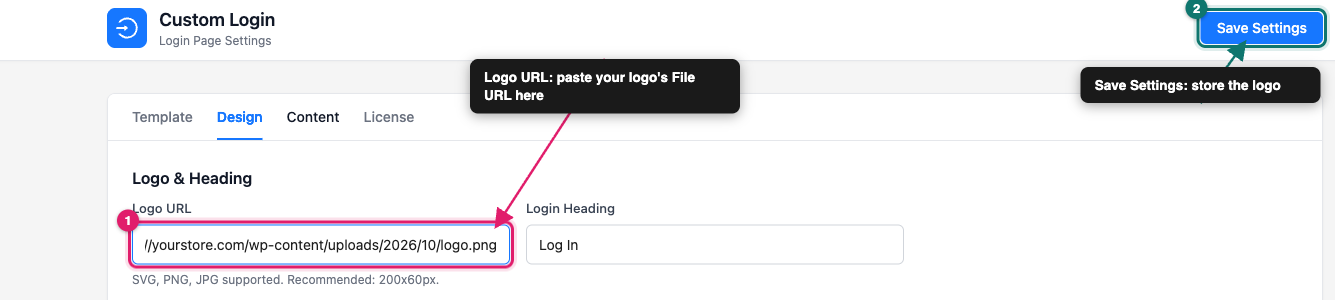
Visit /login again in a private window to check the result. The plugin shows your logo at a maximum height of 50px, so a wide, short image works best. If you leave Logo URL empty, the login page shows no logo.
Troubleshooting
https://, into the Logo URL field, and that you clicked Save Settings. Then open the address on its own in a browser tab. If the image doesn’t load there, upload it again to your Media Library and copy a fresh File URL.What’s next
- How to choose a login page template for WooCommerce
- How to customise your WooCommerce login page colours
- How to set up the promo panel on your WooCommerce login page
Frequently asked questions
/login.login when you activate it. If the page already exists, the plugin leaves it as is.Need help?
Custom Login for WooCommerce is a premium plugin, so if you run into trouble, open a support ticket and our team will help you get set up.