
Your store data lives in WooCommerce, but getting it out is another matter. The built-in export tool handles products and not much else, so the moment you need orders for your accountant, customers for a mailing list, or subscriptions for a report, you’re stuck copying rows by hand or asking a developer.
Store Exporter Deluxe fixes that. It exports orders, products, customers, users, coupons, subscriptions, and plenty more, in the format your spreadsheet or accounting tool expects.
This guide covers installing the plugin, activating your license, finding your way around the admin screen, and running your first export.
Prerequisites
| Requirement | Details |
|---|---|
| WordPress | Version 5.4 or later |
| WooCommerce | Version 5.0 or later, and active. Store Exporter Deluxe reads your WooCommerce data, so it can’t run without it |
| PHP | Version 7.4 or later. On anything older, the plugin stops loading and shows a notice |
| License | A valid license key and the email address you used at purchase |
| Account access | An Administrator account to install the plugin and activate the license. After that, an Administrator or Shop Manager can open Store Export and run exports |
Step 1: Install and activate the plugin
Install Store Exporter Deluxe the same way you would any other WordPress plugin, through Plugins → Add Plugin and then uploading the plugin ZIP file. In your plugins list, it appears as Store Exporter Deluxe for WooCommerce.
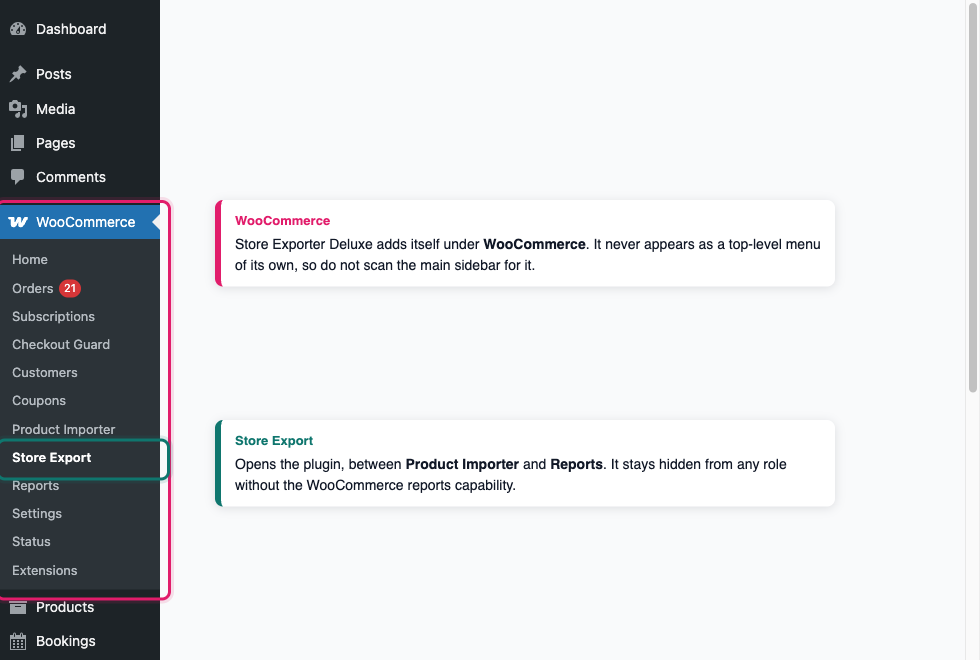
Once activated, a Store Export item appears under the WooCommerce menu in your admin sidebar. There’s no separate top-level menu to look for.
Step 2: Activate your license
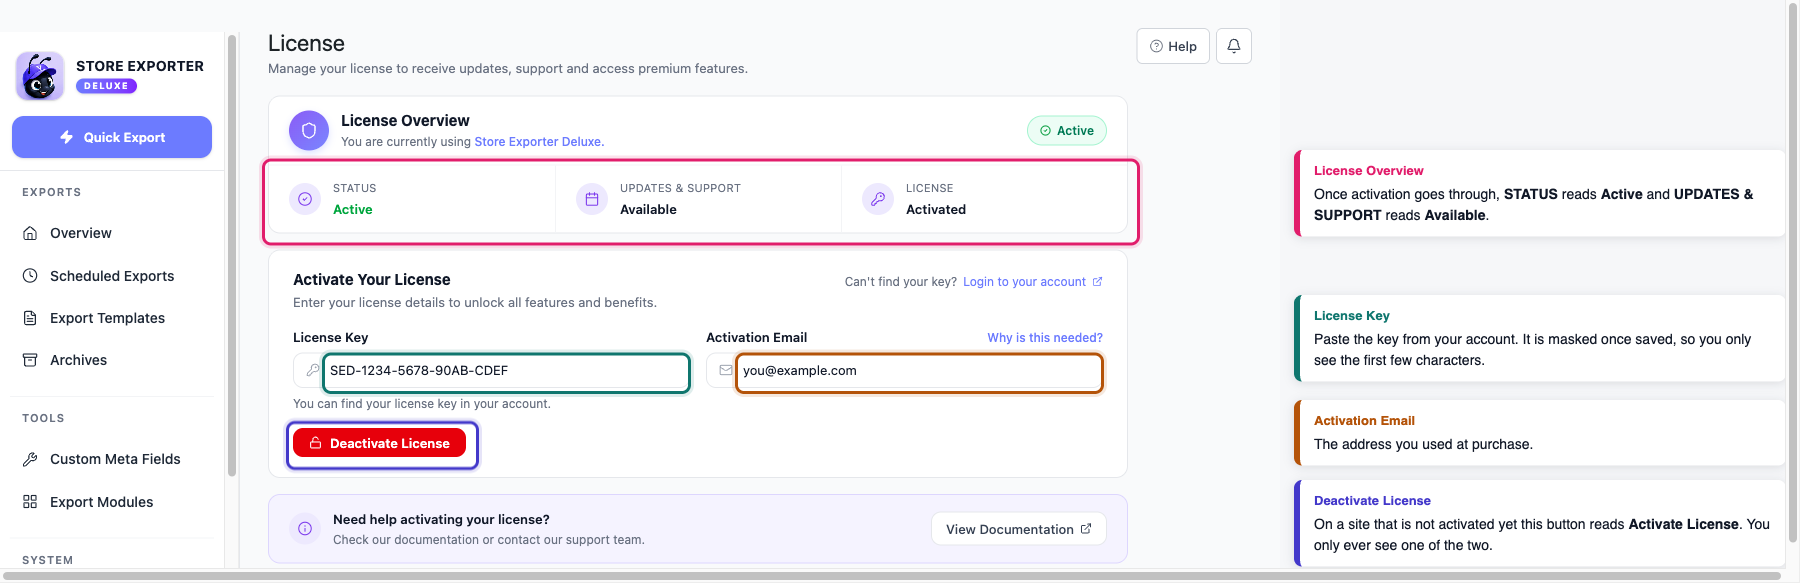
Activating your license unlocks plugin updates and support. Go to WooCommerce → Store Export, then open License in the sidebar.
- Enter your key in the License Key field.
- Enter the address you purchased with in the Activation Email field.
- Click Activate License.
Your license key lives in your account at visser.com.au/my-account. For detailed instructions, see How do I retrieve my license keys?.
Once it goes through, the License Overview card at the top of the screen shows Active, and updates and support switch to Available. The Activate License button is replaced by Deactivate License, so you’ll only ever see one of the two.
Step 3: Find your way around
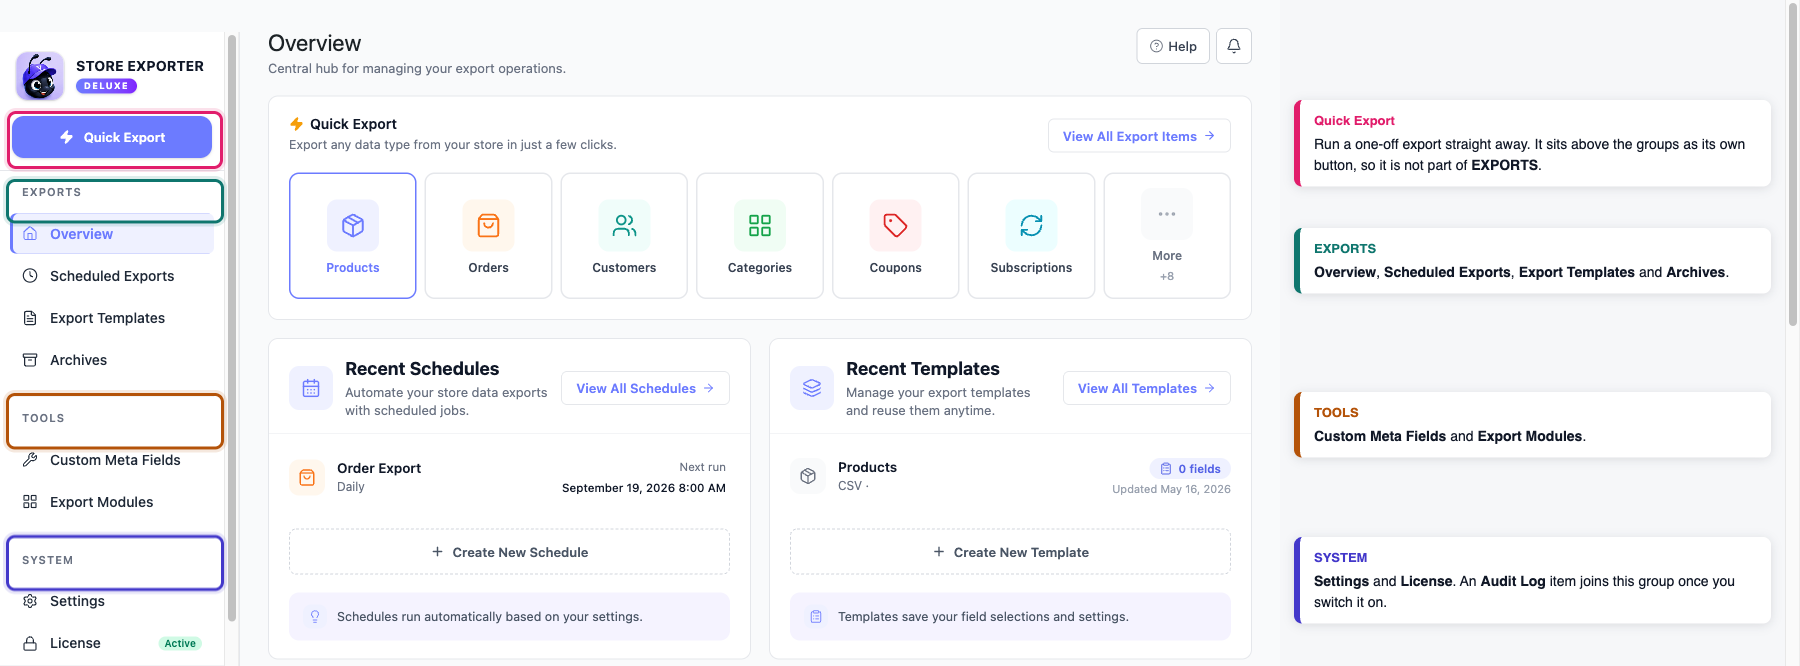
Store Export is a single screen with its own sidebar. Here’s what each section does.
| Section | What it’s for |
|---|---|
| Quick Export | Run a one-off export right now. This is where you’ll spend most of your time |
| Overview | The central hub for managing your export operations |
| Scheduled Exports | Automate recurring exports for backups, reports, and integrations |
| Export Templates | Save reusable field and export configurations to speed up future exports |
| Archives | View and download your exported files, with full run history |
| Custom Meta Fields | Register custom post and order meta so you can pick it as an export field |
| Export Modules | See which other WooCommerce and WordPress plugins add export options, and install the ones you need |
| Audit Log | Review a history of every export that’s run, who triggered it, and when |
| Settings | Manage export behavior, formatting, automation, and integrations |
| License | Manage your license to receive updates, support, and premium features |
Step 4: Run your first export
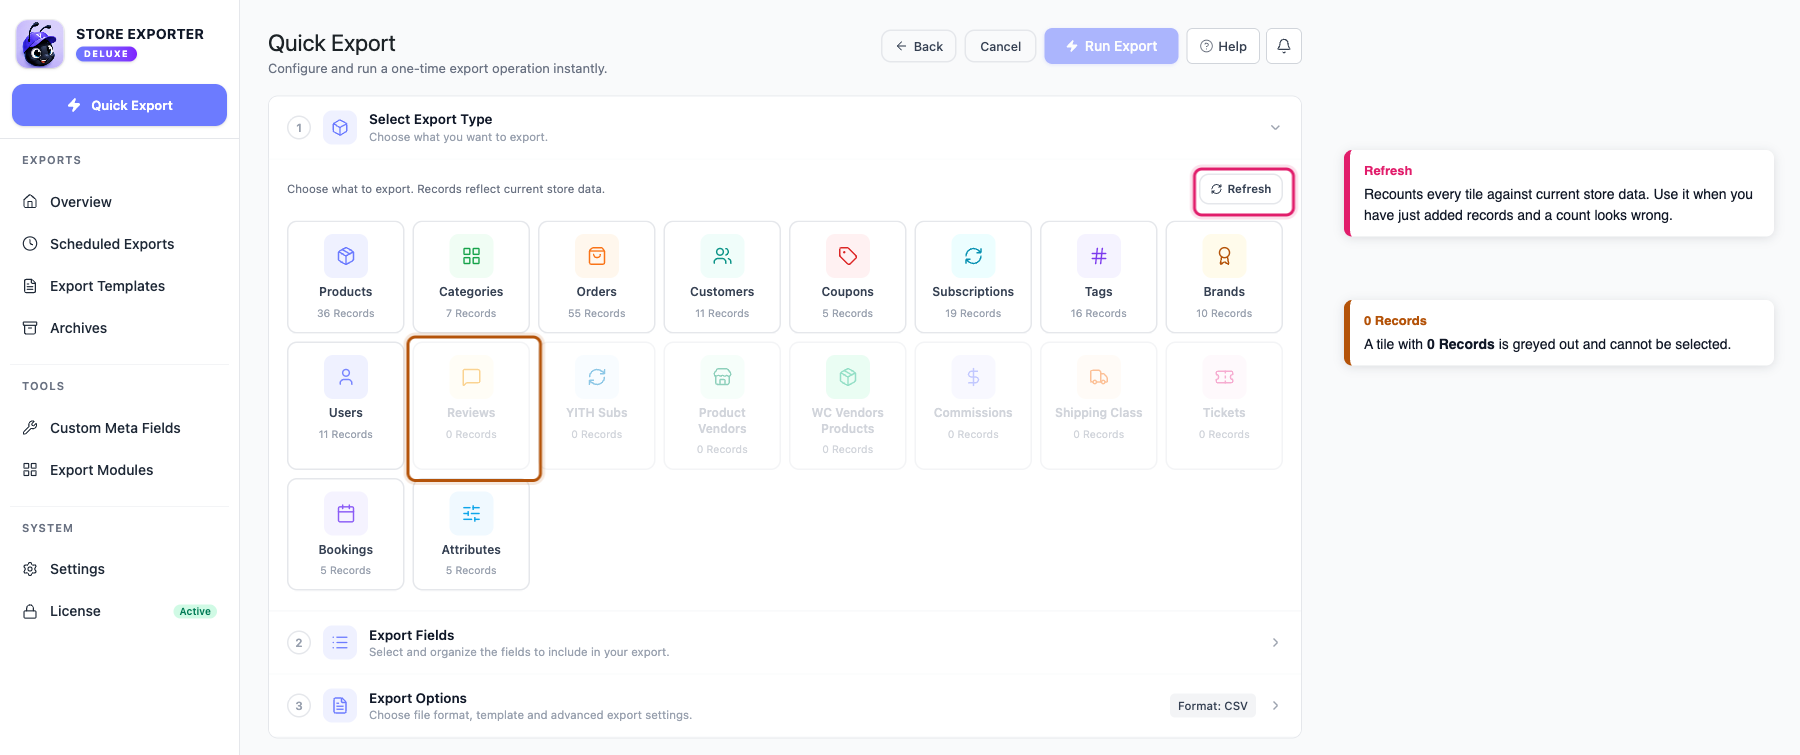
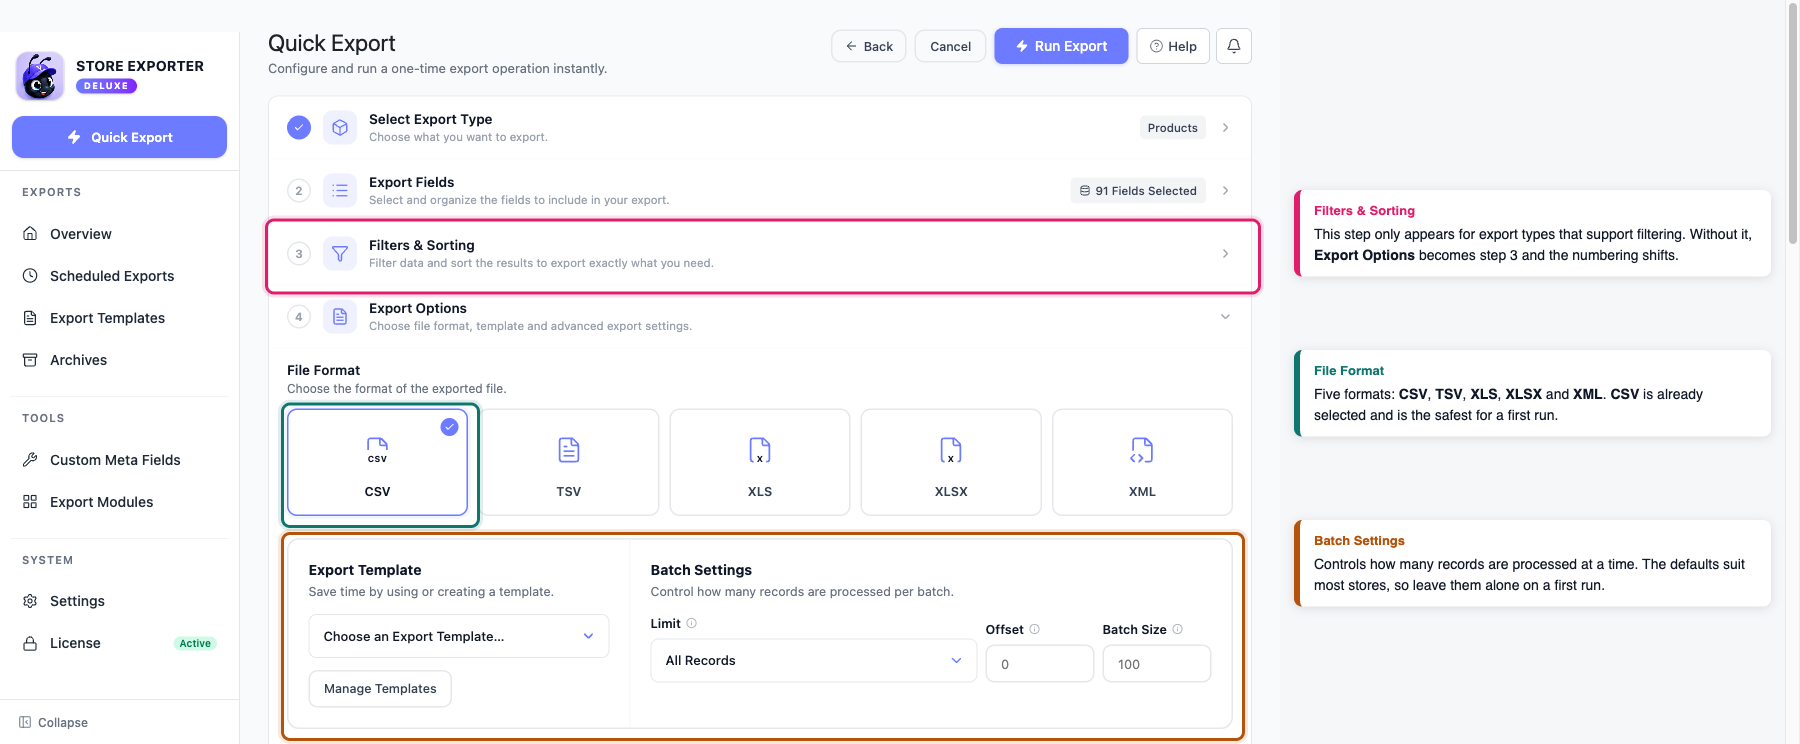
Click Quick Export at the top of the sidebar. The screen opens as an accordion with three steps: Select Export Type, Export Fields, and Export Options. A fourth step, Filters & Sorting, slots in between fields and options once you choose a type that supports filtering, and the numbering shifts to match.
Work through the steps in order.
- Select Export Type: pick what you want to export from the grid of tiles. Each tile shows how many records it holds, and tiles with no records are disabled. If you’ve just added data and the count looks wrong, click Refresh to recount.
- Export Fields: choose the columns to include. Drag fields to reorder them, and the export file follows that same order. Reset to Default puts the standard selection back if you overdo it.
- Filters & Sorting: narrow down what gets exported and set the order of the rows. This step appears only for export types that support filtering, so you may go straight from fields to options.
- Export Options: set your File Format, then leave the rest alone for a first run. The Batch Settings here control how many records are processed at a time, and the defaults work for most stores.
Quick Export writes CSV, TSV, XLS, XLSX, and XML. CSV is selected for you already, and it’s the safest choice if you’re opening the file in a spreadsheet or importing it somewhere else.
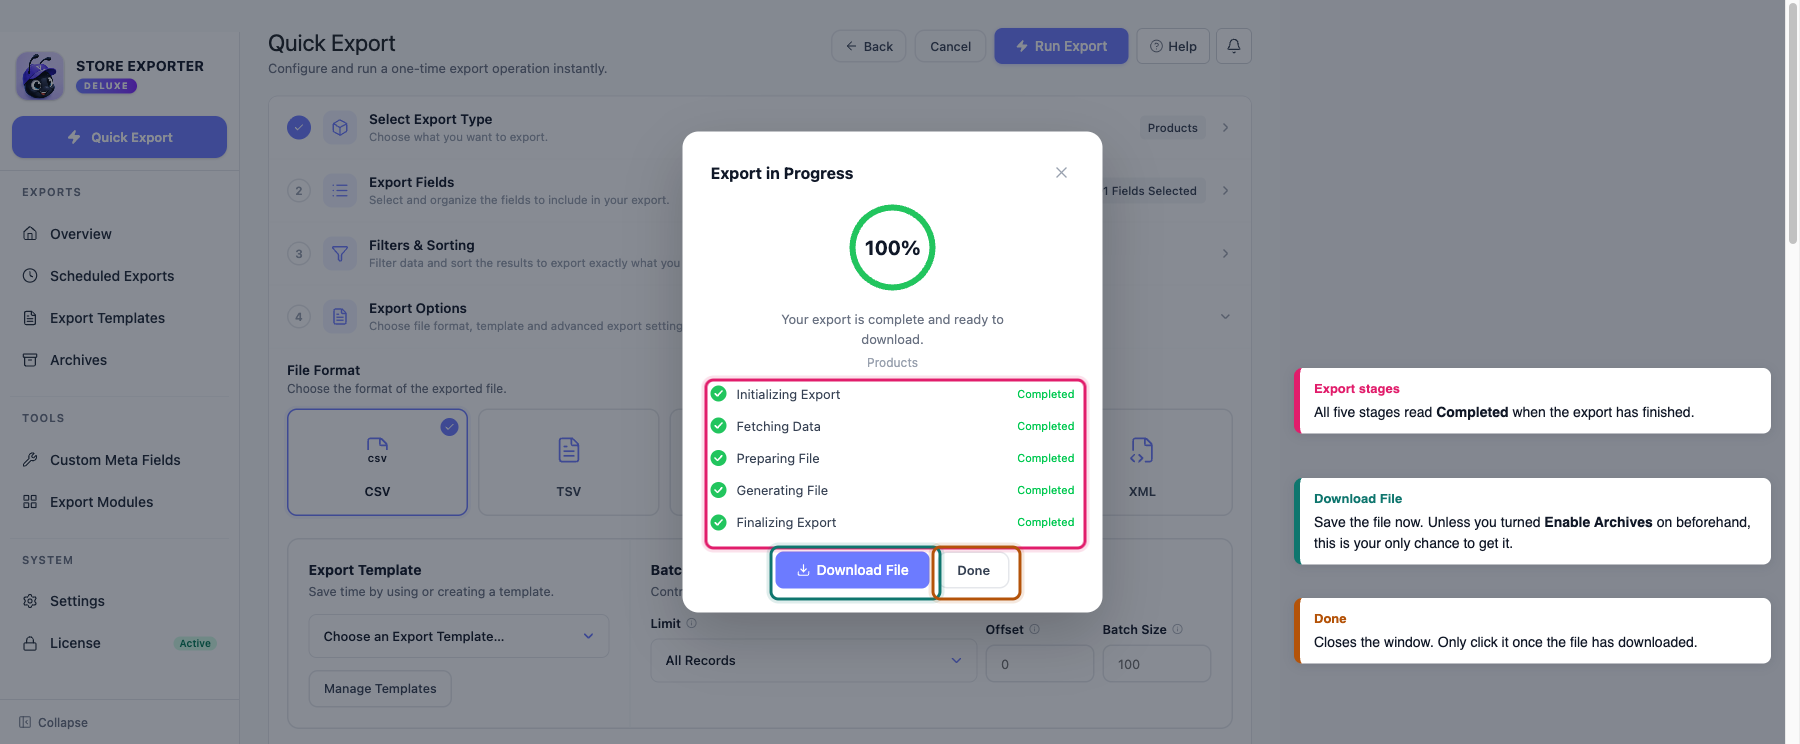
When you’re ready, click Run Export. A progress window opens while the export runs. Once it finishes, click Download File to save it, then click Done.
Keep a copy of every export
Archives are switched off by default, which catches out a lot of new users. With archives off, an export exists only as the file you download at the end of the run. Close the window without downloading, and it’s gone, and you have to run the export again.
To change that, go to Settings, open the Archives category, and turn on Enable Archives. From then on, a copy of each export is saved, and you can re-download past runs from the Archives section any time.
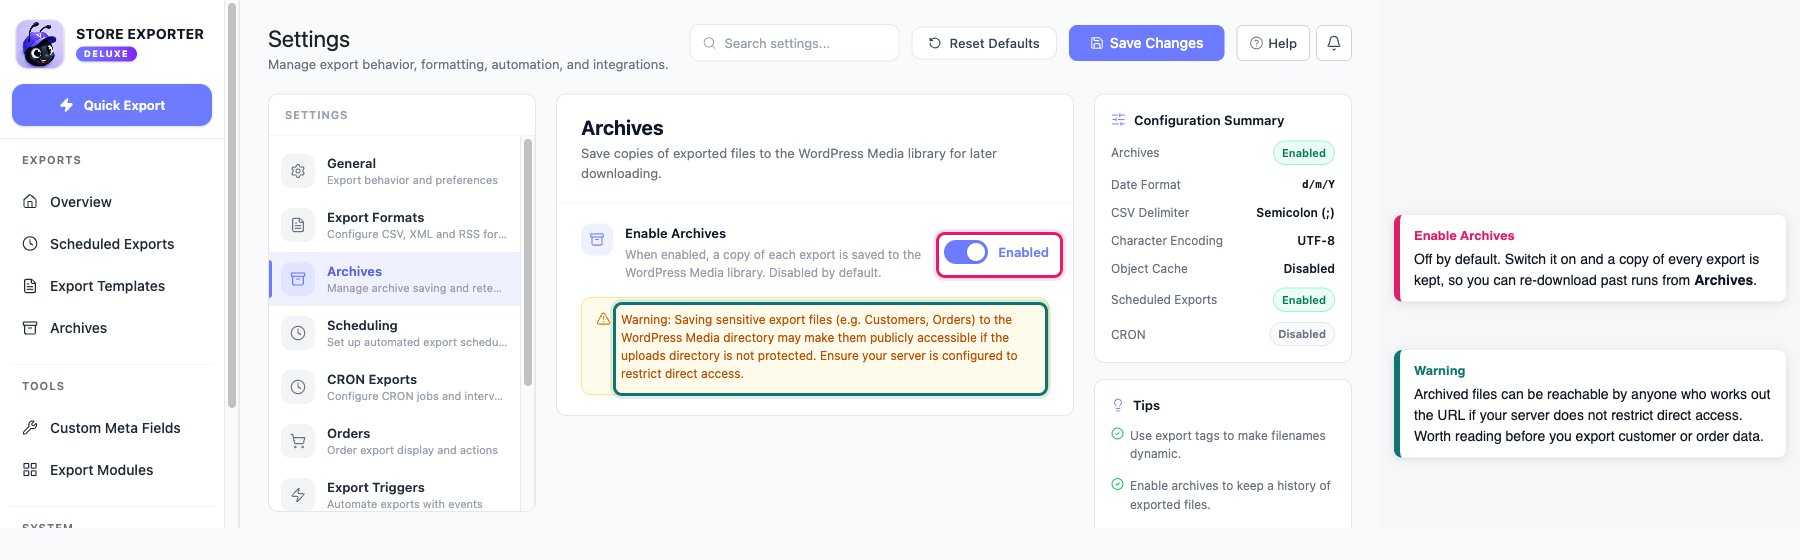
The on-screen description mentions your WordPress Media library, which is worth unpacking. Each archived export is listed in your Media library as a private item, so it stays out of public listings. The file itself is stored outside your uploads folder, in the plugin’s own directory.
Troubleshooting
What’s next
Now that your first export has run, these articles cover the next things most new users need.
- How to use Quick Export in Store Exporter Deluxe goes deeper into the screen you just used, including filters, sorting, and export templates.
- Supported export fields lists every field available for each export type, so you can work out which columns to pick.
- How to schedule exports turns a one-off export into a recurring one, with delivery by email, FTP or SFTP, or Google Sheets.
FAQ
Need more help?
Store Exporter Deluxe is a premium plugin, so if you’re a licensed customer and something isn’t working, open a support ticket, and our team will help you sort it out.
If you’re using the free Store Exporter plugin, post your question on the WordPress.org support forum, and we’ll pick it up there.
