A Shopify to WooCommerce migration usually starts with a renewal invoice. The plan fee is rarely the problem on its own. It’s the plan plus transaction fees on any gateway that isn’t Shopify Payments, plus a stack of app subscriptions that each looked small when you added them. That’s the moment most store owners ask the same question: can we move to WooCommerce without breaking everything?
Yes. The work breaks down into a repeatable workflow: products, customers, order history, the reviews your team spent years earning, and SEO redirects so Google doesn’t drop you off a cliff.
Migrations always feel riskier than they are. Inventory is live, customers are shopping, orders are flowing, and the idea of touching any of it makes people anxious. That deserves a reasonable response: a plan, a parallel-run window, and a clean cutover.
In this guide, we’ll walk through the full process: the pre-migration audit, Shopify exports, WooCommerce setup, the product import and its field mapping, customer and order imports, review migration, the SEO redirect map, and the DNS cutover. Most stores under 5,000 products finish in a half day to a full day of hands-on work.
Most guides on this topic are written by paid migration services or hosting companies. This one is written from the data side, covering the export and import workflow that moves your store cleanly without outsourcing the job. For the wider toolset, see our WooCommerce migration resources.
Table of Contents
Why Migrate From Shopify To WooCommerce
Store owners consider a Shopify to WooCommerce migration for one of four reasons: cost, ownership, customization limits, or a client-driven agency decision. None of them are a knock on Shopify itself, which is a capable platform for many stores. The question is fit, not quality.
Cost and recurring fee structure
Shopify’s Basic plan starts at $19 per month billed annually, or $25 billed monthly, which is not the expensive part. The cost stacks up through transaction fees on any gateway other than Shopify Payments, and through app subscriptions for reviews, upsells, wholesale, or shipping rules.
WooCommerce is free and self-hosted, so you pay for hosting and only the plugins you actually use. Run your own numbers rather than a generic comparison: add up your current plan, your gateway fees, and every app subscription, then compare that against hosting plus the handful of plugins your store genuinely needs.
Ownership and data portability
On WooCommerce you own the database, the theme code, every checkout field, and every line of product metadata. No platform layer decides what you can and cannot customize. For agencies and founders who want to own the stack, this is often the real reason to move.
The customization ceiling
Shopify’s Liquid templating and checkout restrictions limit deep bundling, wholesale tiering, conditional checkout fields, and advanced subscriptions unless you are on Shopify Plus. WooCommerce has plugins or free code for all of it.
Payment gateway flexibility
Shopify charges extra on non-Shopify-Payments gateways. On WooCommerce you pick whichever gateway your business uses (Stripe, PayPal, Square, or a regional gateway) and pay only that gateway’s standard fees.
When Shopify is actually the right choice
Be honest with yourself. Fast-moving direct-to-consumer brands with no tech resource, multi-region Shopify Markets dependency, or a heavy Shopify-only app stack often have a better time staying on Shopify than rebuilding. The goal is the right platform, not a sale.
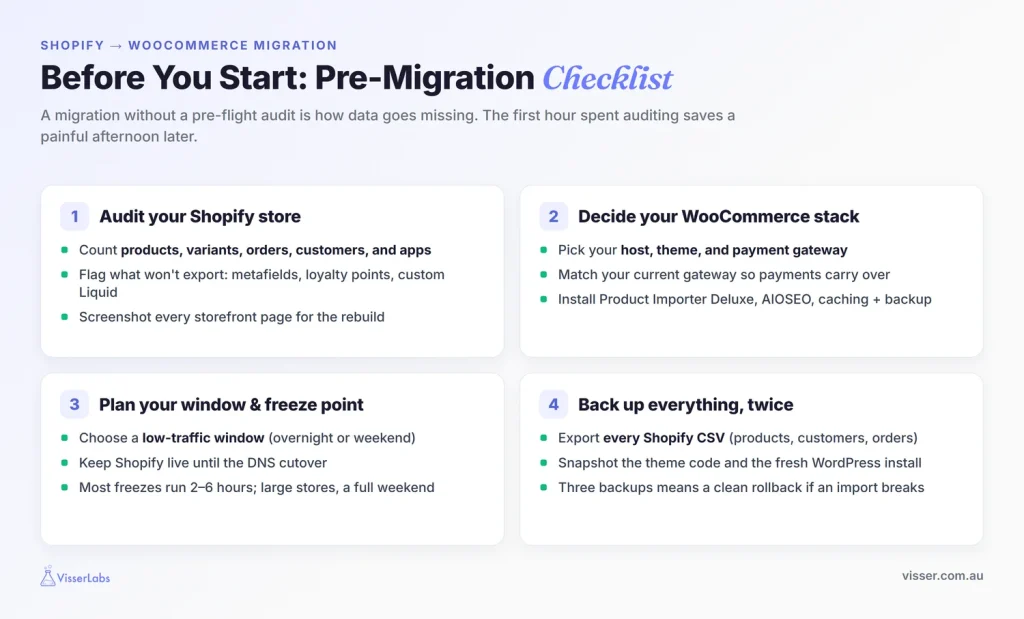
Before You Start: Pre-Migration Checklist
A Shopify to WooCommerce migration without a pre-flight audit is how data goes missing. The first hour spent auditing your current setup saves a painful afternoon later.
Audit your Shopify store
List everything. Product count, variant count, active subscriptions, customer count, historical order count, active apps, custom page content, reviews, and any redirect rules you already have inside Shopify. Note anything that does not export cleanly: metafield behavior, app-managed data like loyalty points or bundle logic, and any custom Liquid snippets on product pages.
Screenshot your Shopify storefront (homepage, category page, product page, cart, checkout) for visual reference during the WooCommerce rebuild.
Decide your WooCommerce stack
Pick your WordPress host (SiteGround, Kinsta, Cloudways, or similar), your theme (Astra, Kadence, Blocksy, or a purpose-built WooCommerce theme), and your payment gateway. Match the same gateway your Shopify store uses so customer payment methods carry across without surprises.
Install the essentials: WooCommerce itself, which includes the product CSV importer you’ll use, plus AIOSEO or Rank Math for redirects and SEO, a caching plugin, and a backup plugin.
Plan your migration window and freeze point
Pick a low-traffic window. Overnight or weekend works for most stores. Announce a brief maintenance window to staff and keep Shopify live until the DNS cutover. Decide your inventory freeze point, which is the moment you stop accepting new orders on Shopify so the final data export is complete. Most migrations freeze for two to six hours. Larger stores may need a full weekend.
Back up everything, twice
Export every Shopify CSV you can (products, customers, orders) and archive them. Snapshot your Shopify theme code. Before you touch WooCommerce, back up the fresh WordPress install as well.
Keep three sets of backups: the Shopify CSV exports, a Shopify theme zip, and a WordPress snapshot taken before any data import. The one time you skip a backup is the time a field mapping goes sideways mid-import and you need to roll back cleanly to a known-good state.
Step-By-Step Shopify To WooCommerce Migration
Run these Shopify to WooCommerce migration steps in this order every time. Each step builds on the previous one. Skipping steps is how migrations end up with silent failures two weeks in.
Step 1: Export Shopify data
Every Shopify to WooCommerce migration starts here. Work through your Shopify admin and pull every CSV you need before touching WooCommerce.
Products: Shopify admin, Products, Export. Choose “All products” and CSV format. Shopify’s export splits variants into separate rows under a parent handle, which matters a lot in Step 3.
Customers: Shopify admin, Customers, Export. The CSV includes names, emails, addresses, and opt-in status. Passwords do not export, so every customer will need to reset theirs on first WooCommerce login. Plan a “we have moved” email now.
Orders: Shopify admin, Orders, Export. For stores under roughly 20,000 orders, export everything in one file. For larger stores, batch by month to keep the CSVs manageable.
Reviews: the export depends on your Shopify review app. Shopify Product Reviews, Judge.me, Loox, and Yotpo all have their own CSV export path. Grab it now while the app is still live.
Images: Shopify image URLs work temporarily during import but will break when you cancel Shopify, so they need re-hosting on your own media library during the product import.
Step 2: Set up WooCommerce on WordPress
Spin up a fresh WordPress install on your chosen host. Install WooCommerce and run the setup wizard (country, currency, products to sell, payment methods). Pick and install the theme, matching your Shopify visual identity roughly; fine-tuning comes later. Install AIOSEO, a backup plugin, and a caching plugin, then configure your payment gateway with your existing credentials.
Step 3: Import products with the built-in importer
WooCommerce’s built-in product CSV importer handles the Shopify product export, and it’s already installed. Go to Products, All Products, Import, and upload the Shopify CSV. The importer opens a column mapping screen, auto-maps the headers it recognizes, and lets you set the rest from dropdowns or mark them “Do not import.”
The critical field mappings are:
- Handle to Slug.
- Title to Name.
- Body (HTML) to Description.
- Vendor to a Brand attribute.
- Type to Product Category.
- Tags to Tags.
- Variant SKU to SKU.
- Variant Price to Regular price.
- Image Src to Images.
Images map straight from the Shopify URL. WooCommerce downloads external image URLs into your media library during import, provided each one is directly accessible and not sitting behind a redirect script.
Variable products need two passes
This is the step that catches people out. Shopify’s export puts a parent handle and its variant rows in one file, but WooCommerce imports variations as a separate pass, so you split the Shopify CSV into two files before importing.
- File one, the parents: one row per product with
Typeset tovariable, and attribute columns listing every value that product offers. - File two, the variations: one row per variant with
Typeset tovariation, aParentcolumn referencing the parent by SKU or ID, its own unique SKU, and only its single attribute value.
Import the parents first, then the variations. Normalize your attribute values in the spreadsheet before either pass, because “Small” and “S” will otherwise become two separate attribute values and generate variations nobody ordered.
If you need to re-run a pass after fixing something, tick “Update existing products” so the importer matches on SKU or ID instead of creating duplicates. For a deeper walkthrough, see the full WooCommerce product import walkthrough and how to import variable products into WooCommerce.
Step 4: Import customers
Customers need a CSV formatted to WooCommerce’s expected column names. The Shopify customer export needs column renaming: First Name to first_name, Last Name to last_name, Default Address Address1 to billing_address_1, and so on for billing and shipping fields.
Shopify customer passwords are hashed and not exportable, so every customer will need to reset their password on first WooCommerce login. Prepare a “we have moved platforms” email through your email platform and send it either just before or immediately after DNS cutover.
A surprise password reset prompt is the fastest way to spike your support queue on day one.
Step 5: Import historical orders
Historical orders matter for three reasons: customer account pages (“my previous orders”), refund records, and accounting continuity. WooCommerce does not import orders out of the box, so you will need a dedicated order importer plus the Shopify order CSV.
Map the critical fields: Shopify Order Number to Order Number, Lineitem SKU to order line item, Total to Order Total, Created at to Order Date, Fulfillment Status to Order Status. For stores with 5,000+ orders, import in monthly batches.
Run a test import on 10 orders first and verify the customer records link correctly, since the customer email field is usually what ties orders to accounts. Then batch the rest.
What We’ve Seen: The three most common Shopify to WooCommerce migration failures trace back to the same root cause, which is rushing the data preparation. First, broken variants: Shopify variant axes get mapped without normalizing the names, so “Small” and “S” become two attribute values and create ghost variations. Second, lost customer passwords: Shopify does not export password hashes, so every customer needs a reset email, and forgetting it means a support spike the day after cutover. Third, missing reviews: review-app data lives inside the app rather than on the product, so skipping that export loses years of social proof. Each one is a short fix at the right stage and a long recovery in production.
Step 6: Reviews, images, and metadata
Reviews import via your WooCommerce review plugin, and most accept CSVs from Judge.me, Loox, and Yotpo directly. Match reviews to products by SKU rather than product name, because SKUs stay stable across platforms while names often get edited during a rebuild.
Images: your product import should already have pulled them in. Double-check featured and gallery images on a random sample of 20 products, since any that failed to download show a broken thumbnail on the product edit screen.
Metadata: SEO titles, meta descriptions, and product-level schema. If you exported Shopify metafields, map them to WooCommerce product attributes or custom fields, which the importer handles through meta: prefixed columns.
Step 7: URL redirects and SEO preservation
The redirect map is where migrations either preserve SEO or torch it. Generate it as a spreadsheet: column A is the old Shopify URL, column B is the new WooCommerce URL.
Shopify products sit at /products/{handle} and map to WooCommerce /product/{slug}/. Shopify collections sit at /collections/{handle} and map to WooCommerce /product-category/{slug}/. Custom pages (/pages/about) map to the WordPress page slug (/about/). Blog URLs (/blogs/news/{post-handle}) map to your chosen WordPress permalink structure.
Export the product and collection handle list from Shopify admin to build a clean source-of-truth for column A, then run a spreadsheet formula to generate column B.
Step 8: Test, DNS cutover, and post-migration checks
Before cutover, run a full test on staging. Place a test order, register a test customer, trigger a password reset email, check every payment method, check tax calculation, check shipping zone logic. This is the last chance to catch a broken checkout without losing revenue.
For the DNS cutover, lower the TTL on your DNS records 24 hours beforehand, change the A or CNAME records to point at your WooCommerce host, then monitor propagation with a DNS checker.
Immediately post-cutover: place a live test order, verify transactional emails send, verify Google Analytics and Search Console are connected to the new domain, and verify the XML sitemap submits to Search Console and Bing Webmaster Tools.
Handling URL Redirects And SEO Preservation
Expect your rankings to move around for a while after a Shopify to WooCommerce migration, and plan for it rather than panicking at it. Google’s site move documentation says visibility fluctuates temporarily during a move and settles over time, with a medium-sized site taking a few weeks for most pages to move across in the index. Skipping redirects is what turns a temporary dip into permanent loss.
Install the redirects
Use AIOSEO’s redirect manager or the free Redirection plugin to upload the CSV of old to new URLs as 301 redirects. Google treats a permanent redirect as the signal that the new URL should be canonical, so the redirect type matters.
Test 10 to 20 random redirects before DNS cutover by hitting the old URL on the new host through a hosts file override or a staging domain. Keep the redirects in place for at least a year, which is what Google advises so every ranking signal has time to transfer.
If your Shopify URLs used a different handle convention than WooCommerce generates by default, decide now whether to override the WooCommerce slug to match Shopify exactly, or accept the WooCommerce slug and redirect from the Shopify version. Match Shopify exactly for top-traffic pages, and redirect the long tail.
SEO carryover checklist
Submit the XML sitemap to Google Search Console and Bing Webmaster Tools immediately after cutover. Audit your internal links for any hardcoded Shopify URLs in blog content or navigation menus, because they will break silently if you miss them.
Verify schema markup (Product, Review, FAQ) on at least 10 product pages using Google’s Rich Results Test. Check canonical tags: WooCommerce sets them by default, but confirm no duplicate content is cached across old Shopify URLs.
Post-Migration Validation
Week one of a Shopify to WooCommerce migration is when silent data gaps surface, and the way to find them is to export what actually landed and compare it against what you archived. Watch four things alongside that: support tickets (expect a password-reset spike), Search Console crawl errors on the new domain, Analytics traffic, and WooCommerce order flow plus email deliverability.
Run a reconciliation export
No Shopify to WooCommerce migration tool can verify its own work. A migration report tells you what a tool believes it moved. An export of the new store tells you what’s really there, in a file you can sort and diff against the original Shopify CSVs.
Product count, customer count, and order count should all reconcile, minus your test data. This check almost always turns up at least one small gap: a few orphaned variations, a missing tag, a category that didn’t map cleanly.
Caught in week one it’s a short fix. Caught in month three it’s a recovery project.
How Store Exporter Deluxe covers the check
Store Exporter Deluxe exports products, orders, customers, subscriptions, reviews, categories, and attributes across 125+ plugin integrations, to CSV, TSV, XLS, XLSX, or XML. That coverage is the point for a reconciliation pass, because the fields most likely to have gone missing belong to third-party plugins rather than WooCommerce core.
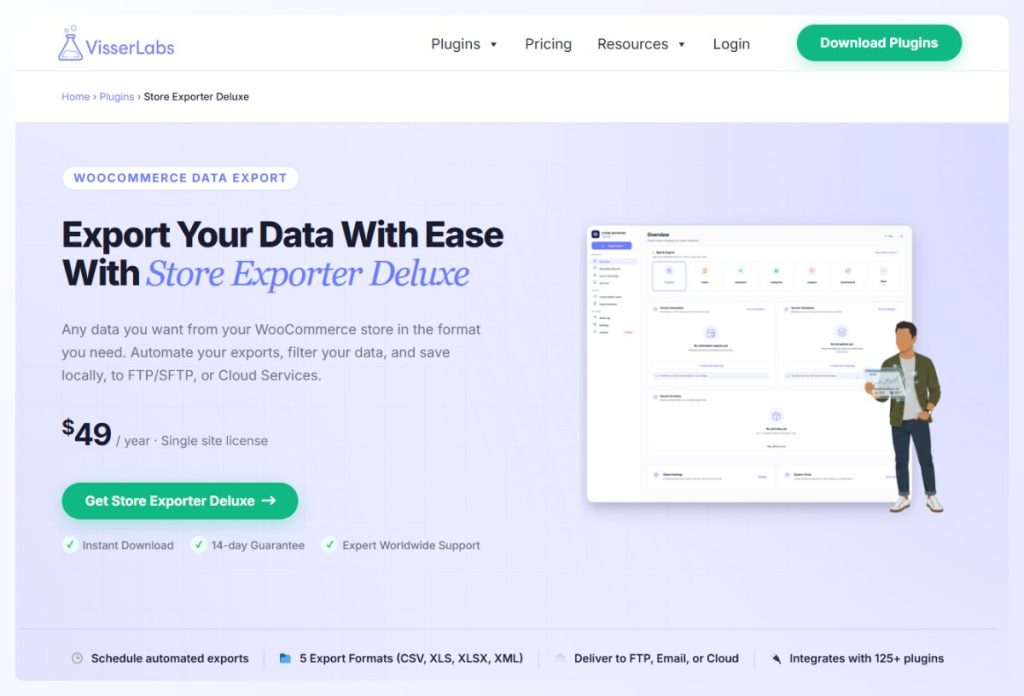
Being able to export only the fields you’re checking also keeps the diff manageable. A targeted export of SKUs, prices, and attribute values is far easier to compare against a Shopify CSV than a full catalog dump.
Migration Time Estimates
Most Shopify to WooCommerce migration projects fit into one of four windows based on store complexity. Treat these as planning guidance, not benchmarked data:
- Simple store (under 200 products, under 1,000 historical orders, simple variants): four to six hours of hands-on work, single-day migration window.
- Standard store (200 to 1,000 products, 1,000 to 10,000 orders, standard variants plus reviews): one to two days, weekend migration window.
- Complex store (1,000 to 5,000 products, 10,000 to 50,000 orders, bundles plus subscriptions plus heavy app dependencies): three to five days, multi-weekend or staged migration.
- Enterprise store (5,000+ products, 50,000+ orders, Shopify Plus, Shopify Markets): consider a paid migration service. If you do go DIY, plan one to two weeks with a dedicated freeze window.
Here is how each data type maps to its tool. Use this as a cheat sheet when sequencing the work:
- Products go through WooCommerce’s built-in CSV importer, in two passes if you have variable products.
- Customers go through a CSV formatted to WooCommerce’s column names (the Shopify export needs renaming).
- Orders go through an order importer plugin (Shopify order CSV, batched by month for large stores).
- Reviews go through your WooCommerce review plugin’s CSV import (Judge.me, Loox, and Yotpo all have compatible exports).
- Images ride along with the product import, downloaded from the Shopify URLs into your media library.
- Redirects go through AIOSEO’s redirect manager or the Redirection plugin (CSV upload of old to new URL pairs).
- Validation runs through a full export of the new store, diffed against the archived Shopify CSVs.
Conclusion
A Shopify to WooCommerce migration is a sequencing problem, not a technical one. Get the order right and prepare the data before you import, and the actual moving is uneventful. Rush the preparation and you’ll spend the recovery time you thought you were saving.
Here’s a quick recap of what we covered:
- Audit your Shopify store, choose your stack, set a freeze point, and back up three ways
- Export products, customers, orders, and reviews out of Shopify before touching WooCommerce
- Import products with the built-in importer, splitting variable products into a parent pass and a variation pass
- Normalize attribute values first, so “Small” and “S” don’t become two attributes
- Build the redirect map, test it before cutover, and keep it in place for at least a year
- Reconcile with a full export in week one, while gaps are still cheap to fix
If you’re ready to check that your Shopify to WooCommerce migration actually landed everything, see how Store Exporter Deluxe handles the reconciliation export.
Frequently Asked Questions
How long does a Shopify to WooCommerce migration take?
A Shopify to WooCommerce migration takes a half day to a full day of hands-on work for a store with under 500 products and under 5,000 historical orders. Larger or more complex stores with subscriptions, bundles, or heavy app dependencies can take a full weekend or longer. The time estimates above break this down by store size.
Will my SEO traffic drop after migrating?
Expect temporary fluctuation rather than a permanent drop, provided you redirect properly. Google states that visibility can move around during a site move and settles over time, with most pages on a medium-sized site transferring within a few weeks. Skipping the redirect map is what causes lasting loss, so build it before cutover and keep it live for at least a year.
Do customer passwords transfer from Shopify?
No, customer passwords do not transfer from Shopify. Shopify hashes them and never exposes them in an export, so every customer will need to reset their password on first WooCommerce login. Send a “we have moved” email before or during cutover so customers aren’t ambushed at the login screen.
Can you keep your Shopify theme design?
Not directly. Shopify themes are built in Liquid and do not convert to WooCommerce, so you rebuild the visual design on a WooCommerce theme such as Astra, Kadence, or Blocksy. Most store owners treat this as a chance to refresh the design rather than replicate it pixel for pixel.
Is a paid migration service better than doing it yourself?
A paid migration service is worth it for stores with 10,000+ SKUs, multi-region Shopify Markets setups, or deep subscription and loyalty app dependencies, where the cost of your own time exceeds the service fee. Services like LitExtension and Cart2Cart exist for exactly those cases. For a standard Shopify store, the self-serve workflow in this guide is faster and cheaper.
What if your Shopify variants do not map cleanly to WooCommerce attributes?
Variant name normalization is the most common gotcha in a Shopify to WooCommerce migration. “Small” and “S” become two different attribute values if you don’t clean the CSV first, which generates variations that never existed. Pick one canonical version of every value, run find and replace across the Shopify CSV, then split it into the parent and variation files before importing.