Every customer who signs in sees your login page, so it’s a good place for an offer or announcement. But if you leave the promo panel on its starter text, your customers see “Get The Best WooCommerce Plugin Free!” instead of your own message. Custom Login for WooCommerce lets you replace it, switch it off, or rotate several messages.
This article covers the Content tab: turning the promo panel on or off, setting the heading, button text, and link, and rotating promo messages. Colours, mobile layout, and templates have their own settings and aren’t covered here.
Prerequisites
| Requirement | Details |
|---|---|
| Plugin | Custom Login for WooCommerce installed and active |
| WooCommerce | Installed and active |
| Access | An account that can manage WooCommerce settings |
Step 1: Open the Content tab
- Go to WooCommerce → Custom Login in your WordPress admin.
- Click the Content tab.
The tab has two sections: Promotional Content and Rotating Content.
Step 2: Turn the promo panel on or off
In the Promotional Content section, use the Enable promo section switch.
On is the default. The promo panel shows next to the login form. On the Centered Card template, the panel shows only on phones, and only with Stack below login form.
Off hides the panel on the login page. The other fields in this section are hidden too.
Your text stays saved while the switch is off. So when you switch it back on, your heading, button, and message are still there.
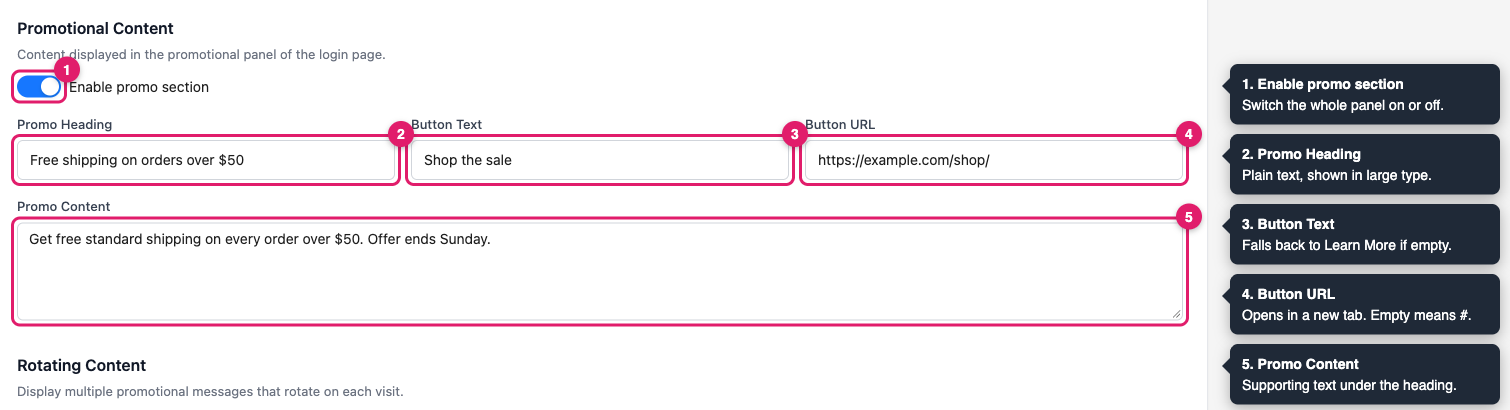
The fields start with the plugin’s starter text and a # link. Replace each one with your own wording in the steps below.
Step 3: Set the promo heading
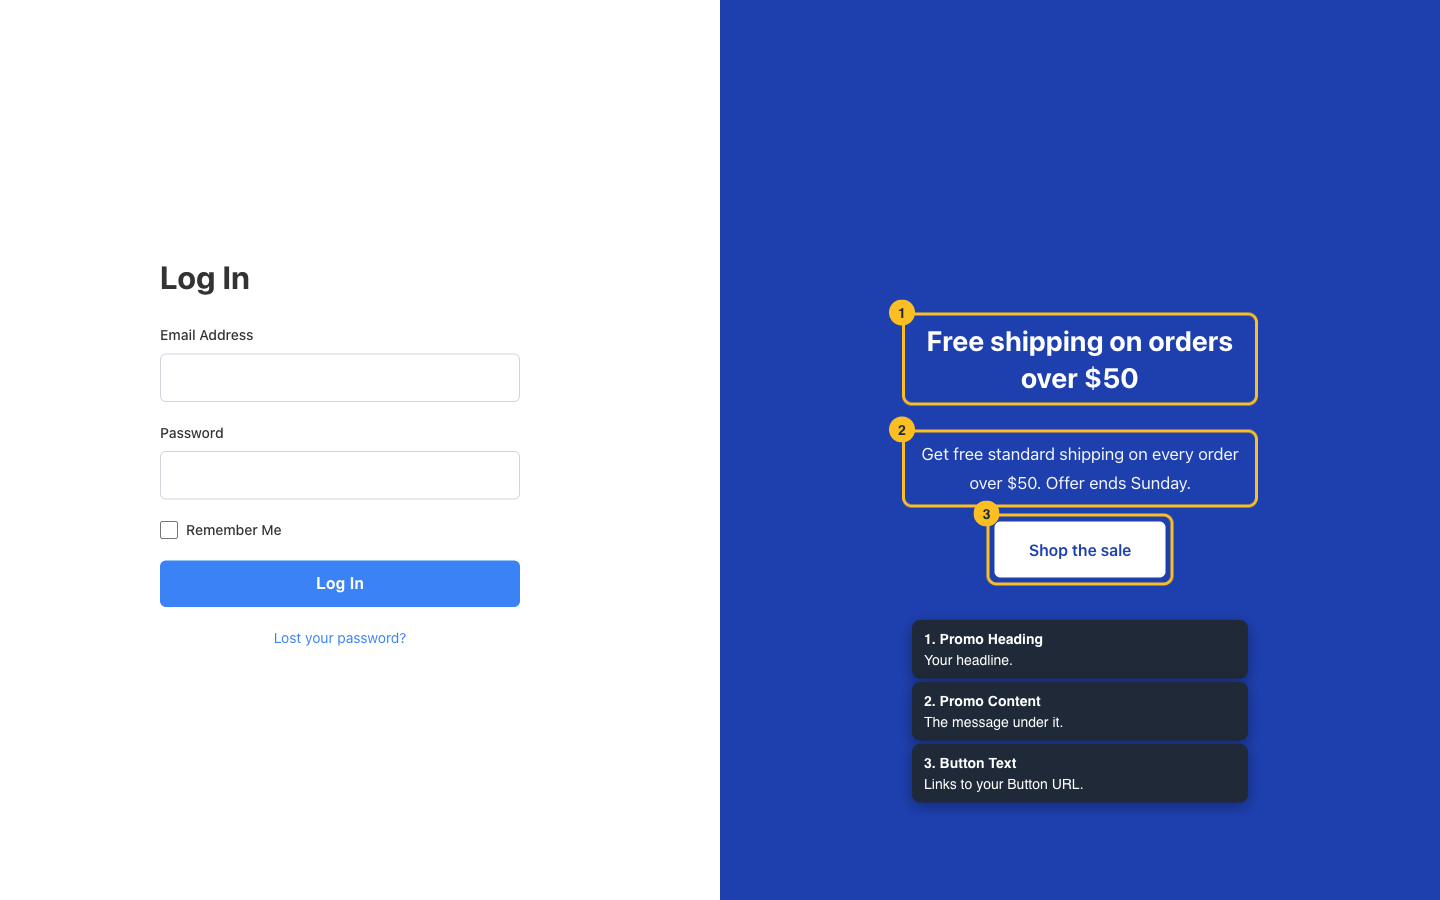
Type your headline into the Promo Heading field, for example Free shipping on orders over $50. The heading appears in large text at the top of the panel. It accepts plain text only.
Step 4: Set the button text and link
Enter the words you want on the button in Button Text, for example Shop the sale. Paste the full address the button should open into Button URL, starting with https://.
The button opens your link in a new browser tab. So if you leave Button URL empty, the button points to # and opens a new tab showing your login page again. Always add a link.
Step 5: Write the promo message
Type the supporting text into Promo Content. It appears under the heading. You can add basic HTML, such as <strong> for bold and <a href="..."> for links. Blank lines start a new paragraph.
Step 6: Rotate promo messages (optional)
Rotation lets you show a different message each time someone opens the login page. Use it to share several offers without picking just one.
- Scroll to the Rotating Content section.
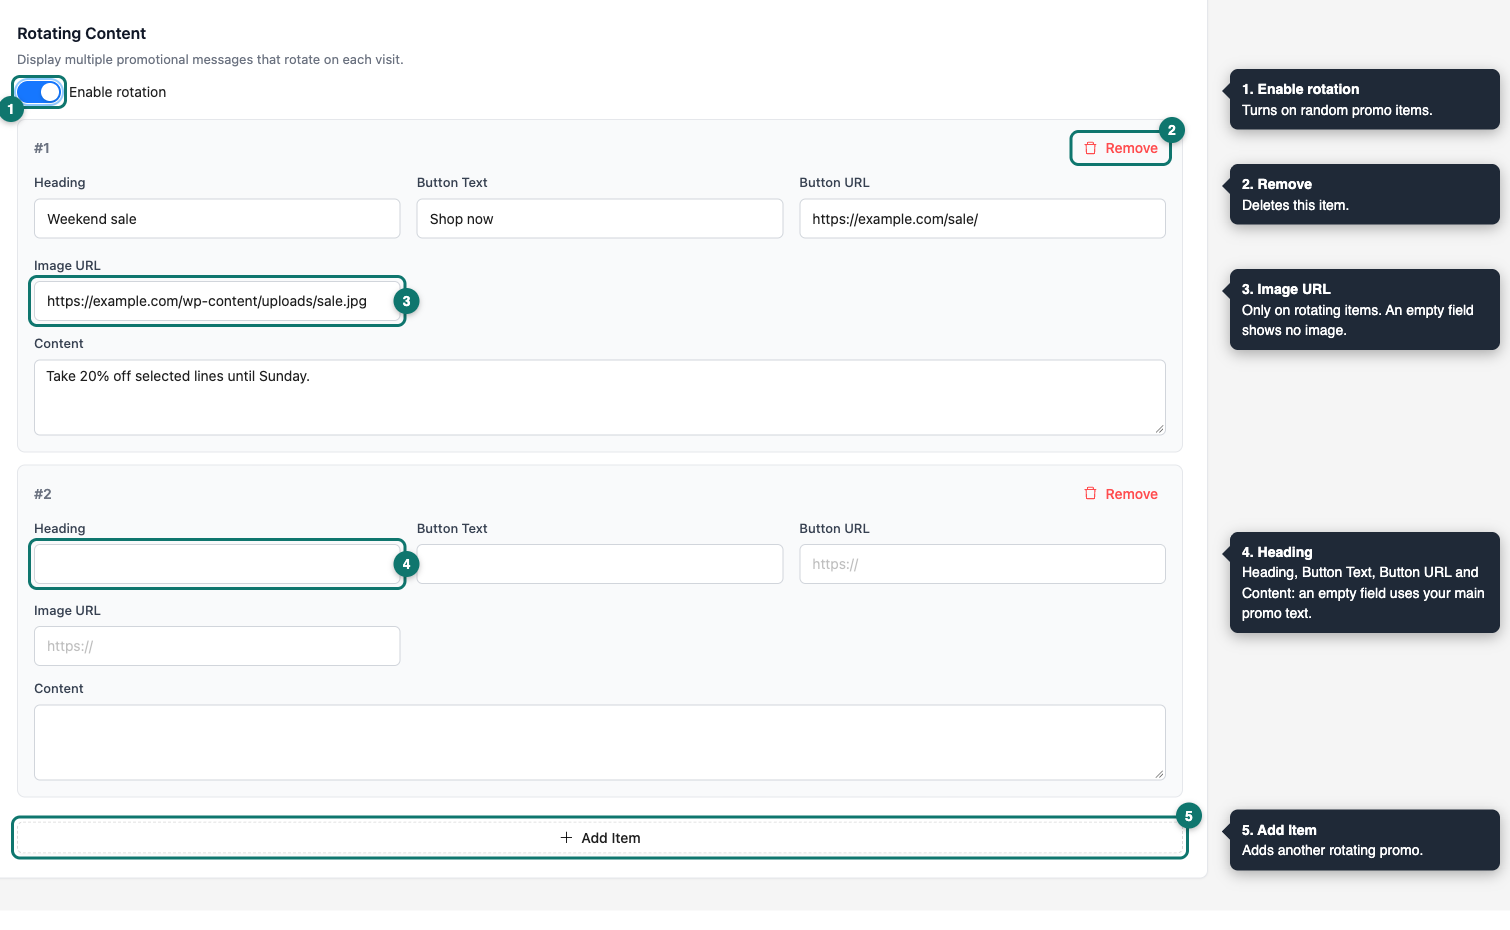
- Switch on Enable rotation.
- Click Add Item.
- Fill in the item’s Heading, Button Text, Button URL, Image URL, and Content fields.
- Click Add Item again for each extra message.
Each item shows a number, such as #1, and a Remove button. Click Remove to delete an item you no longer want.
Here’s how rotation works:
Random order. The login page picks one item at random each time it loads. It doesn’t switch while someone is looking at the page, and it doesn’t go in order. So the same item can appear twice in a row.
Fallback text. If you leave an item’s heading, content, button text, or button URL empty, the login page uses the matching field from Promotional Content instead.
Images. The Image URL field only exists on rotating items. The plugin doesn’t have an upload button, so first add the image to your Media Library. Then paste its File URL into the field. Items without an image show no image.
Promo section required. Rotation only shows when Enable promo section is switched on. With the promo section off, rotating items don’t show either.
No items yet. If rotation is on but you haven’t added any items, the login page shows your main Promotional Content instead.
Step 7: Save your changes
Click Save Settings at the top right of the page. A “Settings saved” message confirms it. The button shows on the Template, Design, and Content tabs.
Step 8: Check your login page
Log out, or open a private browser window. Then visit yourstore.com/login. If rotation is on, reload the page a few times to see different items.
Troubleshooting
yourstore.com/login in a private browser window. If you use a caching plugin or a site-wide cache, clear that cache too.#. Paste the full address you want, starting with https://, into Button URL and click Save Settings. If you use rotation, check the item’s Button URL field too.Frequently asked questions
Need help?
Custom Login for WooCommerce is a premium plugin, so if you run into trouble, open a support ticket and our team can help you get set up.