
If you’ve ever exported orders from Store Exporter Deluxe and found that some files have one row per order while others have a separate row for every product ordered, you’ve run into the Order Items Formatting setting. It controls how each order’s line items are laid out in the file, and picking the wrong mode for your use case is one of the most common points of confusion with this plugin.
This article explains what Combined, Unique, and Individual mode each produce, how they change your row count, and exactly where to set them.
Prerequisites
| Requirement | Details |
|---|---|
| Plugin | Store Exporter Deluxe, active and licensed |
| Export type | Orders (this setting has no effect on Products, Customers, or any other export type) |
| Admin access | You’ll need access to WooCommerce → Store Export → Settings, or to a Scheduled Export, depending on which export you’re configuring |
The three modes
Combined: All of an order’s line items are packed into a single row, with each item field’s values joined together in one cell (separated by the pipe character | by default, or whatever you’ve set as your Category Separator under Settings → Export Formats). One order always equals one row, no matter how many products it contains. It’s the easiest to read at a glance if you mostly care about order-level totals rather than individual line items.
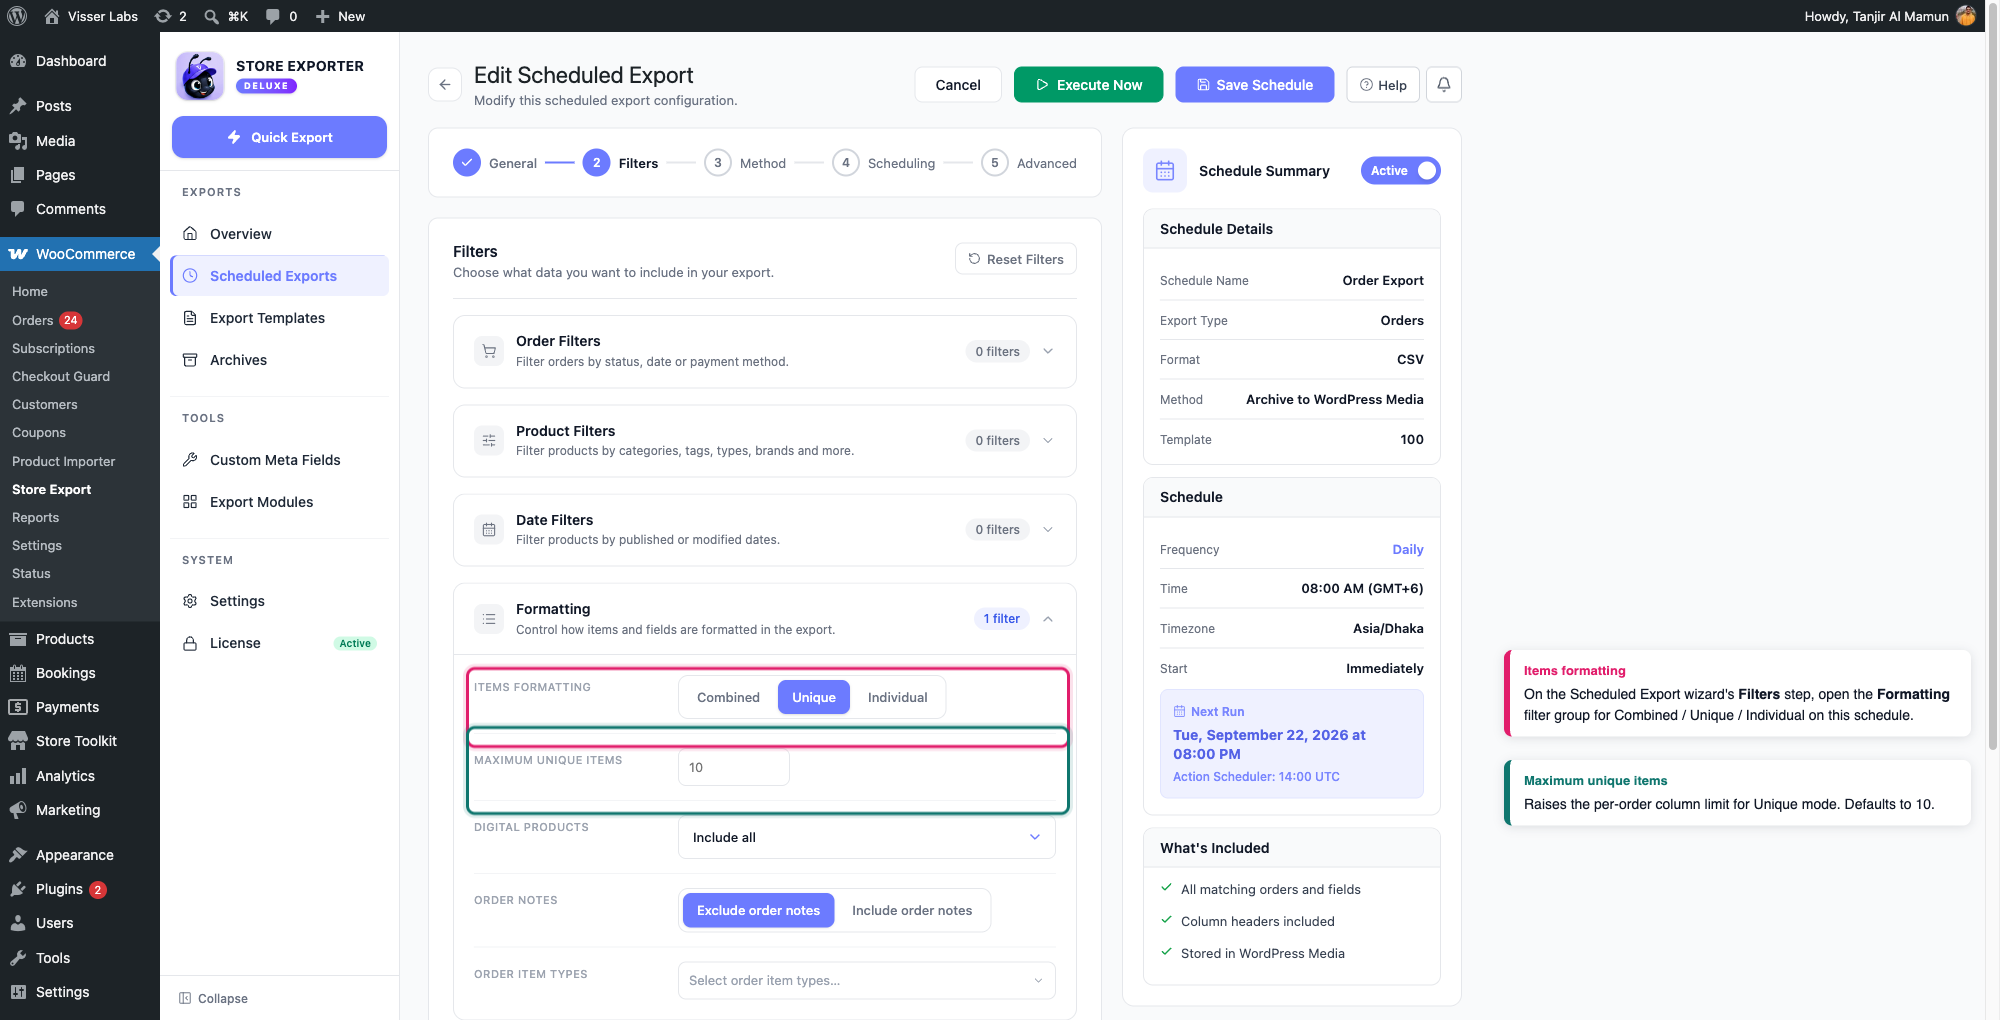
Unique: Each order also stays as a single row, but instead of squeezing every item into one cell, each line item gets its own set of numbered columns, labeled things like Order Item #1: Product Name, Order Item #2: Product Name, and so on. By default this generates columns for up to 10 items per order. Orders with fewer items leave the extra columns blank; orders with more than the limit are truncated, so if your store regularly has 15-item orders, raise Maximum unique items in a Scheduled Export’s Formatting group, or those extra items won’t appear anywhere in the file.
Individual: Every line item gets its own row. An order with 3 products becomes 3 rows, and every order-level field (order ID, customer, date, totals) is repeated on each of those rows. This is the mode to use if you’re feeding the file into accounting or fulfillment software that expects one line per product, or if you need to filter, sort, or total by individual product rather than by order.
Where to set it
This setting lives in a few separate places, and each one controls a different kind of export. Setting it in one place doesn’t change the others.
Orders screen bulk exports
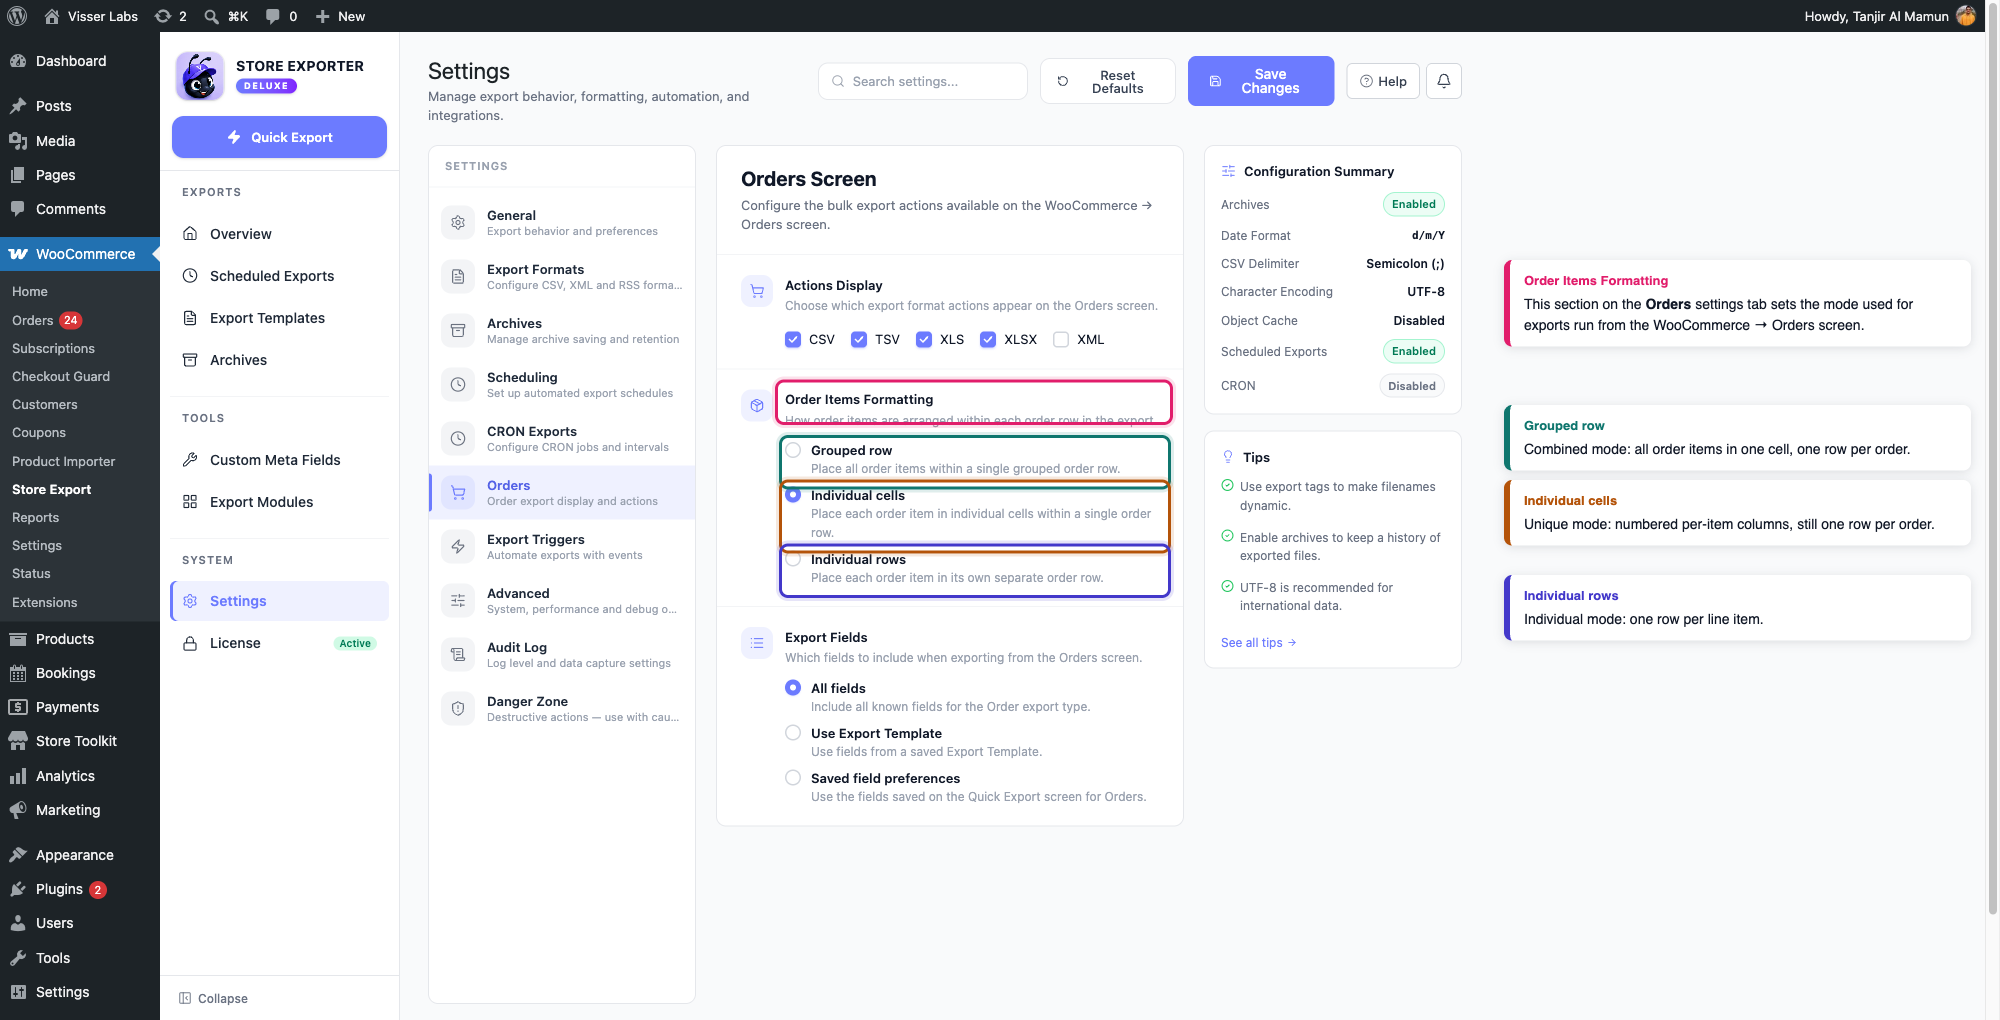
To change the mode used when you export orders straight from WooCommerce’s Orders list (via the bulk action or a row’s export button), go to Store Export → Settings → Orders and find the Order Items Formatting section. Choose one of Grouped row (Combined), Individual cells (Unique), or Individual rows (Individual).
The New Order trigger
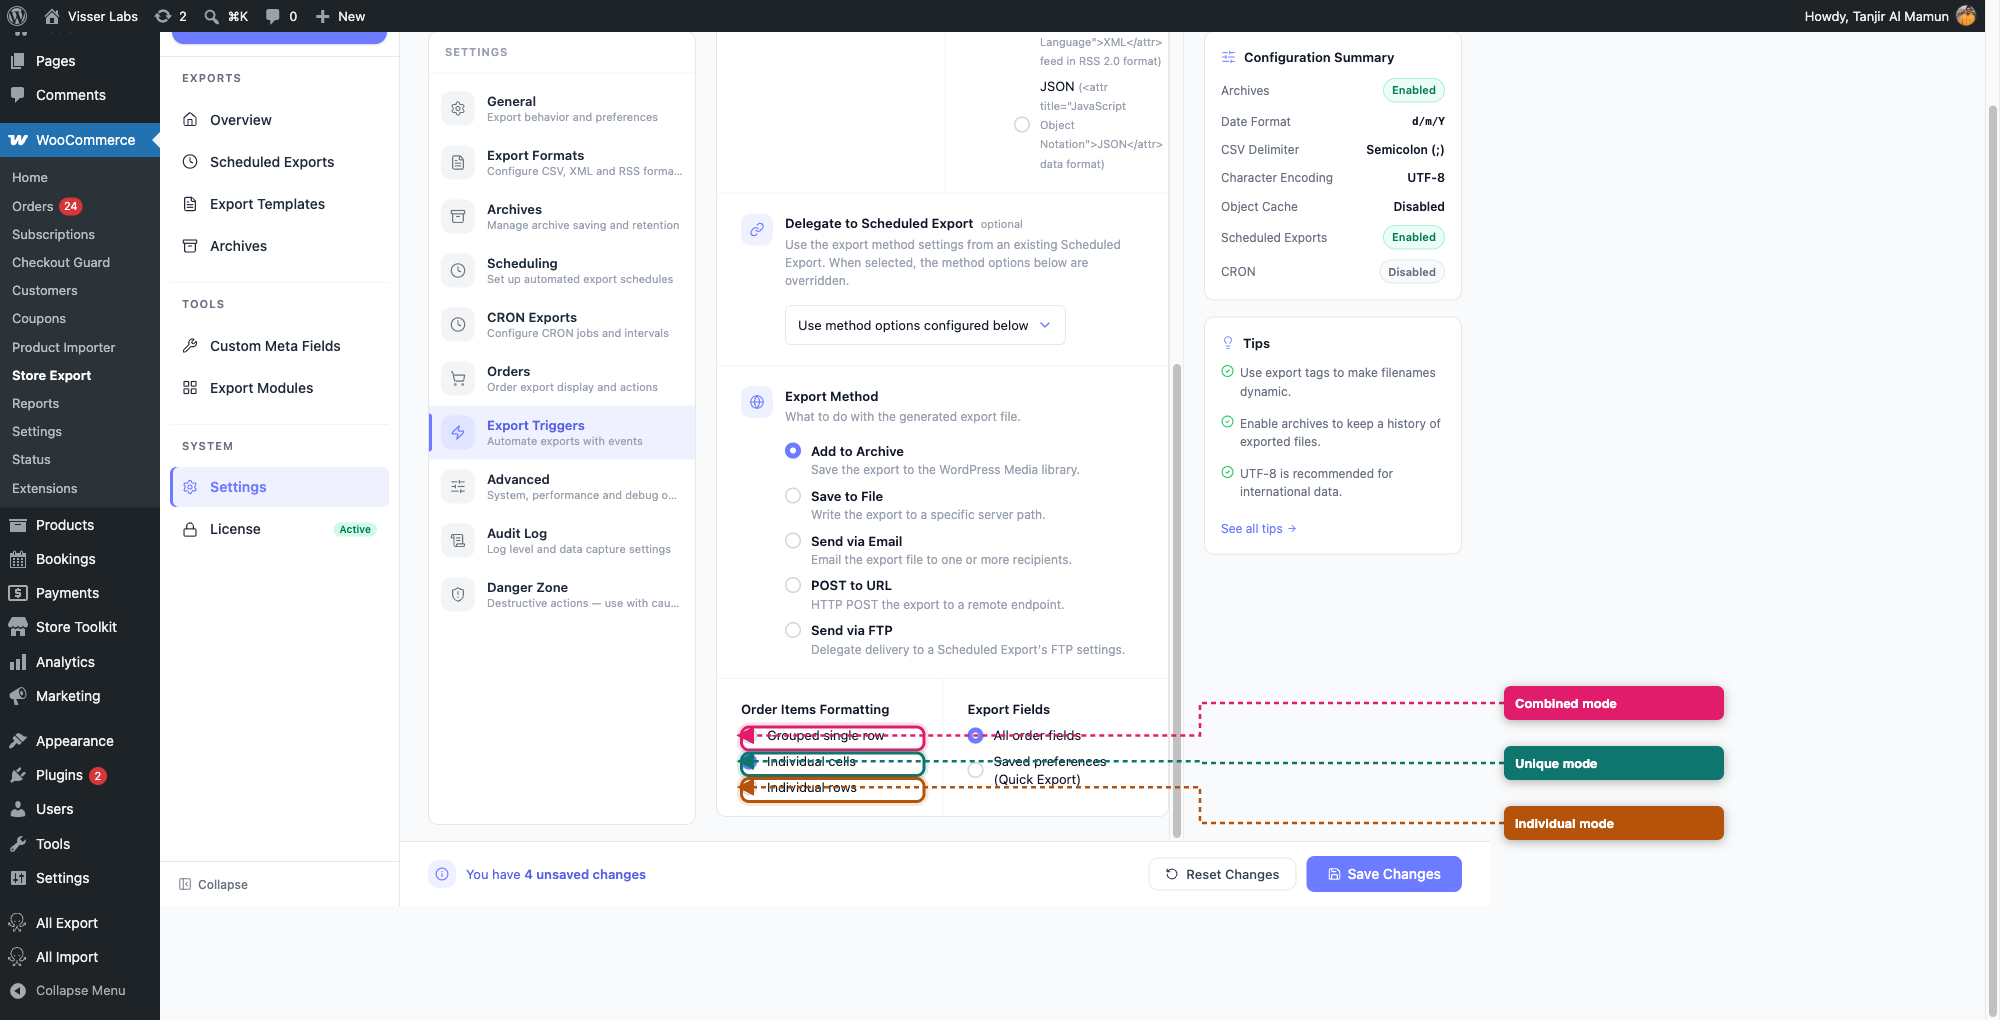
If you have Store Export automatically export every new order as it comes in, go to Store Export → Settings → Export Triggers, and under New Order Trigger you’ll find its own Order Items Formatting control with the same three choices: Grouped single row, Individual cells, and Individual rows. Turn on New Order Trigger first. While it shows Disabled, these options stay hidden.
Scheduled Export’s Filters step
Open Scheduled Exports, edit an Orders schedule, and go to its Filters step. Expand Formatting. Set Items formatting (Combined, Unique, or Individual), and for Unique, set Maximum unique items.
For a one-off export with a set layout, use a Scheduled Export and click Execute Now.
Troubleshooting
Related articles
- How to schedule exports in Store Exporter Deluxe
- Exporting custom product, order, and order item meta
FAQ
Need more help?
If you’re on Store Exporter Deluxe, open a support ticket and our team will help you sort out your export settings.
If you’re using the free Store Exporter plugin, post your question on the WordPress.org support forum and our team will get back to you there.
