
If you run the same export every week, picking the same export type, the same fields, and the same format each time gets old fast. That’s what Export Templates are for. Save your setup once in Store Exporter Deluxe, and you can load it back into Quick Export in a couple of clicks instead of rebuilding it from scratch.
This article covers creating a template, applying it to a Quick Export, editing an existing template, and deleting one you no longer need.
Prerequisites
| Requirement | Details |
|---|---|
| Plugin | Store Exporter Deluxe is active and licensed |
| WooCommerce | Active, since templates are built from your WooCommerce export types |
| Account access | An Administrator or Shop Manager account |
Where to find Export Templates
Open WooCommerce → Store Export from the WordPress admin menu, then click Export Templates in the sidebar, under the EXPORTS group. This screen lists every template you’ve saved and lets you create, edit, or delete them.
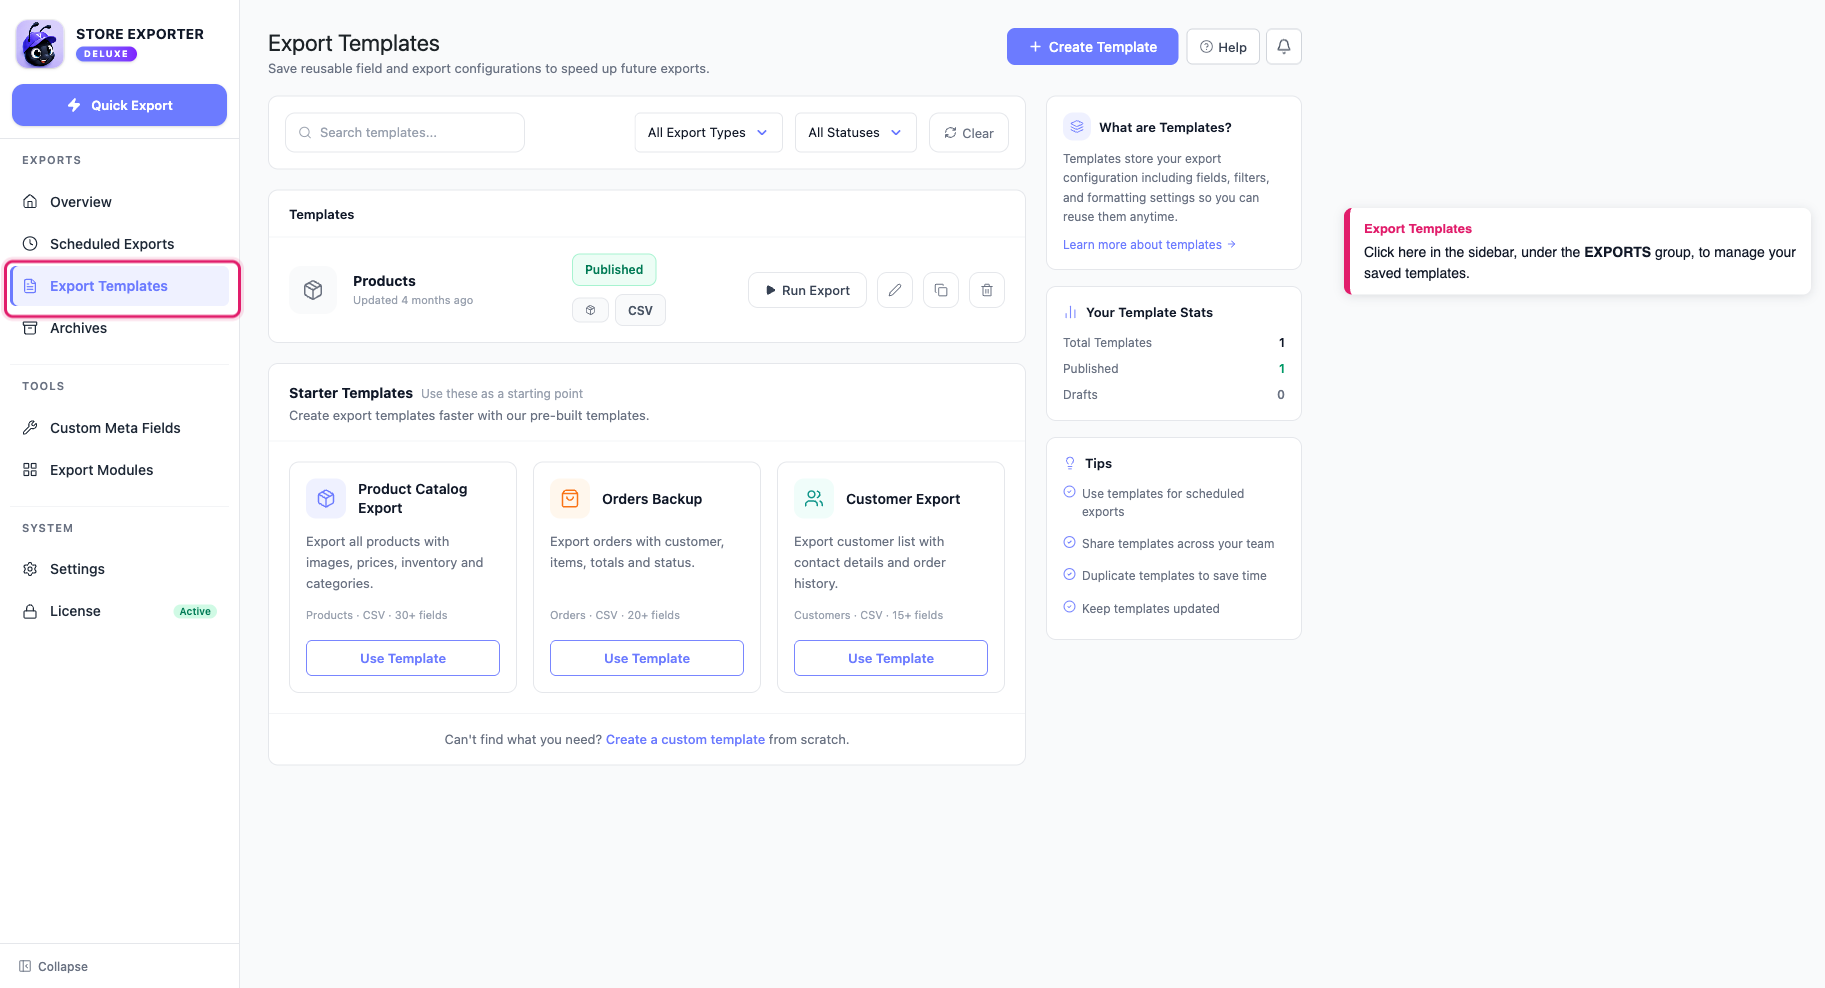
Create a template
Click Create Template on the Export Templates screen. This opens a three-step form.
To start faster, click Use Template on one of the Starter Templates further down the screen. The same form opens with the export type and format already set.
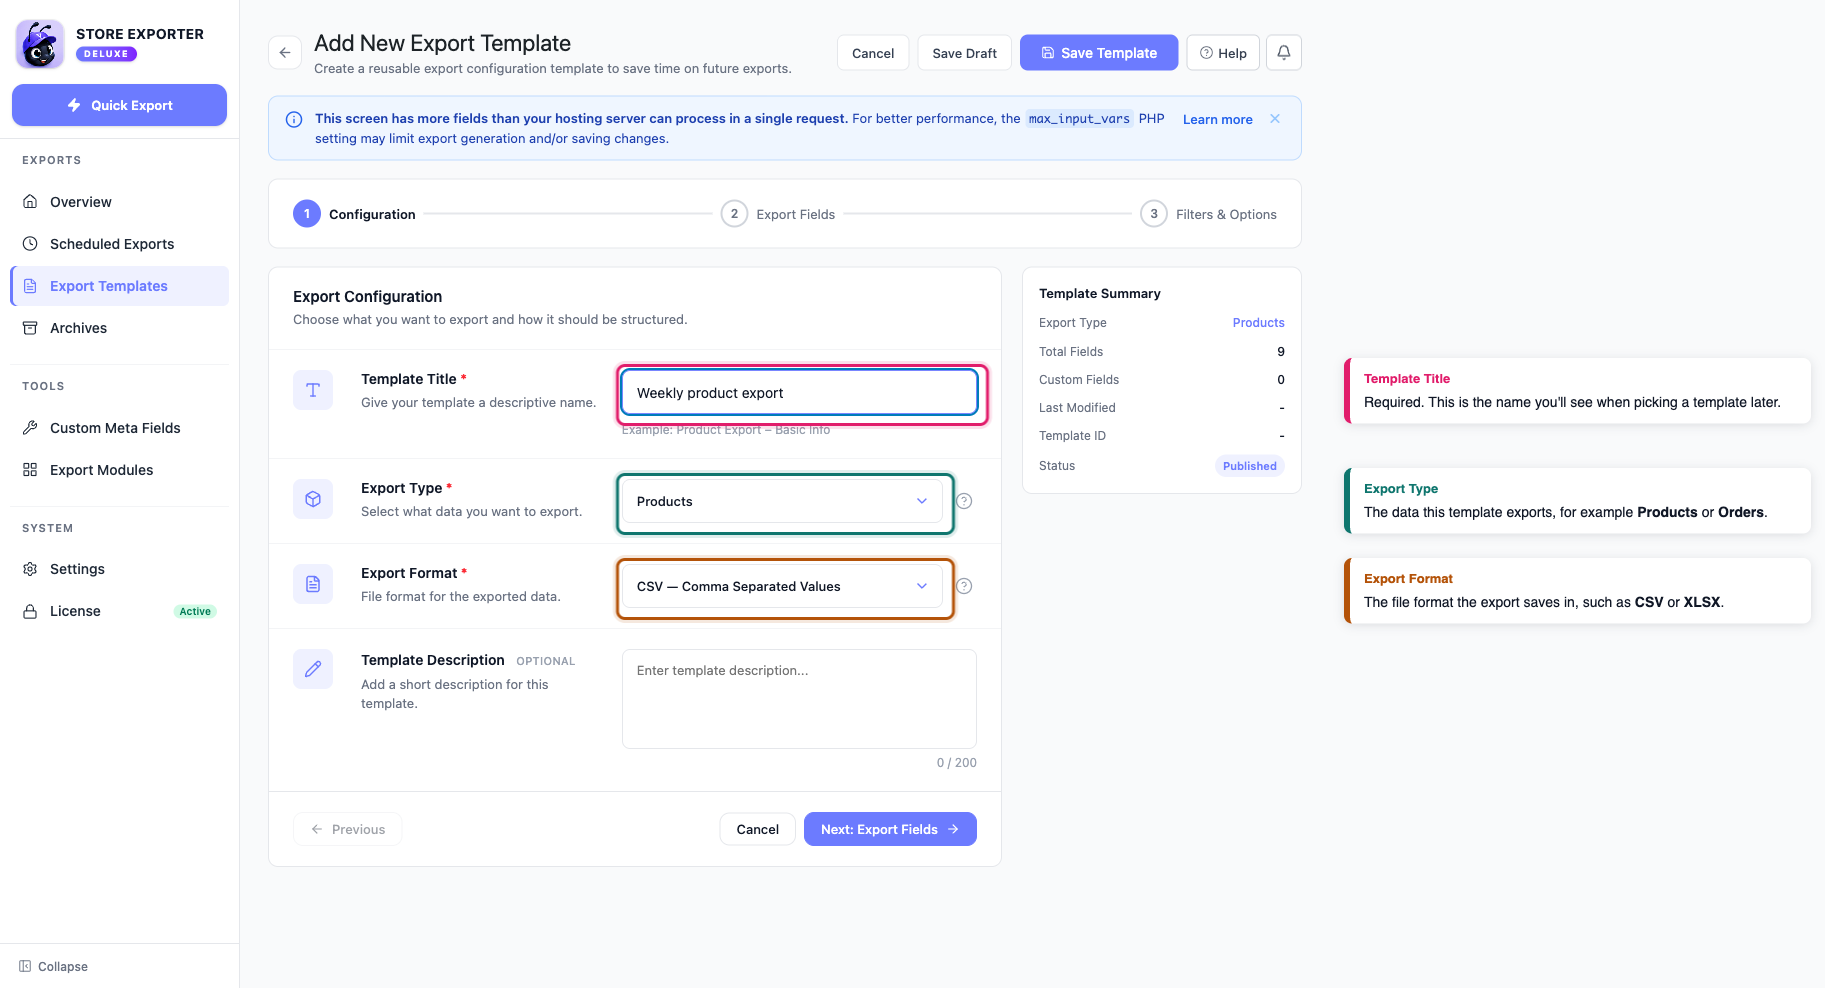
Step 1: Configuration
Give the template a Template Title (required) and, if you like, a Template Description (optional, up to 200 characters). Then choose the Export Type you want the template to cover, for example Products or Orders, and the Export Format it should save in.
Step 2: Export Fields
Choose which fields the template includes, the same way you would on the Quick Export screen. This field selection is what gets applied when you load the template later.
Step 3: Filters & Options
This step has filters, sorting, and formatting options for the export type you chose.
When you’re done, click Save Template to publish it, or Save Draft to keep working on it later. A draft does not show in the Export Template dropdown in Quick Export or in the template list for scheduled exports.
Use a saved template in Quick Export
The fastest way to run a template is from the Export Templates screen itself: click Run Export on the template’s row. This opens Quick Export with the template’s export type, format, and field selection already applied, ready to run or adjust before you click Run Export again to generate the file.
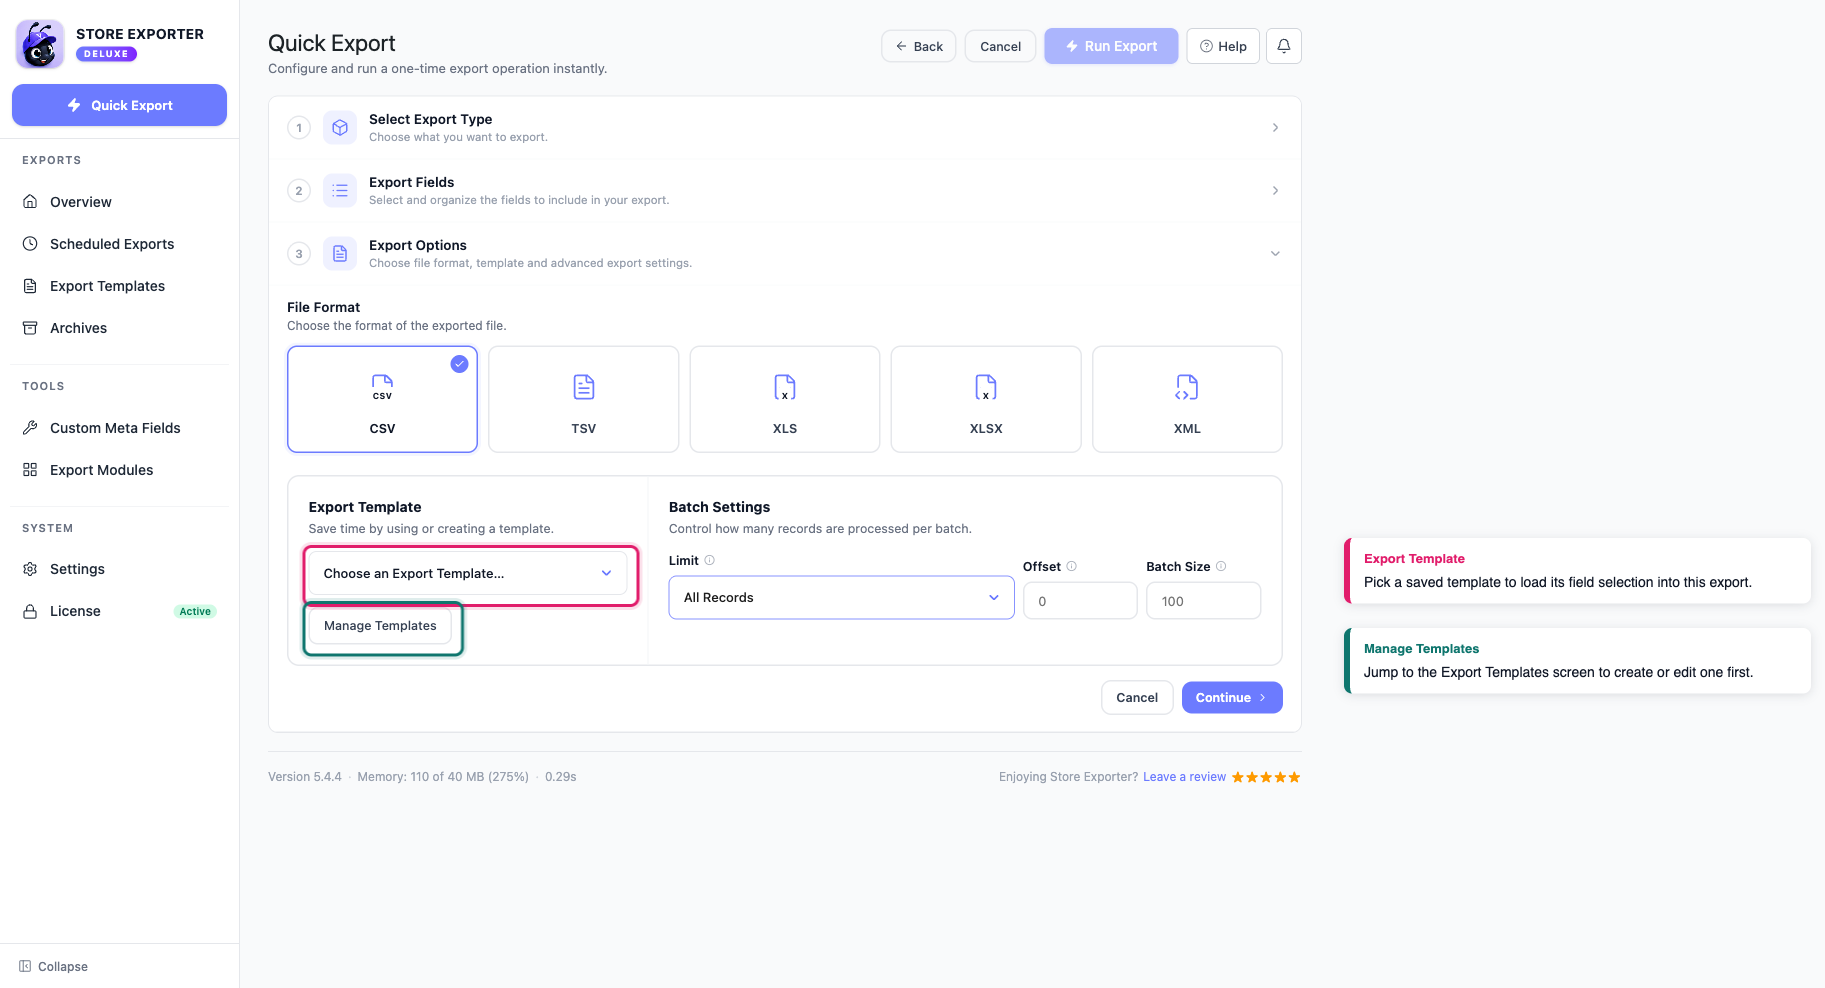
The Export Template dropdown inside Quick Export’s Export Options step is a separate, smaller control: it applies the template’s saved column labels to your export, but it doesn’t load the template’s field selection, export type, or format. You don’t have to use it at all. It’s there for relabeling, not a required step.
From the same dropdown area, click Manage Templates to jump straight to the Export Templates screen if you need to create or adjust one first.
Edit a template
On the Export Templates screen, click the pencil (edit) icon on the template you want to change. This reopens the same three-step form you used to create it, with the Configuration, Export Fields, and Filters & Options steps pre-filled. Change what you need and save.
Delete a template
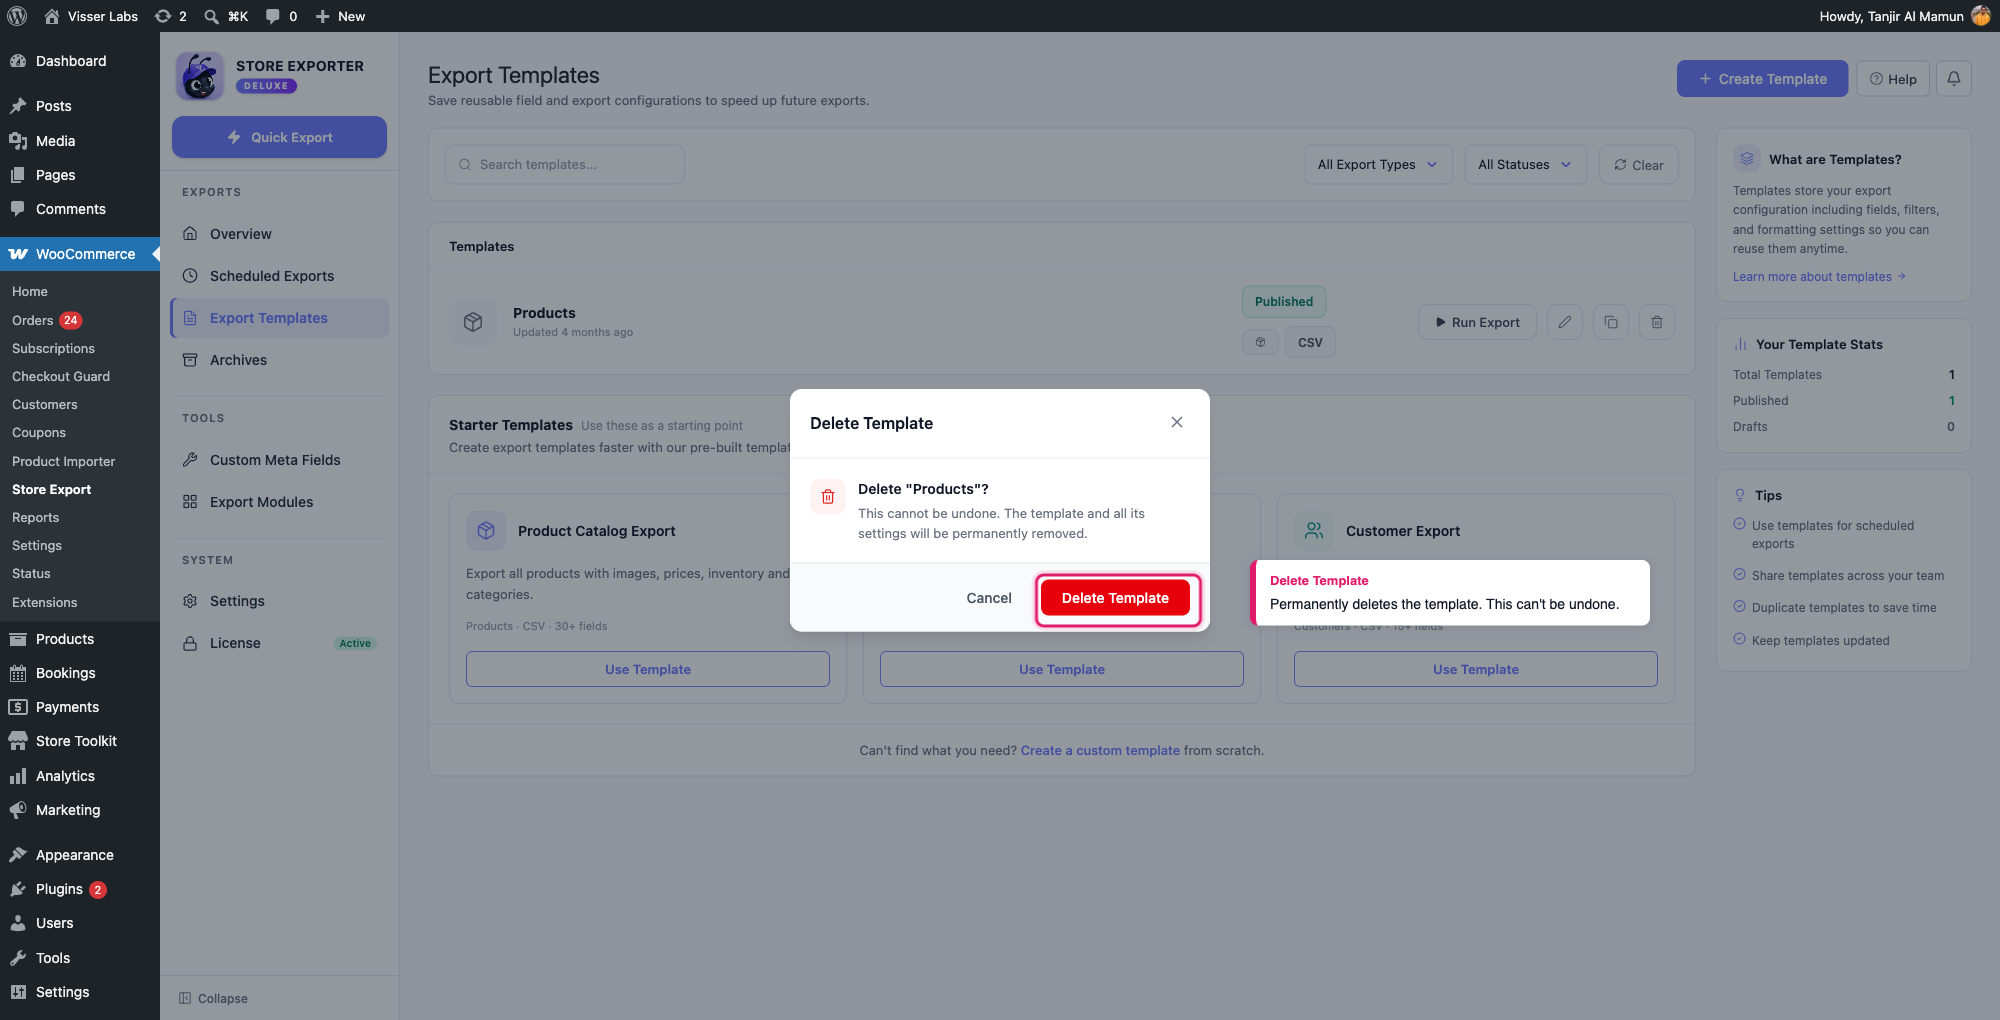
Click the trash icon on the template’s row. A confirmation dialog opens asking Delete "[Template name]"? and warns that this can’t be undone. Click Delete Template to confirm, or Cancel to back out.
Troubleshooting
max_input_vars, or use fewer fields in the template.FAQ
Related articles
Need more help?
If you’re using Store Exporter Deluxe and run into an issue with Export Templates, open a support ticket, and our team will help you sort it out.
If you’re using the free Store Exporter plugin, ask on the WordPress.org support forum, and our team will get back to you there.
