What’s so crucial about the PC data transfer process, specifically one that involves importing product data from a PC file into your e-commerce platform? Why transfer data from pc to online store in the first place?
Understanding the importance of this process is essential for efficiently managing your online business. From saving time to maintaining backups, the import task can significantly enhance your store’s operations.
In this article, we explore why importing product data from a PC file is key to e-commerce success. Furthermore, we provide an easy, step-by-step guide on using Visser Labs‘ Product Importer Deluxe to transfer data from PC to online store.
So let’s get right to it!
I. Why Should You Perform A PC Data Transfer?
Transferring product data from your PC to your e-commerce store is crucial for managing and updating your online business. Here are some reasons why this process is essential:
1. Efficiency
Manually entering product details one by one can be time-consuming and prone to errors. Thankfully, by transferring data from a PC file, you can quickly upload vast amounts of information all at once. In other words, it saves you time and effort, allowing you to prioritize growing your business!
2. Accuracy
When you import data from a prepared file, you reduce the risk of human error. Basically, this ensures that your product listings are accurate, which is vital for customer satisfaction and maintaining a professional online store.
3. Consistency
Using a single file for data transfer helps maintain consistency across your product listings. In other words, all the information, such as product names, descriptions, prices, and images, will be uniform and well-organized.
4. Bulk updates
If you need to update multiple products, a PC data transfer makes it easy. After all, you can modify the details in your file and re-import it, ensuring that all changes are applied simultaneously. A WooCommerce bulk product upload system simplifies updating many products at once while keeping inventory records accurate and current.
5. Backup
Backing up your product data provides an extra layer of security. For instance, should your e-commerce platform experience any issues, you’ll have a copy of all your product information ready to re-upload.
To summarize, performing a PC data transfer enables you to streamline e-commerce store management. This way, you can ensure that your product information is accurate, consistent, and up-to-date. For one thing, this enhances your operational efficiency. For another, it improves the shopping experience for your customers. So it’s a win-win!
Would you like an example of transferring a file’s contents into an online store? Then check out our article, “How To Import Data From CSVs (WooCommerce Product Import CSV).”
Would you like more details about the benefits you can enjoy when you transfer data from pc to e-commerce platform? Then read our post, “What Is Data Import? Why You Need A Product Importer.”
II. How To Transfer Data From PC To Online Store
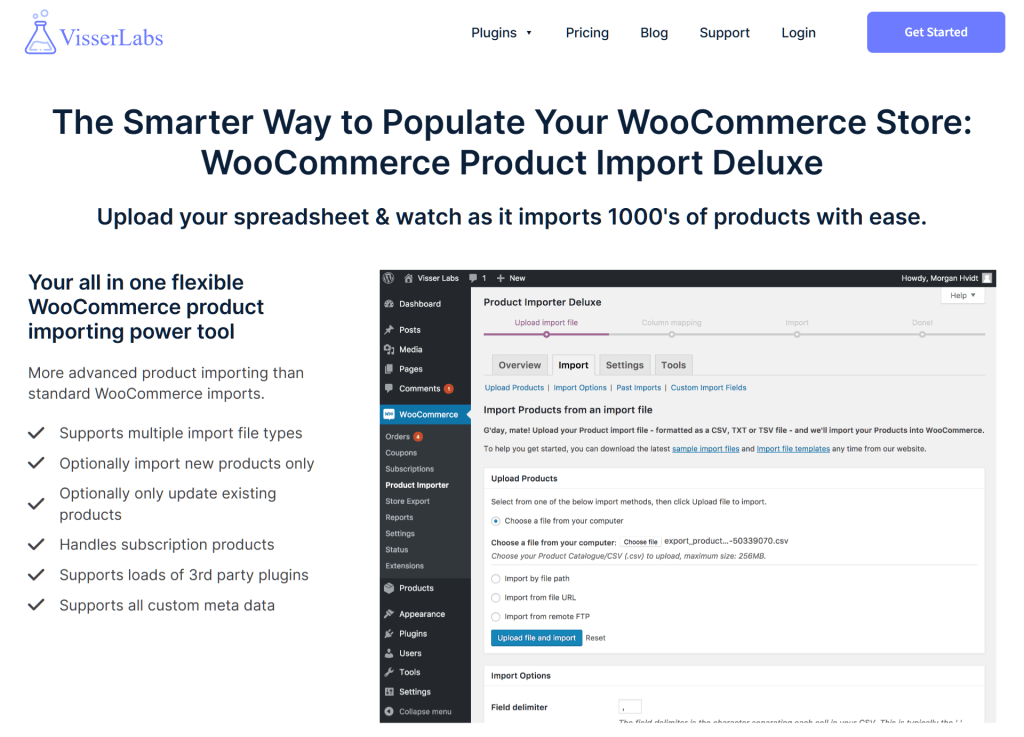
Do you want an efficient and secure way to perform a PC data transfer? Then consider using Product Importer Deluxe, a powerful product data import plugin for WooCommerce.
Of course, for this plugin to work, you’ll need an e-commerce platform powered by WordPress and WooCommerce.
But what should you do once you’ve downloaded, activated, and installed WooCommerce Product Importer Deluxe?
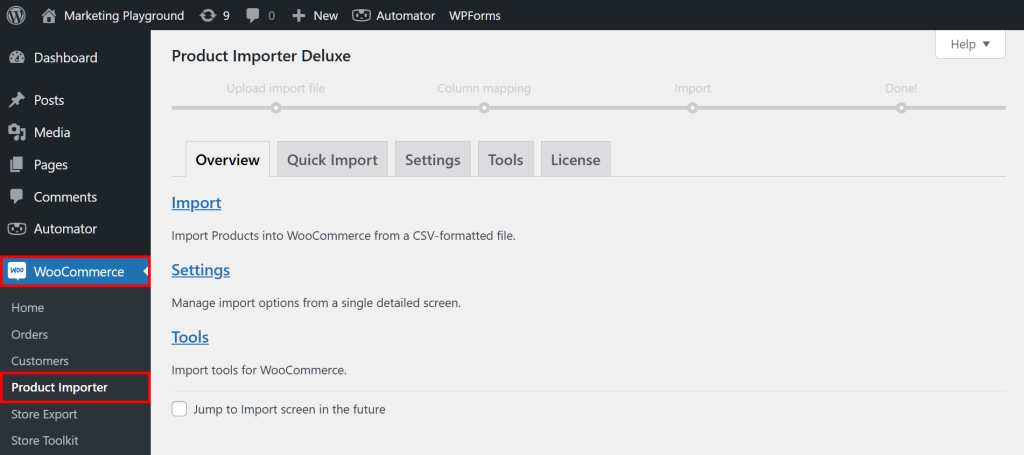
First, head to your WordPress dashboard and click WooCommerce > Product Importer. This takes you to the Product Importer Deluxe page as shown below:
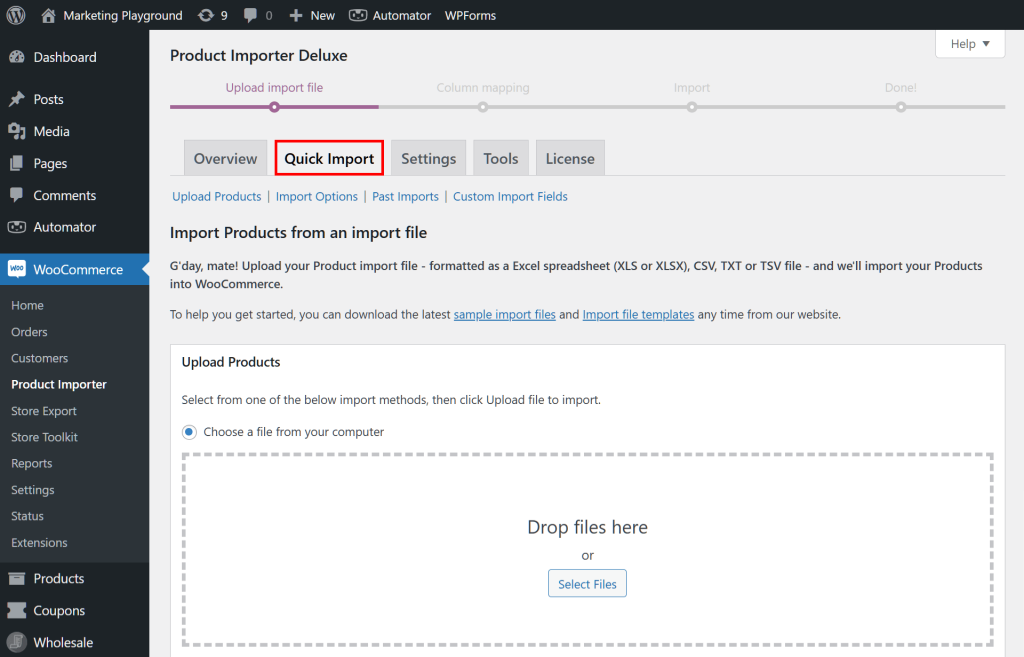
Now, click the Quick Import tab.
Now, to perform a PC data transfer where you import product data into your online store or marketplace, observe the following steps.
Step 1: Upload import file
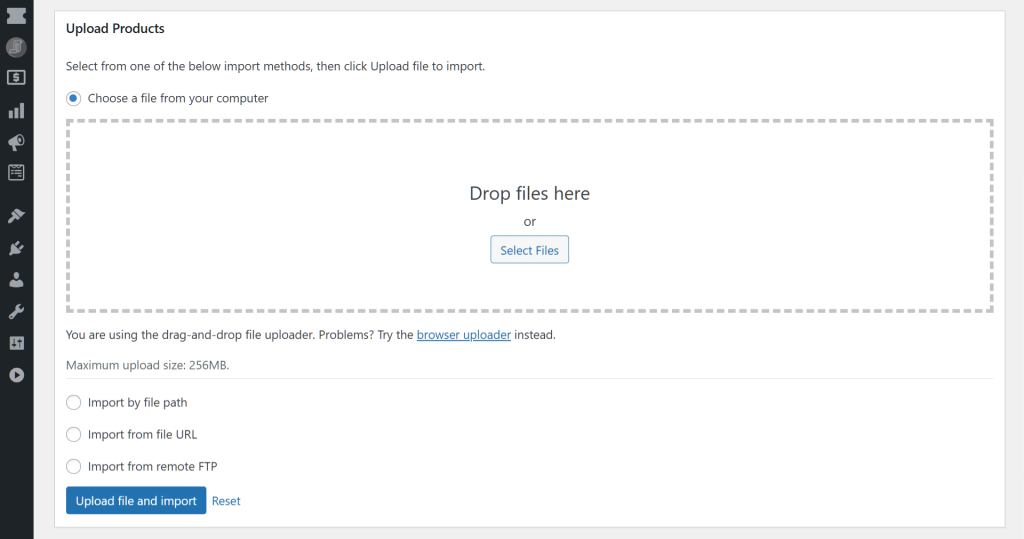
Once you enter the Quick Import section, the first thing you’ll see is the Upload Products interface. Here, you can upload a file from your PC into your plugin.
The plugin provides four ways to select the file to upload:
- Choose a file from your computer
- Import by file path
- Import from file URL
- Transfer from remote FTP/SFTP
As you can guess, the option you must pick is Choose a file from your computer. So go ahead click it!
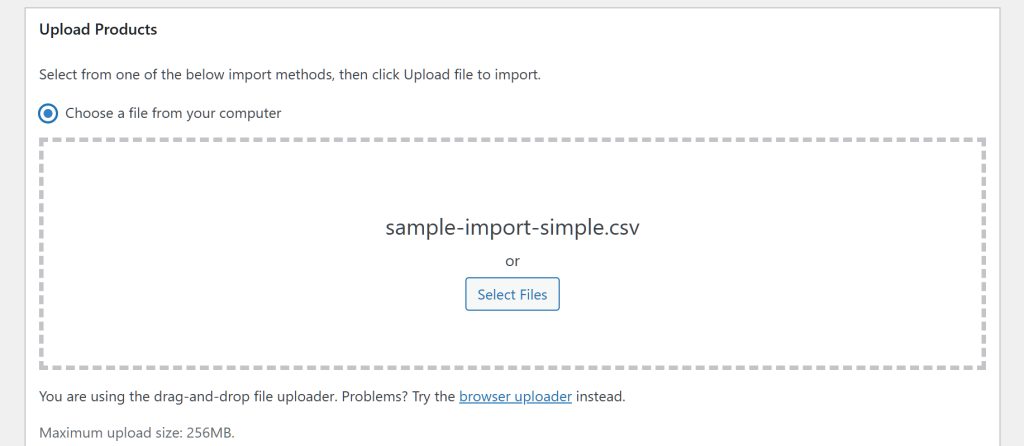
Next, you must select the file you wish to upload. There are two ways to do this:
- Drag and drop the file from your PC into the “Drop files here” area
- Click the “Select Files” button, locate the file within your PC, then click the file
Either option should do the job!
Once you’re done selecting the PC file, upload it into the plugin by clicking the Upload file and import button. This takes you to the next step: column mapping.
Take note: If you made a mistake with your PC file selection, click the Reset button to reset Step 1. Alternatively, you can replace the file simply by dragging a new file into the “Drop files here” area or clicking the “Select Files” button and picking a new file.
Step 2: Perform column mapping
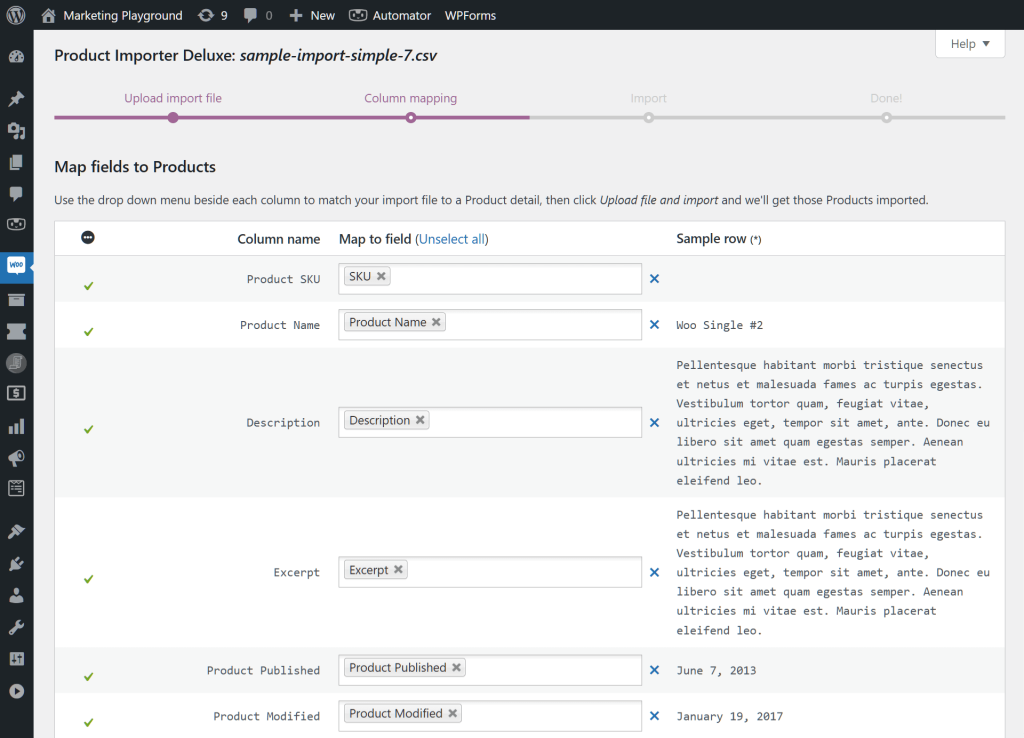
This step involves the Column mapping section, where you must match your PC file’s product fields with WooCommerce fields. In other words, it guarantees that all the product fields you transfer from the file are mapped to the right fields.
This process entails two substeps:
i. Map fields to products
The Map fields to products area is where most of the column mapping process occurs. Pay particular attention to the following two columns:
- Column name: This displays the fields as they’re named in your PC file.
- Map to field: This displays the fields as they’re named in WooCommerce.
Basically, your job is to ensure the Column name fields are matched with the correct Map to field fields.
Thankfully, the plugin automatically matches these two columns. Thus, in most cases, you won’t have much to do in this step.
However, should you wish to change any Map to Field field, click its dropdown and select its replacement from the provided list of fields. This is particularly useful if your PC file contains unique fields that the plugin can’t map to their appropriate WooCommerce counterparts.
For added convenience, you can use the Sample row column to preview the content of your columns. This helps you examine the accuracy of your column mapping.
Once you’re happy with your column mapping, it’s time to configure some settings…
ii. Import Options
Scroll down to the Import Options box. Here, you’ll find the settings that control how your product data is imported from your PC into your store.
The default settings should be adequate for most import tasks. However, you can configure these settings if you have unique requirements in mind.
Import Options comes with three main areas:
a. Import method
Use Import method to choose how you want to transfer product data from your PC file into your platform. For example, you can opt to transfer new products only, delete identical products, and so on:
b. Image import method
Image import method enables you to determine how product image data appears in your import file. For instance, you can create a column including the images’ file names or external URLs. Alternatively, you can choose not to upload product images.
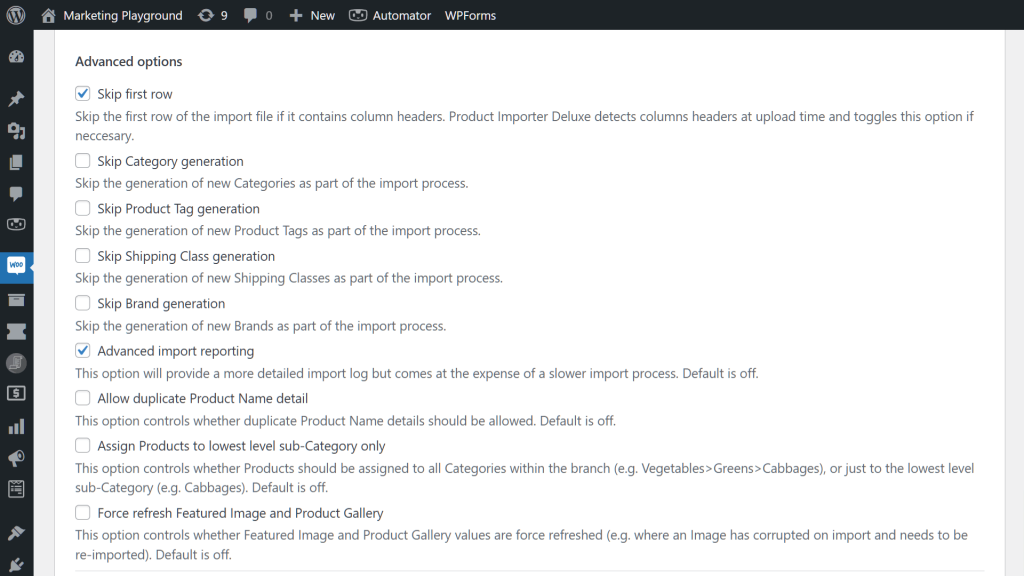
c. Advanced options
The Advanced options area lets you enjoy even greater control over the import task. As illustrated by the image below, many options are at your disposal. To learn what each option is for, simply check out its description.
Finally, we have the Script timeout option. Basically, this lets you determine how much time the import process is allowed to take. The dropdown gives you four options:
- 10 minutes
- 30 minutes
- 1 hour
- Unlimited
Should the import process reach your preferred time limit, the import is canceled.
Once you’re satisfied with your configurations, click the Upload file and import button to move on to the next and final step!
Step 3: Transfer data from PC to online store
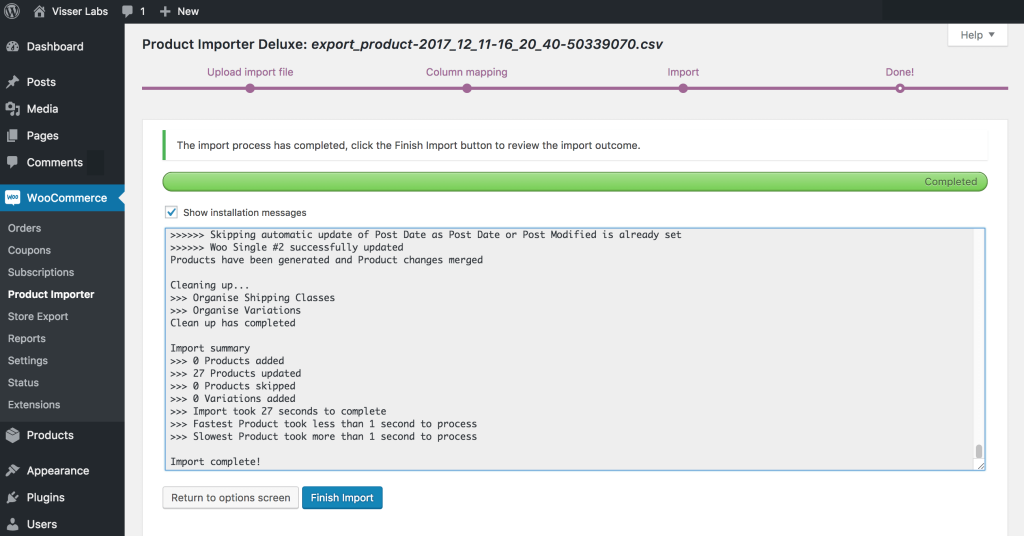
The actual import process has begun… and all you have to do is wait for it to end!
A progress bar steadily moves to the right, showing you how much of the import task has been completed.
If you’d like details about the process, tick the Show installation messages checkbox. Moreover, if you want to temporarily halt the import, click the Pause import button.
The progress bar turns green upon the import’s completion. Furthermore, a Finish Import button appears, which you can click to end the task!
Congratulations! You’ve successfully completed a PC data transfer by importing a PC file’s contents into your e-commerce platform!
Would you like more information on importing product data? Then check out our comprehensive guide, “WooCommerce Product Import Plugin: The Ultimate Importer Tool Guide.”
Bonus Tip: The import process is usually smooth, but if you ever find your WooCommerce product import not working, don’t panic. Common issues often relate to file formatting, server timeouts, or incorrect column mapping. For a detailed troubleshooting guide on resolving these errors, check out our guide: WooCommerce Product Import Not Working? Here’s What To Do!
Conclusion: PC Data Transfer Accomplished!
Importing data from a PC file into your e-commerce platform is critical for any online business. After all, this process allows you to streamline your operations, ensure accuracy, maintain consistency, and make bulk updates with ease. This saves you time and enhances the overall efficiency and reliability of your online store.
Thankfully, you can use Visser Labs’ Product Importer Deluxe to easily transfer data from PC to online store. All you must do is observe the following steps:
Would you like more information on how to transfer data from PC to e-commerce platform? Then reach out to us and let us know; we’d be happy to hear from you!
