Are you wondering how to export WooCommerce products efficiently and effectively?
We wouldn’t be surprised if you are. After all, exporting product data from your WooCommerce store can benefit you in more ways than one. From improving inventory management to enhancing marketing strategies, the process offers insights you can use to help your business grow and succeed.
Today, we’ll explore the many advantages of extracting your store’s product data into a file format of your choice. Furthermore, using Store Exporter Deluxe as our export tool, we’ll give you a step-by-step tutorial on how to export WooCommerce products.
So let’s dive in!
I. What Is The WooCommerce Product Export Process?
Before learning how to export WooCommerce products, we must first define the product export process.
Basically, exporting products is the extraction of product data from a WooCommerce platform into a file format that the store owner can effortlessly access. The export process itself is accomplished using a data exporter tool.
For example, you can use Store Exporter Deluxe to export information into file formats such as:
- CSV (Comma Separated Values)
- TSV (Tab Separated Values)
- Excel (XLSX) (Excel 2007-2013)
- XML (EXtensible Markup Language)
- JSON (JSON data format)
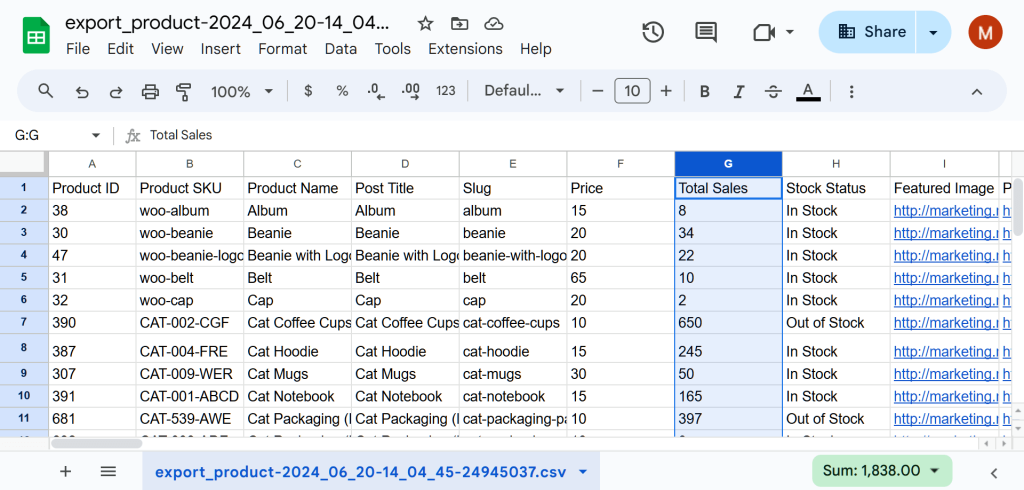
You can export a wide range of product data, some of which include:
- Product ID
- Product SKU
- Slug
- Permalink
- Description
- Price
- Featured Image
- Product Gallery
- Quantity
- Stock Status
- … and so much more!
But what’s the use of this data? Let’s find out!
II. 5 Major Reasons To Export WooCommerce Products
As an online store owner, it’s not enough to know how to export WooCommerce products; you must also know why.
You can use extracted product data to implement various strategies for enhancing business performance and growth.
Key strategies include:
1. Data security and recovery
Among the best reasons to learn how to export WooCommere products is to take advantage of the security it offers.
Website crashes, accidental deletions, or cyberattacks can cause significant data loss, severely impacting your operations. Fortunately, creating regular backups of your WooCommerce product data can safeguard your business against such disasters.
Two important aspects of data backup include:
- Disaster recovery: Having a backup of your product data ensures you can quickly restore your store to its previous state should the worst occur. This minimizes downtime and lets you resume normal operations without massive disruptions.
- Data integrity: Regularly exporting and backing up product data helps maintain the integrity of your records. By keeping copies of your data, you can verify the accuracy of your current inventory and historical sales information. As a result, you can ensure your business decisions are based on reliable data.
2. Inventory management
Exporting WooCommerce product data allows you to maintain a comprehensive and up-to-date record of your stock. This helps you avoid stockouts and overstock situations, ensuring a smooth sales process and customer satisfaction.
Two key aspects of inventory management include:
- Stock level monitoring: Regularly exporting product data allows you to keep track of stock levels in real time. In turn, this helps you make informed decisions regarding product reordering, managing seasonal fluctuations in demand, and optimizing the use of warehouse space. Consequently, you minimize storage costs and prevent lost sales due to out-of-stock items.
- Product categorization: You can use exported product data to categorize your inventory more effectively. For example, you can group products by category, price range, or sales volume. This aids in better organization, easier navigation for customers, and more targeted marketing efforts.
3. Analysis
Here’s another excellent reason to figure out how to export WooCommerce products.
When you extract WooCommerce product data, you can perform detailed analyses of your inventory and sales performance. Consequently, this enables you to make data-driven decisions that improve your product offerings and overall business strategy.
Three types of analyses you can perform include:
- Sales performance analysis: By examining exported product data, you can identify best-selling products, underperformers, and seasonal trends. This helps you make informed decisions about which products to promote, discount, or discontinue. Understanding sales performance also helps you optimize your product mix and pricing strategy.
- Product lifecycle analysis: Analyzing product data over time helps you understand the lifecycle of your products. You can track how long products stay in stock, how quickly they sell, and when they need to be replaced or updated. This ensures you keep your inventory fresh and relevant to customer needs.
- Market trend analysis: Exported product data enables you to identify emerging trends in market demands and customer preferences. This information helps you stay ahead of competitors by adapting your product offerings to align with current trends and customer expectations.
4. Marketing and promotions
Exported product data can significantly enhance your marketing and promotional strategies. After all, understanding which products are popular and how different items perform allows you to tailor your marketing efforts to maximize sales and customer engagement.
Two effective marketing strategies include:
- Targeted promotions: Using product data to identify high-performing items or slow movers, you can create targeted promotions to boost sales. For one thing, you can offer discounts on underperforming products to clear out inventory. For another, you can bundle best-sellers with complementary items to increase the average order value.
- Personalized product recommendations: Exported product data helps you understand customer preferences and buying behaviors. This allows you to generate tailored product recommendations and upsell options. By showing customers items that interest them, you improve their shopping experience, encouraging them to buy from you repeatedly.
5. Data migration and integration exporting
Mastering how to export WooCommerce products allows you to move around valuable data conveniently. Moreover, it can ensure that all your product information is accurately transferred and readily available.
For example, you can implement the following data migration strategy:
- Platform migration: If you decide to switch to a new e-commerce platform, exporting your product data ensures a smooth transition. You can easily import the data into the new platform, minimizing downtime and ensuring your store remains operational.
- Third-party integrations: Exported product data can be used to integrate with various third-party services, such as inventory management systems, analytics tools, and marketing platforms. This helps you streamline your operations and leverage additional functionalities to grow your business.
Do you wish to know more about why you should export WooCommerce products and other data types? Then read the articles below!
- Data Export Tool: Why Your E-Commerce Business Needs One
- Combining Data Export And Import Processes: How To Enhance Data Management
III. How To Export WooCommerce Products
You’ve come here seeking to find out how to export WooCommerce products. However, it’s equally important to know which tools you can use to get the job done.
Introducing Visser Labs’ Store Exporter Deluxe: a powerful data export tool for WooCommerce platforms!
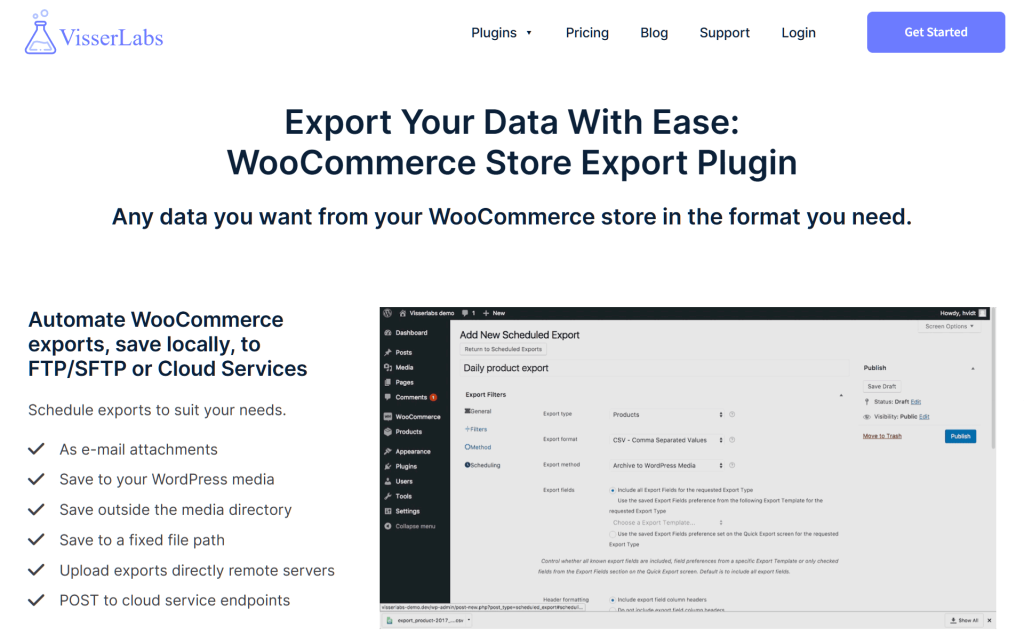
With Store Exporter Deluxe, you can export a wealth of WooCommerce store data into widely used file formats. As a result, you can streamline and enhance data management, which can go a long way in boosting your online store’s chances of success.
For Store Exporter Deluxe to work, however, you need a platform powered by WordPress and WooCommerce. Furthermore, you need to download, install, and activate WooCommerce Store Exporter Deluxe.
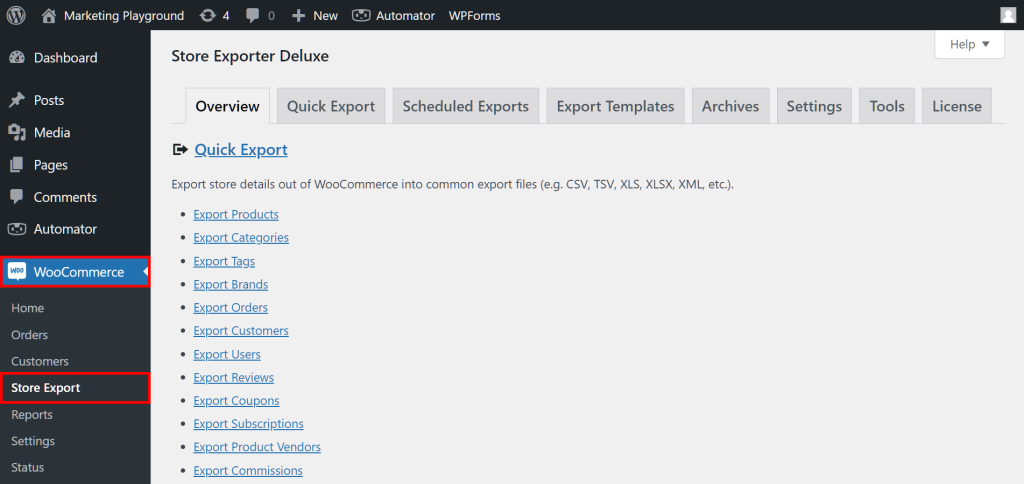
Once that’s done, navigate to your WordPress dashboard and click WooCommerce > Store Export. This takes you to the Store Exporter Deluxe page:
As the above image illustrates, the page comes with eight main sections. However, this guide will focus on only one: Quick Export.
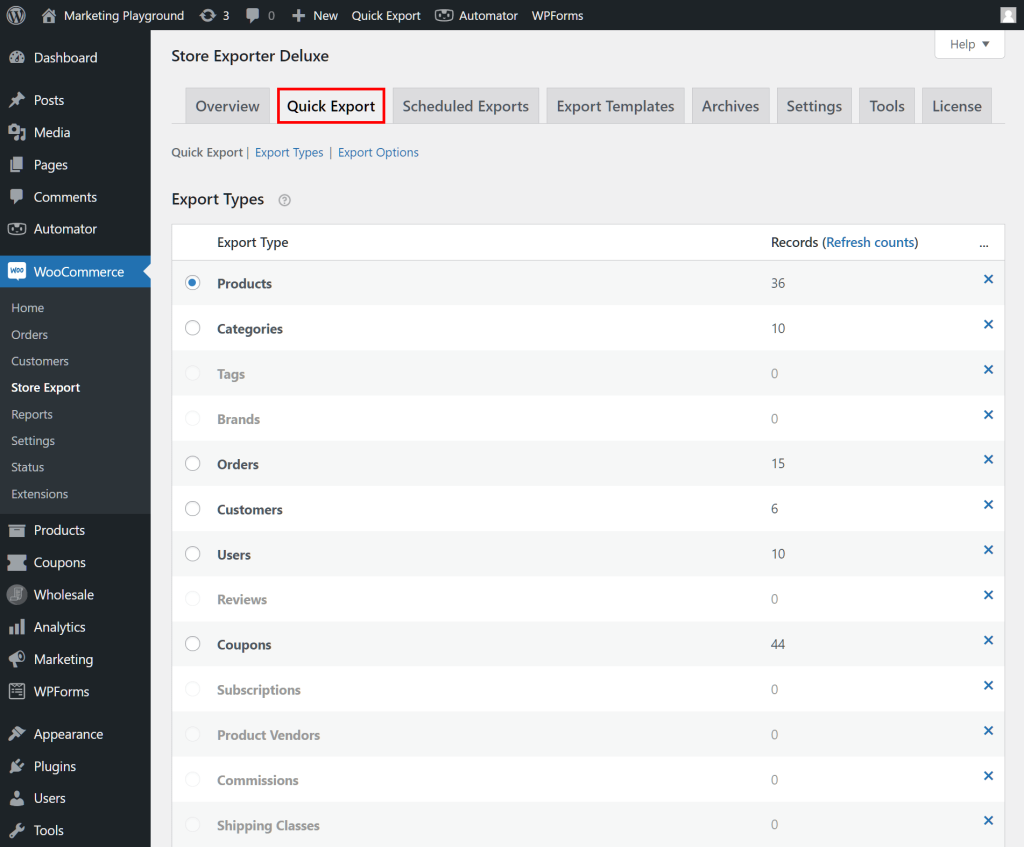
Now, to start the tutorial, click the Quick Export tab.
The Quick Export section allows you to transfer enormous volumes of product data easily and quickly.
Ready to learn how? Then observe the following steps:
Step 1: Select the Export Type
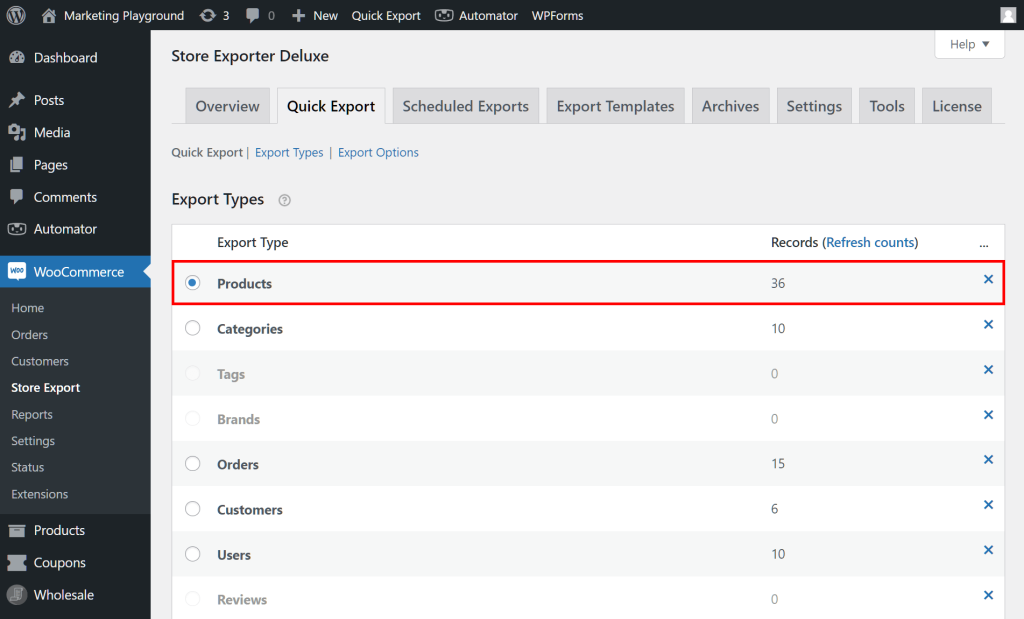
First, pick the data type you wish to export by clicking its circle. In our case, we’ll click “Products.”
If you wish, you can end the tutorial right here. All you must do to start the WooCommerce product export process is to click the Quick Export button below the Export Types box.
However, we recommend configuring your other export settings to ensure the process goes exactly as you desire. Thus, let’s proceed to the next step…
Step 2: Choose the Product Fields to export
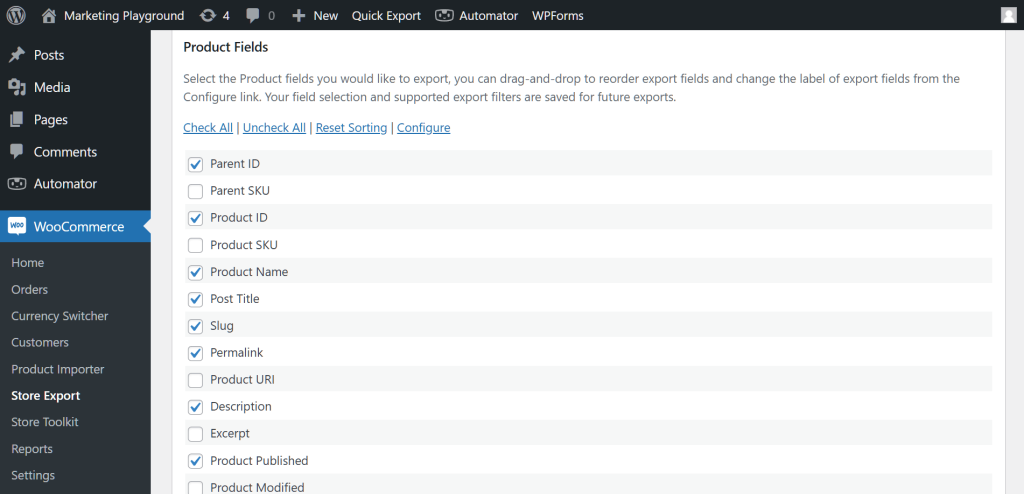
Head down to the Product Fields box, which contains lots of additional information associated with the “Products” data type.
For instance, you’ll see fields such as “Product Name,” “Description,” various product measurements, and more. To choose your fields, simply tick their checkboxes. You can select as many fields as you wish.
You can sort these fields by dragging and dropping them wherever you like. This will affect how the export file orders your products.
What if you don’t need or like certain fields? Don’t worry—you can hide them by clicking the Configure button, then ticking their “Hide” checkboxes.
Once more, you can stop the tutorial at this stage and initiate your export by clicking the Export Products button below the Product Fields box. However, let’s continue to explore your other export configuration options!
Bonus Tip: You can also export products with images — including featured images and product galleries — for a more complete data set. To learn how, read this full guide on WooCommerce Export Products With Images.
Step 3: Pick your Product Filters
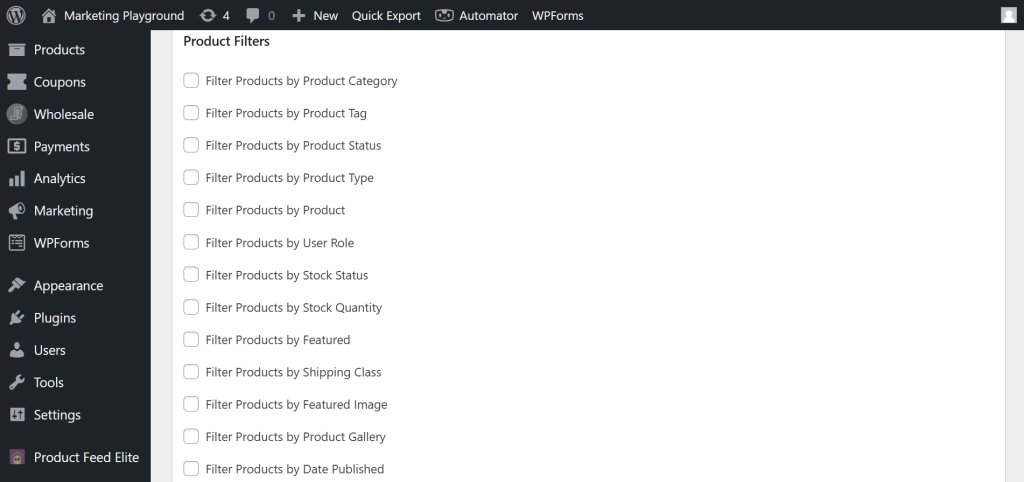
Now, scroll down to the Product Filters box.
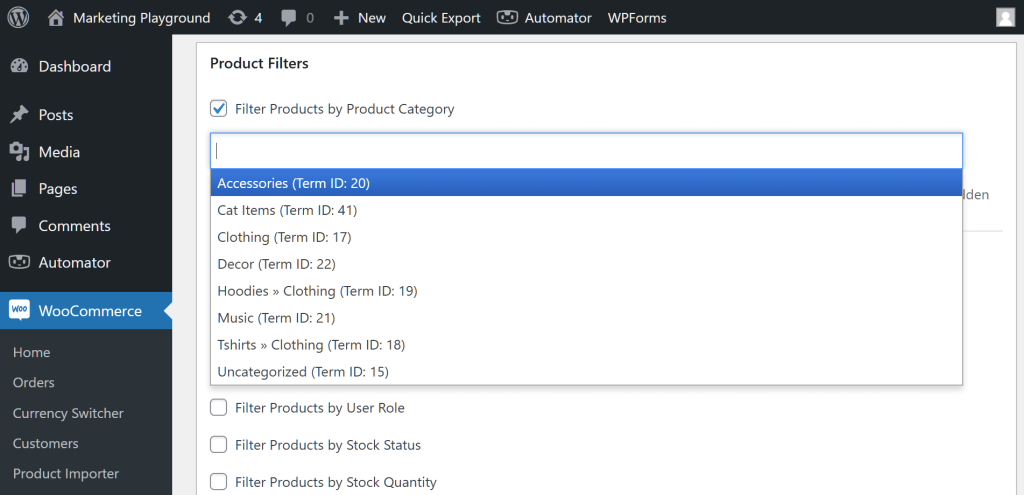
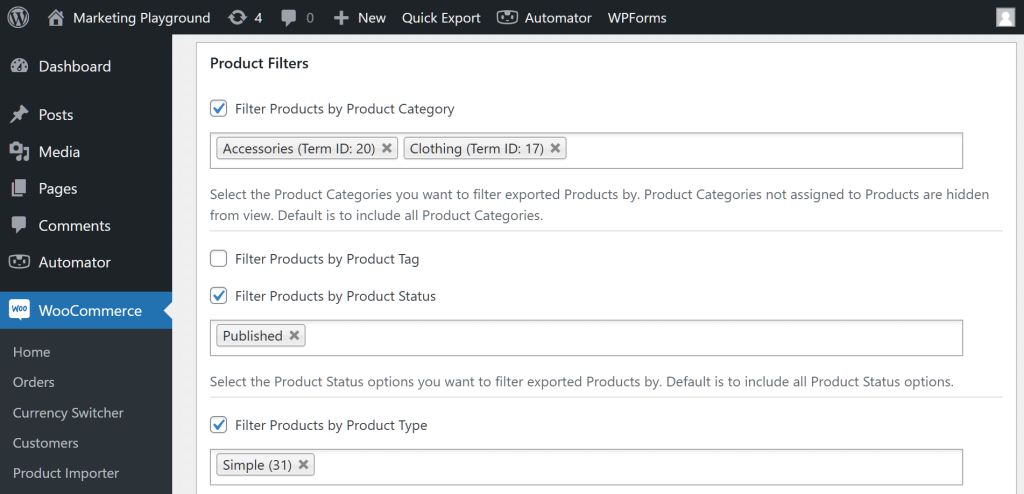
Filters allow you to selectively extract data based on certain groupings. For instance, suppose you only want to export products in the “Accessories” category. All you must do is tick the checkbox for “Filter Products by Product Category,” then choose “Accessories” from the dropdown menu.
Take note that you can use multiple filters. You can even combine filters from various filter groupings. For instance, in the image below, we combined filters from three groupings: “Filter Products by Product Category,” “Filter Products by Product Status,” and “Filter Products by Product Type.”
You can use the Product Sorting option to arrange products in either ascending or descending order. In addition, you can use Custom Multi-Level Field Sorting for more advanced sorting.
Lastly, there’s the Manage Custom Product Fields button. However, we’ll skip Custom Fields for now and move on to the next step.
Step 4: Finalize your Export Options
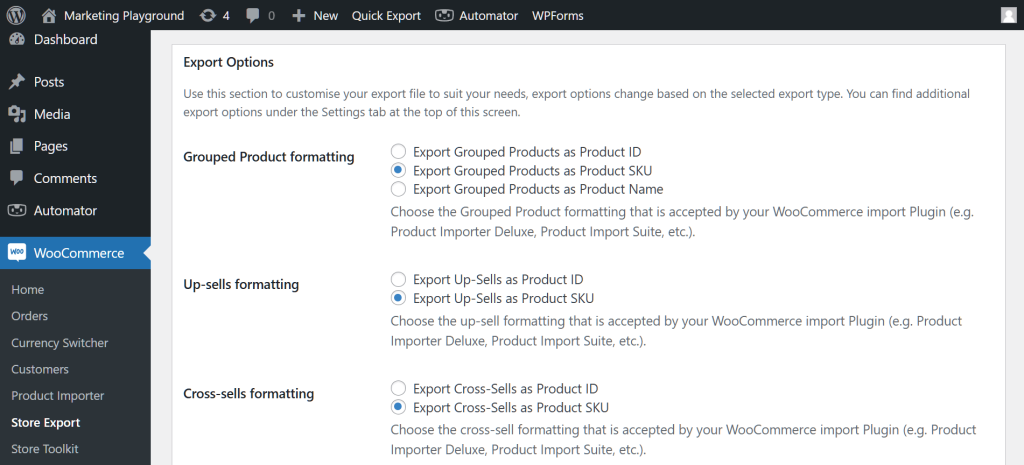
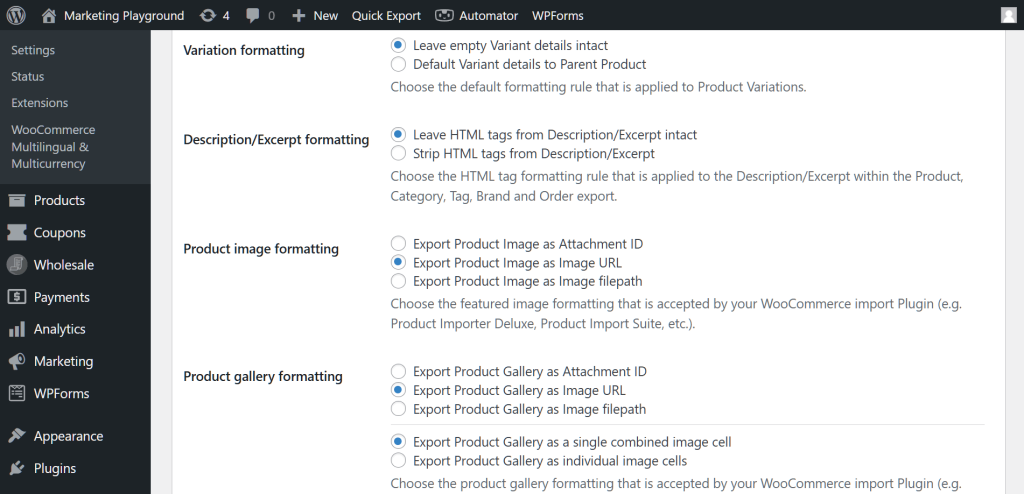
The Export Options area allows you to customize the format of your exported data.
As shown by the two images below, you have various ways to control how product recommendations, image galleries, and more are exported.
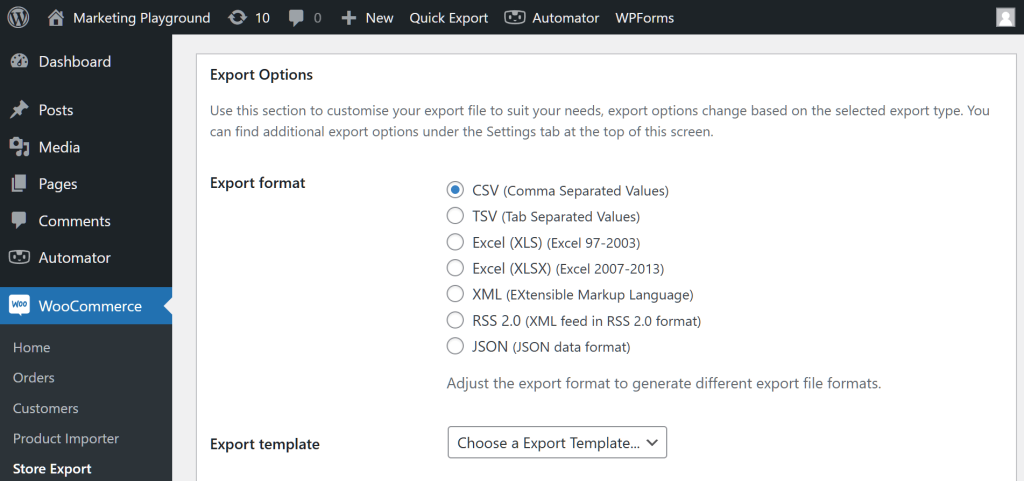
However, the most important option is Export format. This lets you select the file format you wish to export WooCommerce products into.
For this guide, don’t bother with the Export Template option, as this can undo your work.
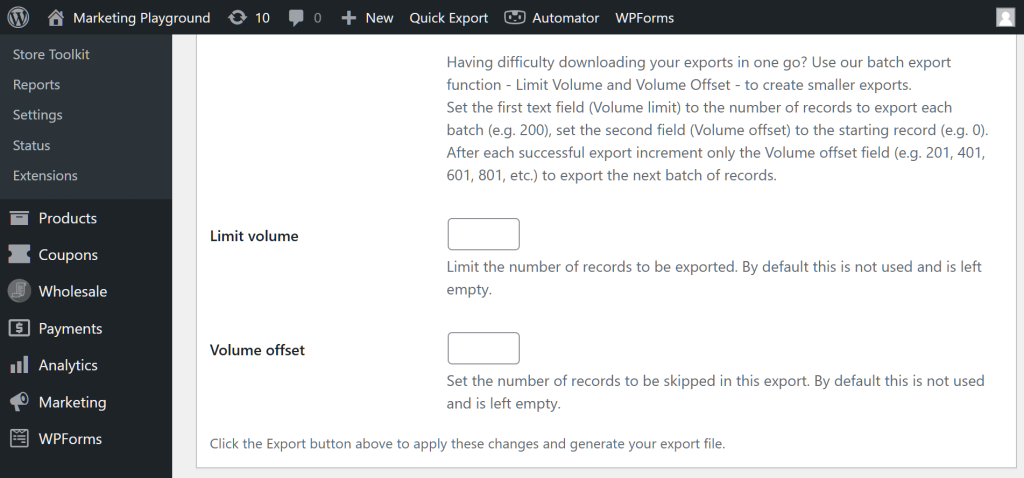
In addition, you can export WooCommerce products in batches, using the Limit volume and Volume offset values to control each batch’s size. This can be useful if you have several hundred or thousand items.
Step 5: Create Custom Fields (Optional)
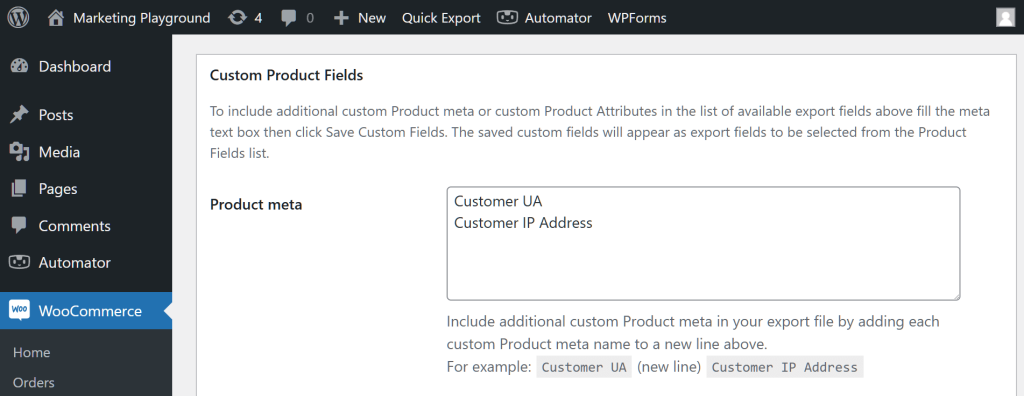
If you think WooCommerce’s default product fields are lacking, you can create your own using the Custom Customer Fields feature.
Simply type the names of the new fields into the Customer meta box, making sure to place only one field per line.
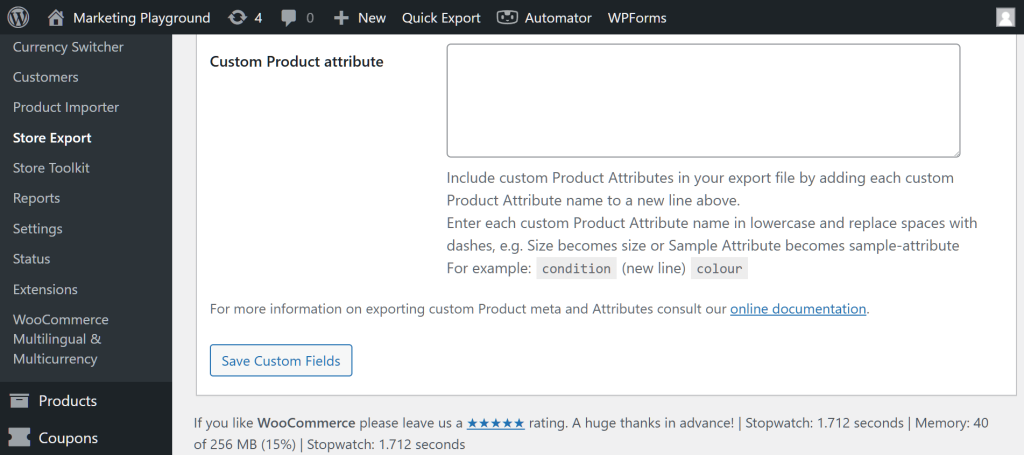
You can even create new product attributes:
Once you’re finished, click the Save Custom Fields button. This makes your newly created fields appear in the Customer Fields area, allowing you to pick them.
Step 6: Run your export!
When you’re satisfied with your settings, return to and click either the Export Products or Quick Export button. This instructs Store Exporter Deluxe to extract your product data and transfer it into your preferred file format—a process that takes a few seconds to a few minutes. Once the plugin has finished the transition, you’ll find the export file on your computer.
Take note: Store Exporter Deluxe automatically saves your Quick Export settings so that you can easily access them in the future.
Conclusion: How To Export WooCommerce Products Safely, Conveniently, And Efficiently
Learning how to export WooCommerce products using tools like Store Exporter Deluxe can revolutionize the way you manage your online store.
To recap, leveraging exported product data lets you enjoy the following benefits:
- Data security and recovery
- Inventory management
- Analysis
- Marketing and promotions
- Data migration and integration exporting
In addition, to export WooCommerce product data, use Store Exporter Deluxe to implement the following steps:
- Select the Export Type
- Choose the Product Fields to export
- Pick your Product Filters
- Finalize your Export Options
- Create Custom Fields (Optional)
- Run your export!
Remember: exporting WooCommerce products empowers you to stay competitive in the world of e-commerce, paving the way for sustained growth and success.
Do you have any questions about how to export WooCommerce products? Let us know in the comments!
