
Fake orders, spammy sign-ups, and repeat problem customers cost you time on every order you have to cancel and refund by hand. Checkout Guard stops those orders before they’re placed. It blocks checkout for any customer whose name or email matches a rule you set, so you catch the problem before it becomes a fulfillment headache.
This article covers installing Checkout Guard, activating your license, and setting up your first blocked entry. For a broader look at what the plugin does day to day, keep this article bookmarked as your starting point.
Prerequisites
| Requirement | Details |
|---|---|
| WordPress | Version 5.2 or later |
| WooCommerce | Active on your site. Checkout Guard reads and blocks orders at the WooCommerce checkout, so it can’t run without it |
| License | A valid Checkout Guard license key and the email address used at purchase |
| Administrator access | You’ll need an account with access to the WordPress admin dashboard |
Step 1: Install and activate the plugin
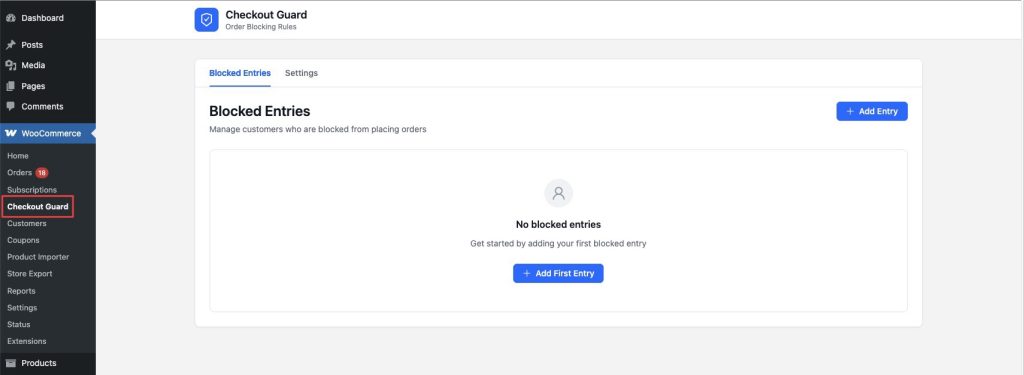
Upload and activate Checkout Guard the same way you would any other WordPress plugin, either through Plugins → Add Plugin or by uploading the plugin ZIP file. Once it’s active, a new Checkout Guard item appears under the WooCommerce menu in your admin sidebar.
Step 2: Activate your license
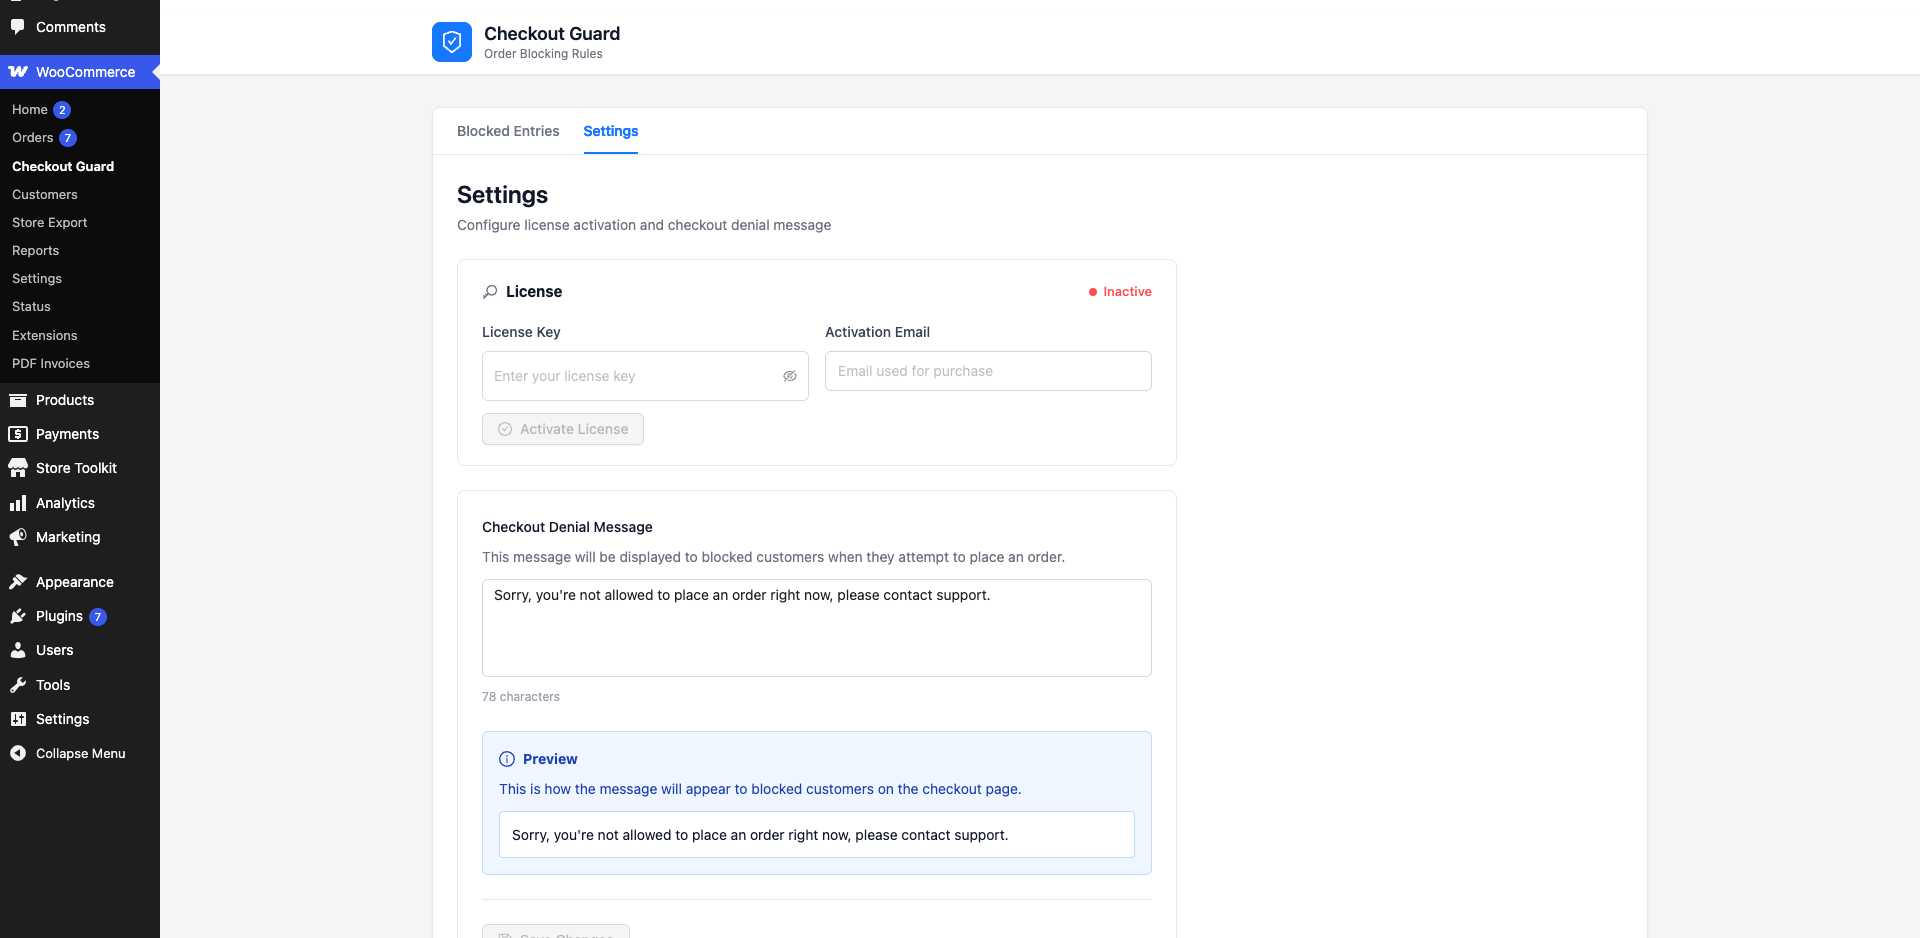
Go to WooCommerce → Checkout Guard, then click the Settings tab. Under License, enter your License Key and the Activation Email you used to purchase Checkout Guard. Then click Activate License (once your license has been activated, this button reads Re-activate License).
Once your license is active, the License status at the top of the section shows Active.
Step 3: Add your first blocked entry
Checkout Guard blocks orders by matching a customer’s name, email, or both against a list of blocked entries you maintain. Go to the Blocked Entries tab (this is the default tab when you open Checkout Guard). On a fresh install, you’ll see an empty state that reads No blocked entries.
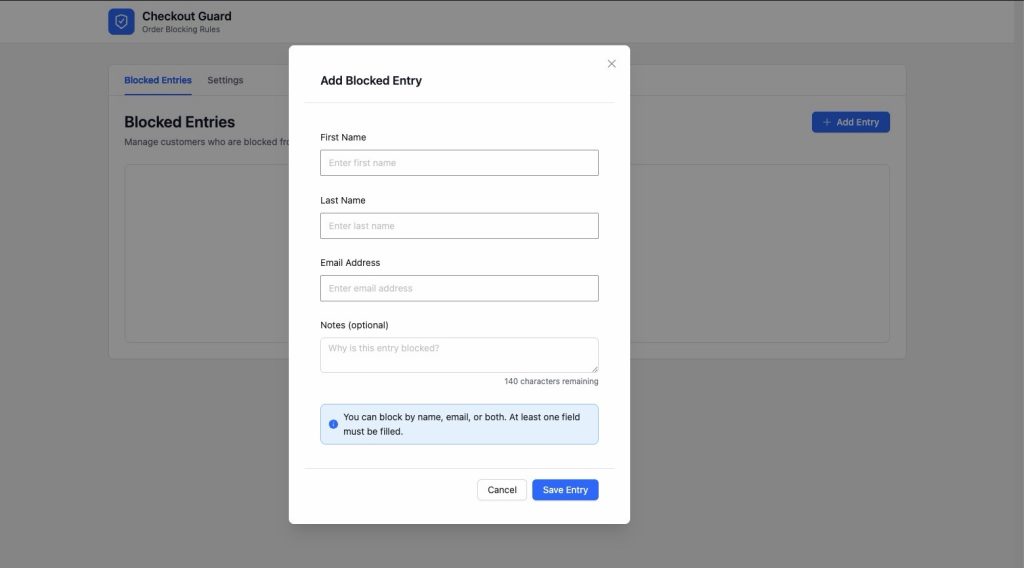
- Click Add First Entry (or Add Entry if you already have entries in the list). This opens the Add Blocked Entry dialog.
- Enter the customer’s First Name and Last Name if you’re blocking by name.
- Enter the customer’s Email Address if you’re blocking by email.
- Optionally, add a short note in the Notes (optional) field explaining why you’re blocking this entry, up to 140 characters.
- Click Save Entry.
You don’t need to fill in every field. Checkout Guard only requires at least one of First Name, Last Name, or Email Address to save an entry, so you can block by name alone, email alone, or both together.
Once saved, the entry appears in your Blocked Entries list. Any WooCommerce order attempting checkout with a matching name or email is blocked automatically. There’s no separate “enable blocking” toggle to switch on. Adding an entry is what activates the block for that customer.
Step 4: Customize the checkout denial message
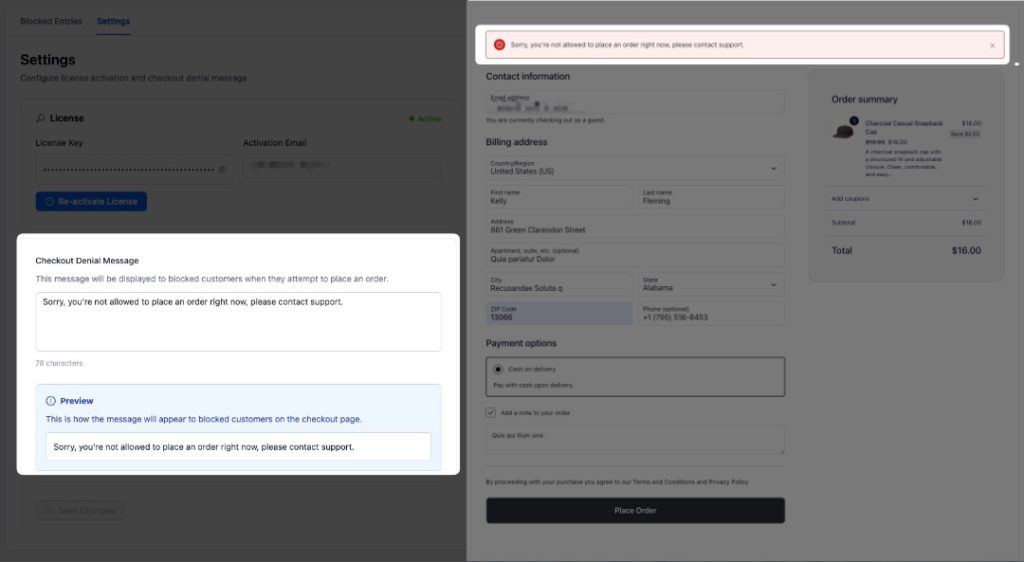
Still under the Settings tab, find Checkout Denial Message. This is the message a blocked customer sees when they try to place an order. Edit the text in the box, and a live Preview below it shows exactly how the message will look. Click Save Changes once you’re happy with it.
Troubleshooting
FAQ
Need more help?
Checkout Guard is a licensed plugin, so if you run into trouble, open a support ticket and our team will help you get set up.
