If you run an online store, you know how time-consuming and error-prone it can be to manually export data like customer info, orders, and product details from WooCommerce. To make your e-commerce store more efficient, it’s a good idea to set up an automated export system.
In this article, we’ll talk about why setting up an automated export system in WooCommerce is beneficial. Then, we’ll also guide you through the simple steps using VisserLabs. Let’s get into it!
Why You Need An Automated Export System In WooCommerce
Before we delve into the details of setting up an automated export system in WooCommerce, let’s first explore the numerous benefits it offers:
Firstly, automating the export process in WooCommerce can save you valuable time and effort.
Instead of spending time manually exporting data, you can let a system handle it for you. This frees up your time to focus on more important aspects of your business.
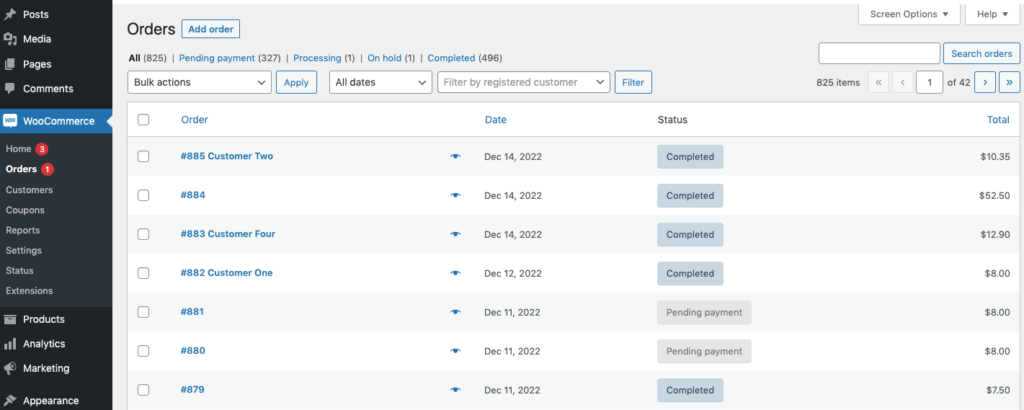
Secondly, it ensures that the exported data is accurate and consistent. When people do it manually, mistakes can happen, leading to incorrect information being shared. Automation helps eliminate these errors, maintaining the integrity of your data.
Moreover, an automated system gives you real-time updates. This means that whenever new data is in your WooCommerce store, the system can export it immediately. This is especially handy for tasks like inventory management or sharing product details with direct suppliers.
How To Set Up An Automated Export System In WooCommerce
Before we dive in, remember that WooCommerce’s basic export feature might not meet all your needs.
If you find it falls short, consider using a specialized export plugin or custom development to tailor automation and customization to your business. Given these limitations, especially if you’re seeking automation, I recommend using the Scheduled Exports feature of Store Exporter Deluxe:
This feature allows you to automate the export process, saving you time and effort. And in this section, we’ll cover the step-by-step process of setting this up:
Step 1: Configure the General settings.
To set up a scheduled export, navigate to the “Scheduled Exports” section of Store Exporter Deluxe:
Here, you can create a new scheduled export by clicking the “Add Scheduled Export” button. You’ll, then, be prompted to configure the following:
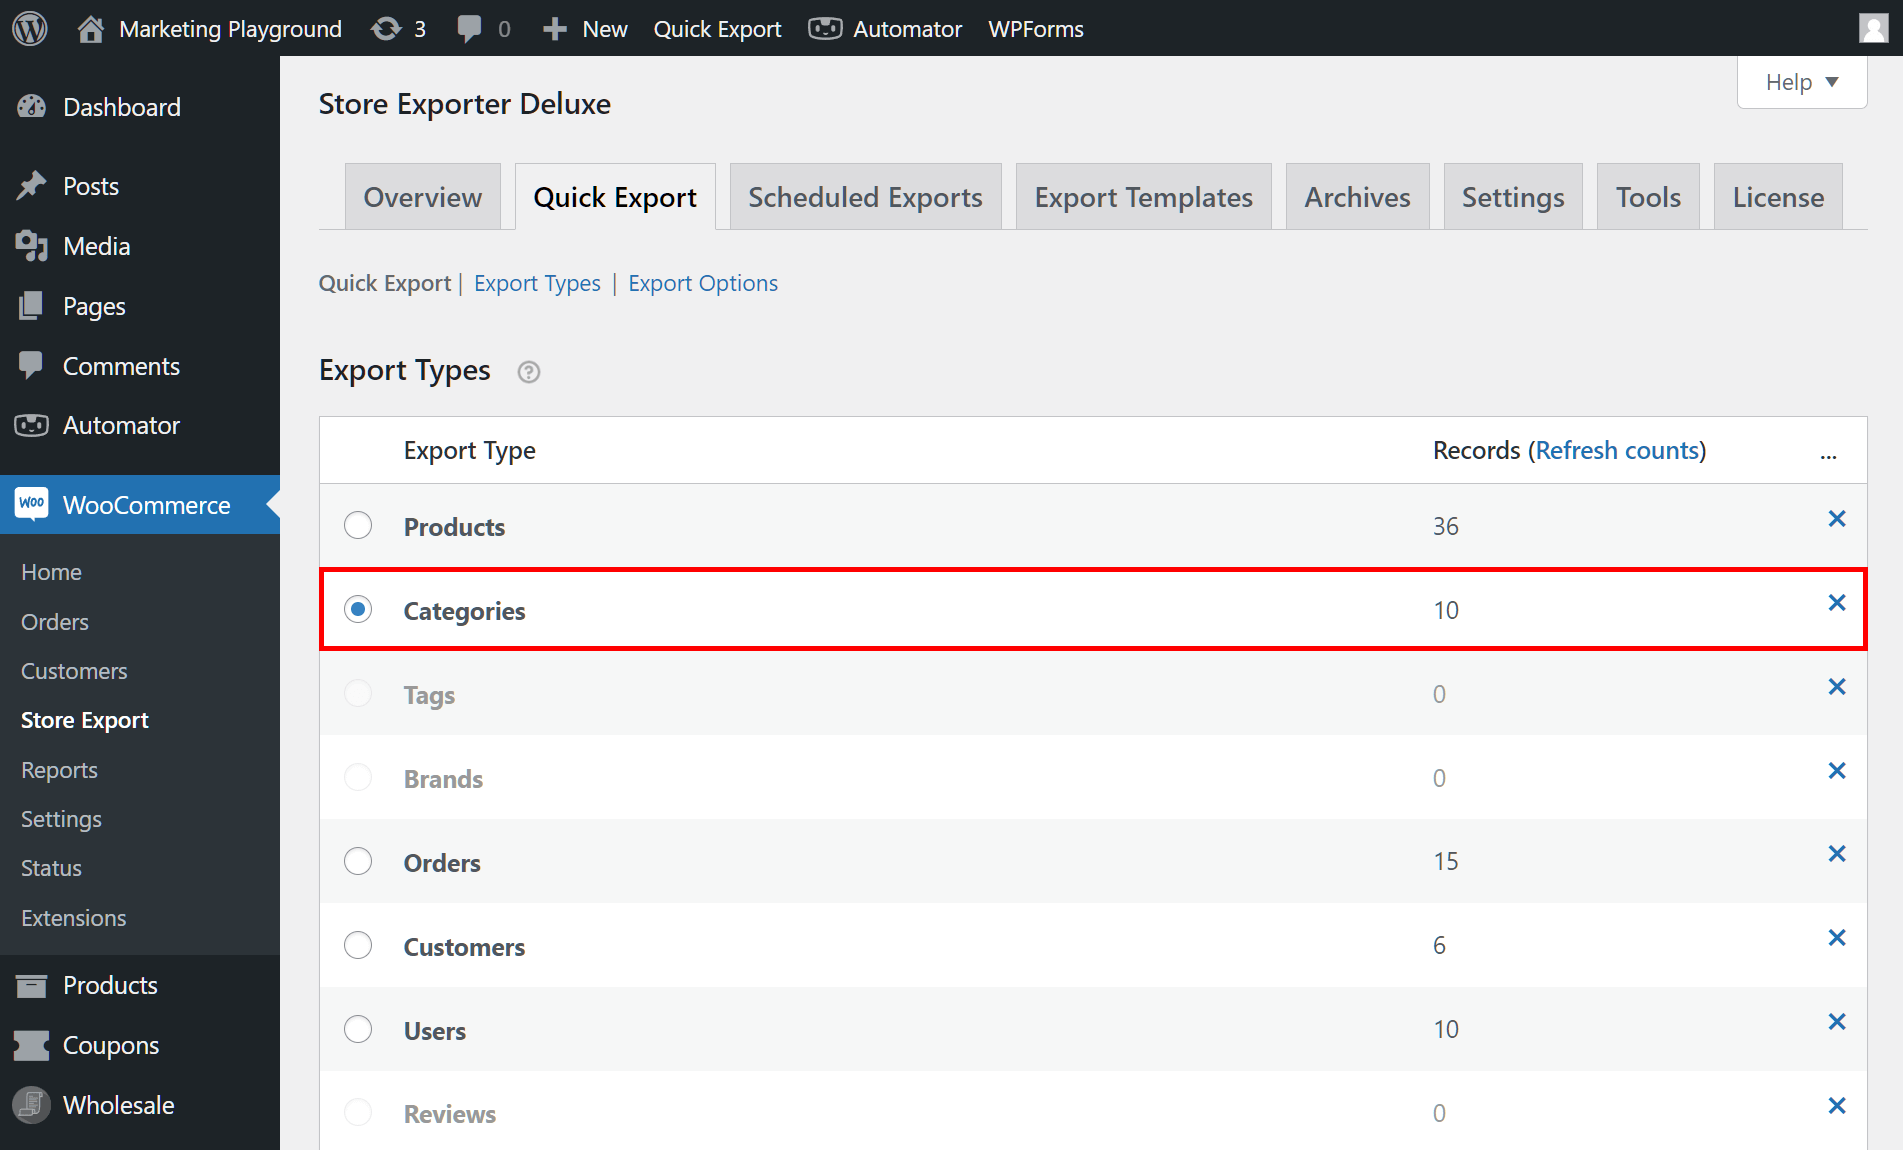
Export Type
This refers to what kind of data you want to export, such as orders, products, customers, or coupons. Choose the specific type of information you need for your export:
Export Format
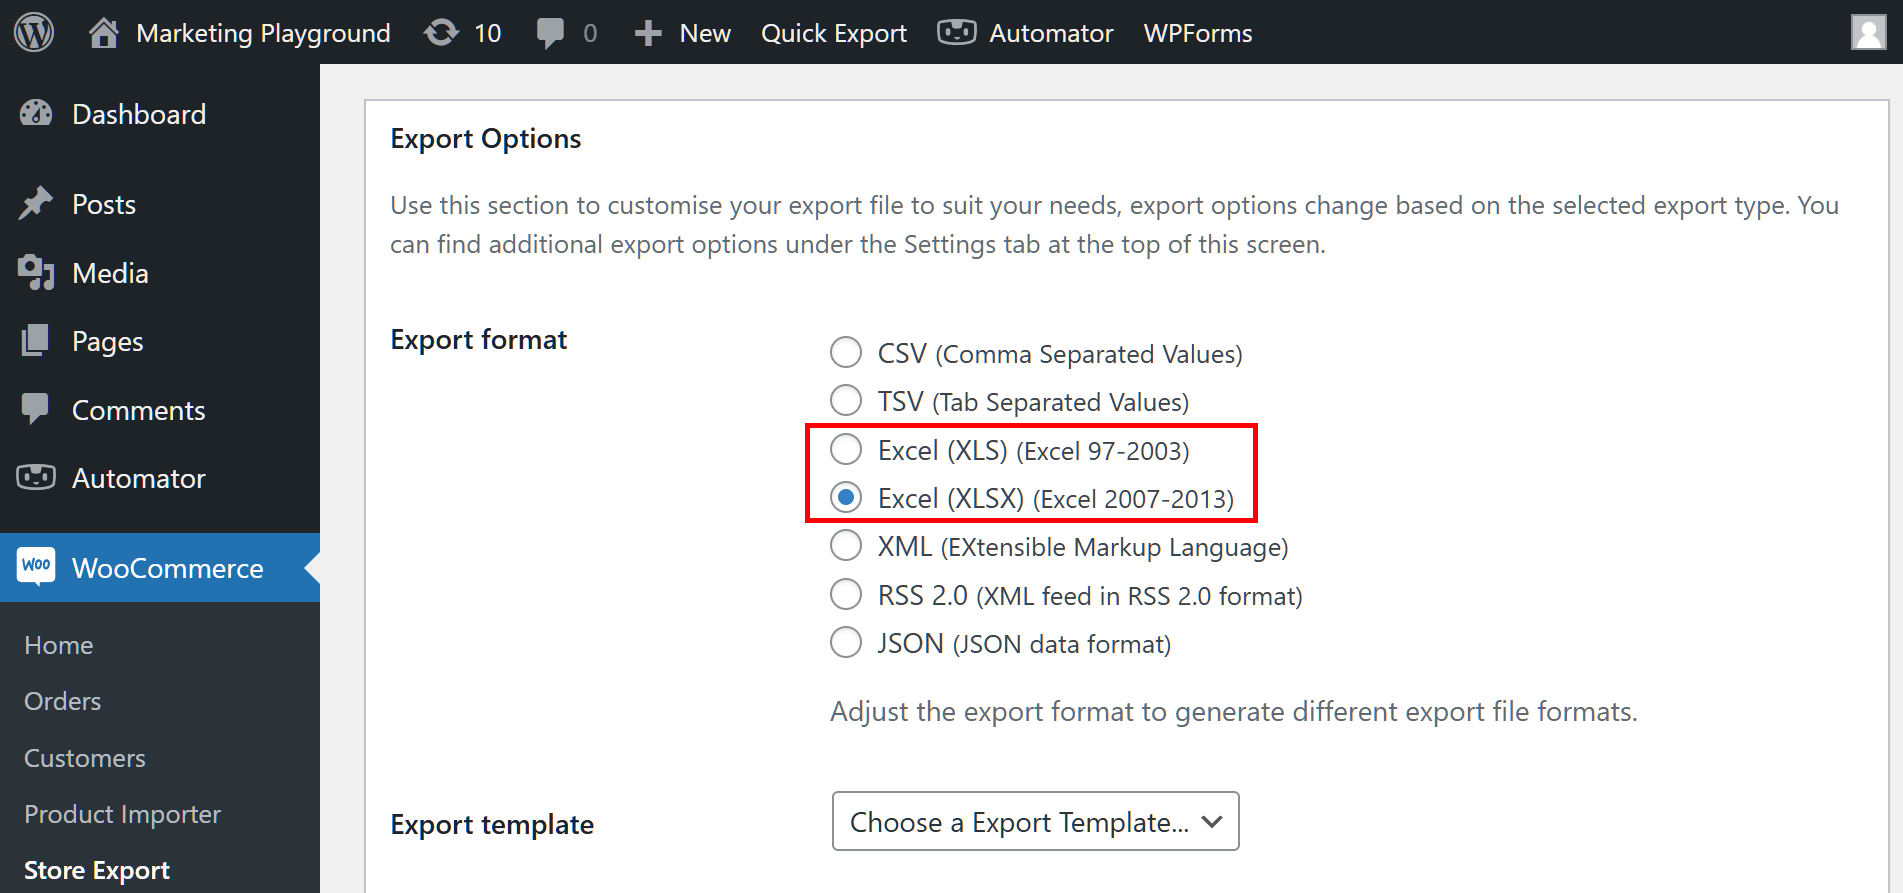
This setting determines the format in which your exported data will be saved. Common formats include CSV (Comma-Separated Values), Excel, or XML. Choose the format that best suits your needs:
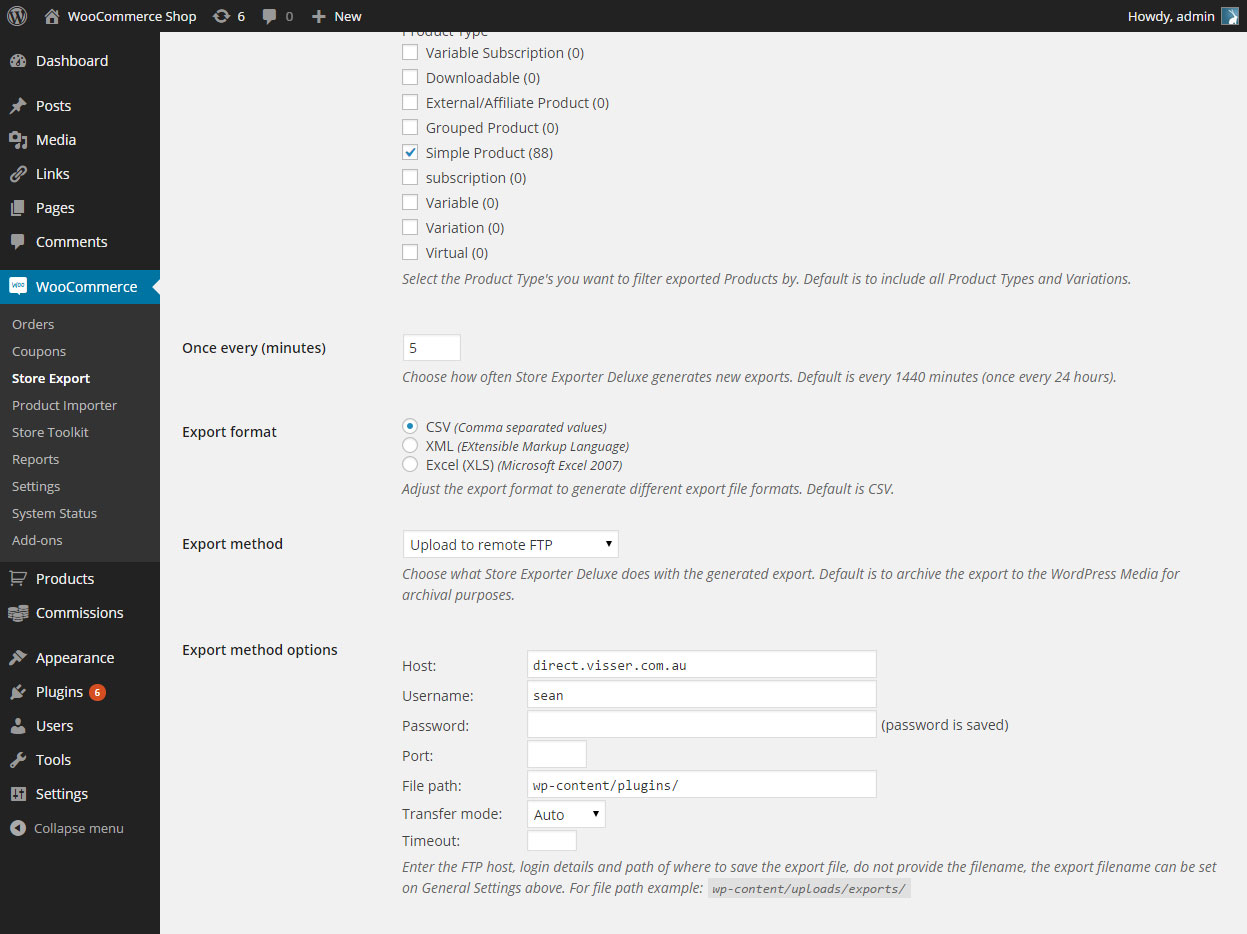
Export Methods
Export methods define how the data will be exported. It could be archived to WordPress media, saved to this server, sent to mail, and many more:
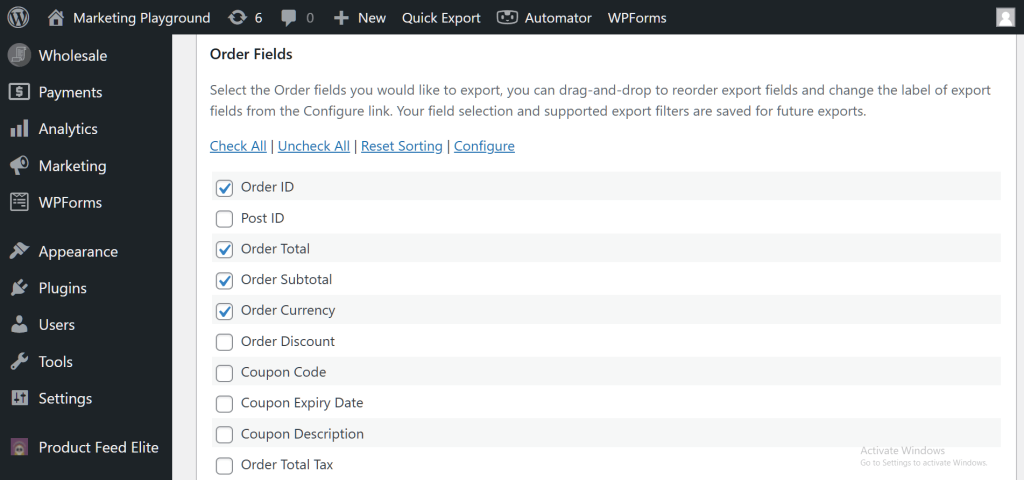
Export Fields
Export fields allow you to select the specific information or data fields you want to include in the export. For example, if you’re exporting orders, you might want to include fields like order number, customer name, product details, and so on.
This customization ensures that you only export the data relevant to your needs:
Step 2: Set up the filters.
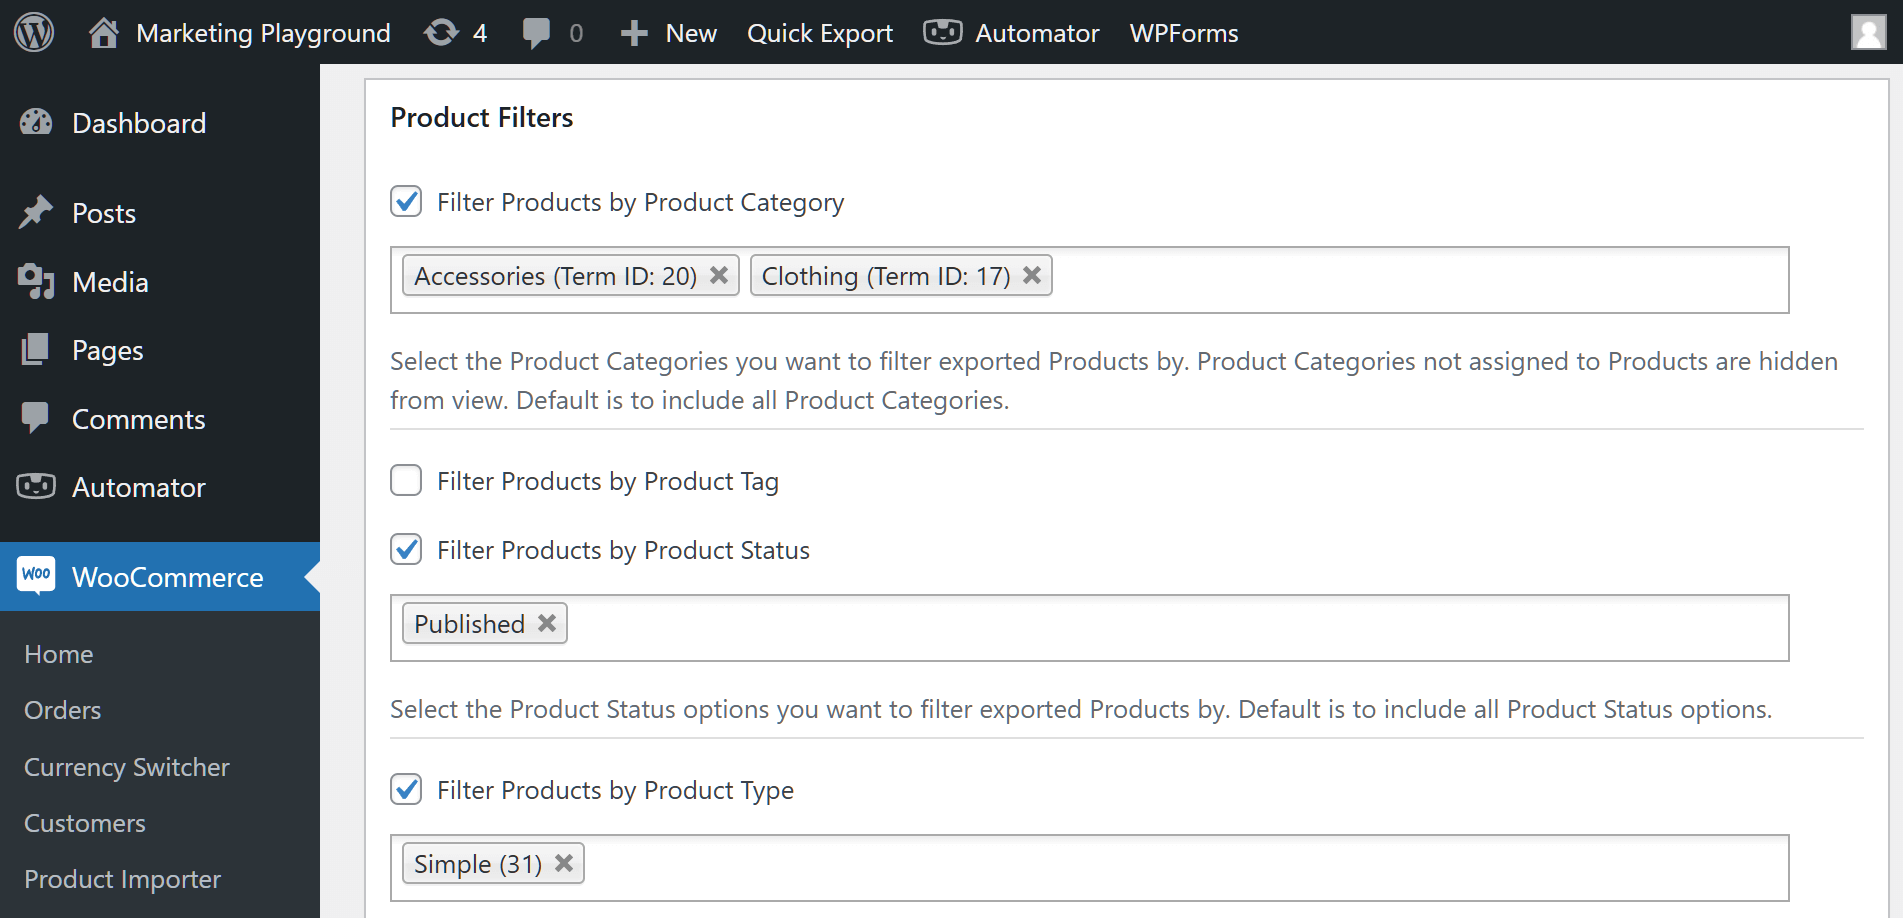
After configuring the “General tab”, the next step is the “Filters tab.” In this section, you can establish product sorting filters to organize how your automatic export will function:
Choose how you want your products to be sorted by selecting from options such as:
- Title: Sorting products alphabetically by their names.
- Product SKU: Organizing products based on their Stock Keeping Unit (SKU) identifiers.
- Product ID: Sorting products numerically by their identification numbers.
- Date: Organizing products based on their creation or modification dates.
Additional filtering options
You also have the option to specify the following:
- First Field to Sort: This allows you to choose the primary field for sorting. For example, you might want to initially sort products by their creation date.
- Second Level Field to Sort: In case of a tie or if you want a secondary level of sorting, you can choose another field here.
- Product Category, Tag, Status, Type, and More: These options enable you to filter products based on specific categories, tags, statuses (like published or draft), types (simple or variable), and other attributes. This allows you to narrow down the exported data to a more targeted subset.
- User Role: If your WooCommerce store has multiple user roles (e.g., administrator, editor, customer), you can filter products based on the role of the user associated with them.
- Date Modified: This lets you sort products based on the date they were last modified.
- Stock Status: You can filter products based on their stock status, helping you focus on products that are in stock, out of stock, or have a specific stock status.
- Stock Quantity: This option allows you to filter products based on their current stock quantity. For example, you can export only products with a stock quantity greater than a certain number.
- Customer IP Address: If you’re dealing with customer-related data, this option allows you to filter products based on the IP address of the customer associated with the purchase.
Step 3: Schedule your exports automatically.
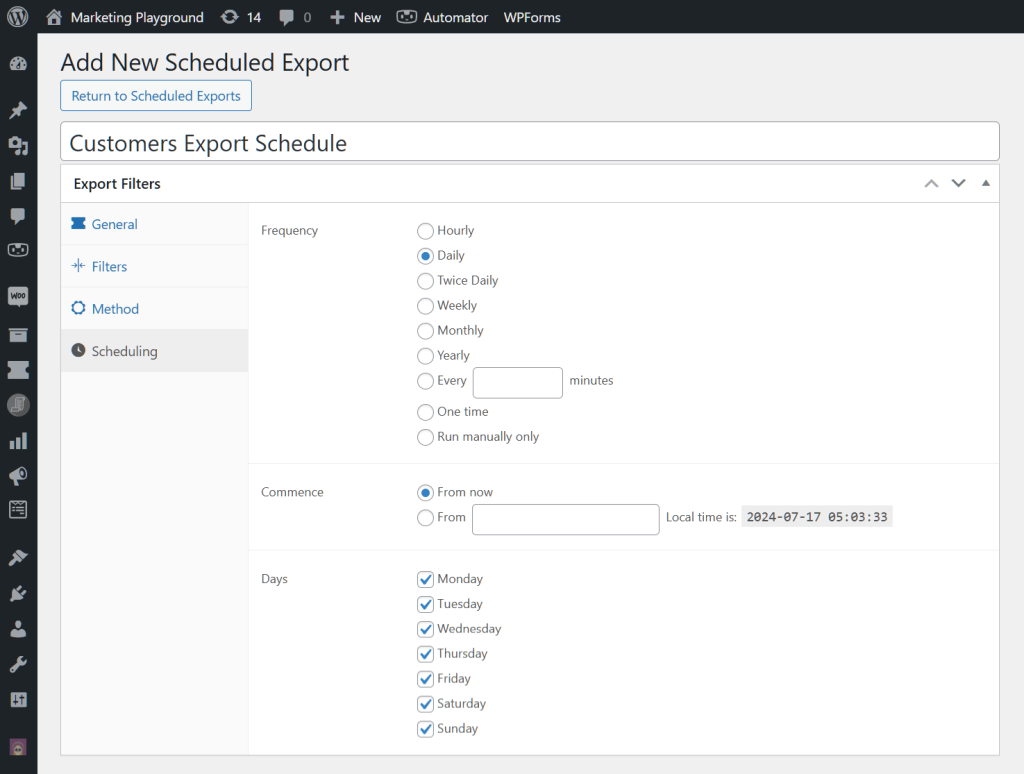
Once you’ve configured the General settings and applied your filters, it’s time to set up the export schedule. Navigate to the “Scheduling” tab, where you’ll find three options:
- Frequency
- Commence
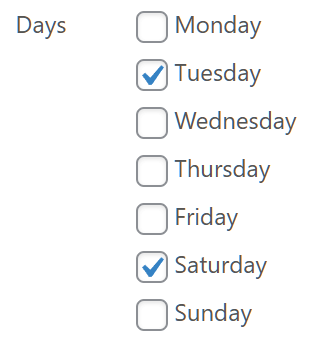
- Days
- First, decide how often you want your data to automatically export. Choose from options like hourly, daily, or set a custom interval in minutes.
- After determining the frequency, specify when you want the automatic export to begin. You can either initiate it immediately or set a specific date and time for the export to start.
- Finally, select the days of the week when you want the data to be exported automatically. Simply mark the checkboxes for the applicable days on the checklist.
By adjusting these settings, you’re essentially instructing the system on how frequently, when, and on which days you want your data to be exported automatically.
Step 4: Manage scheduled exports.
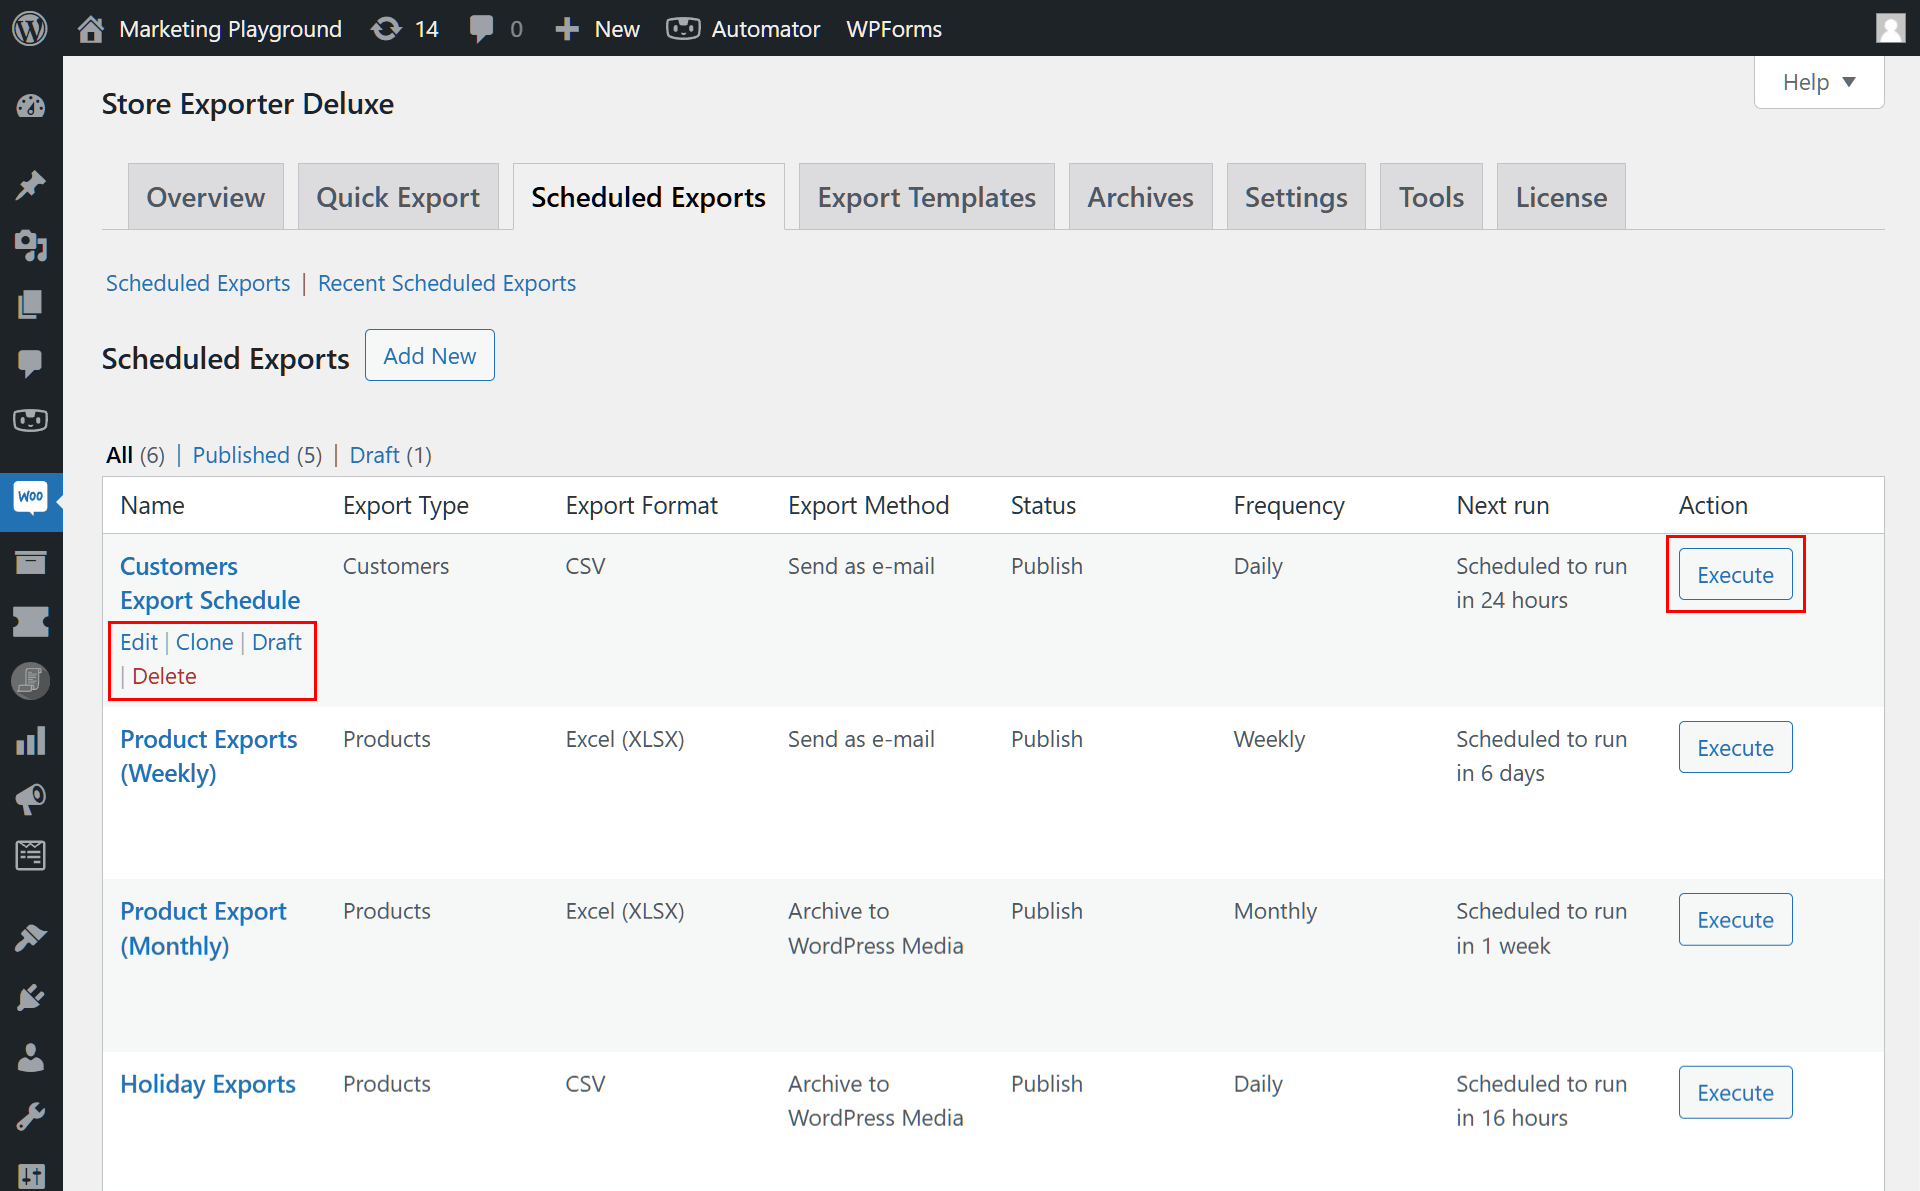
Once you’ve set up a scheduled export, you can view and manage all your scheduled exports in the “Scheduled Exports“ section:
From here, you can edit, delete, and view the details of each scheduled export. This allows you to easily make changes to your export settings or disable scheduled exports if needed.
Scheduled exports offer a convenient way to automate the data export process, ensuring that your store’s data is always up to date without the need for manual intervention.
Conclusion
Automating the export system in WooCommerce can significantly improve your business operations. This streamlines the export process, saving you time, maintaining data accuracy, and keeping you informed with real-time updates.
In this article, we discussed how you can easily set up an automated export system in WooCommerce using the Scheduled Exports feature of Store Exporter Deluxe:
- Configure the General settings.
- Set up the filters.
- Schedule your exports automatically.
- Manage scheduled exports.
Do you have any questions about this article? Let us know in the comments!
