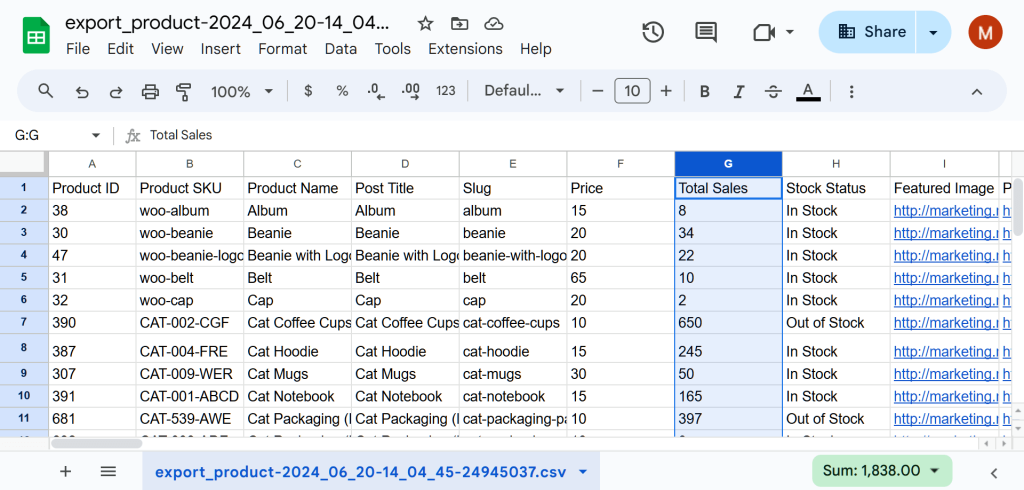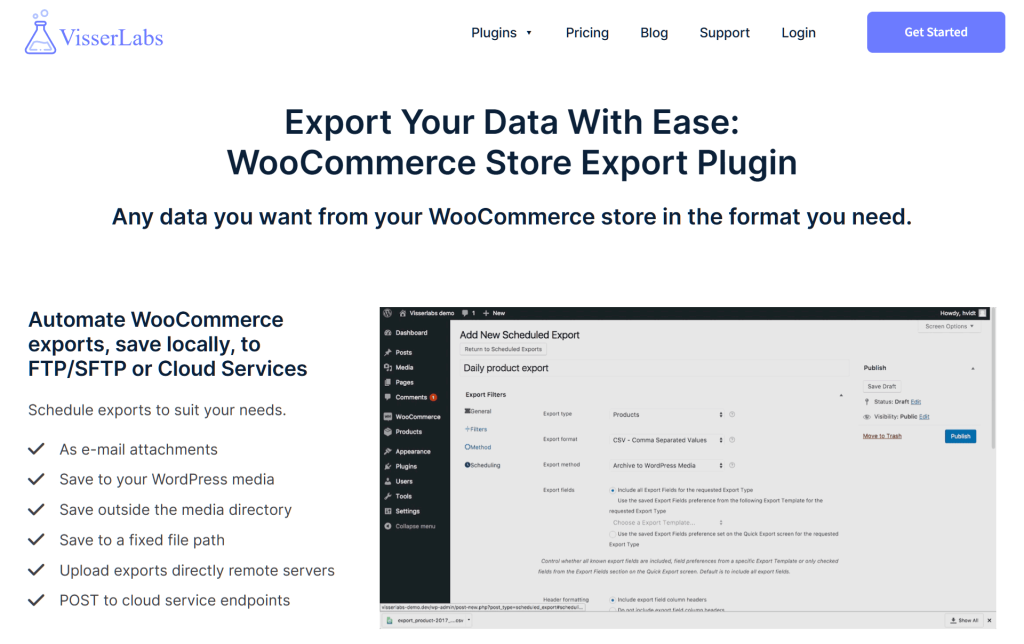
If you’re running an online store, having various data extraction methods grants you the freedom to obtain highly precise information. Thankfully, the right plugin can offer you access to multiple WooCommerce data export options for managing, analyzing, and optimizing your e-commerce operations.
In this guide, we’ll explore the many ways you can transfer your WooCommerce data into your preferred file format. Particularly, we’ll demonstrate how a powerful exporter tool such as Visser Labs’ Store Exporter allows you to extensively customize the export process to suit your needs.
So let’s begin!
I. WooCommerce Data Export Options: Your Definitive Data Extraction Methods
Any good WooCommerce exporter tool should provide users with various data extraction methods. This way, the WooCommerce store owner can specify exactly what kind of data they wish to export and how to export said data.
For example, an exporter tool can come with options allowing you to export the following data types:
- Orders and Customers: Exporting order details and customer information allows you to analyze sales trends, customer behavior, and demographics.
- Products: Exporting product data helps in inventory management, pricing analysis, and product performance evaluation.
- Categories: Exporting category data helps organize products and analyze sales performance across different product groupings.
- Attributes: Exporting product attributes allows you to analyze variations, characteristics, and specifications of your products.
- Shipping Classes: Exporting shipping class data helps in managing shipping options, costs, and strategies for different product categories.
Furthermore, the most advanced exporters let you choose how data is presented. For instance, you can:
- Adjust the sorting of data fields
- Modify the formatting of specific data types
- Choose the size of export batches
- Determine the file format to export the data into
Thanks to these flexible data extraction methods, store owners can gain insights, improve decision-making, and streamline operations.
Do you wish to know more about the benefits of having multiple WooCommerce data export options? Then check out the following articles!
- Data Export Tool: Why Your E-Commerce Business Needs One
- Combining Data Export And Import Processes: How To Enhance Data Management
II. Your WooCommerce Data Export Options Explained
To understand how useful it can be to have access to various WooCommerce data export options, we’ll have to discuss a specific exporter tool.
Introducing Visser Labs’ WooCommerce Store Exporter plugin!
Both the free and premium versions of Store Exporter enable store owners to export mass data conveniently, efficiently, and securely. Basically, the only difference between them is that the latter offers more WooCommerce data export options.
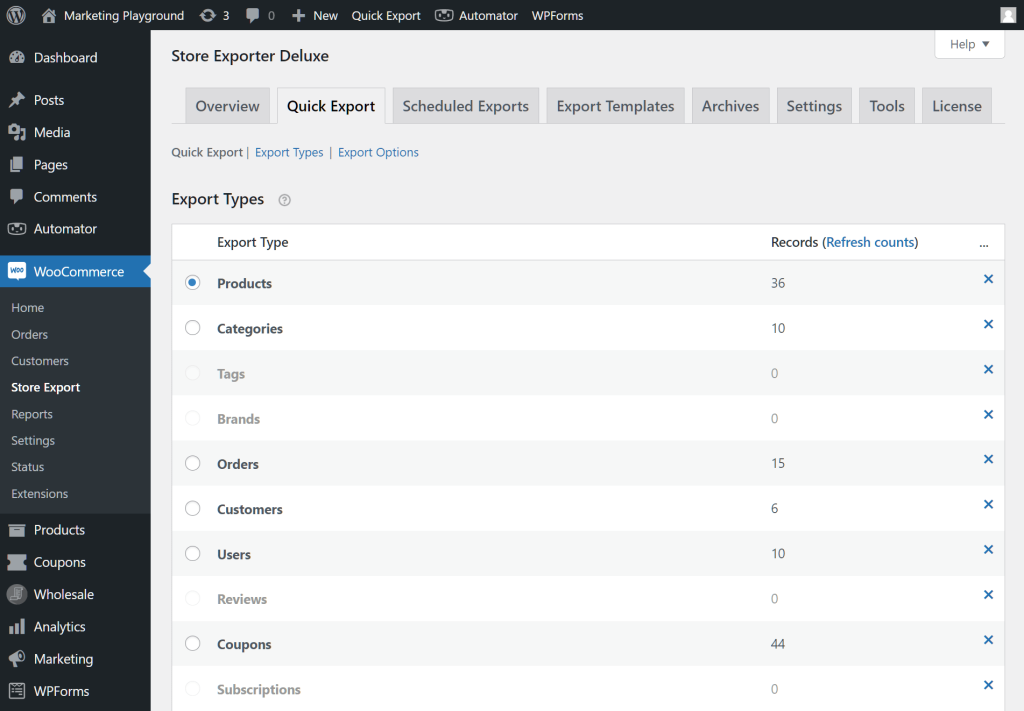
To understand the data extraction methods this plugin provides, we must discuss its Quick Export feature’s major areas.
1. Export Types
The Export Types area lets you choose the main data type to export.
To be precise, it allows you to export:
- Products
- Categories
- Tags
- Brands
- Orders
- Customers
- Users
- Reviews
- Coupons
- Subscriptions
- Product Vendors
- Commissions
- Shipping Classes
- Tickets
- Bookings
- Attributes
2. Fields
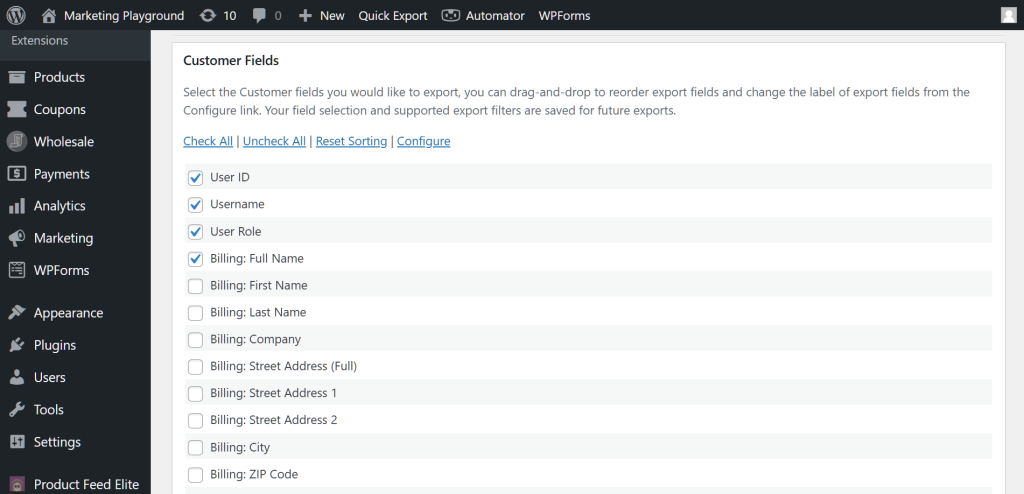
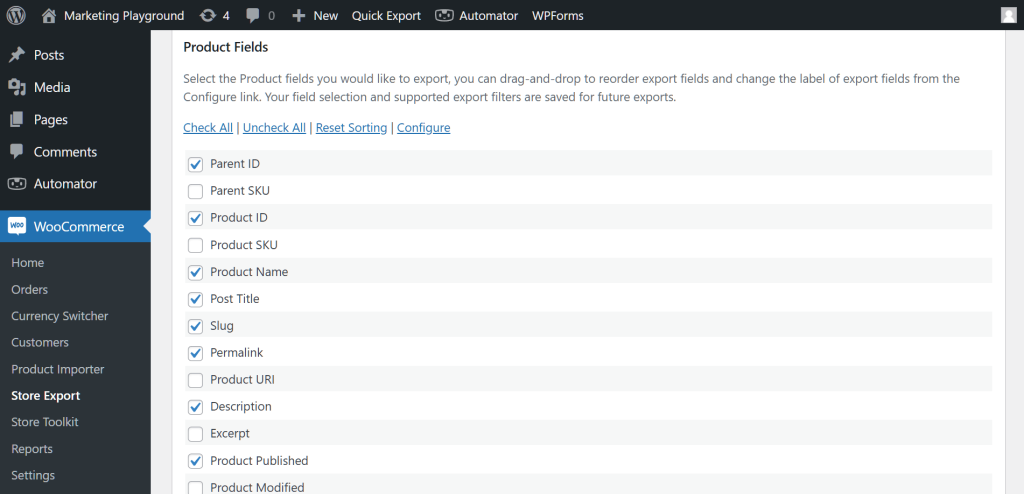
The Fields area displays the many fields that each of the data types listed above comes with. For greater export customization, Store Exporter lets you pick the fields you want to extract into your chosen file format.
The fields you can export depend on your chosen data type. For example, if you pick the data type “Customer,” then you can export fields such as:
- User ID
- Username
- User Role
- Billing: Full Name
- Billing: City
- Shipping: Company
- Total Orders
- Total Spent
- … and more!
On the other hand, selecting the data type “Products” makes the following fields available to you:
- Product SKU
- Product Name
- Price
- Sale Price
- Category
- Tag
- Quantity
- Product Status
- … and more!
3. Filters
In the Filters area, you can selectively extract data based on certain groupings.
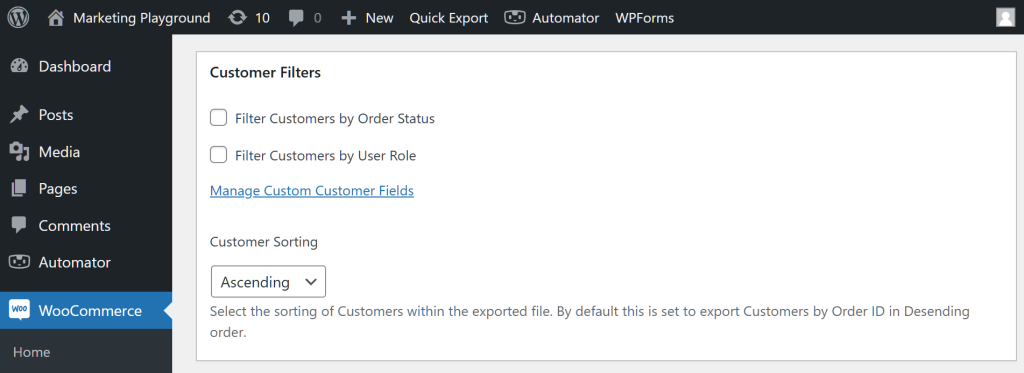
Like fields, your choice of filters depends on the data type you picked. For instance, if you select the “Customer” data type, you can export Customer data based on two types of groupings. Basically, these let you filter customers by:
- Order Status
- User Role
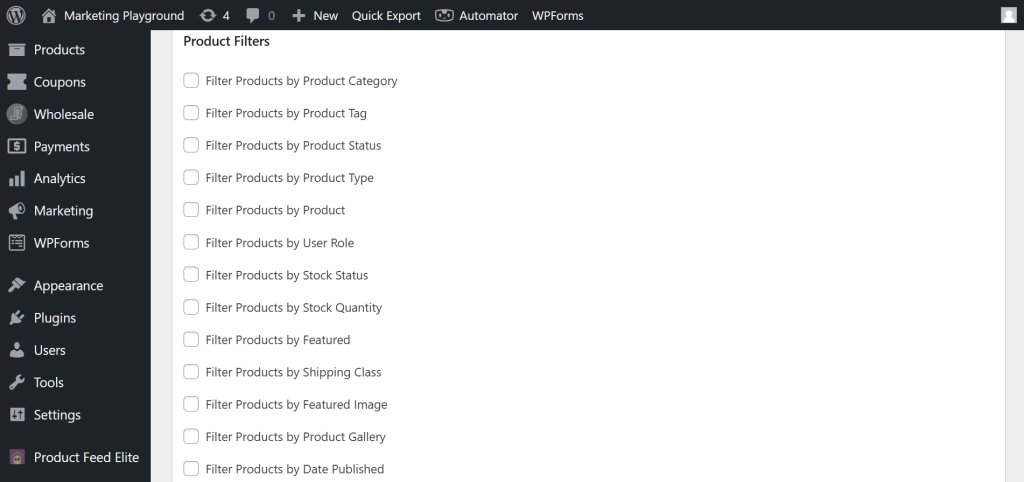
However, if “Product” is your preferred data type, then you gain access to more groupings, letting you filter products by:
- Category
- Status
- Quantity
- Featured Image
- Date Published
- … and more!
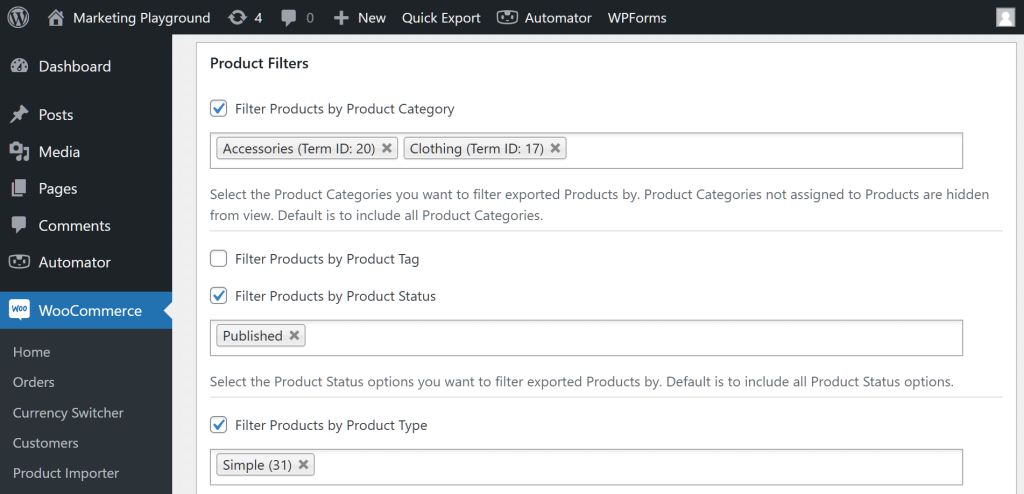
Here’s where things get really awesome: you can combine filters to create extremely defined exports.
For example, what if you want to export only the product data of accessories and clothing? And what if you only want to export published, simple products from these groupings? Then you can implement the following setup:
4. Custom Fields
Are the previous export customization options not enough for you? Then leverage the Custom Fields area for even more in-depth control over your data extraction methods!
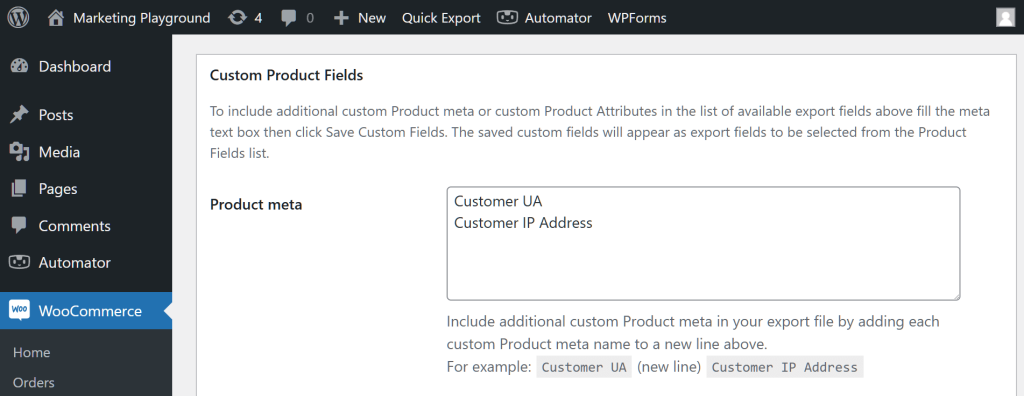
This area lets you create your own fields. It’s as simple as typing the names of these new fields into the provided meta box. Just make sure to place only one field per line!
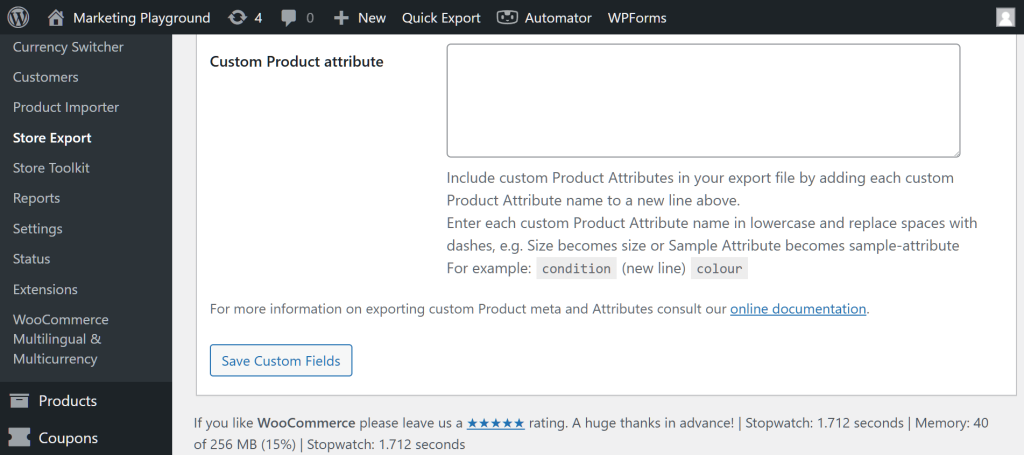
Furthermore, you can create your own attributes:
Once again, the customization options available to you depend on your selected data type.
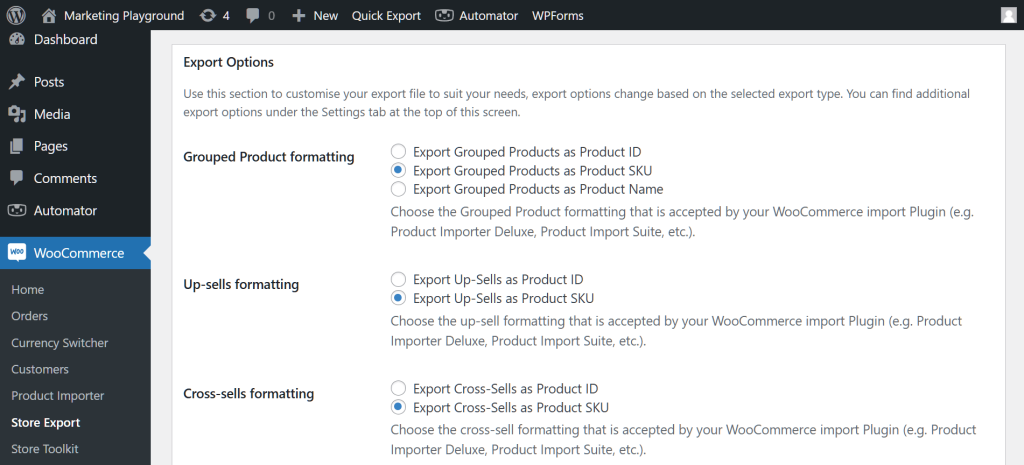
5. Export Options
In most cases, Export Options is the final Quick Export area you’ll visit before running the actual export. It’s also among the most important.
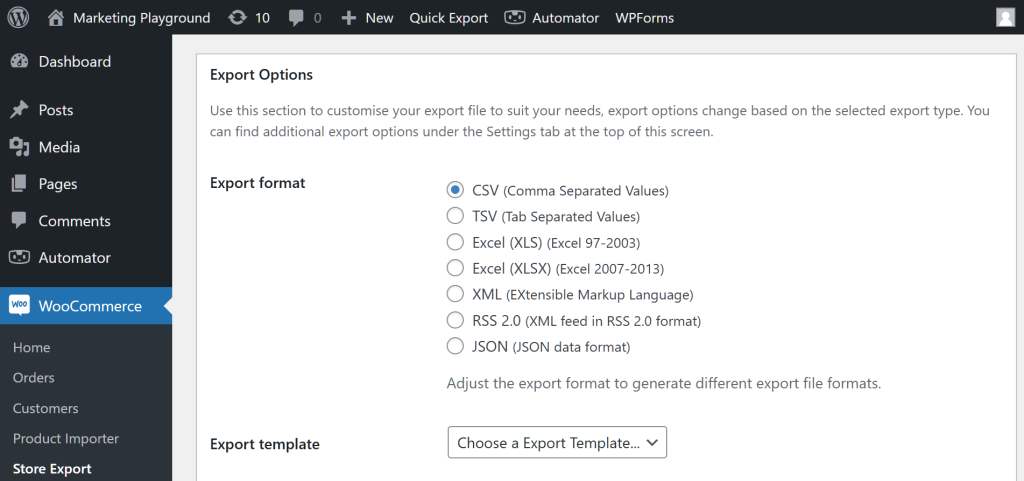
For starters, Export Options lets you select the file format you wish to export your store data into:
- CSV (Comma Separated Values)
- TSV (Tab Separated Values)
- Excel (XLS) (Excel 97-2003)
- Excel (XLSX) (Excel 2007-2013)
- XML (EXtensible Markup Language)
- RSS 2.0 (XML feed in RSS 2.0 format)
- JSON (JSON data format)
In addition, you can pick an existing export template. Basically, this is a pre-configured setup that simplifies the export process by using predefined settings and formats.
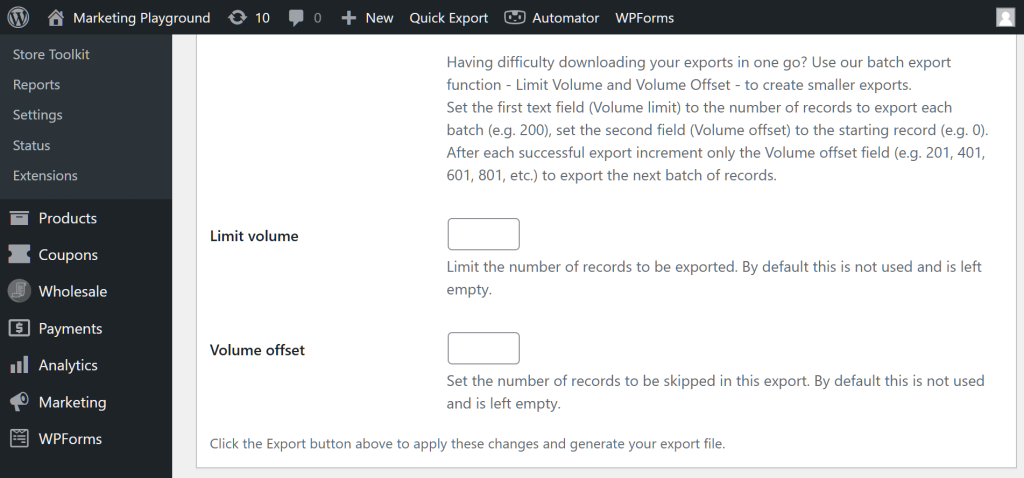
Moreover, you can export store data in batches. This can be useful if your selected data type boasts a vast number of details.
For example, if you have 1,000 products, you can export them in batches of 200. This makes each export file smaller, thus making every export process faster and the details of every file easier to manage.
Depending on your chosen data type, you can access even more WooCommerce data export options.
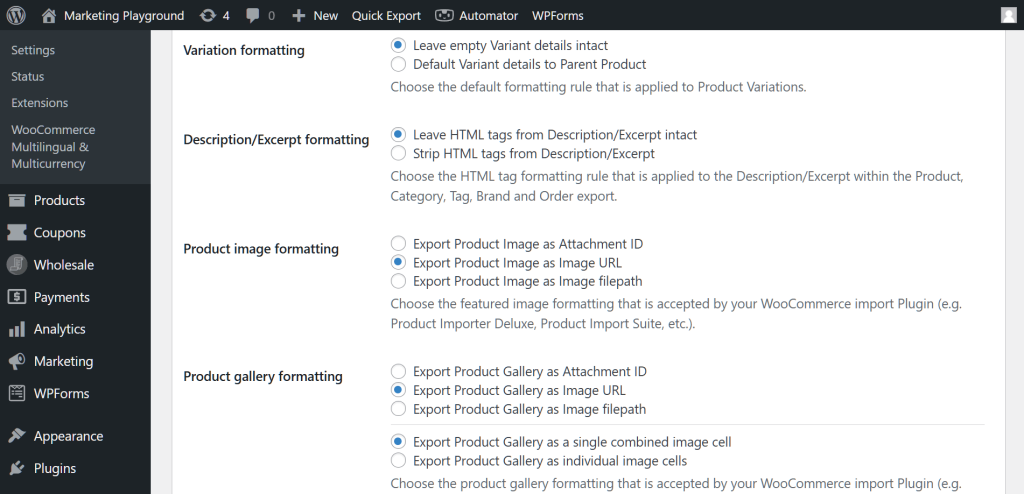
For instance, if you’re exporting product data, you can modify the formatting of specific details. You can see this in the two images below.
Even More WooCommerce Data Export Options
Store Exporter isn’t done offering you choices quite yet!
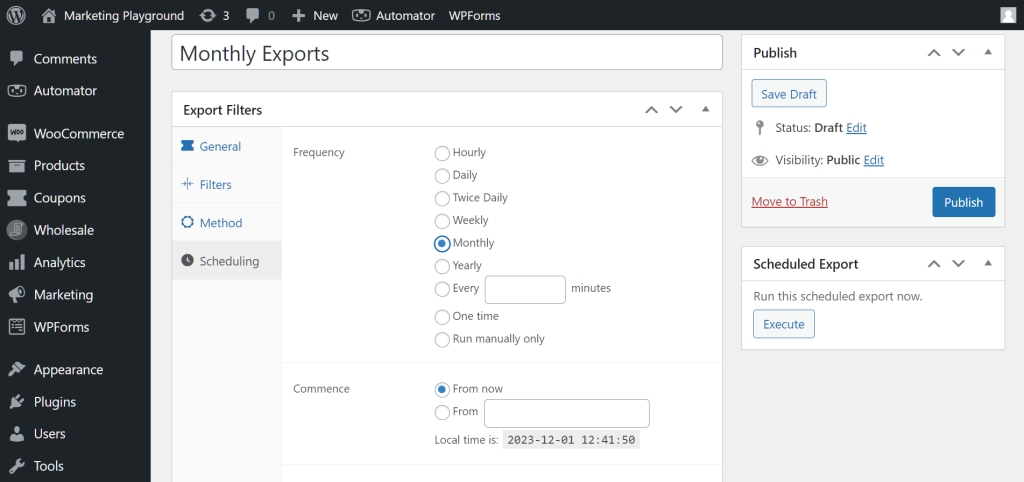
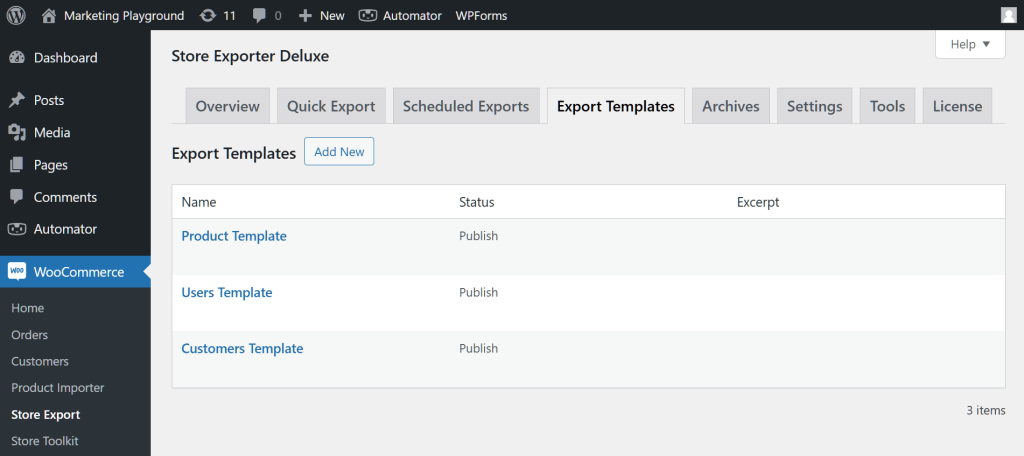
In addition to the Quick Export feature, it boasts the Scheduled Exports and Export Template features.
As its name suggests, Scheduled Exports lets you schedule when your exports occur. In other words, you can automate your exports.
For example, if you want to export your data on the 15th of every month, you can do so. You can even export data:
- Every X minutes
- Hourly
- Once/twice Daily
- Weekly
- Monthly
- Yearly
- On prescribed dates
- On designated holidays
- During indicated days of the week
- During defined date/time ranges
As for Export Templates, you can configure and save your export settings for future use. Basically, this lets you avoid having to reconfigure your WooCommerce data export options every time you want to export store data.
Conclusion
When you leverage comprehensive WooCommerce data export options, you can export a wide range of data types, including but not limited to products, categories, orders, and customers. Such freedom allows you to effectively manage your store data so that you can gain valuable insights about your e-commerce store.
By regularly scheduling these exports, you can cross-reference your records with your actual stock levels to ensure data accuracy across your entire store operation.
To summarize, Visser Labs’ Store Exporter boasts the areas that allow you to extensively customize your exports:
Furthermore, Scheduled Exports & Export Templates add even more convenient customization options to your export processes!
Explore these options to unlock the full potential of your WooCommerce store and enhance your business strategy!
Do you have any questions about the data extraction methods discussed in this article? Let us know in the comments!
