E-commerce store management software are essential for online store owners. After all, such tools let you streamline various administrative tasks, allowing you to operate your online business smoothly. This brings us to Visser Labs’ Store Toolkit.
Store Toolkit boasts many useful features that simplify complex tasks running an e-commerce site involves. For example, you can use it to manage permalinks, integrate your platform with SEO tools, and more.
This guide will focus on one of Store Toolkit’s most prominent features: clearing store records. Or in other words, “nuking” selected WooCommerce details.
So let’s get right into it!
I. What Is The Store Toolkit E-Commerce Store Management Software?
Store Toolkit is an e-commerce store management software comprising a growing set of commonly used e-commerce administration tools. It is designed to assist store maintainers and web developers manage and optimize their online stores efficiently.
As mentioned earlier, one of its most powerful features lets you permanently expunge WooCommerce store records. Whether you need to delete old orders, products, or categories, Store Toolkit simplifies these tasks, allowing you to maintain a clean and organized online store.
II. How To Use The Store Toolkit E-Commerce Store Management Software To Clear Store Records
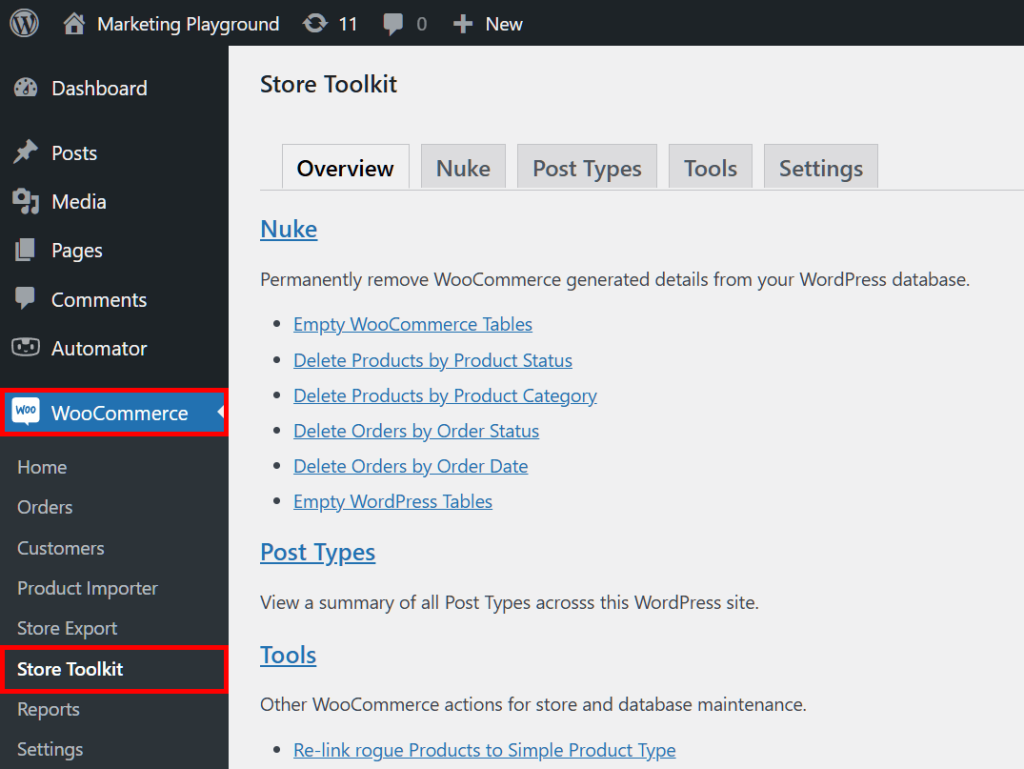
To access Store Toolkit, go to your WordPress dashboard and click WooCommerce > Store Toolkit. This brings you to the Store Toolkit page, which comes with 5 panels: Overview, Nuke, Post Type, Tools, and Settings.
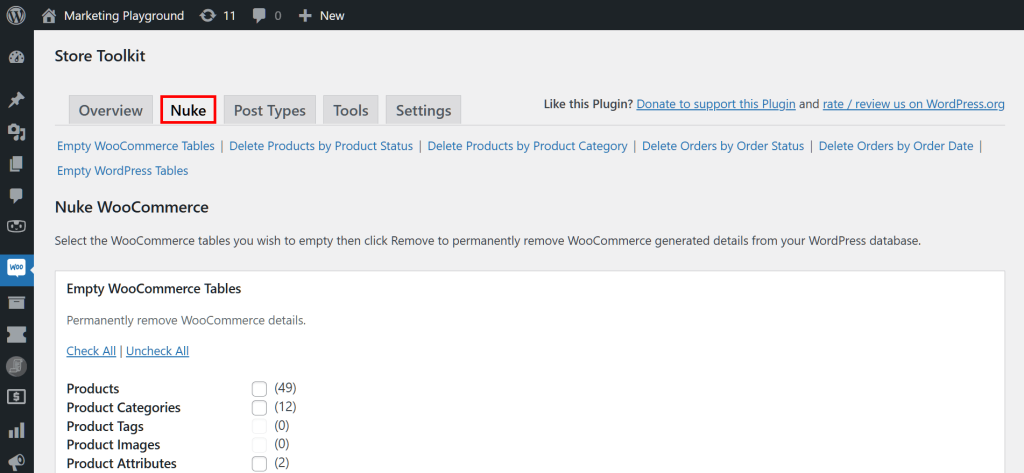
To get started with this guide, click the Nuke panel to go to the Nuke WooCommerce page.
Using Store Toolkit’s Nuke WooCommerce page to clear store records is easy and quick. Basically, all you must do is tick the checkboxes of the data you wish to remove, then click the Remove button.
Take note: using Store Toolkit to nuke data results in permanent deletion. Thus, be extremely careful when clearing store records, and make sure you’re only deleting information you no longer have use for.
For your convenience, Store Toolkit offers many options allowing you to delete specific types of data. We’ll discuss the various ways you can nuke store records below.
1. Empty WooCommerce Tables
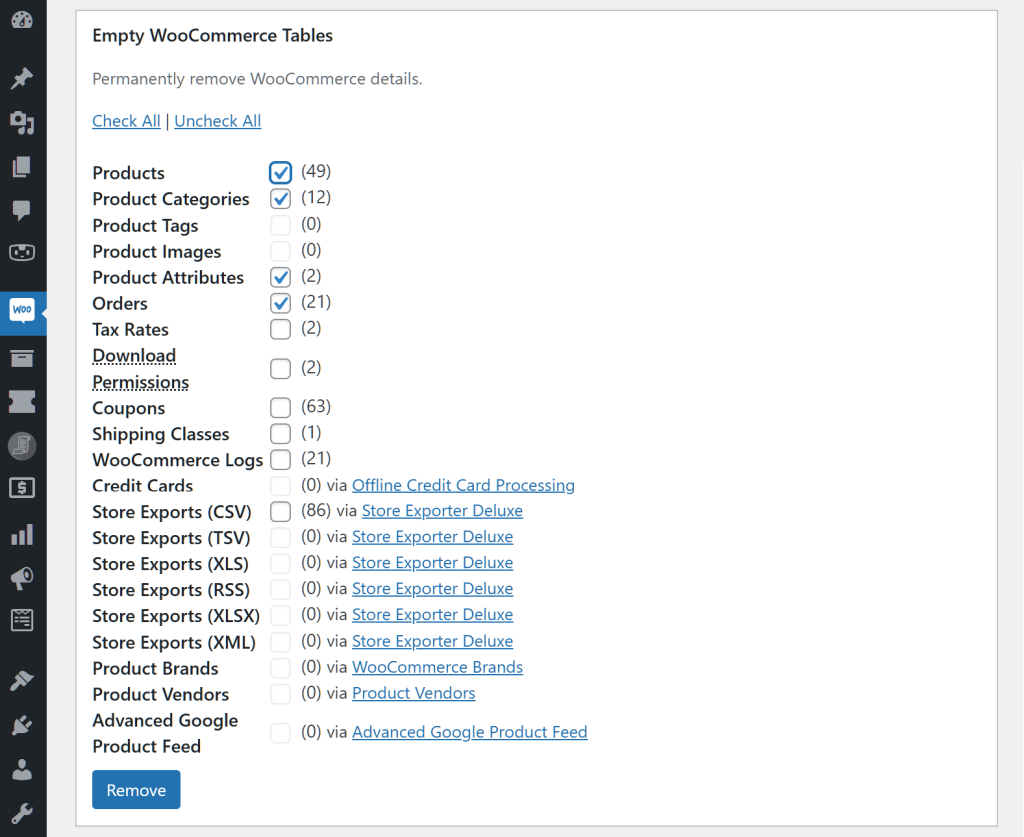
The Empty WooCommerce Tables area offers the most basic way to delete store records. You just have to tick the checkboxes of the details you wish to get rid of. Then, as mentioned earlier, you must click the Remove button.
This section lets you delete details such as:
- Products
- Product Categories
- Orders
- Coupons
- Shipping Classes
- … and more!
Click Check All if you want all the checkboxes ticked. Conversely, click Uncheck All to untick all checkboxes.
2. Delete Products by Product Status
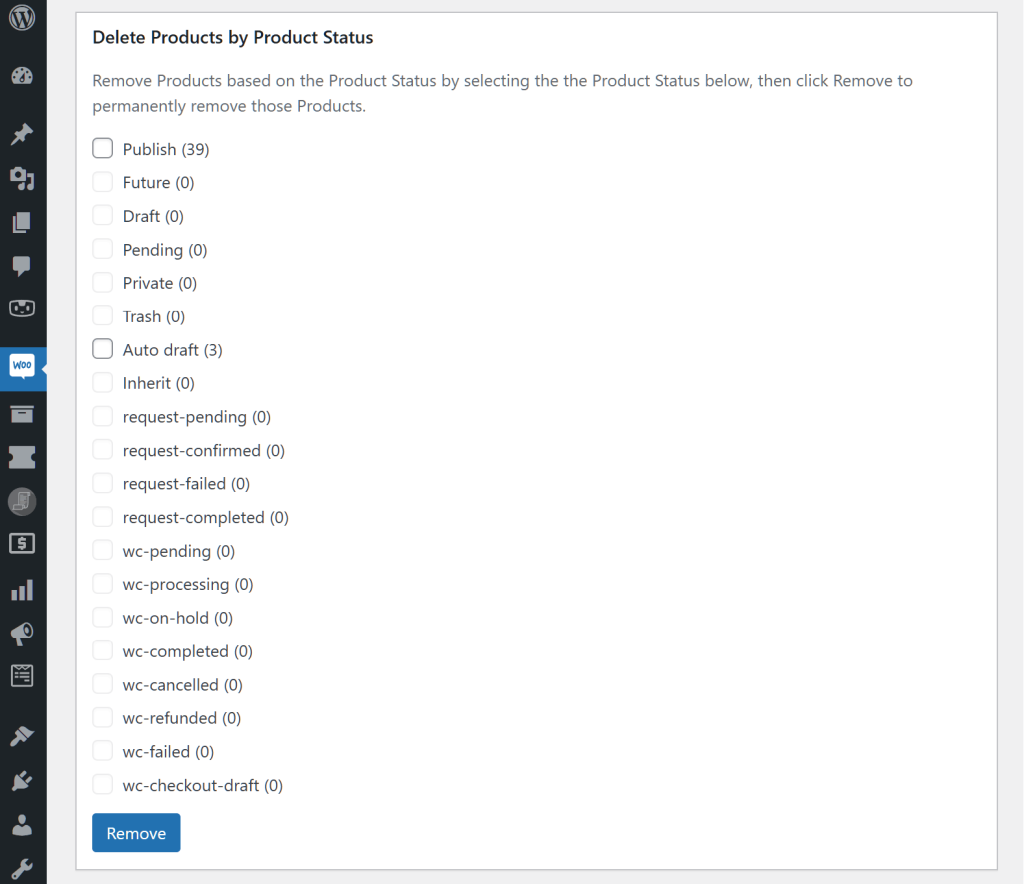
Basically, this area enables you to delete products based on their status. For example, you can delete items with the following statuses:
- Publish
- Draft
- Trash
- … and more!
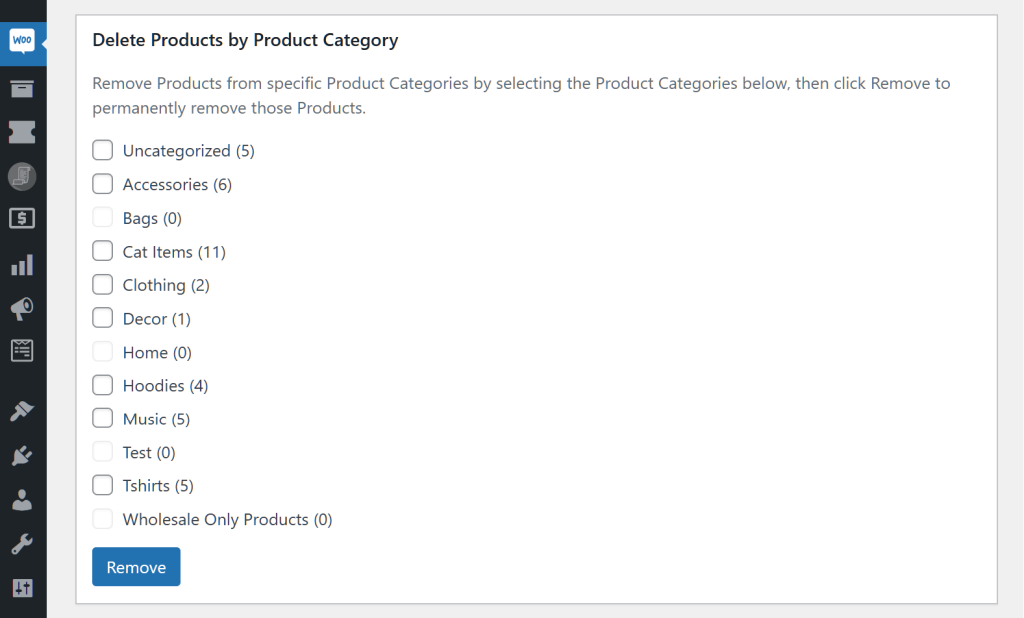
3. Delete Products by Product Category
Do you want to delete specific Product Categories? Then use the Delete Products by Product Category area.
The categories you can eradicate depend on the categories you created for your WooCommerce store. For example, we set up a clothing and cat accessories shop. Thus, we can delete categories such as:
- Bags
- Clothing
- Cat Items
- Music
- … and more!
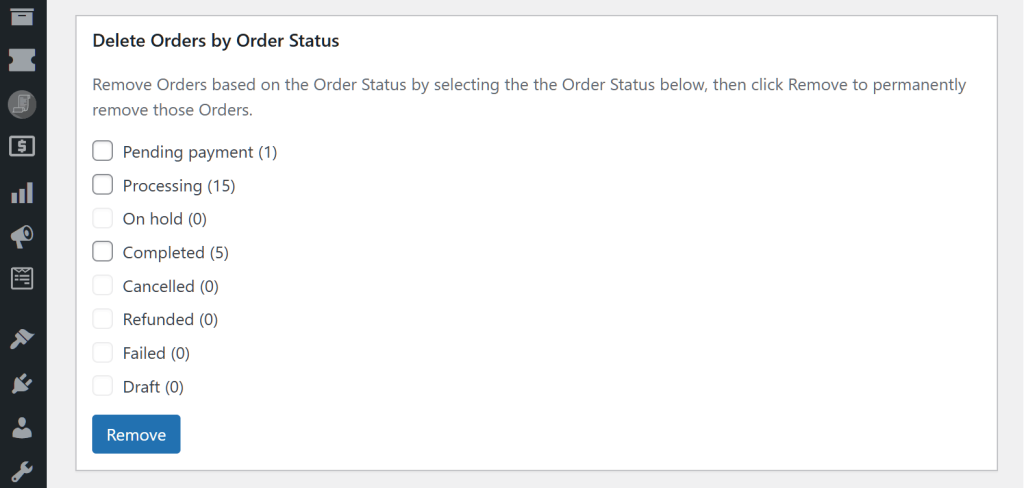
4. Delete Orders by Order Status
This area allows you to clear orders by their status. For instance, you can delete orders with the following statuses:
- Pending
- Completed
- Refunded
- … and more!
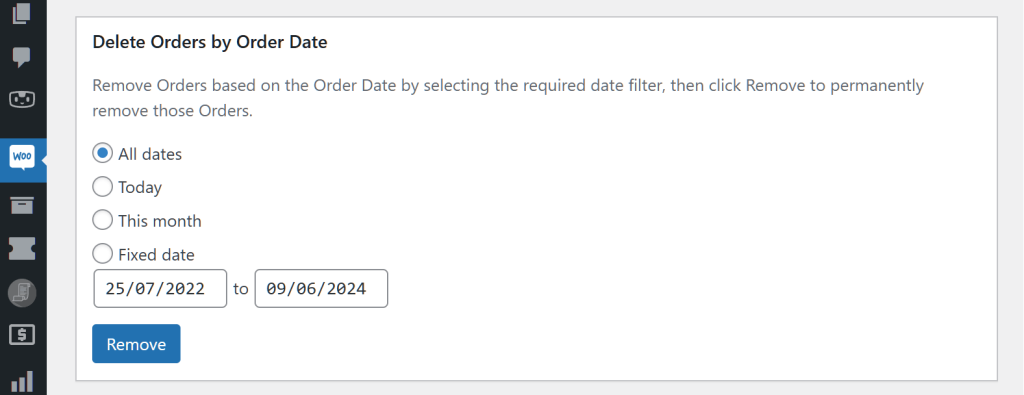
5. Delete Orders by Order Date
With the Store Toolkit e-commerce store management software, you can delete orders from a specific date range.
You can choose to expunge the current day’s orders, the current month’s orders, or all orders your store has ever had. Moreover, you can specify the period for which you want to delete orders, allowing for precise control over the data you manage.
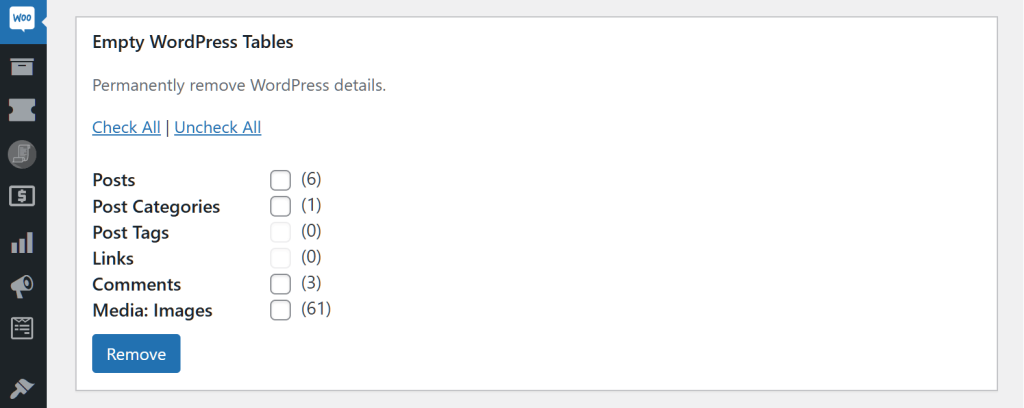
6. Empty WordPress Tables
Is your goal to permanently remove WordPress details? Then use the Empty WordPress Tables area. For example, if you want to wipe out all your blog posts, tick the “Posts” checkbox and click Remove. Furthermore, you can delete links, comments, and images.
Again, you can use Check All and Remove if you’re committed to eliminating absolutely everything. Alternatively, use Uncheck All if you ever change your mind about total annihilation!
III. Alternative Way To Delete Data
The Nuke panel will probably be your go-to destination when you aim to clear WooCommere store records. However, the Store Toolkit e-commerce store management software has another trick up its sleeve.
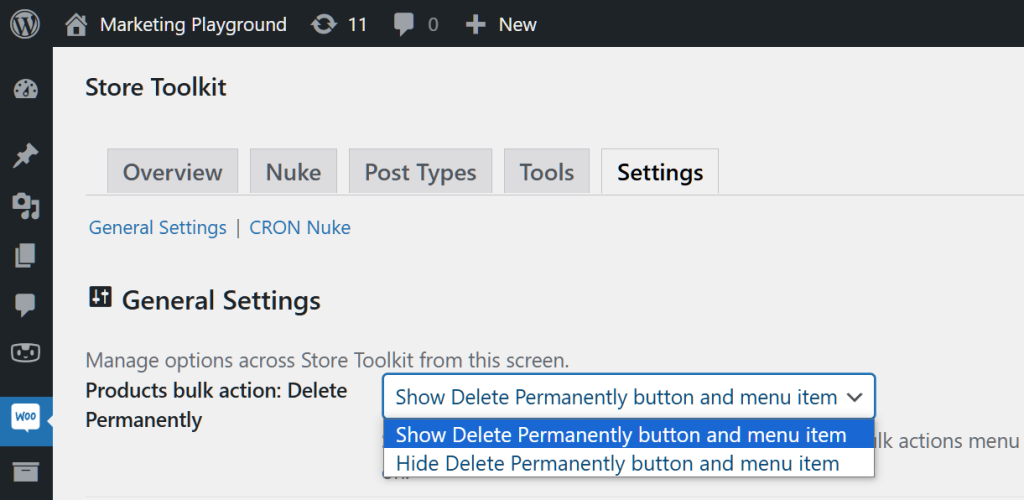
Head to your WordPress dashboard and click WooCommerce > Store Toolkit. But this time, click the Settings panel instead and pay attention to the General Settings area.
General Settings lets you display a Delete Permanently button on the Products page. To make this button appear on said page, click the Products bulk action: Delete Permanently dropdown menu and select “Show Delete Permanently button and menu item.” Conversely, select “Show Delete Permanently button and menu item” to hide this button.
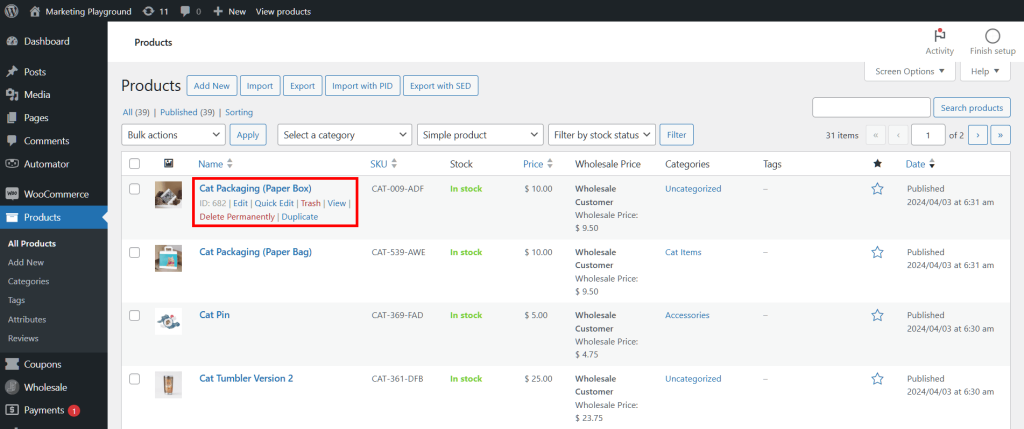
To test if this button is displaying correctly, go to your WordPress dashboard and click Products > All Products. Then, hover your mouse button over any product. Basically, if you chose to display the Delete Permanently button, you should see it among the list of actions you can take. To delete the product, simply click this button.
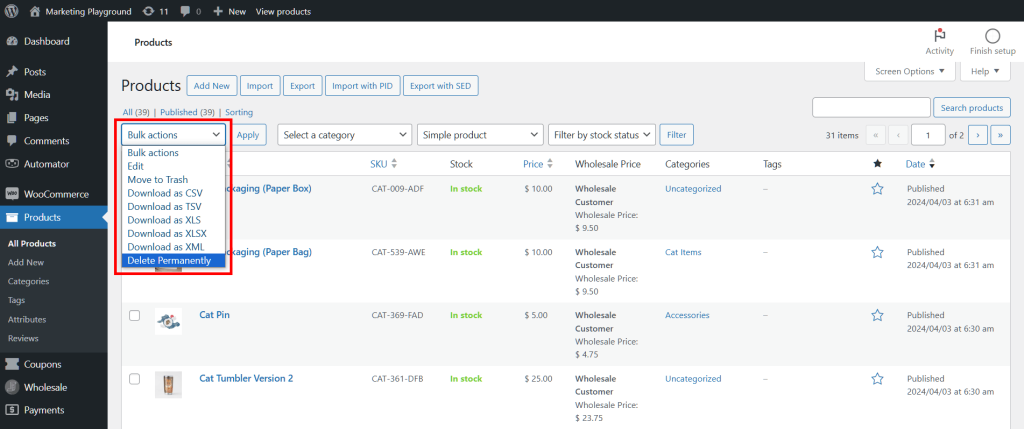
Furthermore, “Delete Permanently” should be available as a choice in the Bulk actions dropdown menu. To use this, select more than one product by ticking their checkboxes. Then, select “Delete Permanently” from the dropdown and click the Apply button to delete them en masse.
If that’s not enough options for you, there’s yet one more way to clear your WooCommerce store records. To learn more about it, click on this “Nuking via Manual CRON” documentation.
Conclusion
A powerful e-commerce store management software, Store Toolkit offers various ways to help you efficiently optimize and manage your online store. And one of its most powerful tools is its “nuke” feature, which lets you permanently remove unneeded data from your platform.
To recap, Store Toolkit boasts the following options for deleting your WooCommerce store records:
- Empty WooCommerce Tables
- Delete Products by Product Status
- Delete Products by Product Category
- Remove Orders by Order Status
- Remove Orders by Order Date
- Empty WordPress Tables
In addition, you can use General Settings to delete unwanted store details.
Remember to use these features carefully to avoid permanently deleting important data!
Do you have any questions about the Store Toolkit e-commerce store management software? Let us know in the comments!
