If you’re running an online business, it’s essential to keep your store and accounting system working together. When you integrate WooCommerce with QuickBooks, you create a direct link between your eCommerce storefront and your accounting records.
WooCommerce is one of the most popular platforms for online selling, especially for WordPress users. QuickBooks, whether Online or Desktop, handles your business’s financials, helping you track income, expenses, payroll, and taxes.
This guide will show you how to integrate WooCommerce with QuickBooks using the most reliable tools available. From choosing the right tools to solving common sync problems, you’ll get everything you need to make your store’s data flow into QuickBooks accurately and automatically.
Why You Should Integrate WooCommerce With QuickBooks
If you’re running a busy WooCommerce store, you already know how quickly data piles up. Sales, tax, customer details, inventory levels — it all needs to be accurate, and it all needs to be fast.

Manual entry isn’t just slow. It’s a liability. Data entry mistakes lead to inaccurate reports, stockouts, tax problems, and frustrated customers. That’s where QuickBooks integration comes in.
Connecting WooCommerce and QuickBooks lets you sync financial and operational data in real-time. When you integrate WooCommerce with QuickBooks, you’re investing in accuracy and long-term efficiency for your business.
This improves your inventory management, ensures your reports reflect reality, and helps you make informed decisions. Plus, it gives you more time to focus on actual business, not bookkeeping.
What You Need Before You Start
You don’t need technical expertise to integrate WooCommerce with QuickBooks, just the right plugin and a bit of preparation.
Before you connect anything, make sure you have the basics covered:
- A live WooCommerce store
- A QuickBooks Online or QuickBooks Desktop account
- Admin access to both platforms
You’ll also benefit from data-handling tools like the WooCommerce Store Export Plugin or the WooCommerce Store Export & Import Tools, especially when syncing large amounts of historical data.
Want to start clean? Export your orders and products using these tools. Review your data, then proceed.
For a comprehensive walkthrough on how to do this properly, refer to our complete guide on exporting WooCommerce data.
Plugin Options To Connect WooCommerce And QuickBooks
There’s no single way to do this. But there are some standout options when choosing an integration plugin:
MyWorks QuickBooks Sync for WooCommerce
- Real-time syncing
- Handles complex tax setups
- Works with both QuickBooks Online and Desktop
QuickBooks Connector (formerly OneSaaS)
- Official Intuit tool
- Great for beginners
- Maps orders, customers, products, and more
Zapier
- More flexible
- Great if you want to trigger multiple actions across tools
- Can require more setup
These tools all offer direct WooCommerce QuickBooks integration. However, if your data isn’t clean or needs formatting, tools like Visser Labs’ Product Importer Plugin can prepare it for better syncing.
Tip: Always check plugin compatibility with your specific version of QuickBooks (Online or Desktop).
How To Connect WooCommerce To QuickBooks (Step-By-Step)
You can connect your WooCommerce store to QuickBooks Online using the QuickBooks Integration for WooCommerce plugin, available from the WooCommerce Marketplace.
This official integration allows you to sync key data like orders, customers, and products directly to QuickBooks. It also supports automated invoice generation, two-way product syncing, partial refunds, tax syncing, and more.
Note: This plugin only works with QuickBooks Online, not QuickBooks Desktop.
Step 1: Download and Install the Plugin
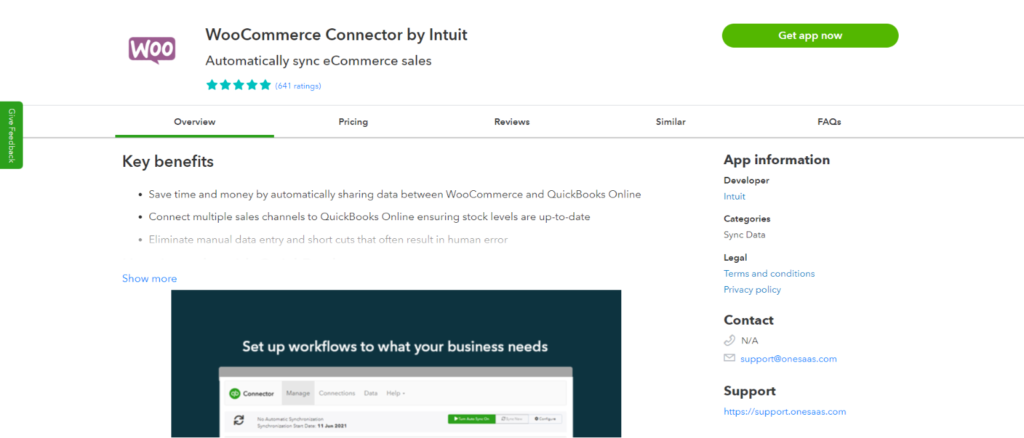
Visit the WooCommerce Marketplace and purchase the QuickBooks Integration for WooCommerce plugin.
Once downloaded, upload it to your WordPress dashboard under Plugins > Add New > Upload Plugin. Install and activate it.
Step 2: Connect to QuickBooks Online
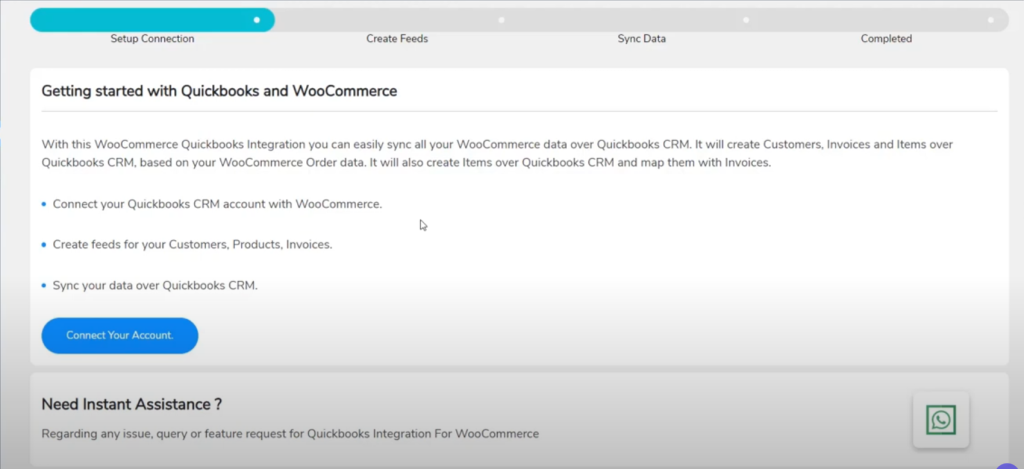
Go to the new plugin menu under your dashboard. You’ll find an option to Connect Your Account. Click this to begin the authentication process.
Log in to your QuickBooks Online account. The plugin will request authorization to connect. Approve the request to create the connection between your store and your accounting platform.
Step 3: Create and Configure Feeds
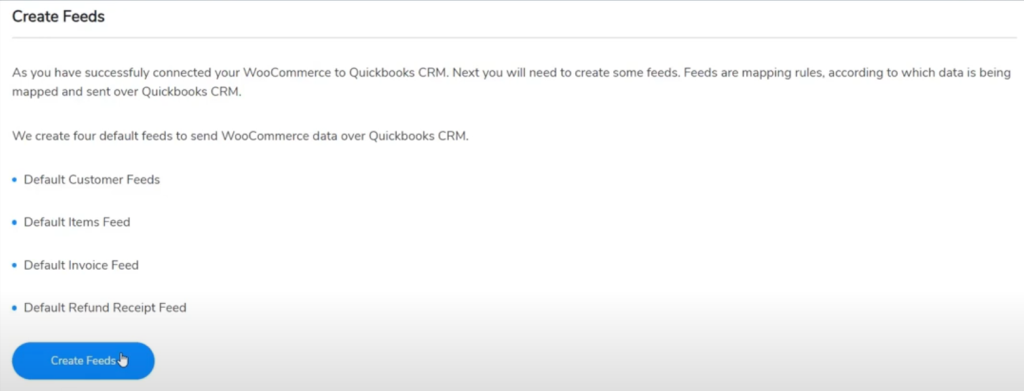
Feeds control what data gets synced. The plugin allows you to create feeds for:
- Customers
- Products
- Invoices
- Sales receipts
- Estimates
Within each feed, you can:
- Add conditions and filters
- Map WooCommerce fields to QuickBooks fields
- Select the event that triggers a sync (e.g. order creation)
- Choose which QuickBooks account to sync to (Income, Assets, etc.)
Step 4: Set Field Mapping and Sync Settings

Set up how SKUs, taxes, discounts, payment info, and shipping charges sync between systems. You can even sync partial refunds, user IP addresses, and browser data.
If needed, enable:
- Two-way product syncing
- Two-way deletion (products deleted in WooCommerce also deactivate in QuickBooks and vice versa)
- Category syncing
- Currency handling, including compatibility with Fox Currency Switcher
To avoid sync errors, map each field carefully when you integrate WooCommerce with QuickBooks. You can also configure tax mapping to ensure the right rates sync to your QuickBooks invoices.
Step 5: Sync Historical Data (Optional)
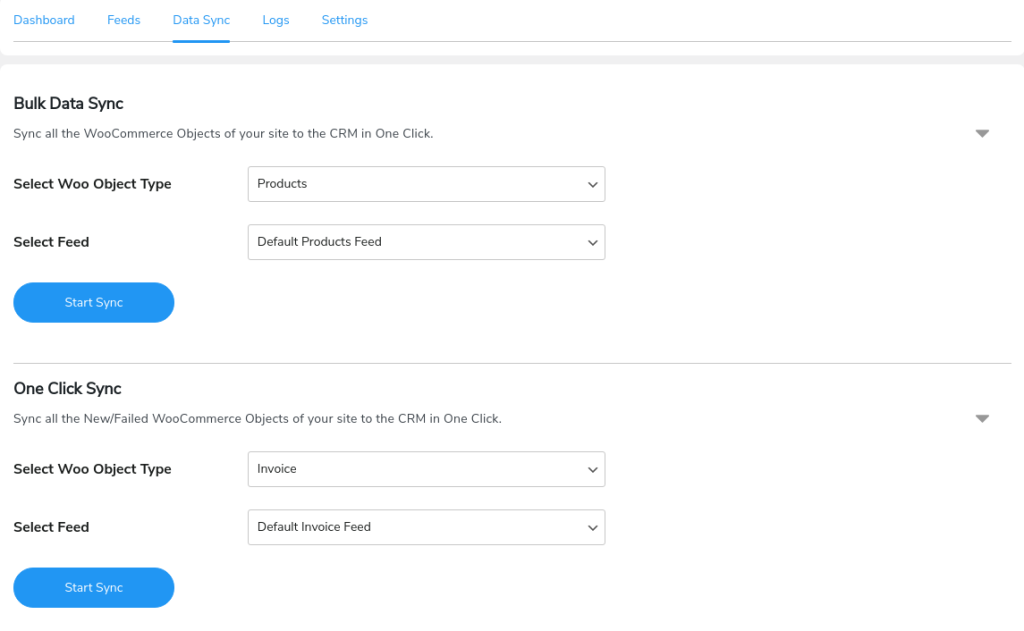
Want to bring your past orders, customers, or product data into QuickBooks? Use the historical data sync tools:
- One-click sync for recent or failed data
- Bulk data sync for entire categories of data
Just select the object type (e.g. products or orders) and choose the relevant feed.
Step 6: Test and Enable Instant Sync
Once your setup is complete, run a few test transactions to confirm everything is syncing properly. Review the detailed sync logs if anything goes wrong — the plugin records object IDs, feed names, and error messages.
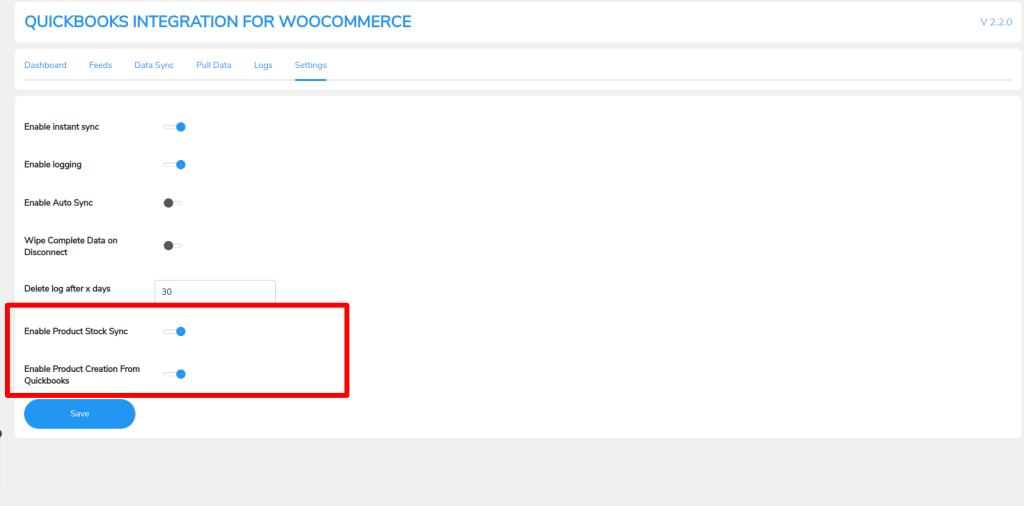
Finally, enable Instant Sync to start syncing new WooCommerce activity automatically as it happens. You can disable this if you prefer manual or batch syncing.
With these steps complete, your WooCommerce store is now successfully integrated with QuickBooks Online, giving you complete control over financial tracking and reporting.
Syncing Orders, Products & Inventory
Once you integrate WooCommerce with QuickBooks, the plugin starts syncing your store data automatically based on the feeds you’ve configured. This includes:
- Orders
- Products
- Customers
- Refunds
- Shipping charges
Orders from your WooCommerce store can be synced to QuickBooks as Invoices, Sales Receipts, or Estimates. You can map every important field — such as product SKUs, tax values, shipping costs, discounts, and order totals — to their corresponding field in QuickBooks. This mapping gives you control over exactly what data moves between the platforms.
Additionally, the plugin supports both partial and full refunds, which are synced as Refund Receipts in QuickBooks. It also handles tax syncing; however, for tax values and rates to transfer correctly, you must create matching tax rules in QuickBooks beforehand.
Product syncing works both ways:
- You can push products from WooCommerce to QuickBooks
- Or pull products from QuickBooks into WooCommerce
Moreover, if a product is deleted in WooCommerce, it will be marked inactive in QuickBooks — and vice versa. You also have the flexibility to enable or disable stock syncing depending on how you manage inventory.
To ensure consistency:
- Use a WooCommerce product import plugin to standardize your catalog before syncing
- And if you have a large store, a WooCommerce export product tool is helpful for reviewing data in bulk
Finally, every sync operation is logged. These detailed sync logs help you identify what data synced successfully, what didn’t, and why. This makes it easier to stay on top of potential issues when you integrate WooCommerce with QuickBooks.
Common Issues & How To Fix Them
Even the best integrations can run into trouble. Here are a few issues you might face when you integrate WooCommerce with QuickBooks, and what you can do to fix them.
- Product mismatches are common. This usually means your SKUs or product names don’t align across platforms. Double-check them in both WooCommerce and QuickBooks.
- Duplicate entries, especially for customers or invoices, may happen if field mappings are inconsistent. Check the plugin’s mapping settings or manually merge duplicates in QuickBooks.
- Tax discrepancies can result from different tax rules or naming conventions. Ensure your tax zones and rules in WooCommerce mirror those in QuickBooks.
- Inventory not syncing? Confirm that the integration plugin supports two-way inventory sync. You might need to re-import products using a WooCommerce import plugin to reset the data correctly.
Still stuck? Reach out to the plugin’s customer support team. Many of them offer step-by-step troubleshooting or will review your setup directly.
How Visser Labs Tools Help With QuickBooks Integration
Before you sync anything to QuickBooks, it’s important to make sure your WooCommerce data is clean, complete, and structured correctly. That’s where Visser Labs tools come in — they help you prepare your data so your QuickBooks integration runs smoothly from day one.
Why you need these tools:
Even the best integration plugin can’t fix inconsistent product data, missing SKUs, or unformatted customer records. If your WooCommerce database is messy, you’re more likely to run into sync errors, mismatched fields, and data that doesn’t show up where it should in QuickBooks.
To avoid that, store owners use Visser Labs plugins to get their data in shape before syncing.
Tools that make a difference:
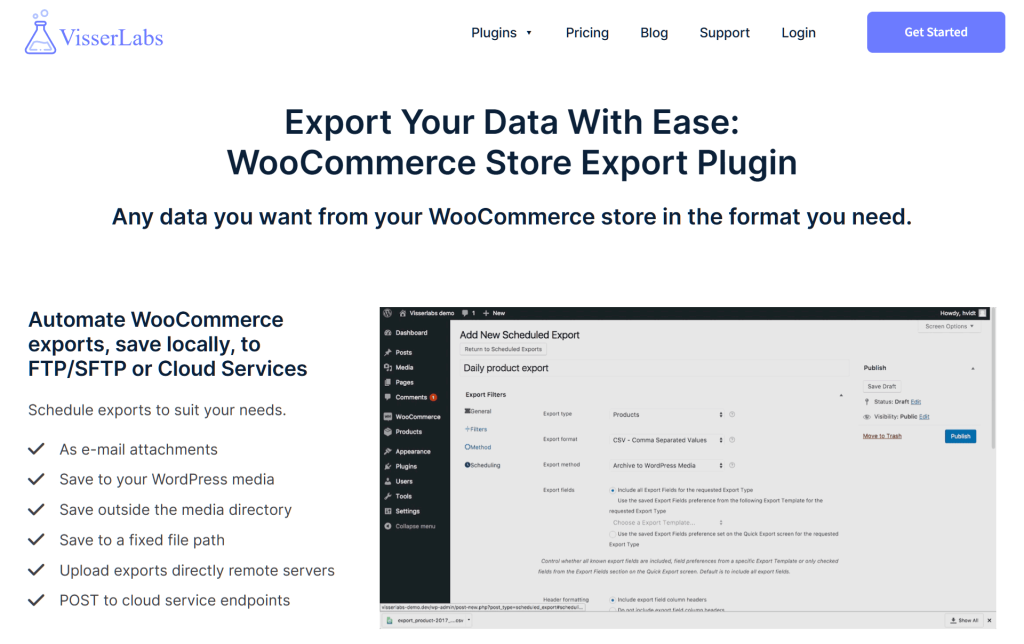
WooCommerce Store Export Plugin
Export orders, products, and customer data into clean, organized CSV files. This is especially useful when reviewing or migrating historical data to QuickBooks. You can spot inconsistencies, fix them in bulk, and ensure your records are accurate before any sync begins.
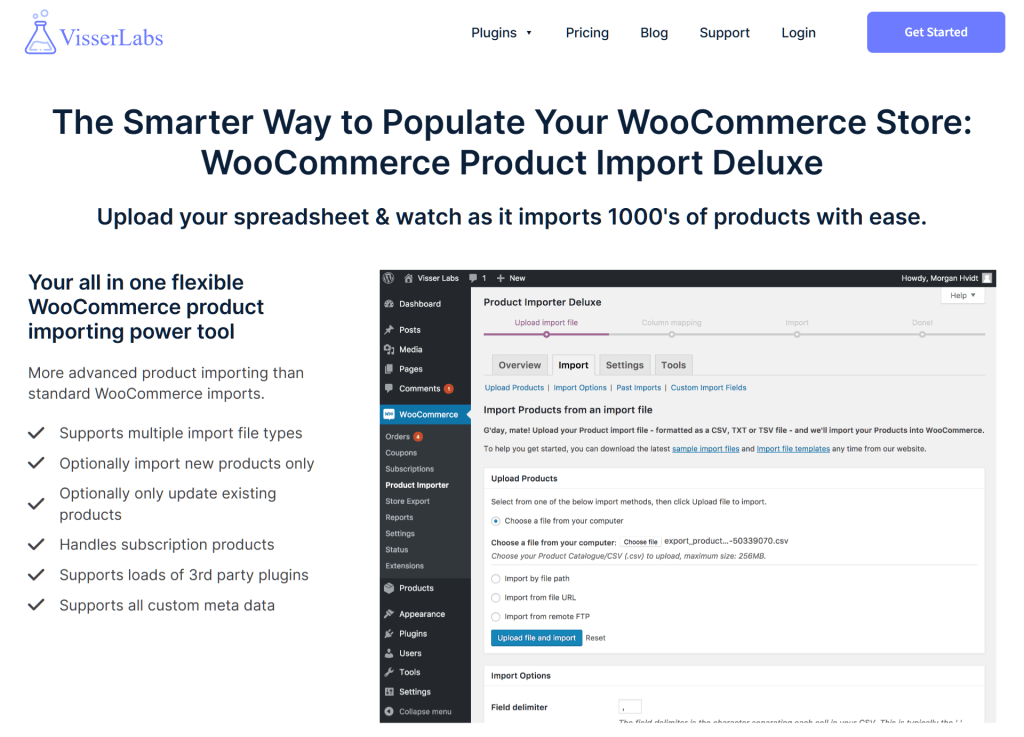
Product Importer Plugin
If you need to update product SKUs, tax settings, categories, or stock levels in bulk, this tool gives you full control. You can clean up your entire catalog ahead of time. This significantly reduces sync errors and keeps your QuickBooks inventory in check.
When used before setting up your QuickBooks integration, these tools act as a “data quality gate.” They make sure it has clean, reliable data to work with.
As a result, you get fewer sync issues, less back-and-forth with support, and more confidence that what you see in QuickBooks actually reflects what’s happening in your WooCommerce store.
Conclusion
Integrating WooCommerce and QuickBooks helps you create a system that works behind the scenes so you don’t have to.
When everything flows between your store and your accounting platform, you get better reporting, fewer mistakes, and more time to focus on growth.
To recap, here’s how to integrate WooCommerce with QuickBooks:
- Step 1: Download and Install the Plugin
- Step 2: Connect Your QuickBooks Online Account
- Step 3: Create and Configure Feeds
- Step 4: Map Fields and Customize Sync Settings
- Step 5: Sync Historical Data (Optional)
- Step 6: Test the Sync and Enable Instant Sync
By following these steps — and pairing the plugin with Visser Labs’ export and import tools — you’ll build a stable, accurate connection between your WooCommerce store and QuickBooks.
Get started today and make your accounting work for you, not the other way around.


