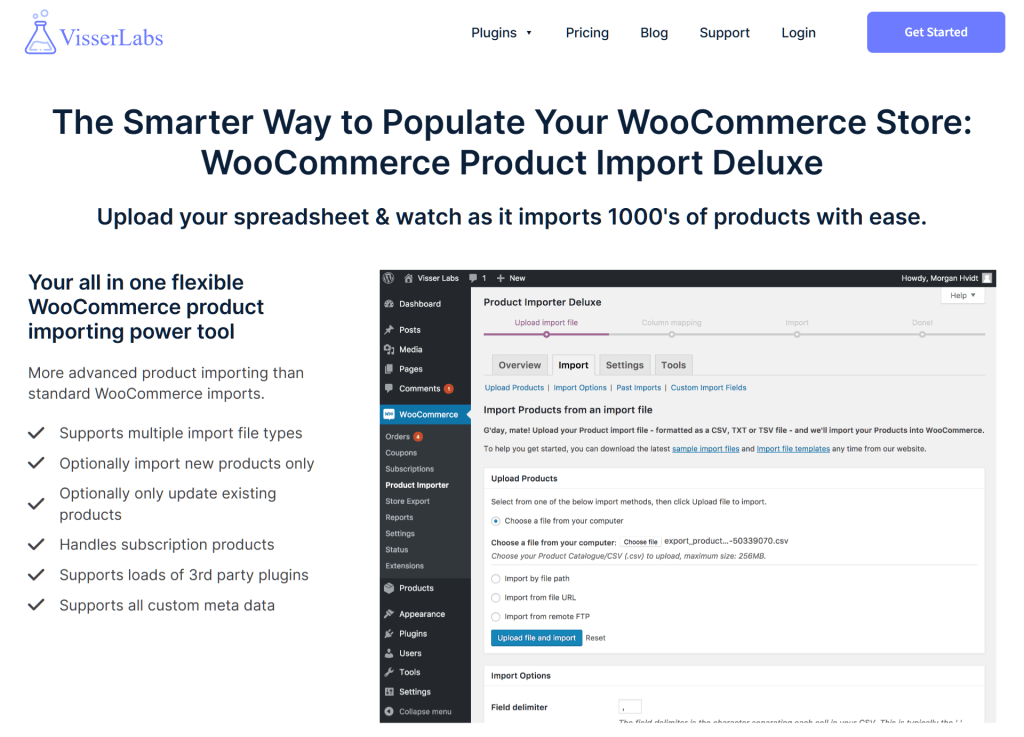
Running a successful WooCommerce store involves migrating, updating, and sharing product data in a way that’s efficient, accurate, and secure. Thus, it’s to your best benefit to leverage a robust WooCommerce product import plugin to manage these processes for you. This is where Visser Labs’ product importer tool comes in.
In this comprehensive guide, we explore Visser Labs’ WooCommerce Product Importer Deluxe and its many features. Furthermore, we provide you with a step-by-step tutorial on how to use this plugin to import product data into your platform. This way, you can ensure efficient and reliable product and inventory management for smooth and successful e-commerce operations.
So, without further ado, let’s dive in!
I. What Is WooCommerce Product Importer Deluxe Plugin?
WooCommerce Product Importer Deluxe Plugin is Visser Labs’s product importer tool. Basically, it allows you to transfer substantial amounts of product data from various file types into a platform of your choosing. In addition, it can transfer all WooCommerce product fields and even extended fields from 3rd party plugins. What’s more, this plugin streamlines the entire process, ensuring seamless and accurate transitions.
Why use the WooCommerce Product Importer tool?
To operate a WooCommerce store, you must manage a plethora of products and product details. Doing this manually takes a lot of time and effort, preventing you from focusing on other important business responsibilities.
Thankfully, WooCommerce Product Importer simplifies and speeds up the transfer of product data from different file formats into your store. It does so by automating many aspects of the process, allowing transitions to last seconds instead of several hours.
What file formats can the WooCommerce Product Importer tool read?
Visser Labs’ WooCommerce product import plugin can import product data from a range of file formats, including:
- XLS or XLSX (Excel spreadsheet)
- CSV (Comma Separated Values)
- TXT (Plain Text File)
- TSV (Tab Separated Values)
These are widely used file types. As such, you’ll experience no problems migrating product data into any WooCommerce platform.
What features to expect from WooCommerce Product Importer
Here’s a sampling of the features to expect from Visser Labs’ WooCommerce product import plugin:
- Grants you the option to import new products only
- Grants you the option to update existing products only
- Handles subscription products
- Lets you import product data from a PC, file path, URL, or remote FTP
- Lets you import various product types, including simple and subscription products
- Allows the import of a wide range of product data fields
- Supports all custom metadata
- Compatible with WC Vendors and Wholesale Suite
- Compatible with hundreds of other WordPress and WooCommerce plugins
II. How To Import WooCommerce Products Using Visser Labs’ WooCommerce Product Importer Deluxe
WooCommerce Product Importer Deluxe is the best importer tool to use if you want to transfer product data from a file into an e-commerce platform.
For this tutorial, we’re going to assume you already have an online store or marketplace powered by:
- WordPress
- WooCommerce
We’re also going to assume you’ve already downloaded, installed, and activated WooCommerce Product Importer Deluxe.
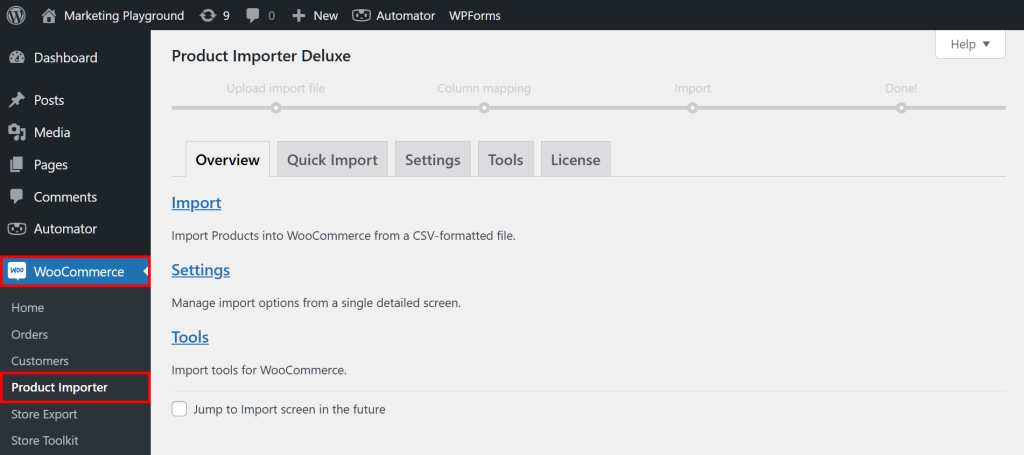
As for how to find this importer tool within your store’s backend, head to your WordPress dashboard and click WooCommerce > Product Importer. This takes you to the Product Importer Deluxe page as shown below:
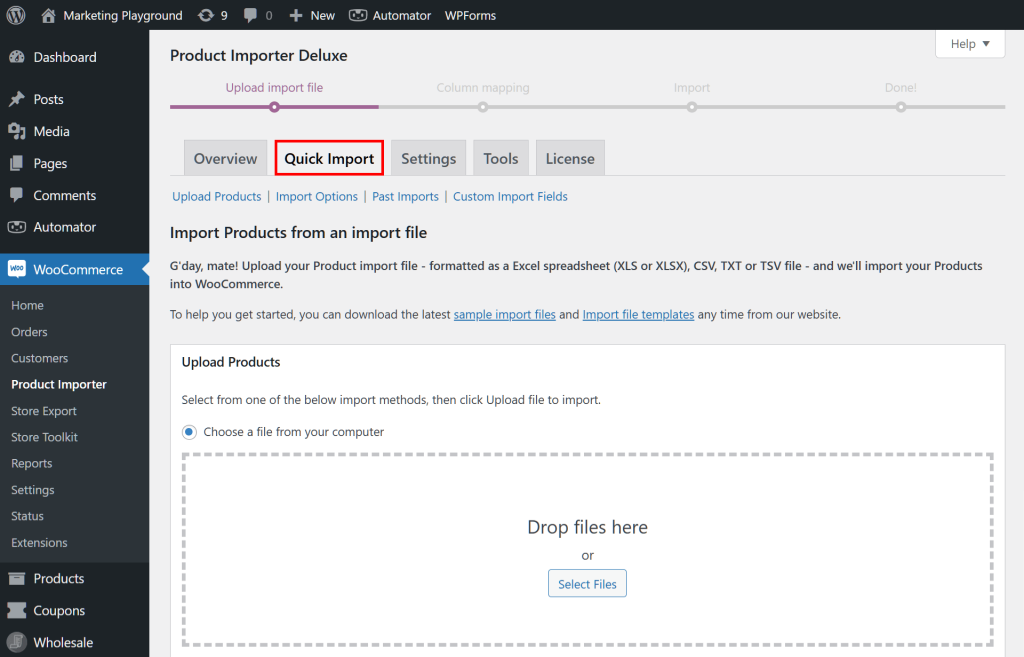
As you can see above, the page consists of five tabs. However, for this guide, we’ll focus on the import process itself. So when you’re ready, click the Quick Import tab!
Importing involves three steps:
Step 1: Upload import file
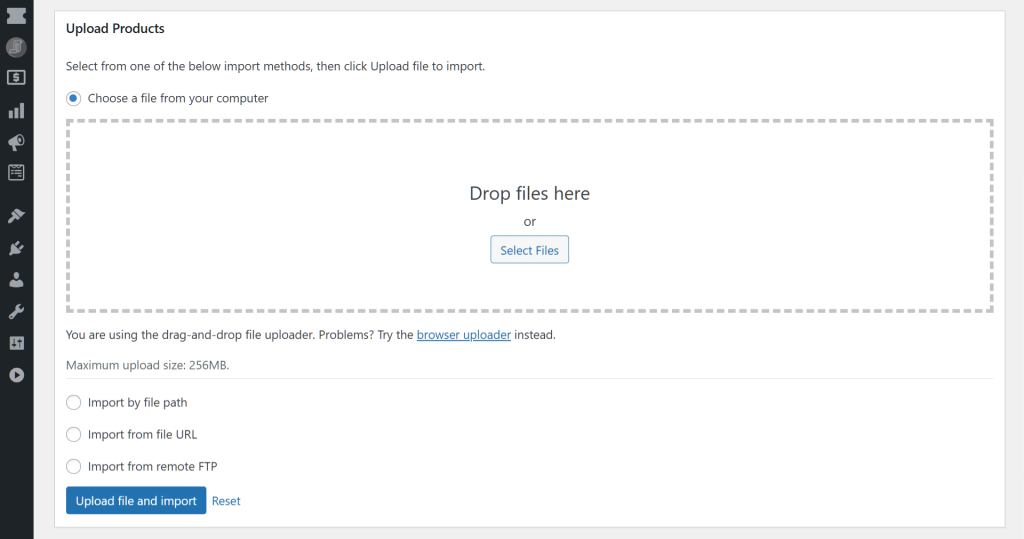
The Upload Products box is likely the first thing you’ll see upon entering the Quick Import section. This is the interface you have to interact with to import products.
There are four ways to import products.
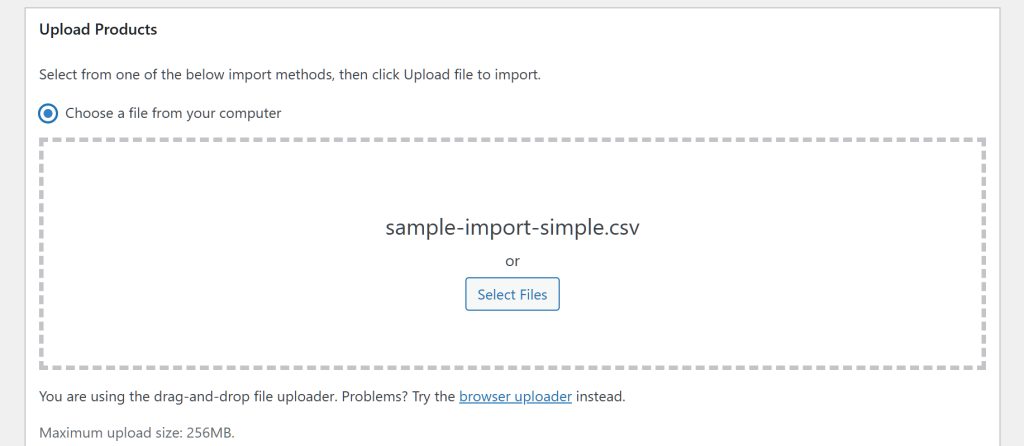
i. Import products from a file on your computer
To import product data, you must first upload the file containing said data. To upload, you have two choices:
- Drag and drop the file into the “Drop files here” area
- Click the “Select Files” button, locate the file within your computer, and click the file
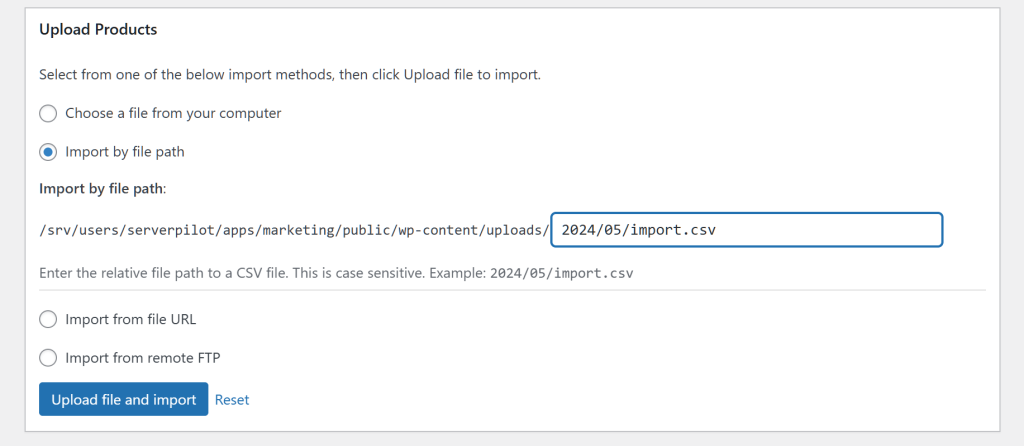
ii. Import products by file path on the server
This method of importing product data requires you to enter the file path in the provided entry field. Keep in mind that this path is case-sensitive.
For example, you can type the following into the entry field: 2024/05/import.csv
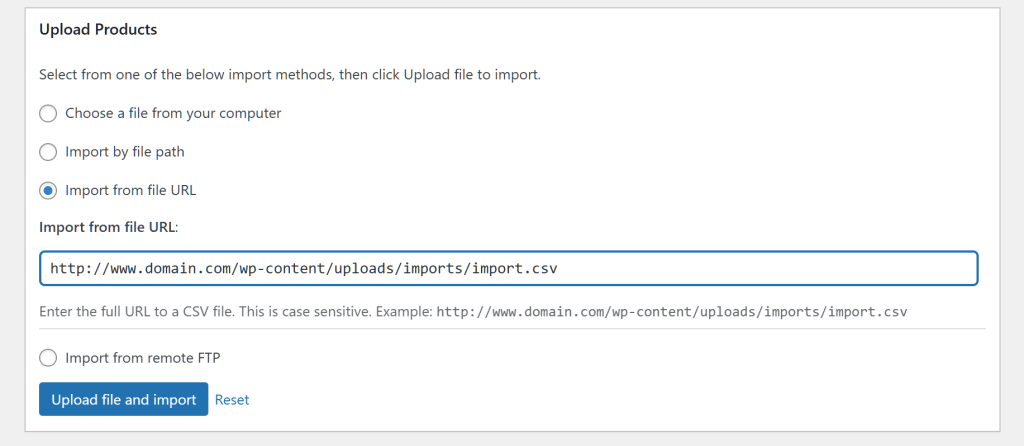
iii. Import products from file URL
This importing method requires you to enter a file’s full URL in the provided entry field. The URL is case-sensitive.
For example, you can input the following URL into the entry field: http://www.domain.com/wp-content/uploads/imports/import.csv
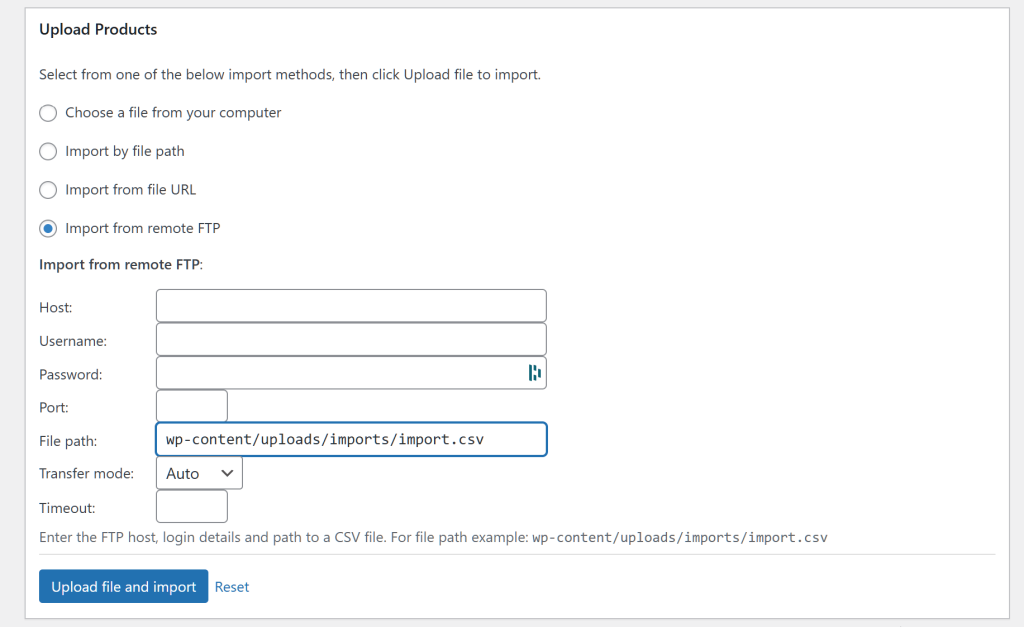
iv. Import products from remote FTP/SFTP
For this method, you must enter the FTP host, login details, and path to your file. Again, the details are case-sensitive.
Here’s an example of a file path: wp-content/uploads/imports/import.csv
Upload file and import
Once you’ve uploaded your file, you’re ready to extract product data from it. So click the Upload file and import button to proceed to the next step.
If you want to undo your uploading, click the Reset button, instead.
Step 2: Perform column mapping
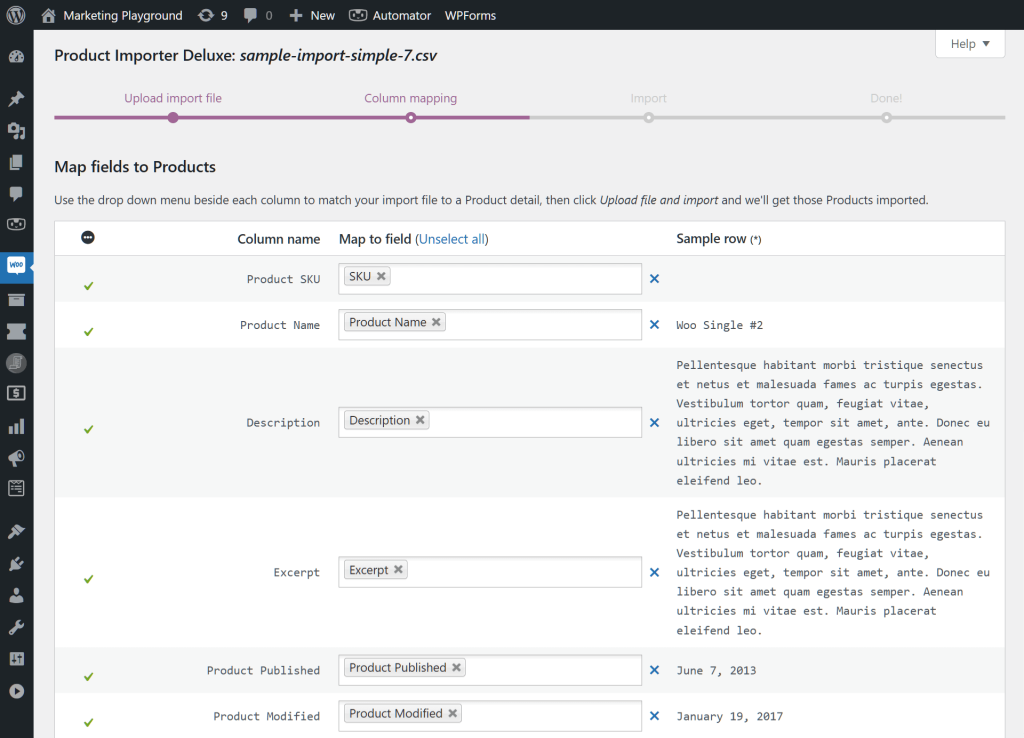
This step takes you to the Column mapping section. Column mapping is a process that lets you match your file’s product fields with WooCommerce fields. As such, it ensures all the product fields you extract from the file find their way to the correct fields.
i. Map fields to products
The Map fields to products area is where the bulk of the column mapping takes place.
Column name contains the names of the fields as they appear in your file. On the other hand, Map to field consists of dropdown menus, where you’ll find the names of the fields as they appear in WooCommerce.
The WooCommerce product import plugin automatically matches your product fields with their corresponding WooCommerce fields. Thus, in most cases, you won’t have to select any options from the dropdowns.
However, if your file contains unique product field names, you can click the dropdown menu and choose any name you think is appropriate.
On the other hand, Sample row lets you preview the content of your columns. Thus, it allows you to check if they match their intended content.
Once you’re done with column mapping, you can scroll down the page and click the Upload file and import button to proceed to the third and final step.
However, we recommend staying on this page to configure some settings…
ii. Import Options
Below the Map fields to products area is the Import Options box. This serves as the location of various configurable settings governing the import process.
Typically, the WooCommerce product import plugin’s default settings should suffice for a successful import. However, you might want to check out your other options if you want the import to go exactly the way you want it to.
Import Options has three main areas:
a. Import method
Import method lets you choose how your products are imported from your file into your platform. See the four available choices in the image below:
b. Image import method
Image import method lets you decide how the importer tool handles WooCommerce images during the import. The image below displays the three available choices:
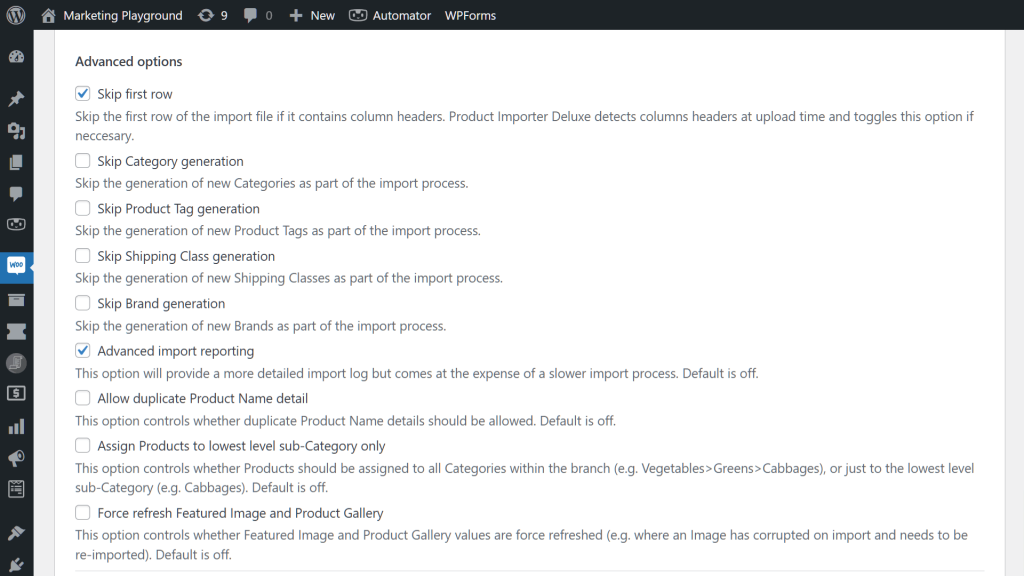
c. Advanced options
Advanced options grant you a finer degree of control over the import. Many options are available. Thankfully, each comes with a description allowing you to easily figure out what it’s for.
Your choices are on display in the following image:
Lastly, there’s the Script timeout option, which defines how long the WooCommerce product import plugin is allowed to process your import. Once the time limit is reached, the import process halts.
Script timeout comes with a dropdown menu containing four choices:
- 10 minutes
- 30 minutes
- 1 hour
- Unlimited
Step 3: Initiate mport
The third and final step is the import process itself.
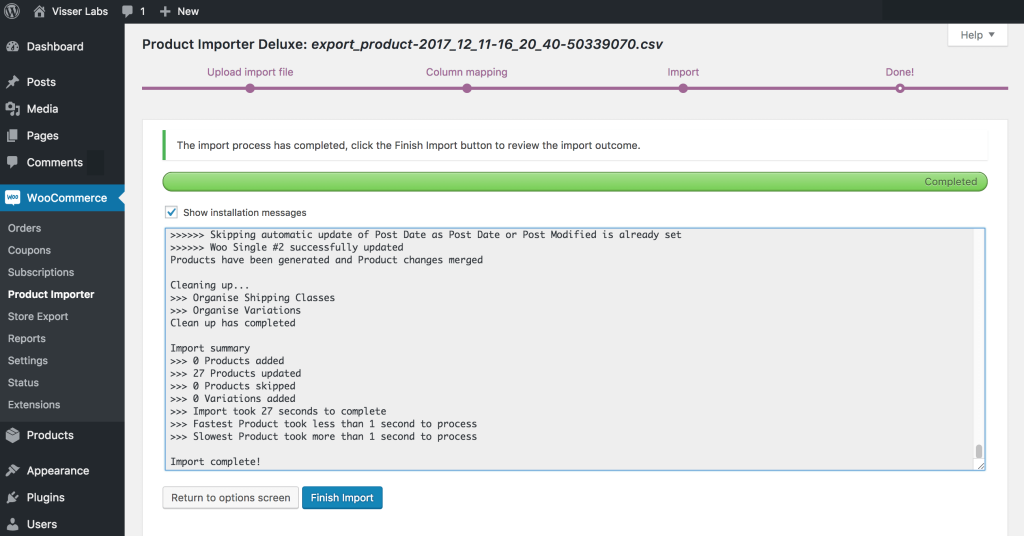
The page comes with a progress bar that lets you visually examine the import’s advancement.
In addition, you can tick the Show installation messages checkbox to view a real-time log detailing the import’s various stages.
Moreover, there’s the Pause import button, which you can click if you want to temporarily stop the process.
Once the import is complete, the bar turns green. More importantly, a “Finish Import” button appears. Click this to end the entire process.
And that’s it! You’ve successfully used Visser Labs’ WooCommerce product import plugin to import new products and merge existing WooCommerce products!
Conclusion
Managing a successful WooCommerce store requires the efficient handling of products. Leveraging a powerful importer tool like WooCommerce Product Importer Deluxe streamlines the transfer and updating of product data, ensuring accuracy, security, and ease of use.
Throughout this guide, we’ve delved into the features and functionalities of Visser Labs’ WooCommerce product import plugin. From transferring large quantities of product data to column mapping to selecting various import options, this tool simplifies the entire import process.
To recap, to import product data using WooCommerce Product Importer Deluxe, you need to implement three simple steps only:
Do you have any questions about Visser Labs’ WooCommerce product import plugin? Let us know in the comments section!
