In WooCommerce, categories help organize your products, making it easier for both store owners and customers to find the products they’re looking for. However, to keep your category data updated and organized, it’s essential to know how to export WooCommerce categories.
Today, we’ll discuss everything you need to know about running a product category export for WooCommerce store owners. In addition, we’ll introduce you to a powerful data exporter designed to make such processes more efficient and convenient.
So, ready to learn how to export WooCommerce categories using among the best WooCommerce plugins available? Then let’s get started!
I. What Are WooCommerce Categories?
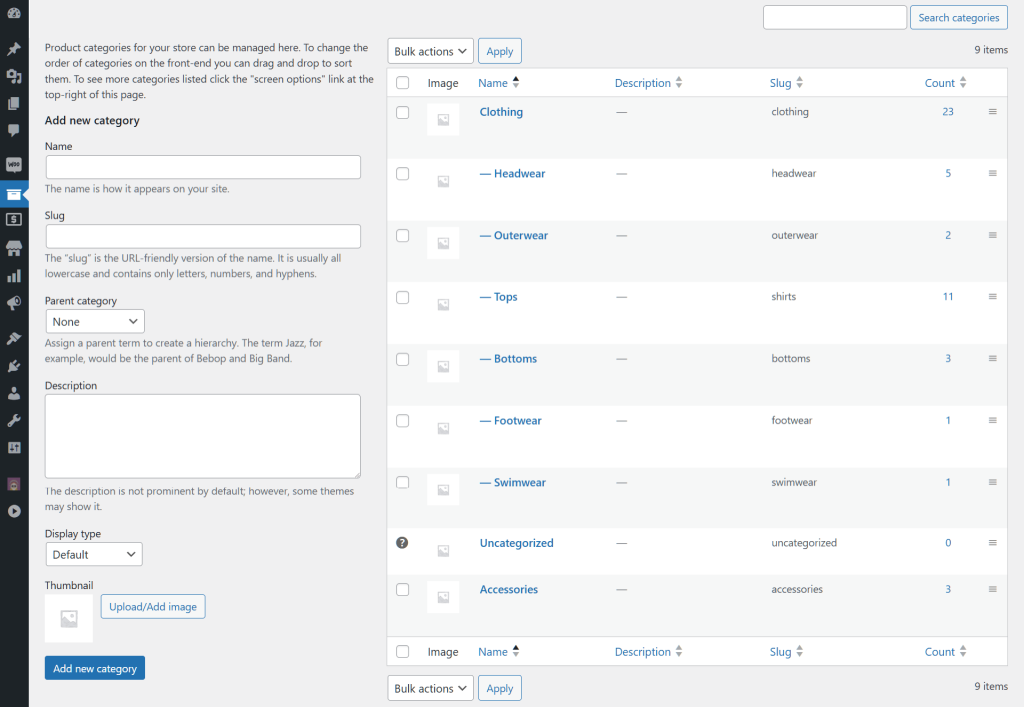
WooCommerce categories (a.k.a. WooCommerce product categories) are essential tools for organizing your products into specific groups. Basically, they make it easier for customers to find what they’re looking for.
Think of WooCommerce categories like virtual shelves in your store. For example, if you’re selling clothes, you can place them under the “Clothing” category. Meanwhile, accessories and electronics can go under the “Accessories” and “Electronics” categories respectively. This way, they help keep everything tidy and accessible.
For store owners, categories in WooCommerce simplify inventory management, enable targeted marketing, and boost SEO by creating a clear, organized structure. Plus, they enhance the shopping experience by allowing customers to quickly browse and discover their desired products.
II. What Does It Mean To Export WooCommerce Data?
When you export data, you move information from one system to another. In e-commerce, particularly with WooCommerce, this involves shifting important store details to an external format like a TSV or XML file.
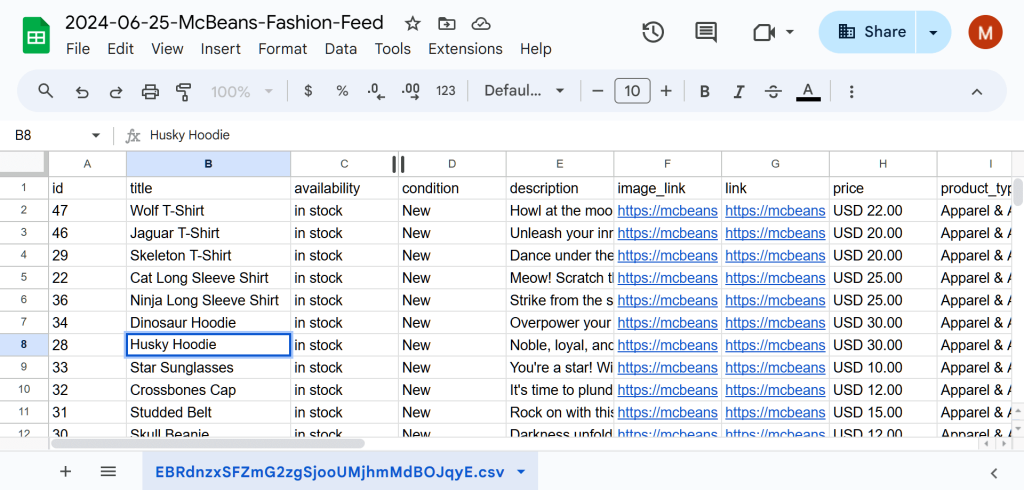
For instance, you might export your WooCommerce data, such as product details, sales transactions, and WooCommerce categories into a CSV file. This allows you to easily access and review these records using spreadsheet software such as Excel.
Using a reliable data export tool ensures that your data is transferred accurately without losing its quality or functionality. Further below, we’ll explore how one such tool can make exporting product categories as easy, fast, and accurate as possible.
III. Why Export WooCommerce Categories?
Exporting WooCommerce categories is a smart move for several reasons:
1. Backup your organization
When you run WooCommerce category exports regularly, you create a safety net for your store’s layout. After all, backups protect your carefully organized categories from unexpected data loss or accidental mishaps.
If something goes wrong or you need to roll back to a previous setup, your exported file is ready to restore everything to its original state. Thus, you avoid losing your well-structured organization and keep your store running smoothly.
2. Simplify bulk updates
When it’s time to tweak several categories, exporting them into a file is a game-changer.
Imagine being able to rename categories, update descriptions, or change product assignments all at once. Working in a spreadsheet or similar format enables you to make these updates quickly and efficiently. Thus, you save yourself from the tedious task of editing each category one by one in WooCommerce, making the whole process much faster and smoother.

3. Ease data migration
Moving to a new e-commerce platform or integrating with different systems? Exporting your categories makes the transition a breeze.
When you export product categories into an external file, you keep your store’s organizational structure intact. This ensures a seamless move. As a result, your products stay neatly arranged, and your customers won’t face confusion or trouble finding what they need in your newly set-up store.
4. Improve efficiency
Exporting your category data into a file brings all your information together in one spot. This centralization simplifies management and analysis by letting you handle everything from a single place, instead of hopping between different parts of your store.
With everything neatly organized, you can streamline your workflow. Consequently, it becomes easier to oversee and fine-tune your store’s product categories.

5. Enhance reporting and analysis
Exporting your categories unlocks a treasure trove of insights into your store’s organization. With this data, you can dive deep into reports that reveal how each product category is performing, track sales trends, and monitor inventory levels. This detailed analysis equips you to make smart decisions about where to place products and how to shape your marketing strategies, ensuring your store runs at its best.
6. Facilitate collaboration
Exported category data is a powerful tool for teamwork. By sharing this information with your team or external partners, you make it simple to review, discuss, and refine your store’s setup.
Exporting WooCommerce data ensures that everyone involved can easily coordinate changes, offer feedback, and stay aligned on how your store is organized. As a result, collaboration becomes smooth and effective.

7. Support inventory management
Exporting your category data dramatically enhances your inventory management. After all, it lets you keep a close watch on stock levels within each category, enabling you to spot any discrepancies or gaps in your inventory. With this clear view, you can quickly identify when it’s time to restock, ensuring your store remains well-supplied and organized.
8. Optimize SEO strategies
A well-organized category structure can give your SEO efforts a major boost. After all, when you export and review your product categories in WooCommerce, you can ensure they fit perfectly with your SEO strategy. This helps you fine-tune your product listings, making them more search engine-friendly and improving your store’s visibility online.
9. Streamline marketing campaigns
Exported category data is a goldmine for crafting targeted marketing campaigns. By digging into this data, you can pinpoint which products to spotlight, plan out your promotions, and tailor your marketing strategies to specific product groups. This focused approach boosts the impact of your campaigns and ensures you’re hitting the mark with your promotional efforts.
Overall, exporting WooCommerce categories not only keeps your store organized but also supports effective management, analysis, and growth.

IV. How Do I Export Product Categories From WooCommerce?
To export WooCommerce categories, you’ll need a powerful export plugin from Visser Labs—the developer of top-tier export and import plugins for WooCommerce.
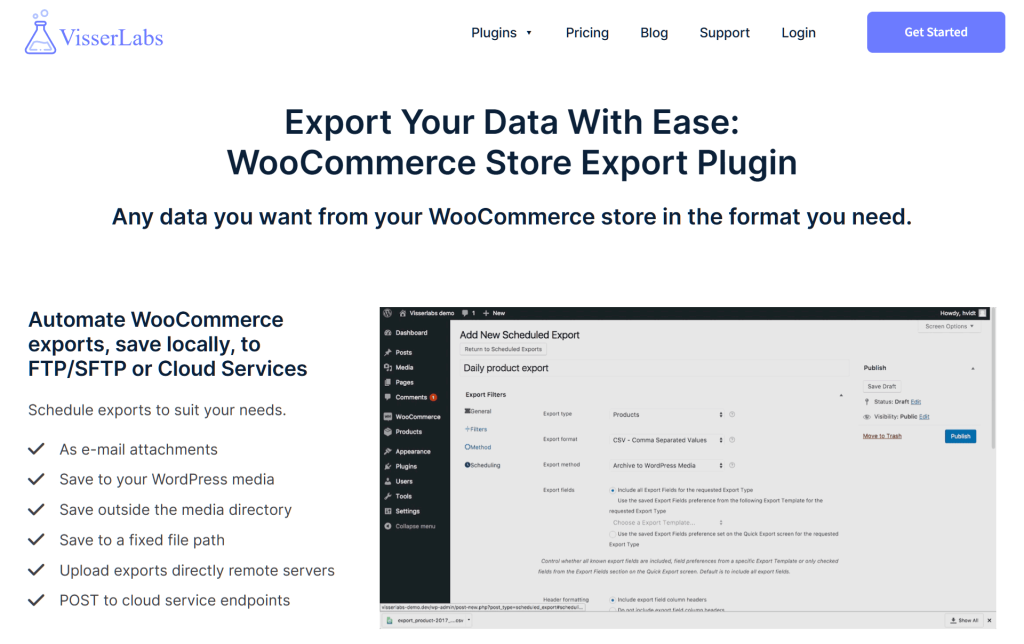
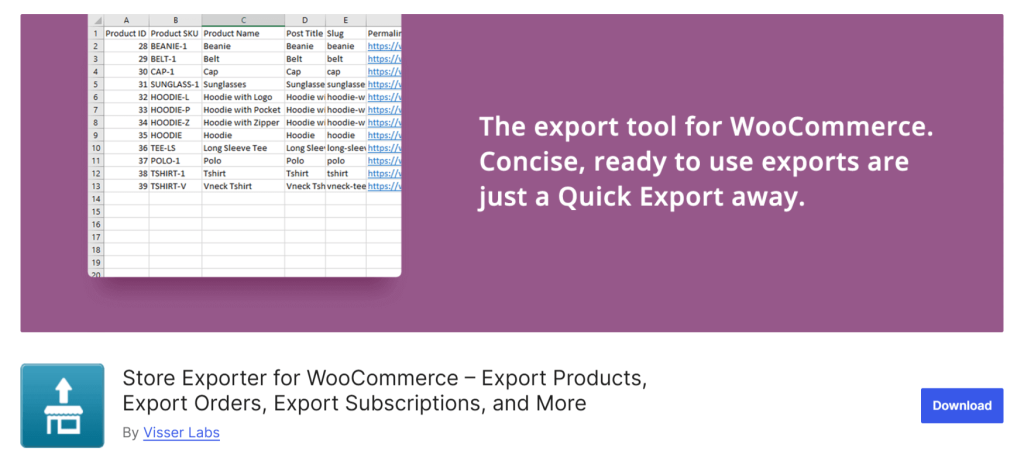
Introducing Visser Labs’ Store Exporter—a data exporter designed to help e-commerce platform owners transfer large volumes of data from their WooCommerce platforms into XML, TXT, TSV, or CSV files.
Store Exporter offers a secure, accurate, and efficient way to export your category data. With this tool, you can easily transfer data from your WooCommerce platform into popular file formats, which helps you manage your information and boost your store’s performance.
To get started, you’ll need a WordPress site with WooCommerce. Simply download, install, and activate either the free Store Exporter plugin or the premium Store Exporter Deluxe. While both versions enable WooCommerce category exports, the latter comes with more powerful features, such as automated exports and export templates.
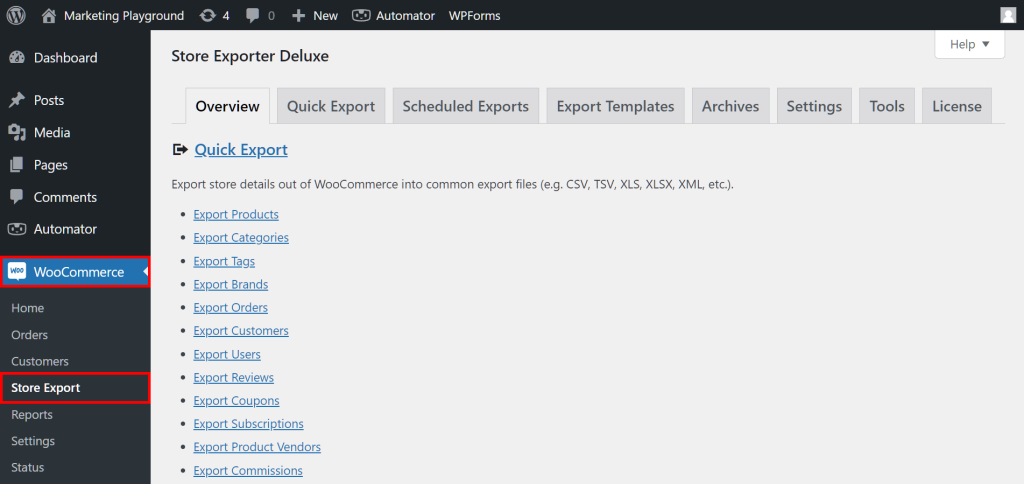
Once the plugin is set up, go to your WordPress dashboard and click on WooCommerce > Store Export. This will take you to the Store Exporter Deluxe screen where you can manage your exports.
This page features eight main sections. However, for this guide, we’ll focus on Quick Export.
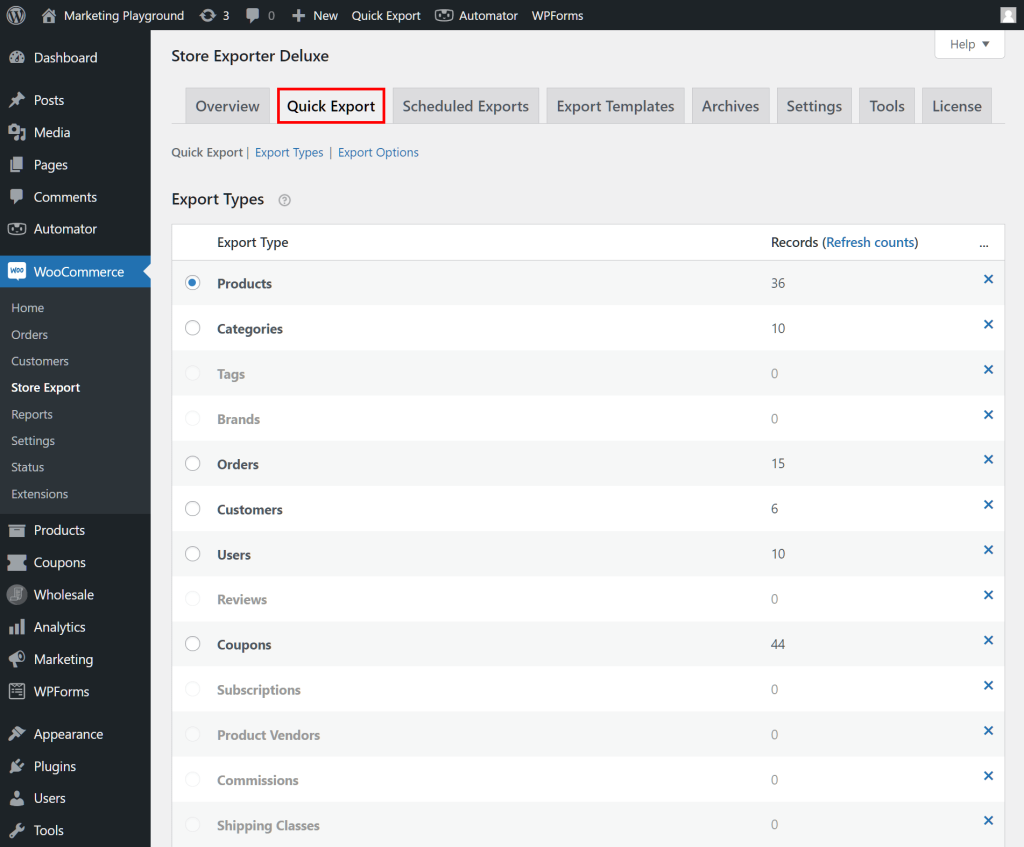
To begin, click the Quick Export tab.
The Quick Export section boasts tools enabling you to transfer any number of WooCommerce categories with ease. All you must do is implement the following steps”
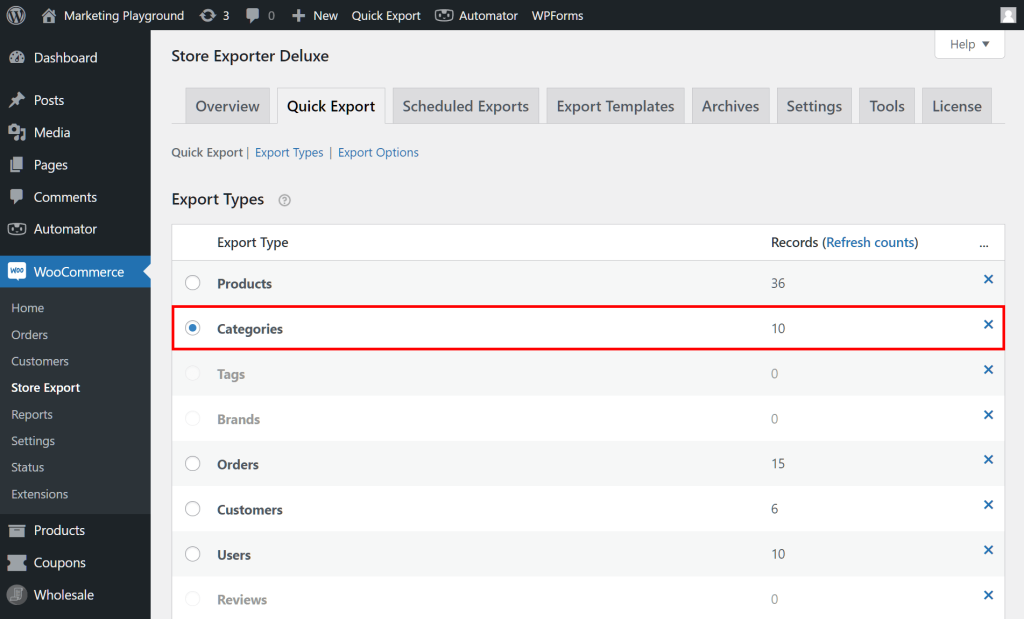
Step 1: Select the Export Type
First, pick the data type you want to export by selecting the appropriate option. For WooCommerce categories, click “Categories.”
Ready to kick off the export process? Just hit the Quick Export button below the Export Types box, and you’ll instantly export all your category data from WooCommerce.
However, if you’re looking to export only certain category details, you’ll need to customize your export further. Let’s move on to the next step:
Step 2: Choose the Category Fields to export
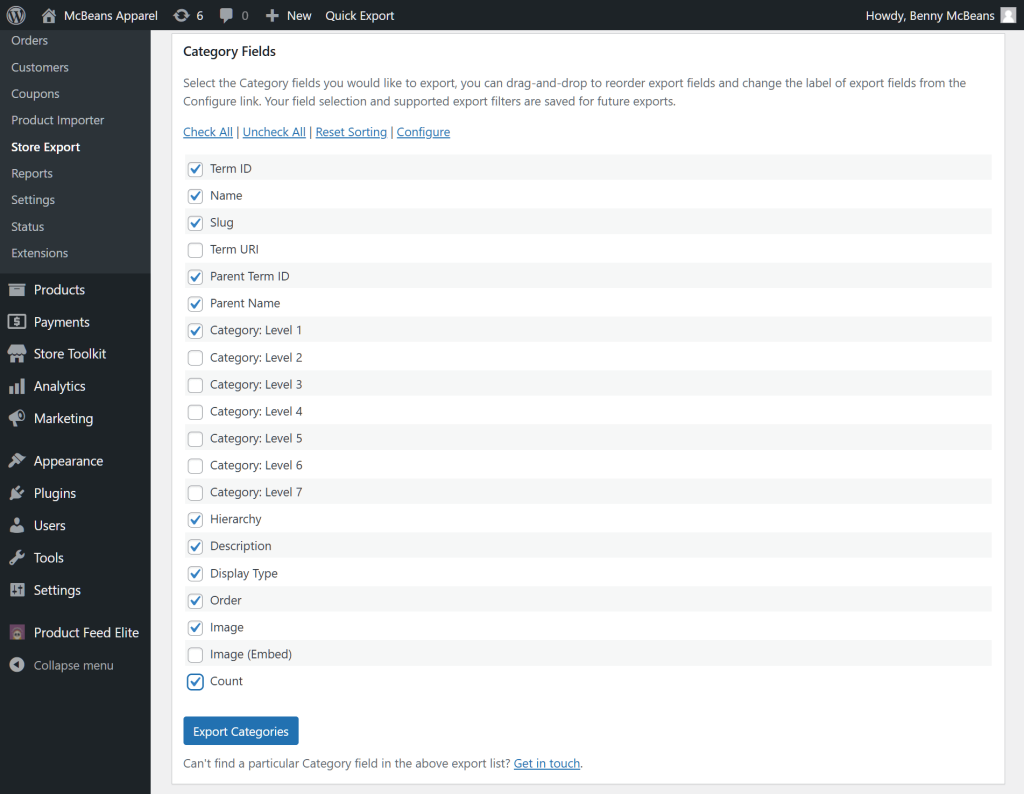
Scroll down to the Category Fields box. Here, you can check the boxes next to the specific details you want to include in your export. This way, you’ll get exactly the data you need, tailored just for you.
For instance, you can pick details like:
- Name: The category’s title as it appears on your site
- Slug: The URL-friendly version of the name
- Parent Name: The title of a category’s parent category
- Description: A description of the category
- … and more!
Plus, you can easily drag and drop these fields to arrange them just how you like.
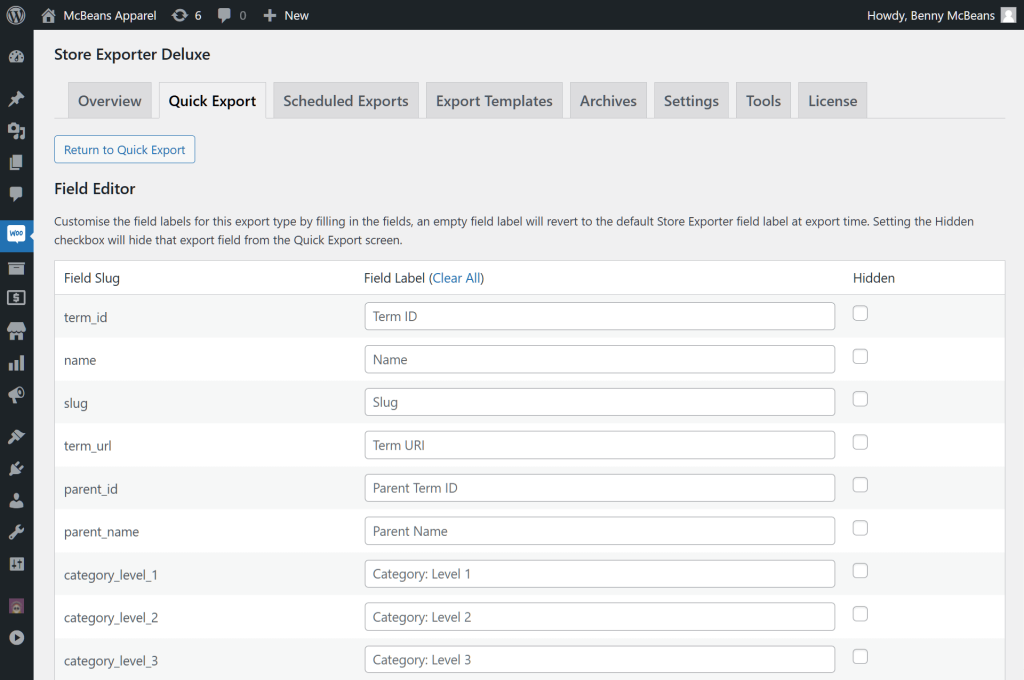
Want to tweak some fields? Click the Configure button to open the Field Editor. Here, you can rename labels or hide any fields you don’t need by checking their “Hidden” boxes.
Once you’ve finished customizing the category fields, click the Return to Quick Export button.
At this point, you can hit Export Categories and be done. But why stop there? Let’s dive into more advanced options!
Step 3: Determine your category data order
Scroll down to the Category Filters box to determine the order of your category data.
You can organize the data by Term ID or Category Name, choosing either ascending or descending order for a customized view.
Step 4: Create Custom Fields (Optional)
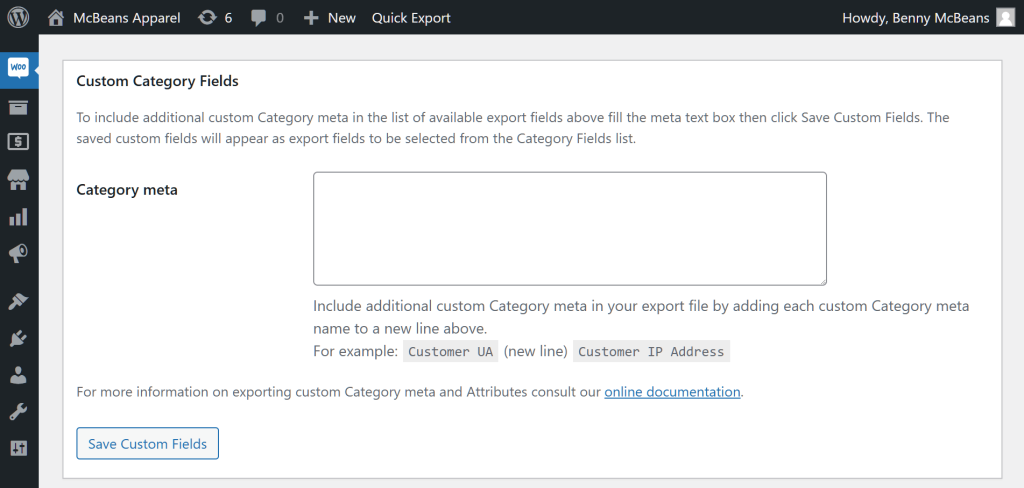
If the default category fields aren’t quite cutting it, you can easily create your own custom fields. Just enter the names of the new fields in the Custom Category Fields section, one per line. You can even add new category attributes. Once you’re done, click Save Custom Fields to add them to your export options, giving you complete control over the data you need.
Step 5: Finalize your Export Options
In the Export Options section, you can customize how your data is exported. Pick the file format that suits you best; your options include, XML, TSV, XLS, XLSX, RSS 2.0, JSON, or CSV file. This gives you full control over how your data is saved and shared.
Furthermore, you can select the HTML tag formatting rule that will be applied to the “Description” or “Excerpt” fields during your category exports. This helps ensure your content is properly formatted in the export file.
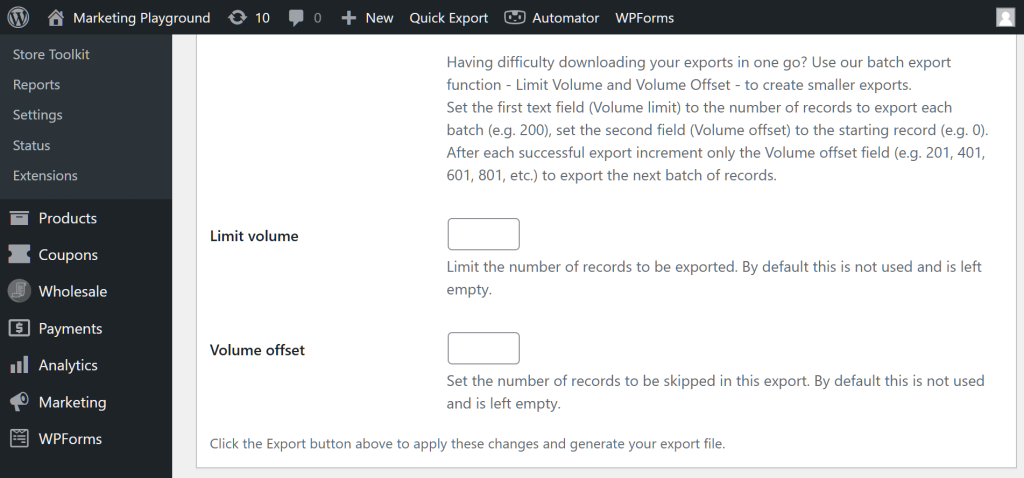
Got a lot of categories? No problem! You can export in batches to keep things manageable. Just use the Limit Volume and Volume Offset options to break your export into smaller chunks.
Step 6: Export WooCommerce categories!
Ready to start exporting your WooCommerce categories? Then click the Export Categories or Quick Export button to kick off your Woocommerce export!
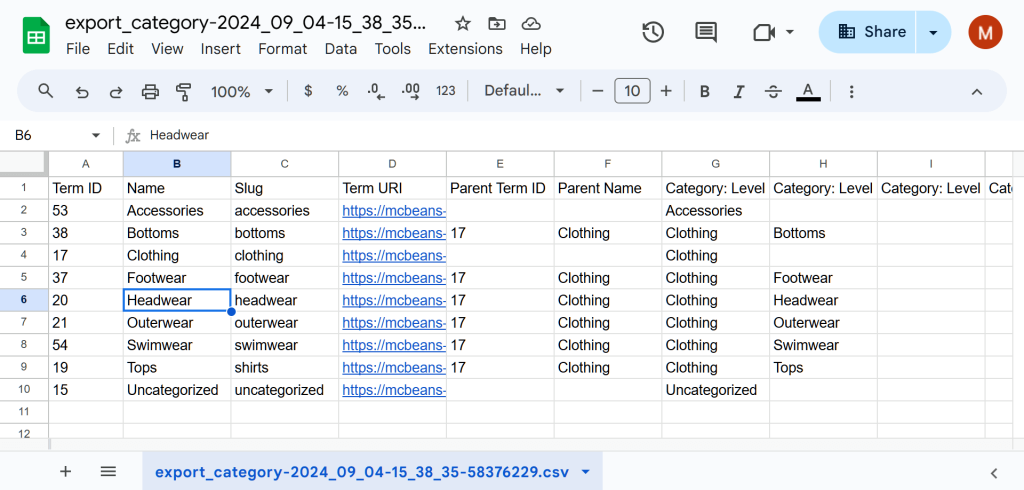
Store Exporter will grab your category data and save it in the format you’ve chosen. Depending on the amount of data, the export may take anywhere from a few seconds to a few minutes. Once it’s done, you’ll find your export file ready to go on your computer!
V. Frequently Asked Questions About Exporting WooCommerce Categories
1. How do I export all categories in WordPress?
To export all WordPress categories, go to your WordPress dashboard and click WooCommerce > Store Export > Quick Export.
Next, go to the Export Types box and select “Categories.” Then, go to the Category Fields box and click Check All.
Finally, click the Export Categories button to export WordPress categories your store contains. When you export product categories this way, it becomes quicker and easier to transfer all category data from your WordPress site into an external file.
2. How can we export WooCommerce products to CSV?
To export WooCommerce products to CSV, go to your WordPress dashboard and click WooCommerce > Store Export > Quick Export.
Next, go to the Export Types box and select “Products.” Then, go to the Products Fields box and click Check All.
Now, select an export method by going to the Export Options box, locating the Export format option, and picking “CSV.”
Lastly, click the Export Categories button to transfer your products into a CSV file.
Are you interested in a more in-depth exploration of product exports? Then read our detailed guide, “How To Export WooCommerce Products (An Easy, Step-By-Step Guide).”
Do you want to know more about how to export WordPress and WooCommerce data using one of the best WooCommerce plugins for data transfers? Then check out our comprehensive guide, “How To Export WooCommerce Data: Ultimate Guide.”
Conclusion
When you export WooCommerce categories regularly, you maintain better control over your store’s organization, boosting your business’ chances of success.
To transfer category data from your store into a file, implement the following steps:
- Select the Export Type
- Choose the Category Fields to export
- Determine your Category data order
- Create Custom Fields (Optional)
- Finalize your Export Options
- Run your export!
And remember, a reliable data exporter makes all the difference. So take control of your store’s organization; leverage the power and versatility of Visser Labs’ Store Exporter!
Would you like more information on how to export WooCommerce product categories?
