This guide walks you through importing WooCommerce products using Product Importer Deluxe. You’ll learn how to upload your import file, map columns, choose the right import mode, handle images, and run the import with real-time logging.
Looking for a general guide to importing WooCommerce products? See our comprehensive guide.
Before you start, make sure you have:
- Product Importer Deluxe installed and activated on your WordPress site
- A product file ready in CSV, TXT, or TSV format
- WooCommerce installed and active
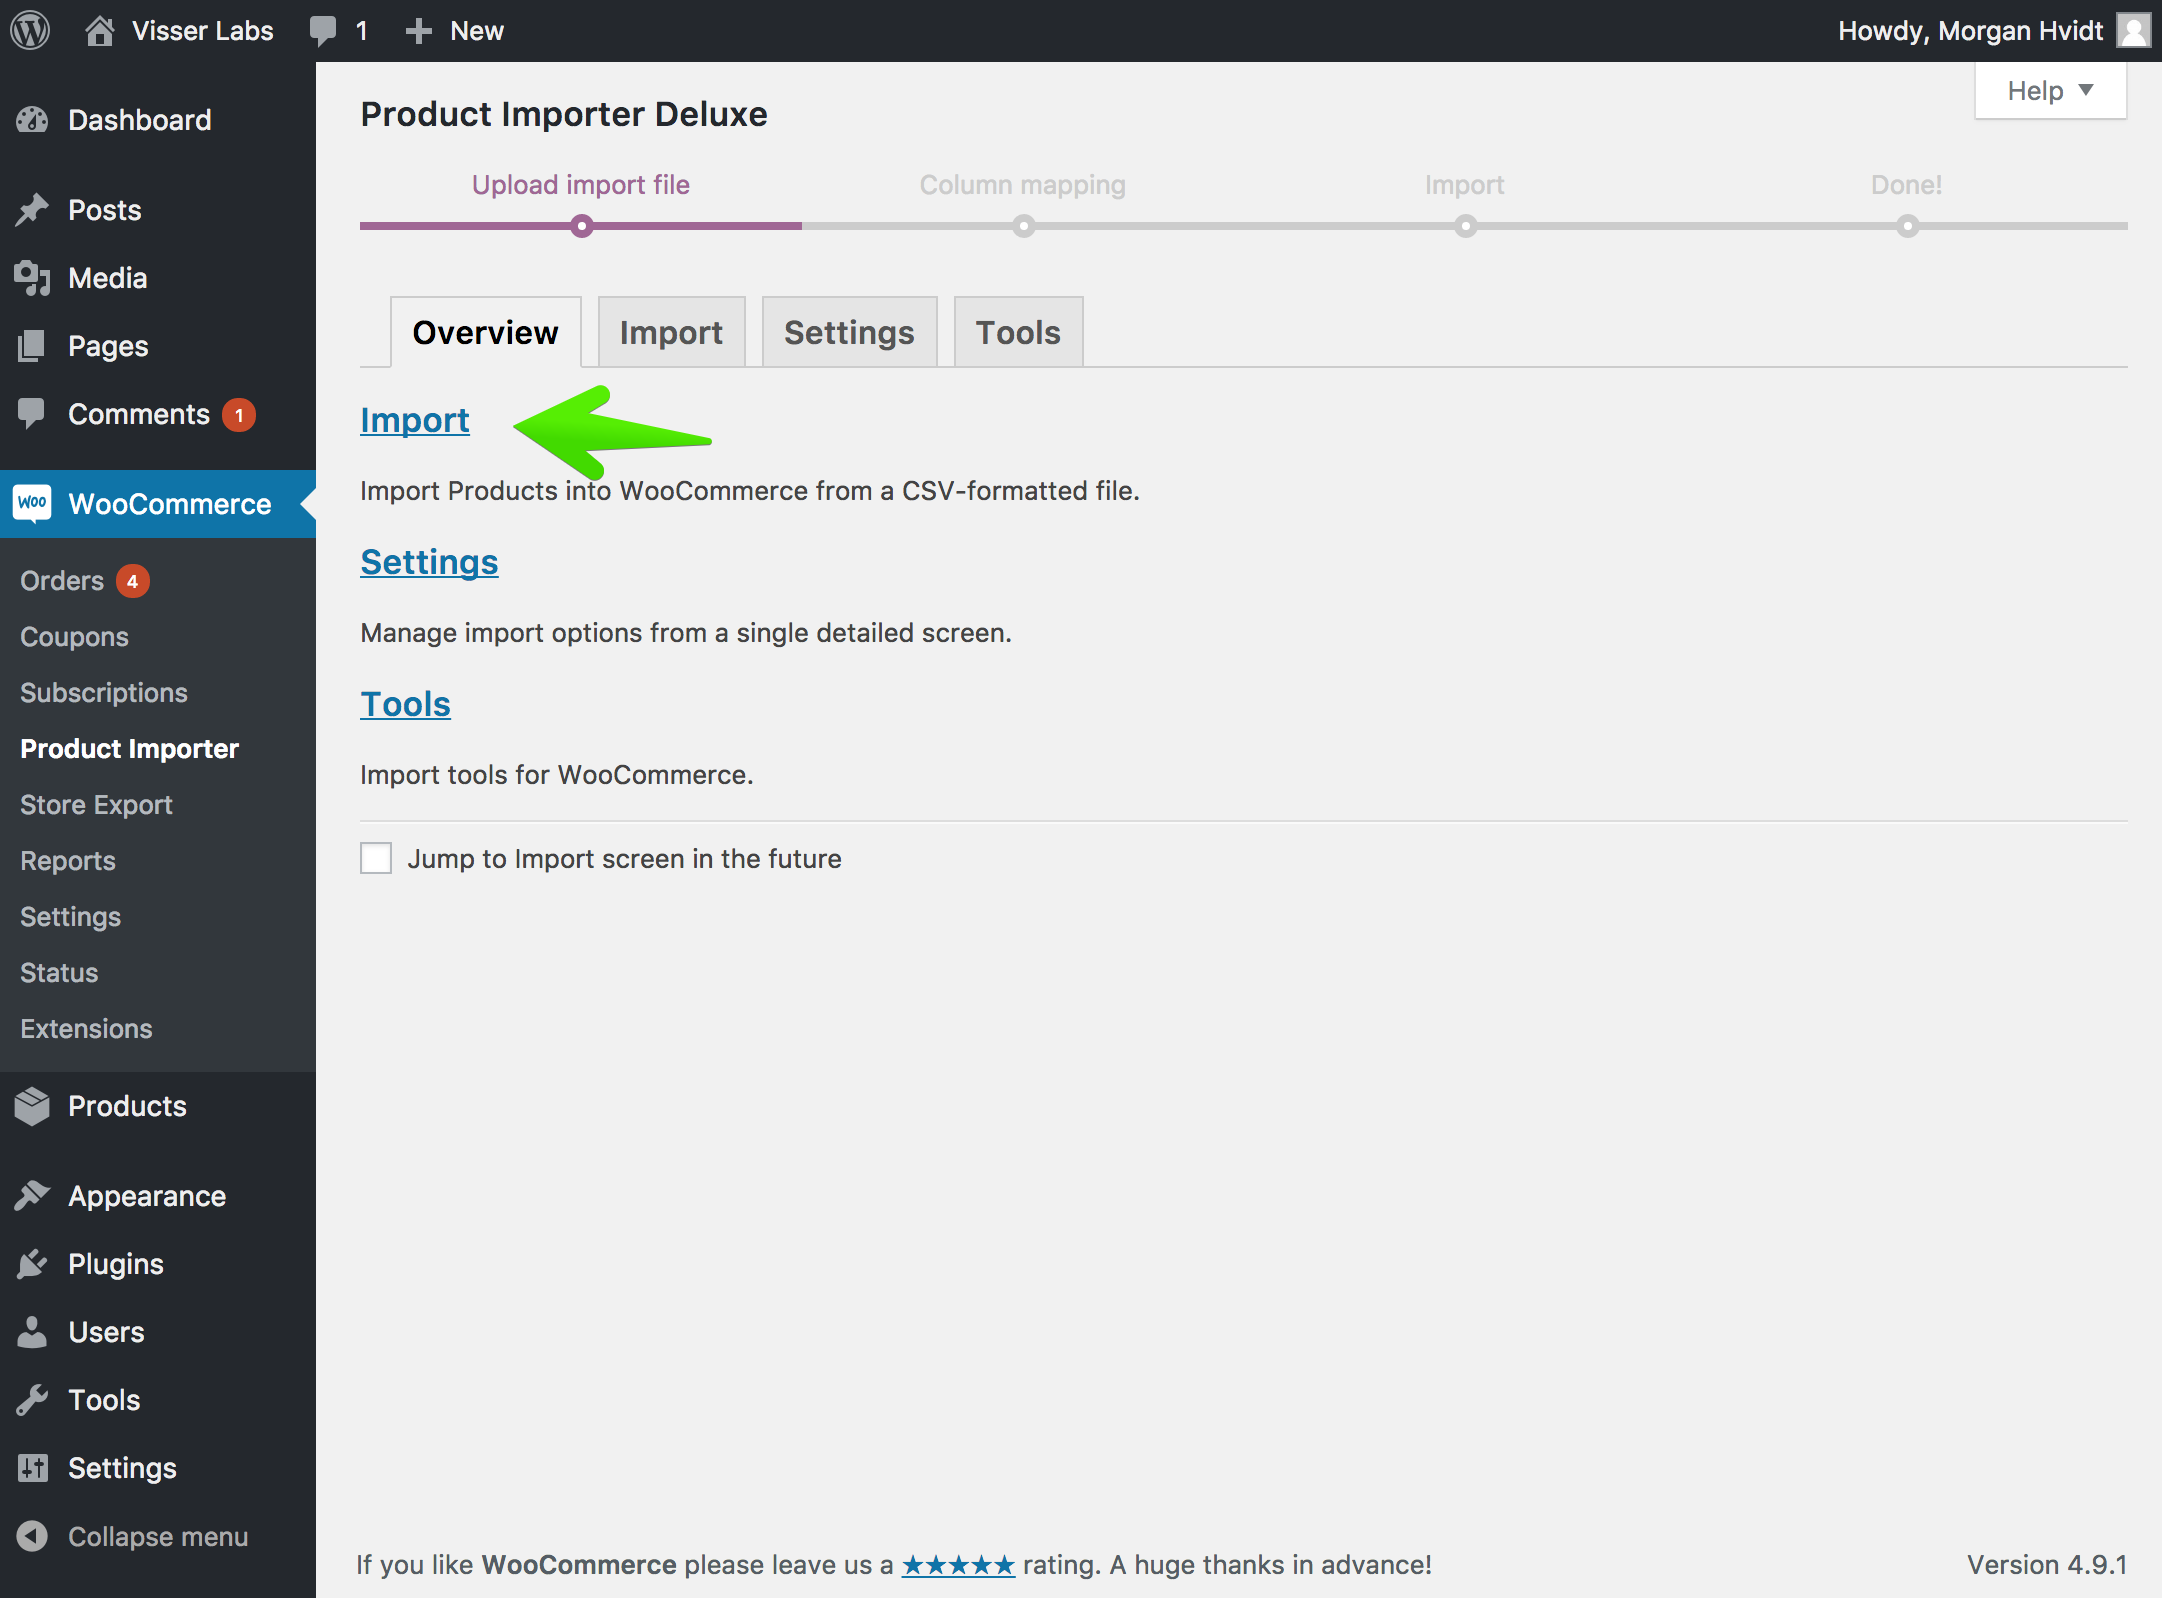
Step 1 — Upload Your Import File
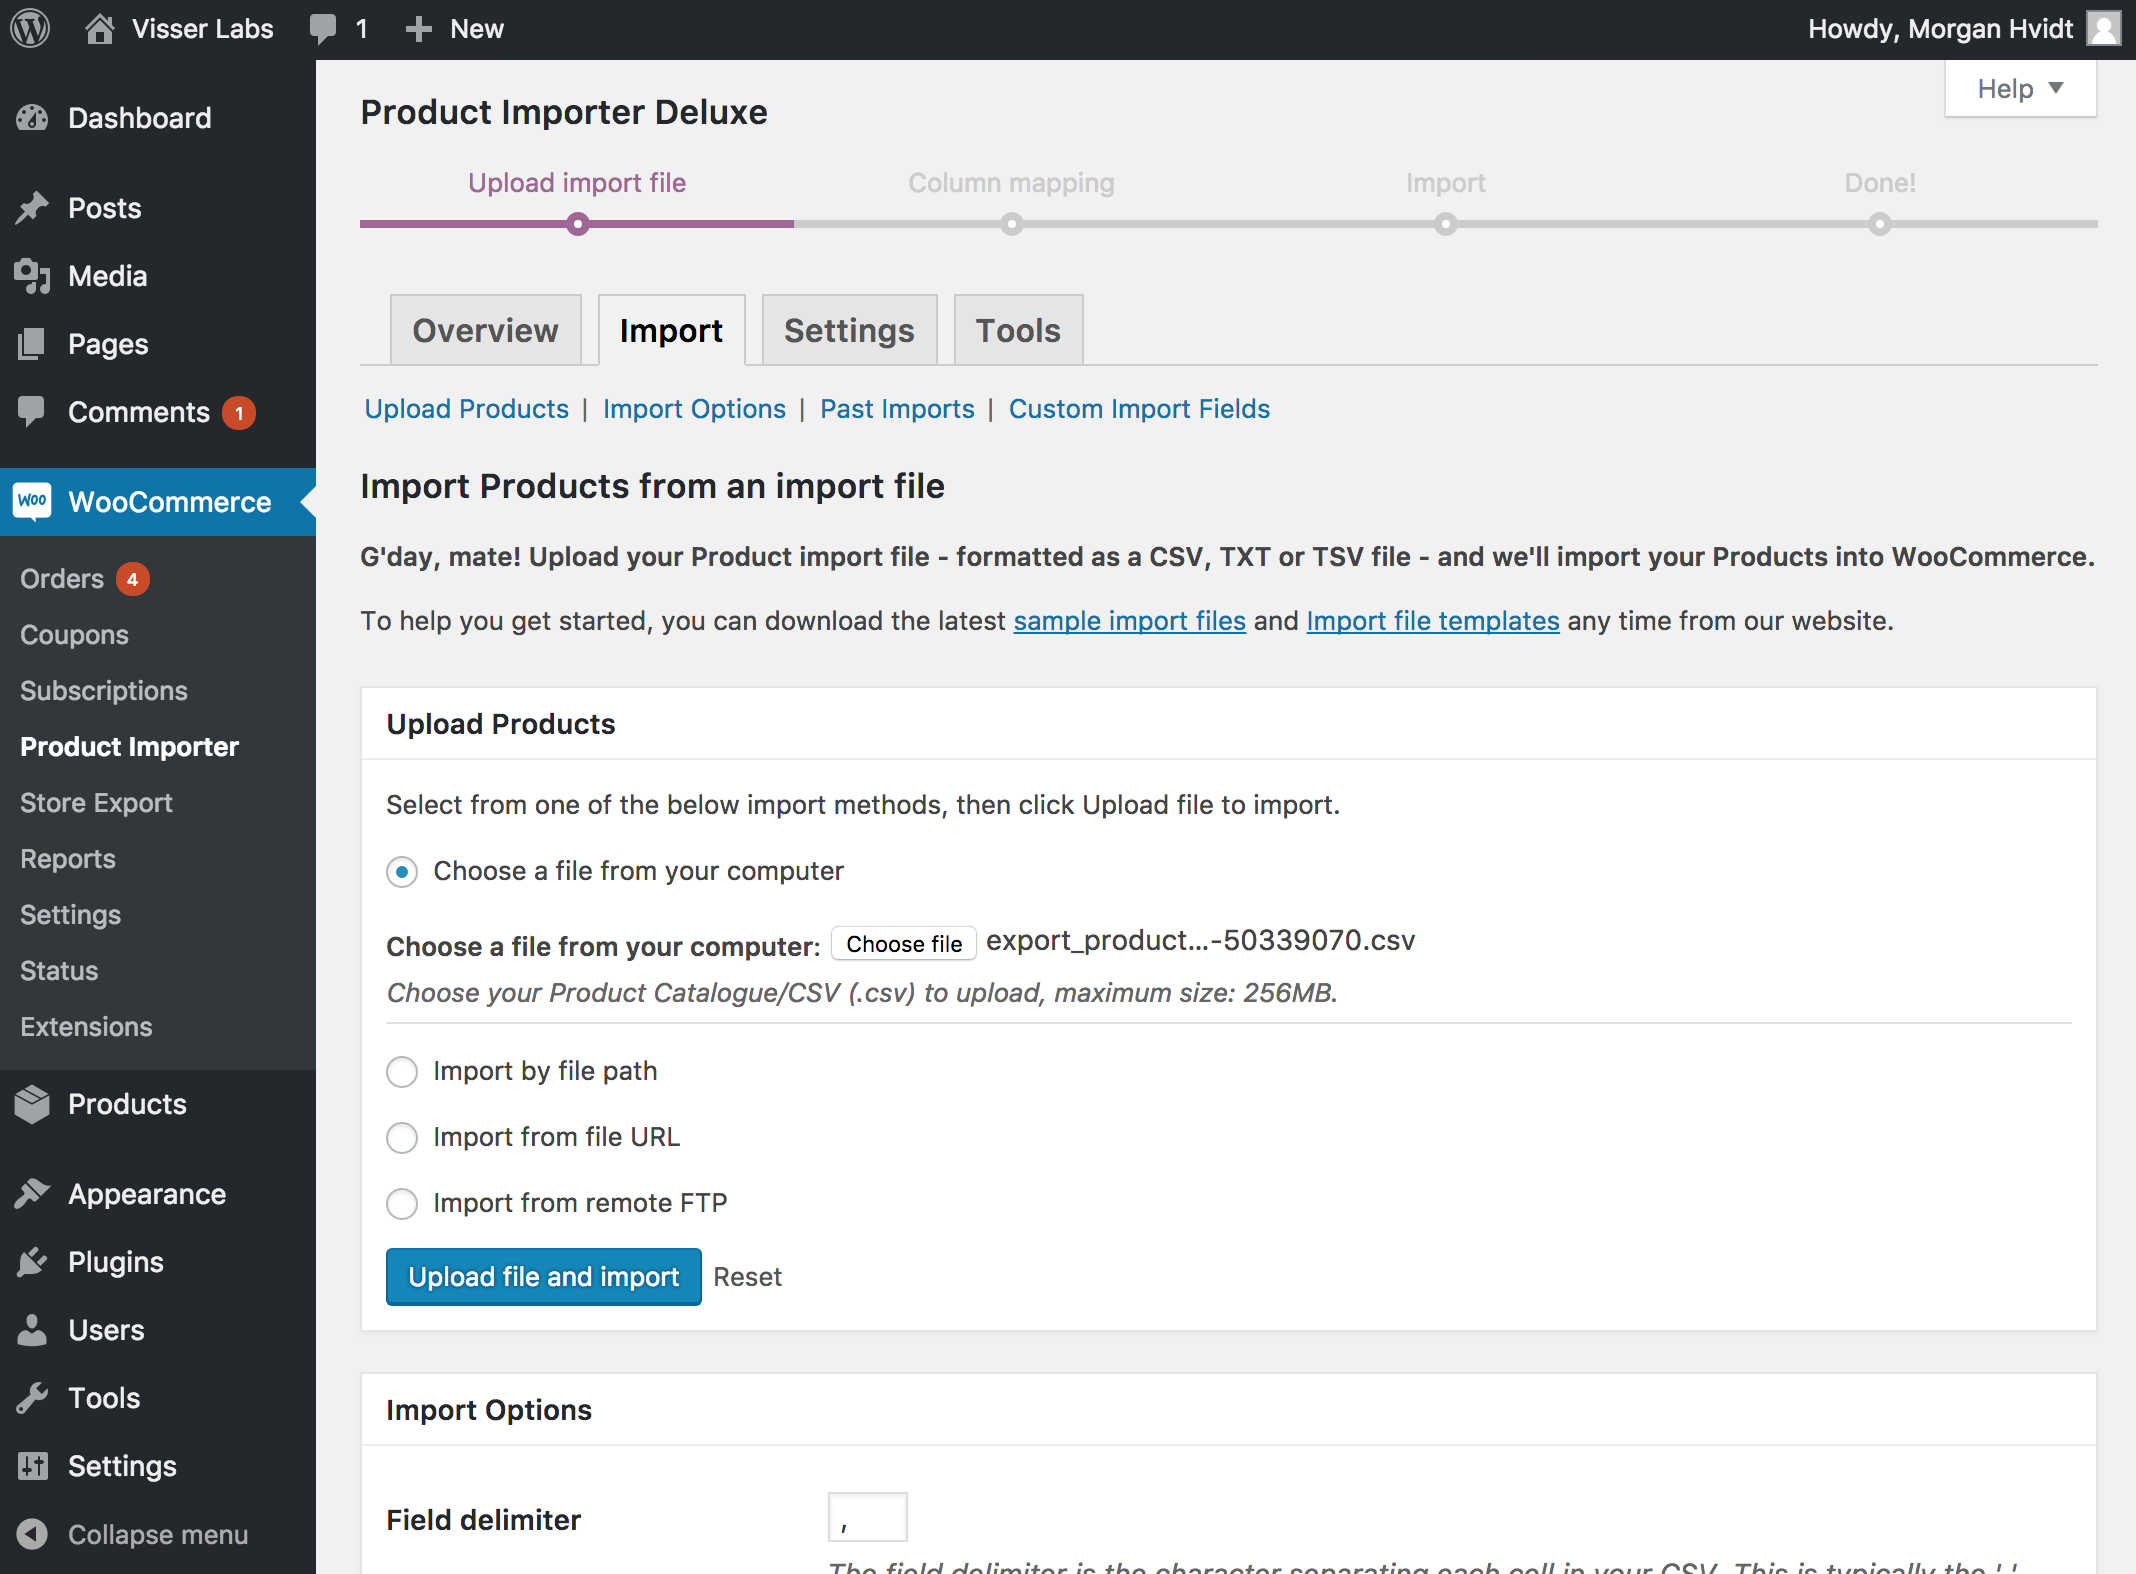
Navigate to WooCommerce > Product Importer in your WordPress dashboard. You’ll see the import screen where you can select your file source.
Product Importer Deluxe supports four upload methods:
- Local upload — Browse your computer and upload a file directly through your browser. Best for smaller files and one-off imports.
- Server file path — Enter the full server path to a file already on your hosting account (e.g.,
/home/yoursite/imports/products.csv). Useful for large files that may exceed upload limits. - URL — Provide a direct URL to a remotely hosted file. The plugin downloads the file before processing. Handy when your supplier provides a product feed URL.
- Remote FTP/SFTP — Connect to an external FTP or SFTP server to retrieve your import file. Ideal for automated workflows where suppliers drop files on an FTP server.
Select your preferred method, choose or point to your file, then click the button to proceed to column mapping.
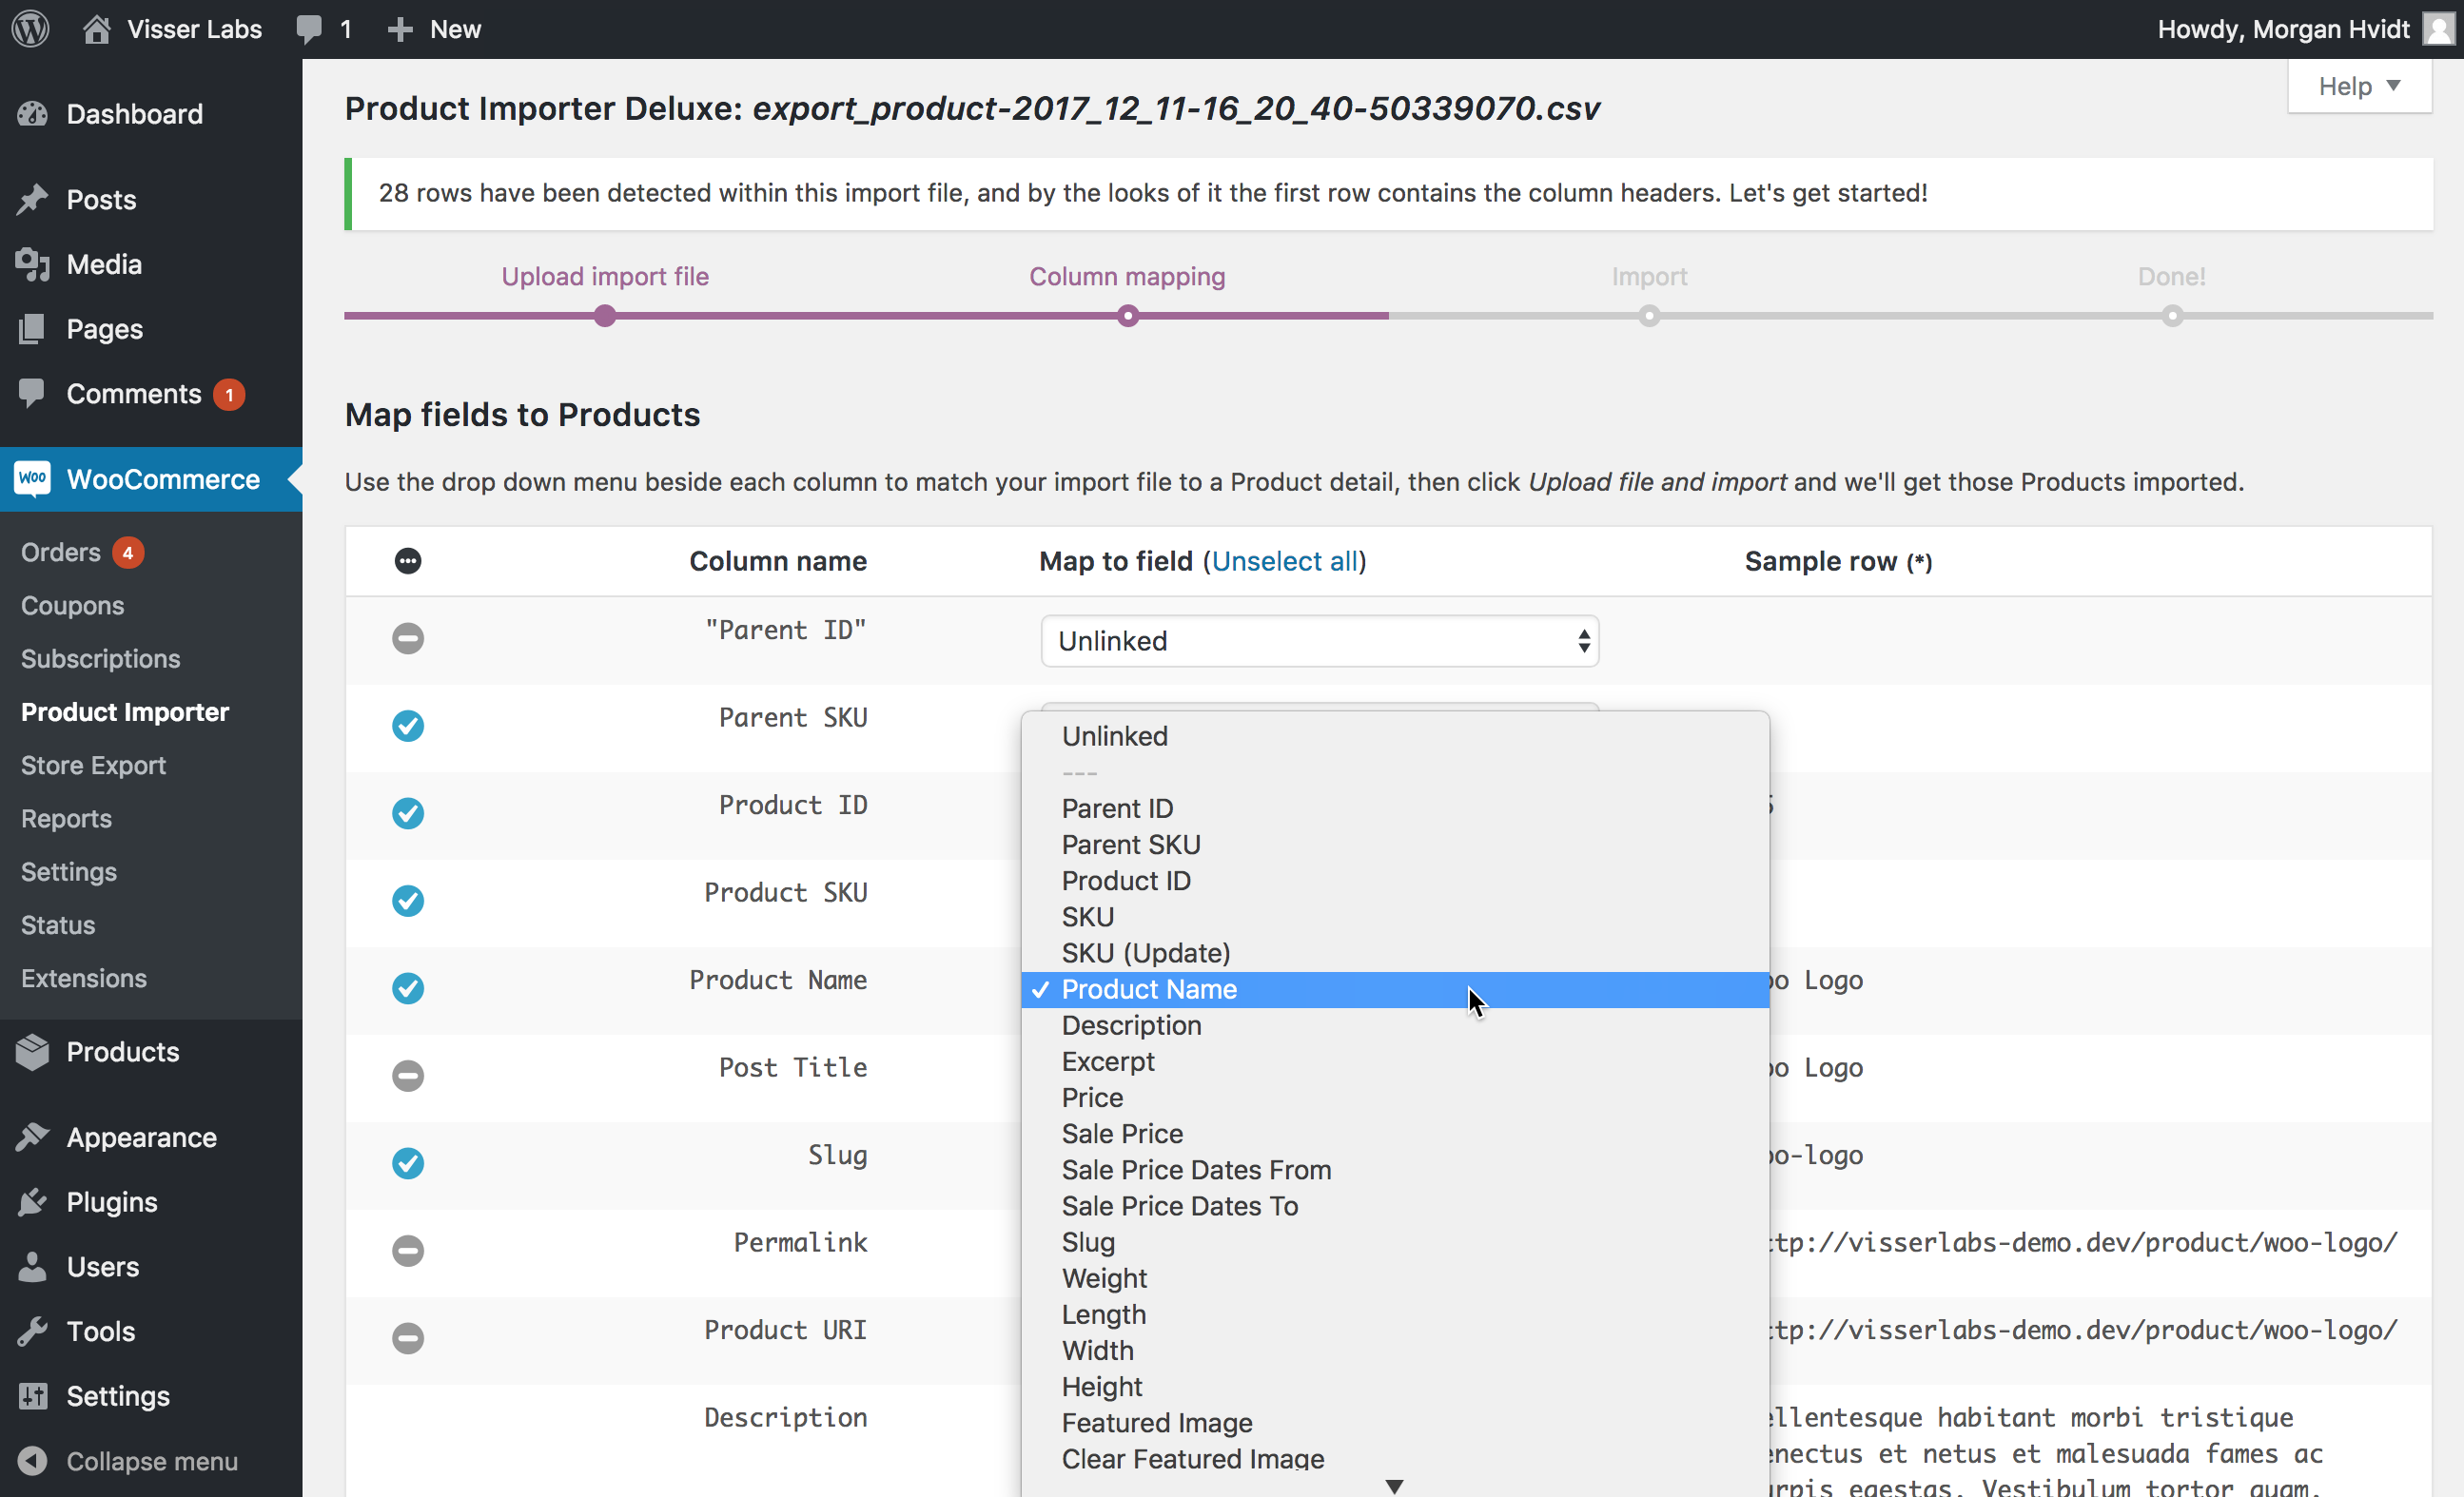
Step 2 — Map Your Columns
After uploading your file, Product Importer Deluxe reads the column headers and attempts to automatically match them to WooCommerce product fields. In most cases, standard headers like post_title, sku, regular_price, and stock_qty are detected without any manual work.
A preview row appears below the mapping table so you can verify each column is assigned correctly. Check that your data aligns with the expected fields — for example, make sure your price column maps to regular_price rather than sale_price.
Handling custom fields and metadata
If your CSV includes custom metadata columns (like brand names, warranty info, or custom attributes), use the dropdown to map them to the appropriate custom field or product attribute. Product Importer Deluxe supports categories, tags, brands, and any custom metadata registered by your theme or plugins.
You can also skip columns you don’t need by leaving the mapping set to “Do not import.”
Step 3 — Choose Your Import Mode
The import mode determines how the plugin handles your data relative to existing products in your store. Choosing the right mode is important — it controls whether products are created, updated, or removed.
| Mode | What It Does | When To Use It |
|---|---|---|
| New products only | Creates new products from every row in the file. Does not touch existing products. | First-time import or adding a brand-new product line. |
| Delete referenced products | Deletes products from your store that match rows in the import file (matched by SKU or ID). | Removing discontinued products in bulk. |
| New products + merge changes | Creates new products and updates existing products that match by SKU or ID. | Regular catalog syncs where you add new items and update existing ones at the same time. |
| Merge changes only | Updates existing products only. Skips any rows that don’t match an existing product. | Bulk price updates, stock adjustments, or metadata changes without adding new products. |
If you’re unsure which mode to use, New products + merge changes is the safest default for most catalog syncs. It handles both new additions and updates in a single pass.
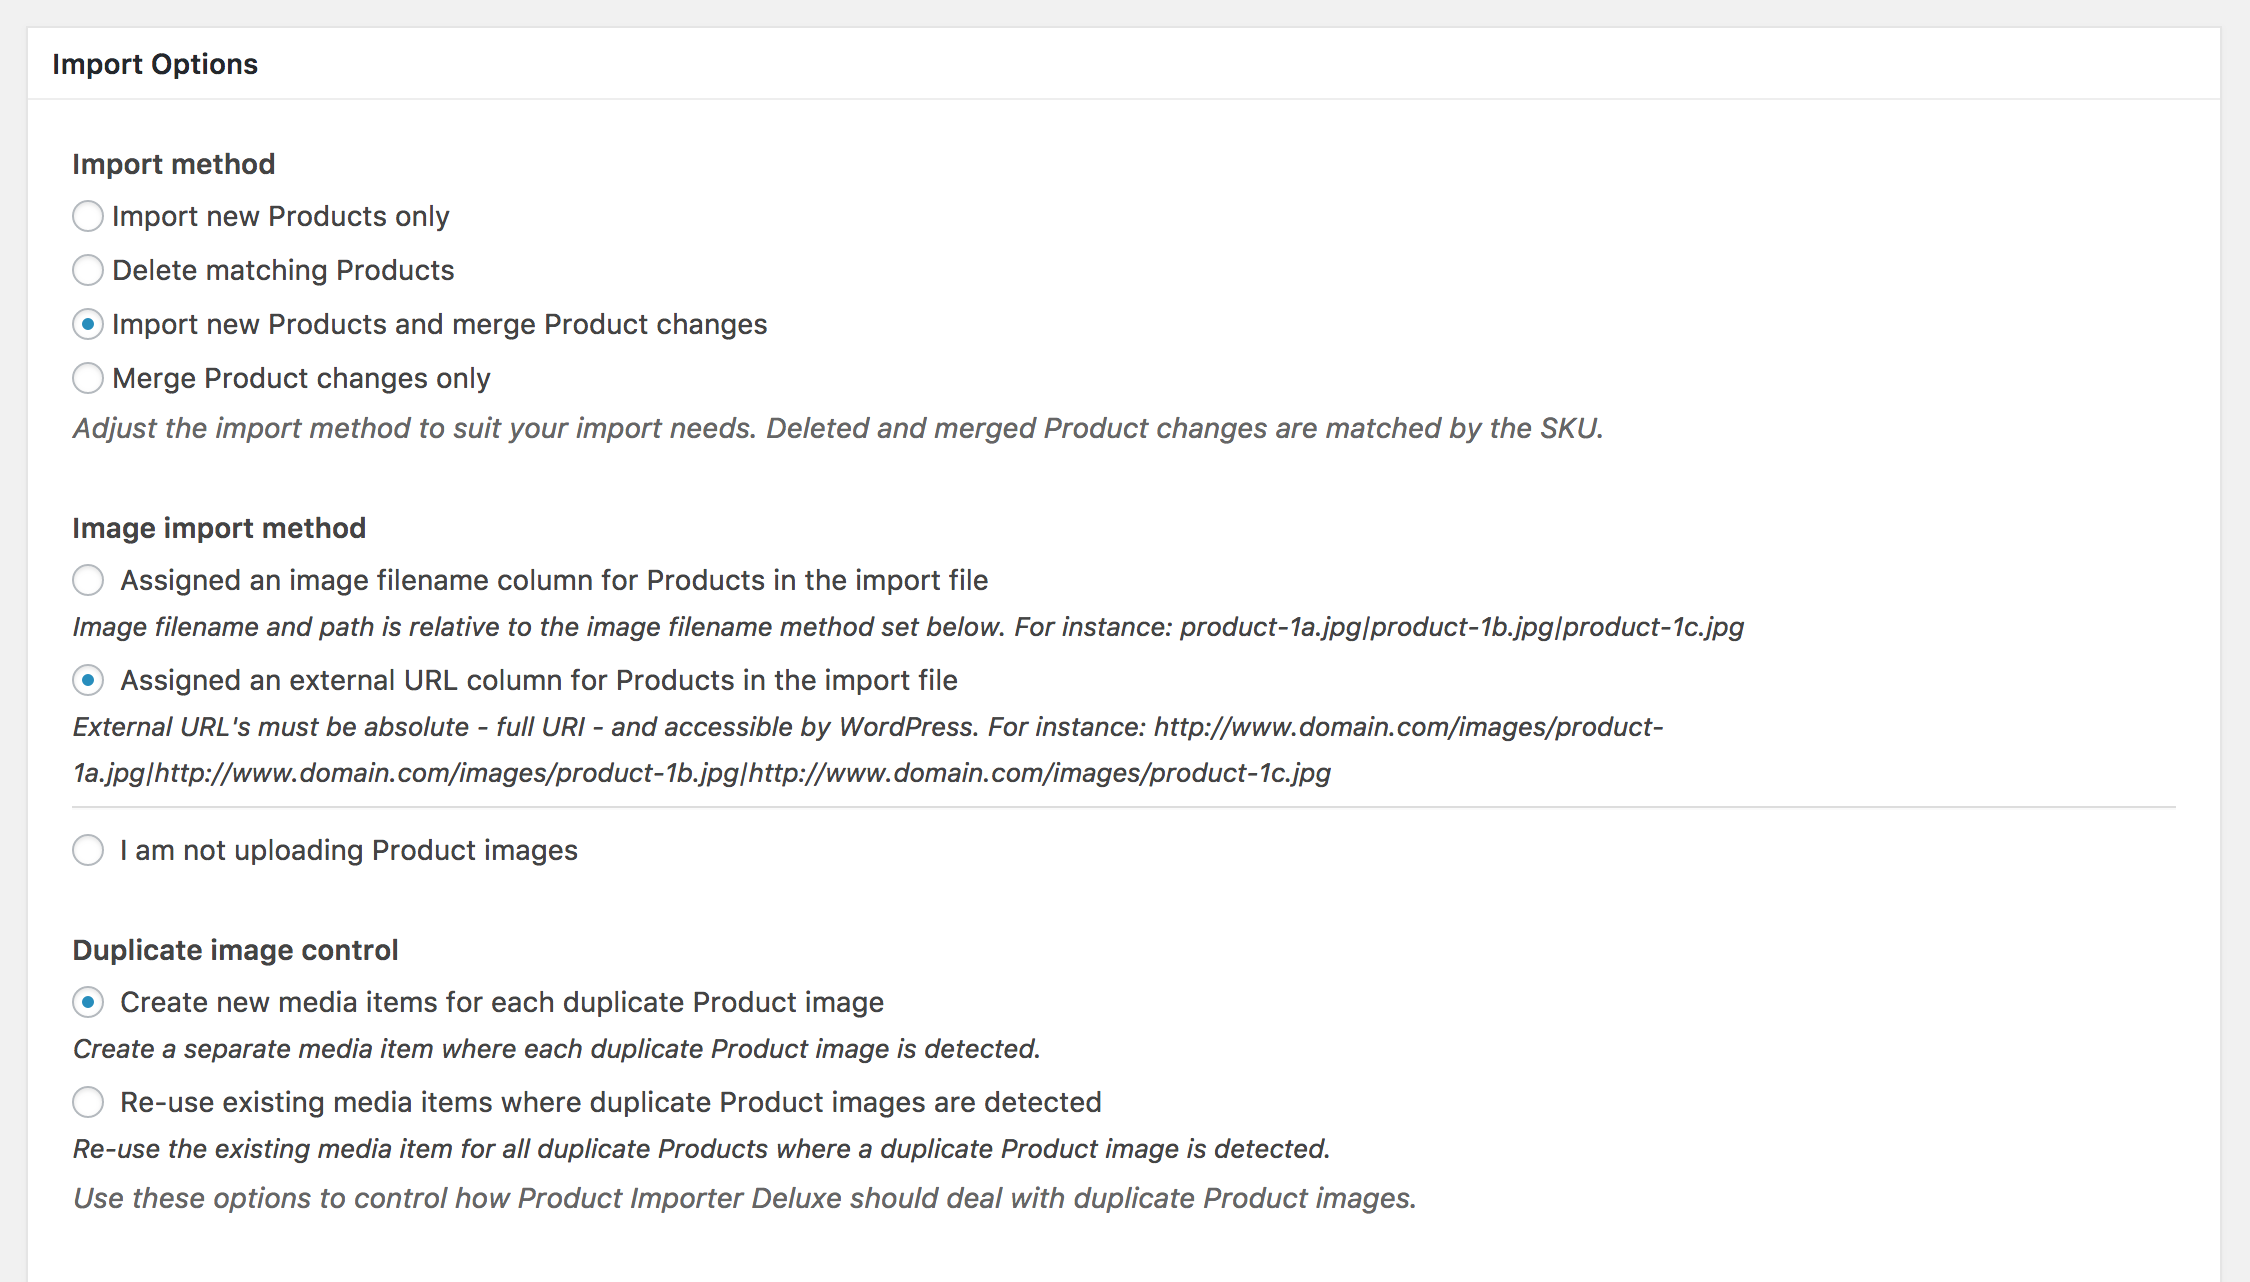
Step 4 — Configure Image Imports
Product Importer Deluxe can import both a featured image and product gallery images. You have three options for specifying image sources in your CSV:
- Filenames — Enter just the image filename (e.g.,
blue-widget.jpg). The plugin looks for the file in your WordPress uploads directory. - External URLs — Provide full URLs to images hosted elsewhere (e.g.,
https://cdn.example.com/images/blue-widget.jpg). The plugin downloads and imports each image into your media library. - None / skip images — Leave image columns unmapped if you don’t need to import images in this run.
Filename path options
When using filenames, the plugin checks your WordPress uploads folder by default. If your images are stored in a subdirectory, include the relative path (e.g., 2026/03/blue-widget.jpg).
Duplicate image handling
The plugin includes a duplicate image control option. When enabled, it checks whether an image with the same filename already exists in your media library before downloading. This prevents duplicate files from piling up during repeated imports and speeds up the process by skipping images that are already present.
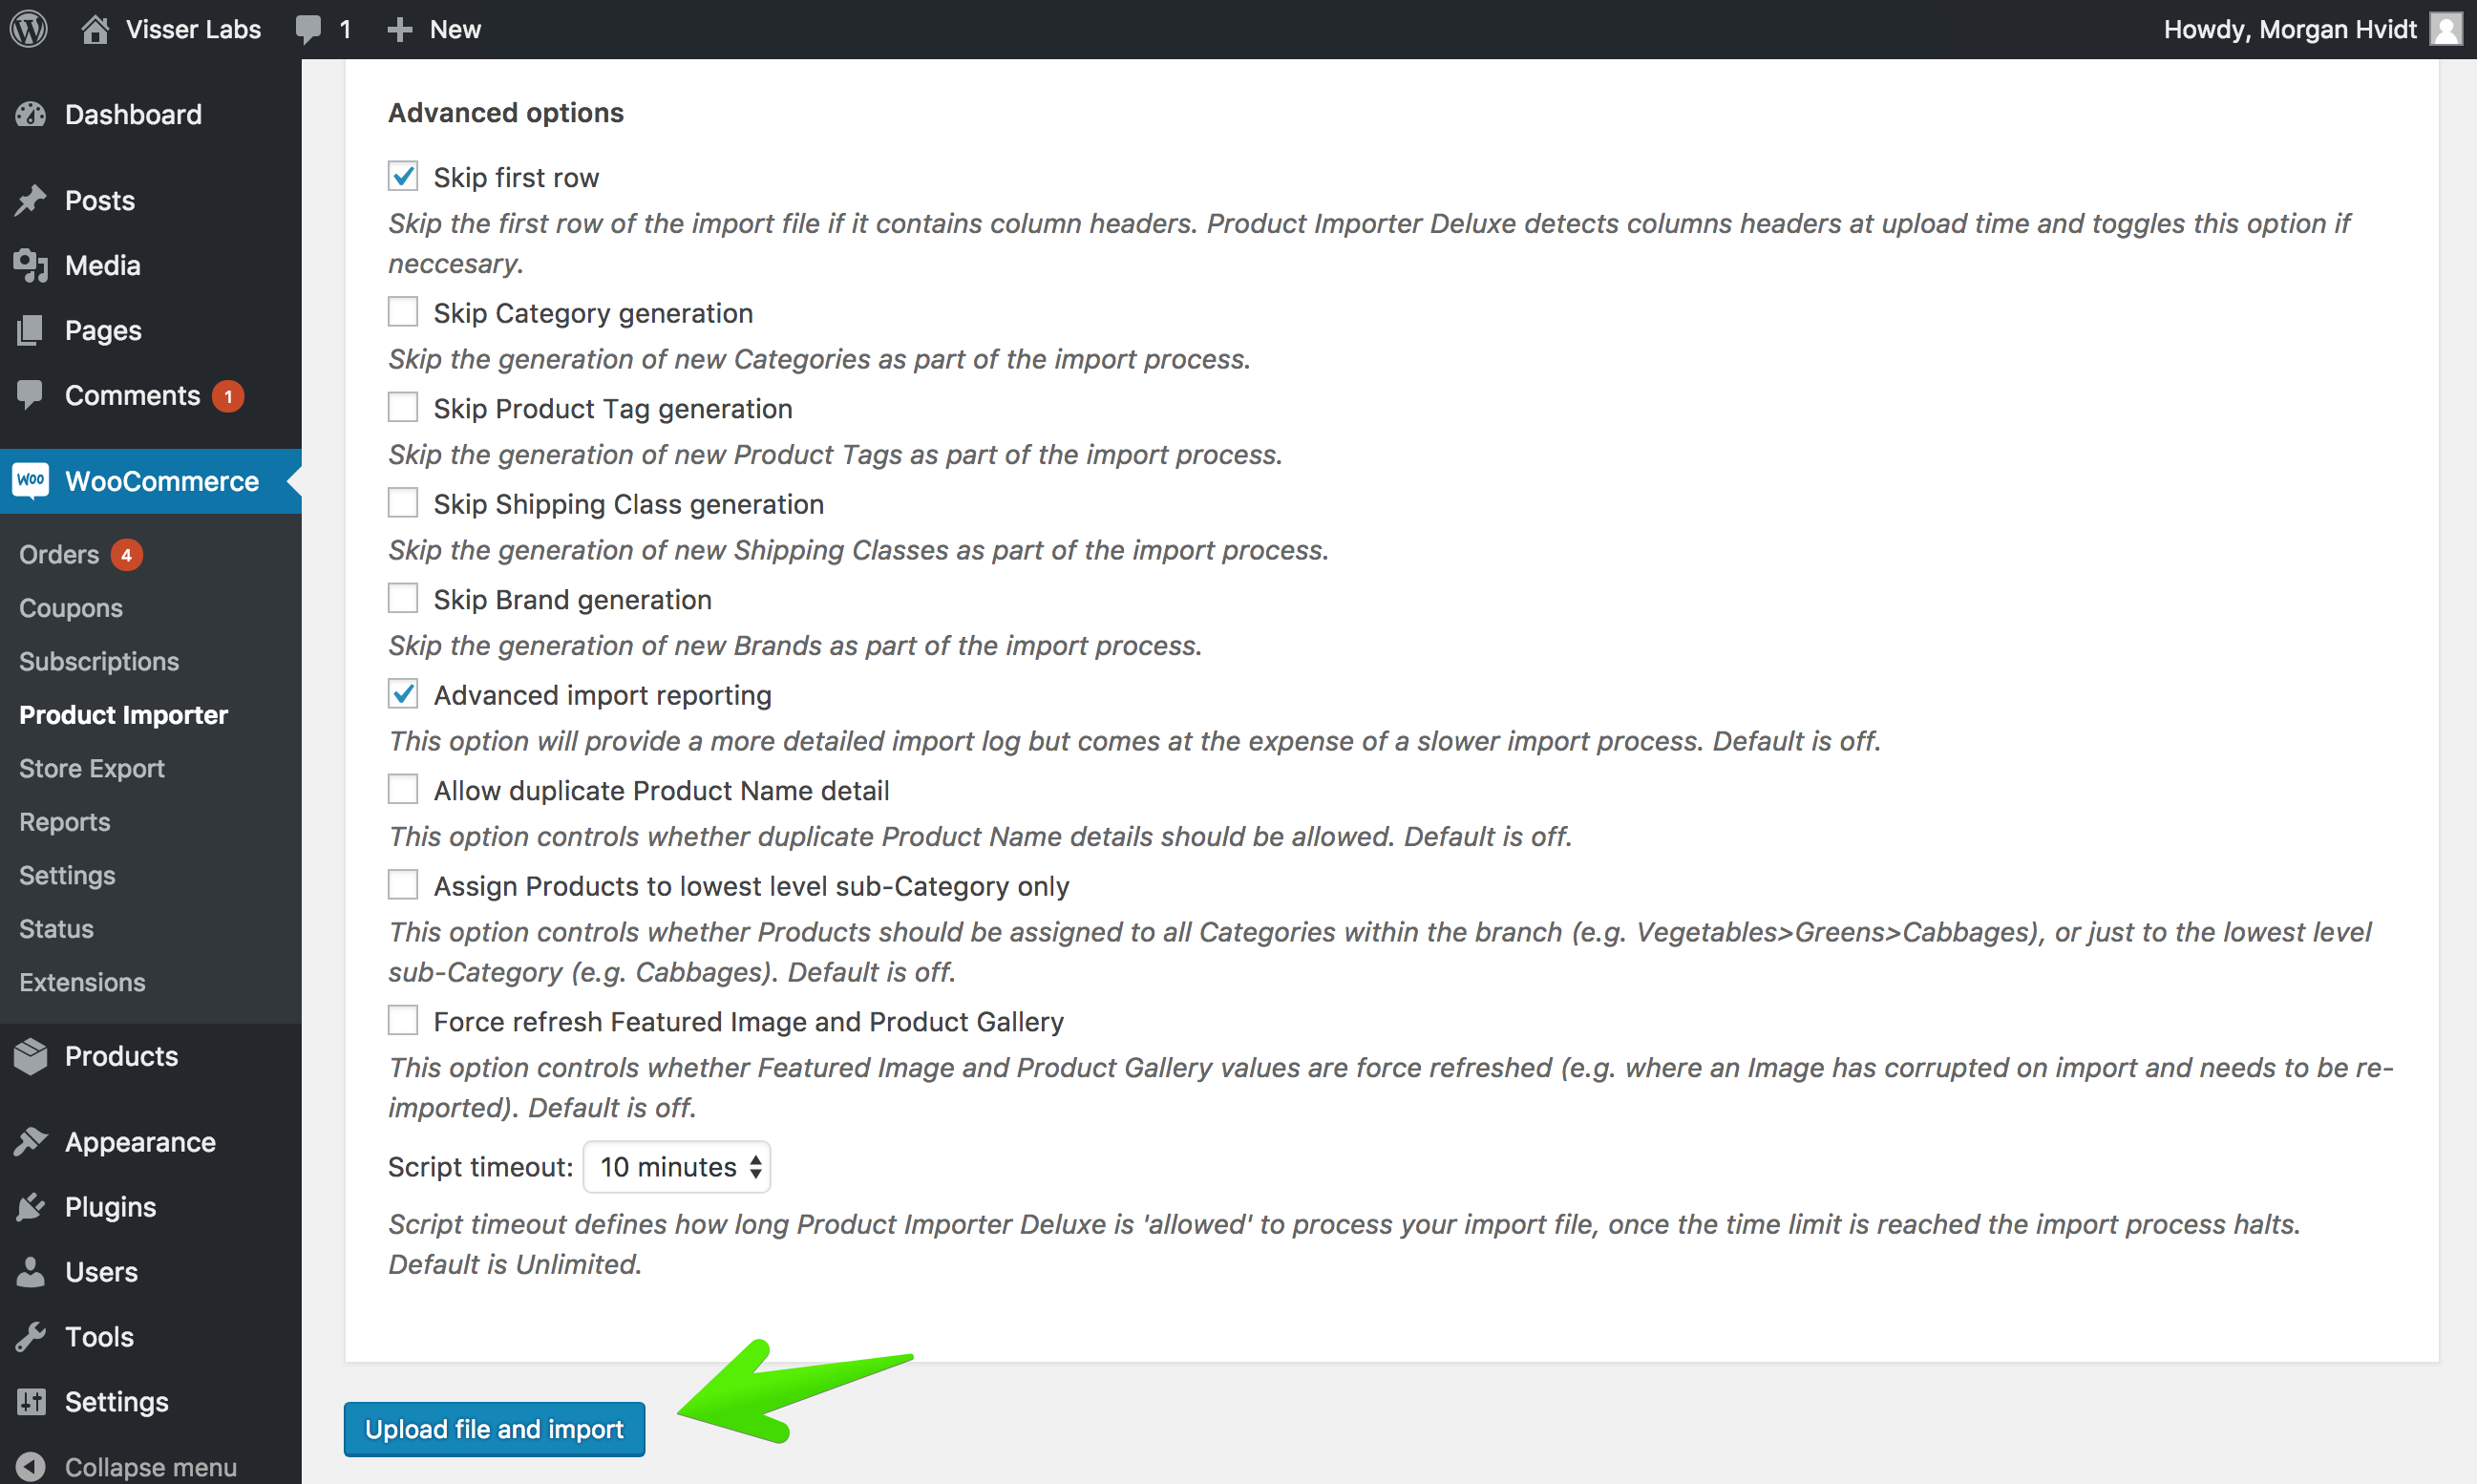
Step 5 — Run The Import
Once your columns are mapped, import mode is set, and image options are configured, click the import button to begin processing.
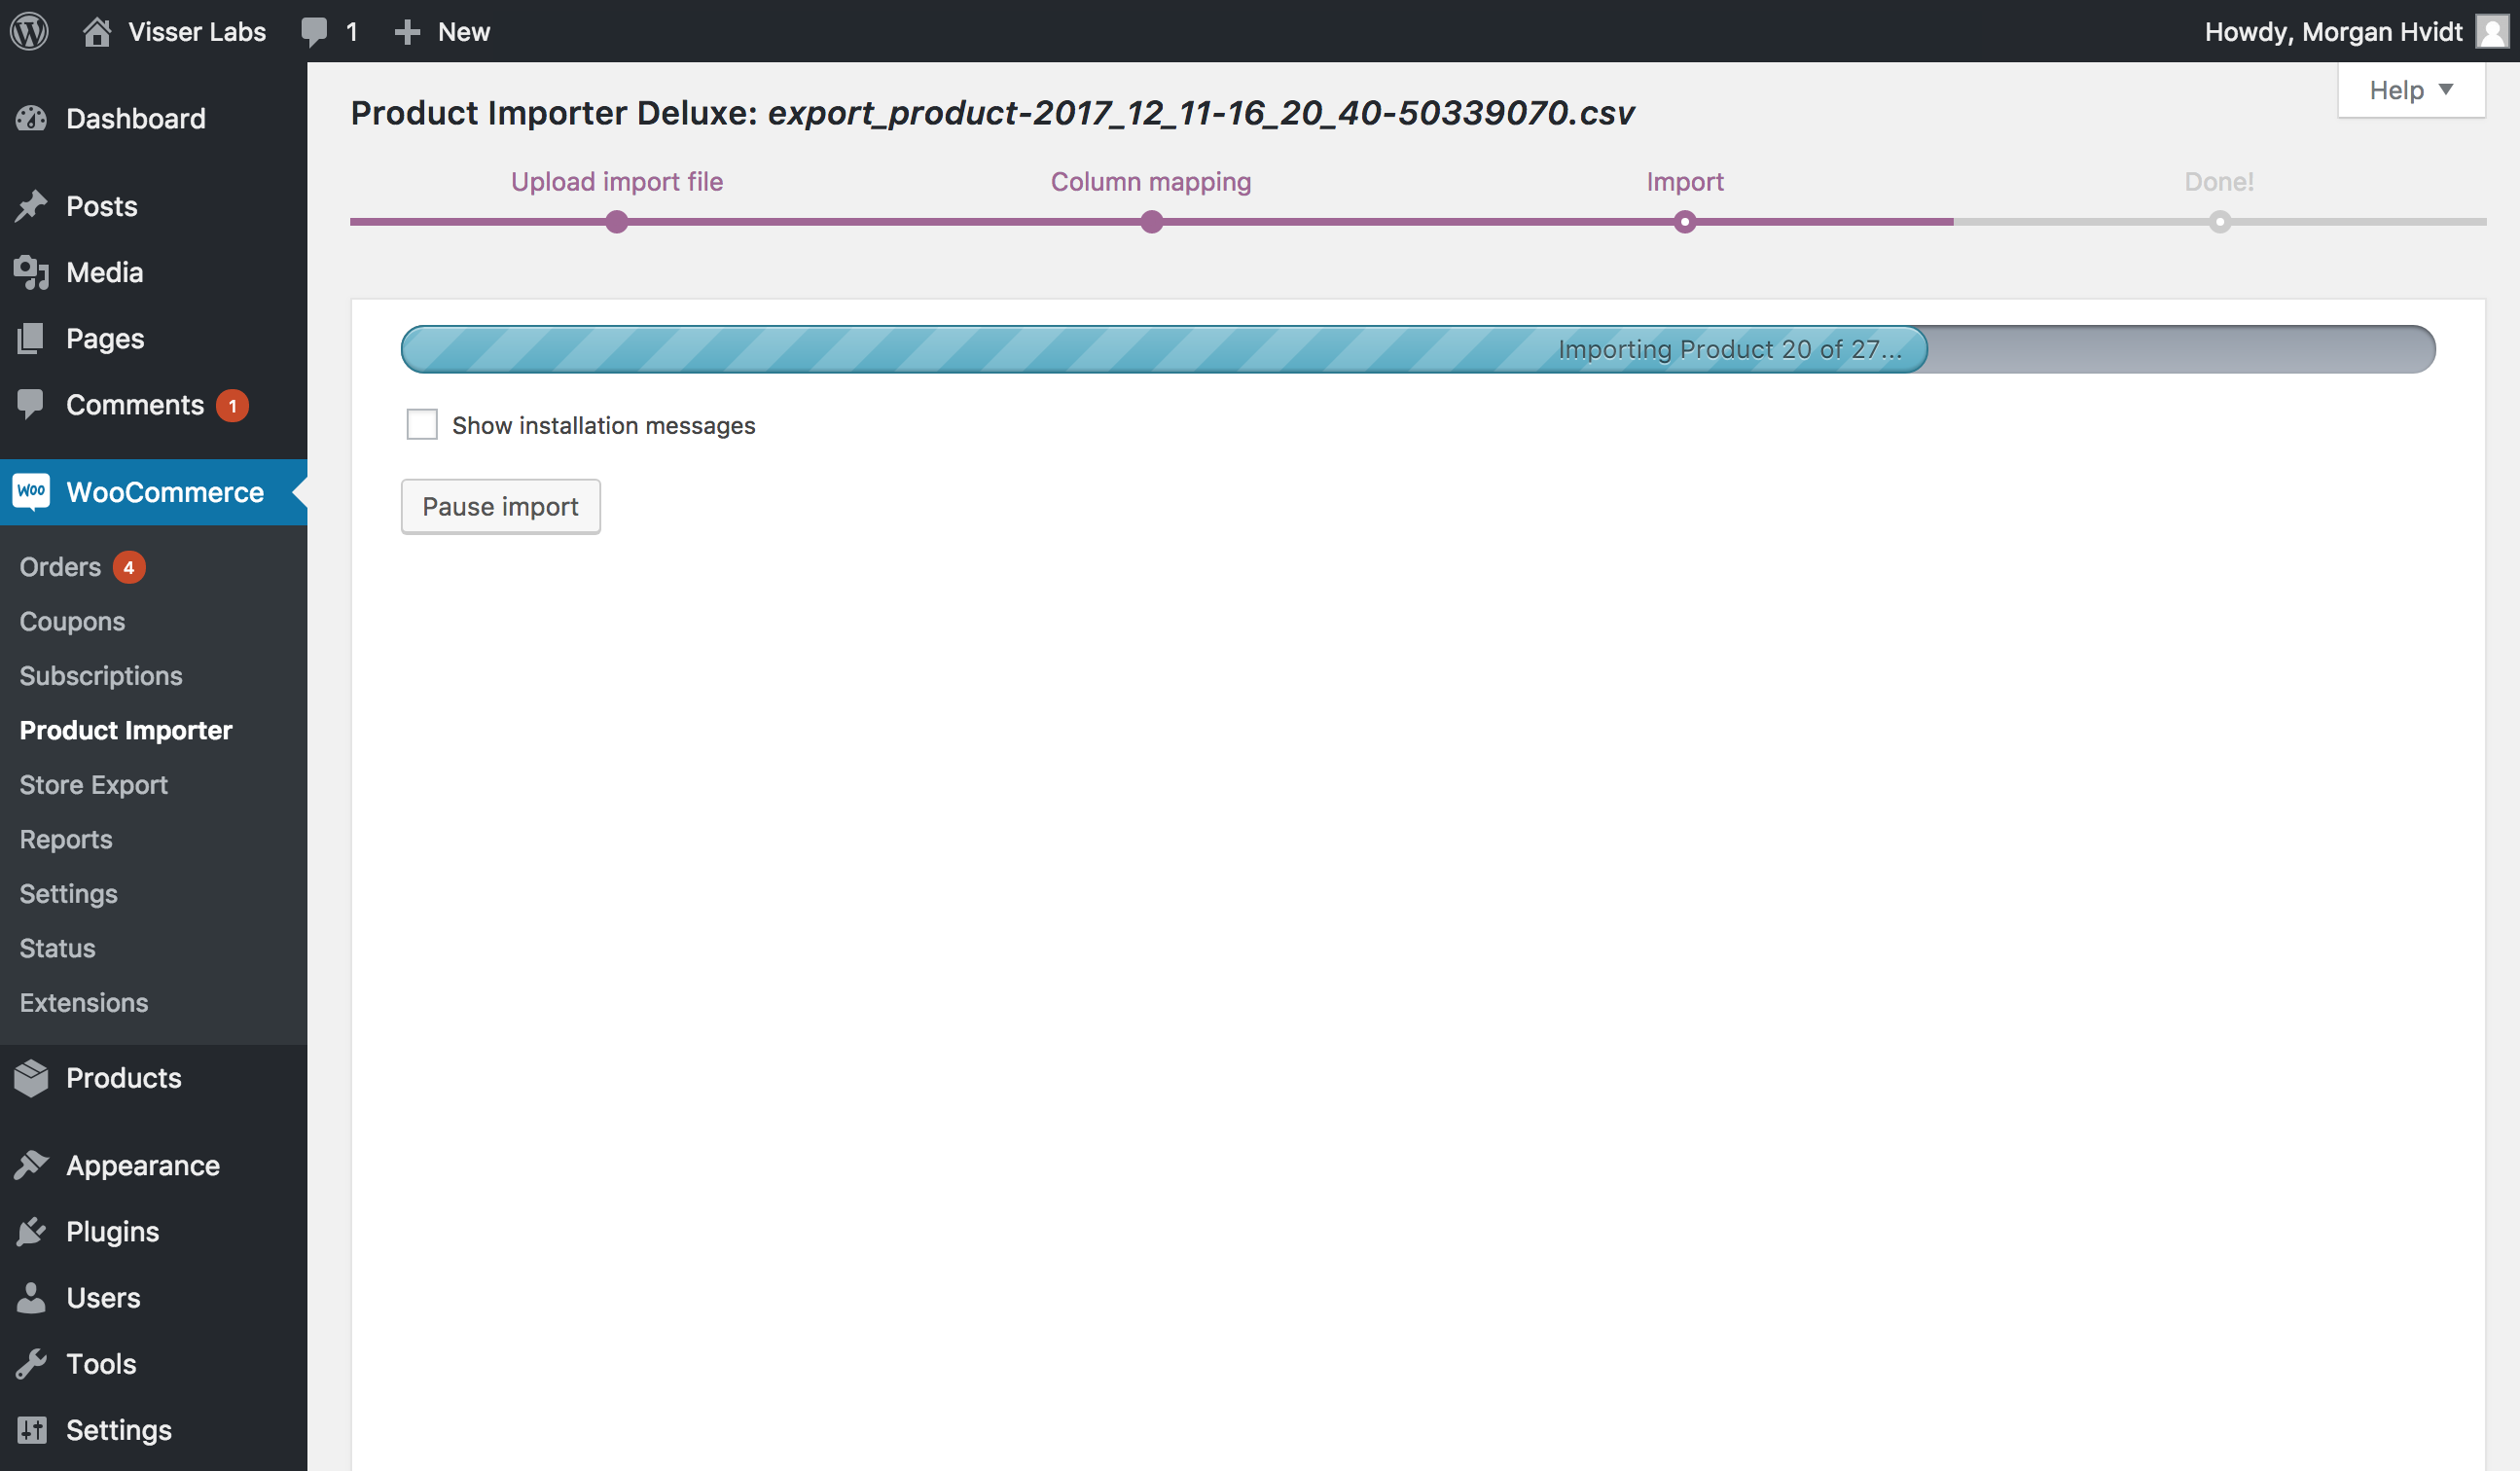
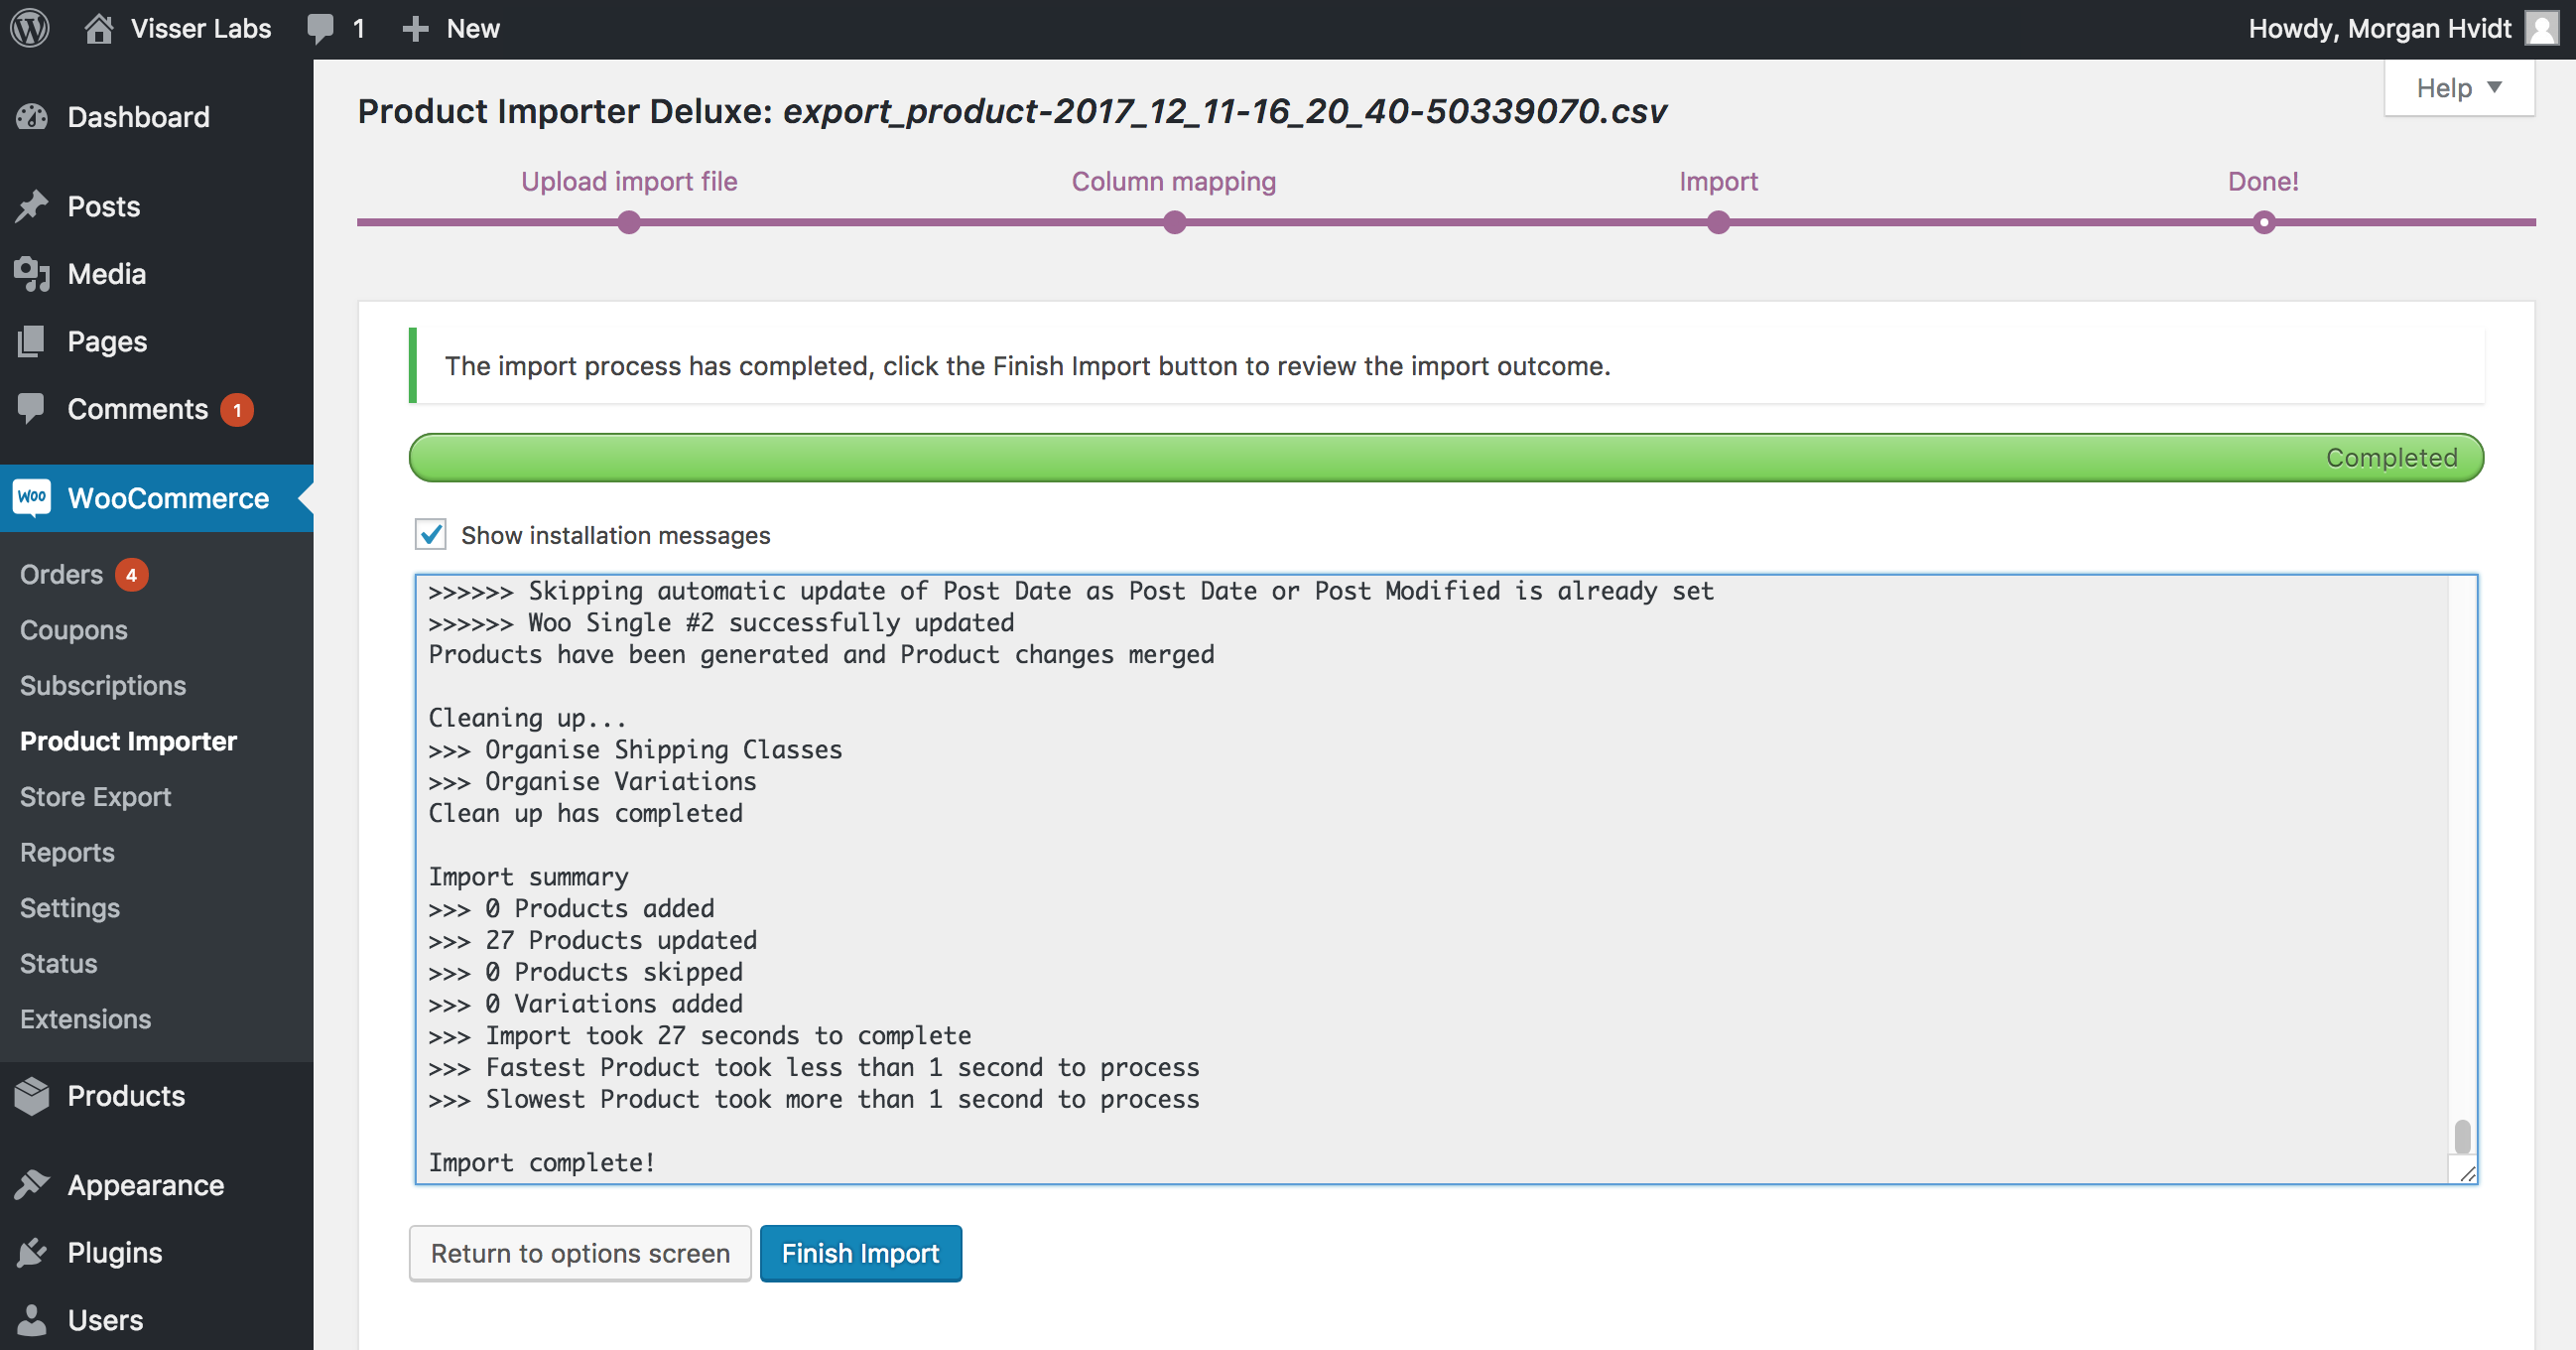
Real-time logging
Product Importer Deluxe displays a real-time log as it processes each row. You can see which products are being created, updated, or skipped, along with any warnings or errors that occur. This makes it easy to spot issues immediately rather than discovering them after the import completes.
If errors occur
Common errors include missing required fields (like product title), invalid data formats, or image download failures. The log identifies the specific row and field causing the issue. Fix the problem rows in your CSV and re-run the import using Merge changes only mode to update just the affected products without creating duplicates.
Verifying results
After the import finishes, go to Products > All Products in your WooCommerce dashboard. Sort by date to see newly imported products at the top. Spot-check a few products to verify that titles, prices, images, and categories all imported correctly.
Importing Variable Products
Product Importer Deluxe handles variable products — products with attributes like size or color that create distinct purchasable variations.
In your CSV file, the parent variable product and its variations are represented as separate rows. The parent row defines the product-level data (title, description, categories), while each variation row specifies its unique attribute values, price, and stock.
CSV structure tips for variable products
- Set the parent row’s product type to
variable - Set each variation row’s product type to
variation - Use the parent SKU field in variation rows to link variations back to their parent product
- Define attribute columns (e.g.,
attribute:color,attribute:size) with the specific values for each variation - List all possible attribute values in the parent row, separated by pipes (e.g.,
Red|Blue|Green)
The plugin also supports importing Simple, External, Virtual, and Subscription product types using the same column mapping approach.
Third-Party Plugin Support
Product Importer Deluxe automatically detects compatible third-party plugins installed on your site and extends the import to include their data fields. You don’t need to configure anything — the plugin adds the relevant columns to the mapping screen automatically.
Supported integrations include:
- WooCommerce Subscriptions — Import subscription-specific fields like billing period, interval, and trial settings
- WPML — Import multilingual product data and translation links
- Yoast SEO — Import SEO titles, meta descriptions, and focus keywords
- All-In-One SEO — Import AIOSEO-specific metadata fields
- YITH Brands — Import brand assignments for each product
To check which plugins are detected, look at the column mapping screen after uploading your file. Any additional fields from supported plugins appear alongside the standard WooCommerce fields.
Troubleshooting Common Issues
Import times out before completing
Large imports can exceed your server’s default PHP limits. Ask your hosting provider to increase the max_execution_time and memory_limit values in your PHP configuration. A good starting point is 300 seconds for execution time and 256M for memory. Alternatively, split your CSV into smaller batches and import them sequentially.
Columns not mapping correctly
Verify your CSV is properly formatted with consistent delimiters and that the first row contains column headers. Open the file in a plain text editor (not Excel) to check for hidden characters, extra commas, or mismatched quotes. If your file uses a non-standard delimiter, check the advanced options to specify the correct separator.
Images not importing
If images fail to import, check that the file paths or URLs in your CSV are correct and accessible. For external URLs, make sure they point directly to the image file (ending in .jpg, .png, etc.) and that the server allows downloads. For filenames, confirm the images exist in your WordPress uploads directory at the expected path.
Duplicate products being created
Duplicates happen when the plugin can’t match incoming rows to existing products. Make sure your CSV includes a SKU column and that SKUs match your existing products exactly. Switch to Merge changes only or New products + merge changes mode to update existing products instead of creating new ones.
Need more detail on any of these steps? Check our comprehensive WooCommerce product import guide for in-depth coverage, or visit the Product Importer Deluxe page for pricing and feature details.